Popular queries
Clean the bin and cyclone
Press the button at the top of the cyclone handle and remove the bin from the machine.
Press the red button on the top of the cyclone to open the bin base.
Press the button near the rectangular inlet to remove the clear bin from the cyclone.
The clear bin can be wiped with a damp cloth.
WARNING: Do not use any detergent or polish on any part of the machine.
Check the bin and cyclone for blockages and remove as necessary.
Ensure that the bleed valve at the top of the cyclone is free of debris and moves freely when pressed.
Clear any hair or fibres from the cyclone shroud.
WARNING: Do not use any water on the cyclone.
Once the parts are completely dry, reassemble and test the machine.
Please select the appropriate option


Check the Brush bar
Press the foot pedal to release the Cleaner head and pull the handle towards you.

Ensure the stabilising wheels are fully retracted or the Brush bar will not operate.

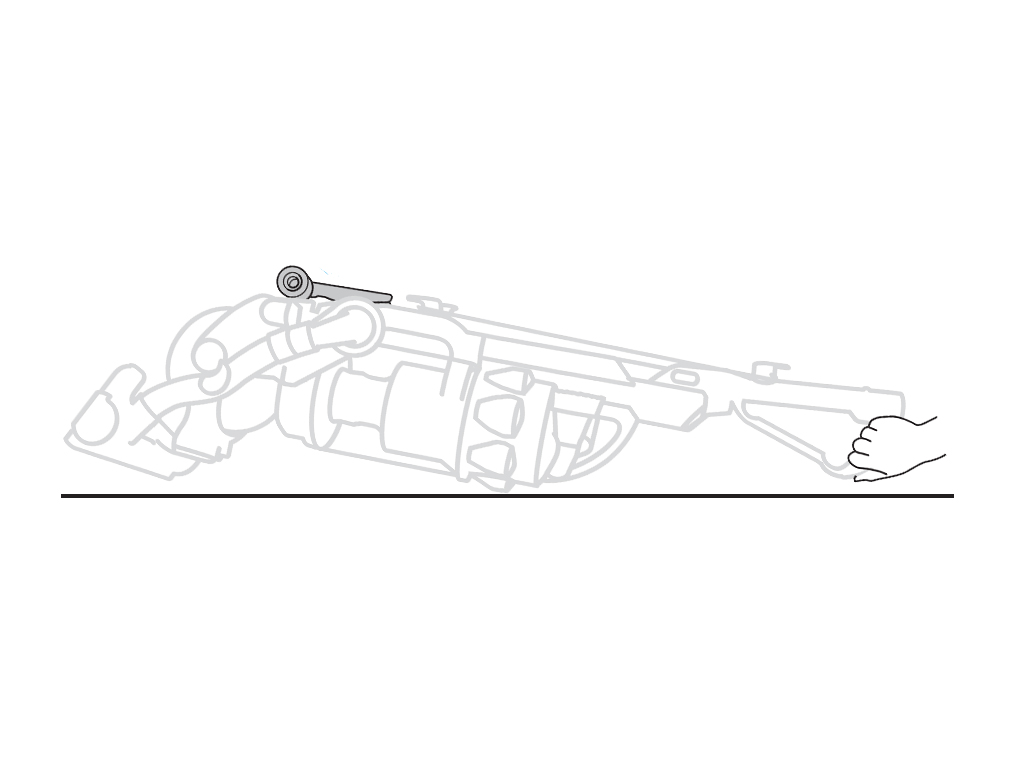
Lay the machine on its side, keeping it in the vacuuming position.
Turn the machine on and check to see if the Brush bar is spinning.

NB: Please keep hair and loose clothing away from the Brush bar.
Does the Brush bar spin when the machine is reclined?
Check the Cleaner head
Turn off and unplug the machine.
Check the Cleaner head for any blockages and remove as necessary.
Clear the Cleaner head
Turn off and unplug the machine.
Remove the end caps:
Undo coloured soleplate fasteners with a coin
Rotate end caps to remove.
Remove the Brush bars:
Pull out Brush bar sections
Cut out debris avoiding bristles.
Refit the Brush bars and tighten the fasteners.
Check the valve pipe and Cleaner head hose
Squeeze the release catches to remove the valve pipe and check inside.

Pull the top end of the tube away from the machine and check inside.

Reassemble and test machine.
Check the bin and cyclone
Press the button at the top of the cyclone handle and remove the bin from the machine.
Press the red button on the top of the cyclone to open the bin base.
Press the button near the rectangular inlet to separate the clear bin from the cyclone.
The clear bin can be wiped with a damp cloth.
Do not use any detergent or polish on any part of the machine.
Check the bin and cyclone for blockages and remove as necessary.
Ensure that the bleed valve at the top of the cyclone is free of debris and moves freely when pressed.
Clear any hair or fibres from the cyclone shroud.
WARNING: Do not use any water on the cyclone.
Once the parts are completely dry, reassemble and test the machine.
Washing the filter
Turn the power off and unplug the machine.
Lift the filter release catch and remove the filter from the machine.

Wash the filter in cold water only.
WARNING: Please do not use detergent, do not wash in a dishwasher or washing machine.

Leave the filter to dry in a warm place until completely dry.
WARNING: Do not dry the filter in a tumble dryer, microwave, oven or near and open flame.

Make sure the filter is completely dry before replacing in the machine.
Replace the filter into the filter casing and then put back into the cyclone top.
This filter should be washed at least once every 3 months. The permanent filter located under the clear bin should last the lifetime of the machine and does not need to be washed.
Please do not remove this filter.
Clear the Cleaner head
Turn off and unplug the machine.
Remove the end caps
Undo coloured soleplate fasteners with a coin.
Rotate endcaps to remove.
Remove the Brush bars
Pull out Brush bar sections.
Cut out debris avoiding bristles.
Reassemble and test the machine.
Clear the Cleaner head
Turn off and unplug the machine.
Remove the end caps
Undo coloured soleplate fasteners with a coin.
Rotate endcaps to remove.
Remove the Brush bars
Pull out Brush bar sections.
Cut out debris avoiding bristles.
Reassemble and test the machine.
Test the hose suction
Lift up the Wand cap and pull the metal tube from inside the Wand until it locks into place.

Press button to release Hose and Wand handle from the machine.

Press side buttons to remove the Wand handle from the hose.

Test the suction from the hose.

Is the suction from the hose strong or weaker than usual?
Check the hose
To remove the hose, rotate the base of the hose downwards until it clicks, then twist away from the machine.

Check the hose for blockages and remove as necessary.
Check the valve pipe
Squeeze the release catches to remove the valve pipe and check inside.
Check the bin and cyclone
Press the button at the top of the cyclone handle and remove the bin from the machine.
Press the red button on the top of the cyclone to open the bin base.
Press the button near the rectangular inlet to remove the clear bin from the cyclone.
The clear bin can be wiped with a damp cloth.
WARNING: Do not use any detergent or polish on any part of the machine.
Check the bin and cyclone for blockages and remove as necessary.
Ensure that the bleed valve at the top of the cyclone is free of debris and moves freely when pressed.
Clear any hair or fibres from the cyclone shroud.
WARNING: Do not use any water on the cyclone.
Once the parts are completely dry, reassemble and test the machine.
Remove the Wand
To release the Wand, lift up Wand cap and pull metal Wand from inside handle until it clicks.
To release the Wand, lift up Wand cap and pull metal Wand from inside handle until it clicks.
Press side buttons to remove the Wand handle from the hose.
Check the Wand
Look through both ends of the wand and remove any blockages.
Check the Wand for damage.
Please follow the next step.
Check the hose
To remove the hose, rotate base of the hose downwards until it clicks, then twist away from the machine.
Check the hose for blockages and remove as necessary.
Please follow the next step.
Clear the Cleaner head
Turn off and unplug the machine.
Remove the end caps
Undo coloured soleplate fasteners with a coin.
Rotate endcaps to remove.
Remove the Brush bars
Pull out Brush bar sections.
Cut out debris avoiding bristles.
Reassemble and test the machine.
Turn off the Brush bar
Press the foot pedal to release the Cleaner head and pull the handle towards you.
Ensure the stabilising wheels are fully retracted and press the ON/OFF switch.
Clear the Cleaner head
Turn off and unplug the machine.
Remove the end caps
Undo coloured soleplate fasteners with a coin.
Rotate end caps to remove.
Remove the Brush bars
Pull out Brush bar sections.
Cut out debris avoiding bristles.
Refit the Brush bars and tighten the fasteners.
Has clearing the Cleaner head resolved the problem?
Remove the bin and cyclone
Press the button at the top of the cyclone handle.

Remove the bin and cyclone from the machine.
Turn the machine on, keeping it in the upright position.
Blockage checks
This is likely to be caused by a blockage.
Remove the Wand
Lift up the Wand cap and pull the metal tube from inside the Wand until it locks into place.
Press button to release Hose and Wand handle from the machine.
Press side buttons to remove the Wand handle from the hose.
Check the Wand
Look through both ends of the wand and remove any blockages.

Check the Wand for damage.
Check the hose
To remove the hose, rotate the base of the hose downwards until it clicks, then twist away from the machine.
Check the hose for blockages and remove as necessary.
Refit the Wand and Hose.
Clear the Cleaner head
Turn off and unplug the machine.
Remove the end caps
Undo coloured soleplate fasteners with a coin.
Rotate endcaps to remove.
Remove the Brush bars
Pull out Brush bar sections.
Cut out debris avoiding bristles.
Refit the Brush bars and tighten the fasteners.
Clean the valve pipe and Cleaner head hose
Squeeze the release catches to remove the valve pipe and check inside.
Pull the top end of the tube away from the machine and check inside.
NB: Check all seals for damage.
Refit the Valve pipe and Cleaner head hose.
Check the bin and cyclone
Press the button at the top of the cyclone handle and remove the bin from the machine.
Press the red button on the top of the cyclone to open the bin base.
Press the button near the rectangular inlet to remove the clear bin from the cyclone.
The clear bin can be wiped with a damp cloth.
WARNING: Do not use any detergent or polish on any part of the machine.
Check the bin and cyclone for blockages and remove as necessary.
Ensure that the bleed valve at the top of the cyclone is free of debris and moves freely when pressed.
Clear any hair or fibres from the cyclone shroud.
WARNING: Do not use any water on the cyclone.
Once the parts are completely dry, reassemble and test the machine.
Check the Brush bar
Press the foot pedal to release the Cleaner head and pull the handle towards you.

Ensure the stabilising wheels are fully retracted or the Brush bar will not operate.

Lay the machine on its side, keeping it in the vacuuming position.
Turn the machine on and check to see if the Brush bar is spinning.
NB: Please keep hair and loose clothing away from the Brush bar.
Clear the Cleaner head
Turn off and unplug the machine.
Remove the end caps
Undo coloured soleplate fasteners with a coin.
Rotate endcaps to remove.
Remove the Brush bars
Pull out Brush bar sections.
Cut out debris avoiding bristles.
Reassemble and test the machine.
Release the catch by hand
Pull the clear plastic catch on the base away from the bin. Open the bin base and tip away the contents.
Press the bin release button on the cyclone handle.
Refit the stabiliser
Turn off and unplug the machine.
Lay the machine flat resting on the clear bin.
Using both thumbs, guide the top of the stabiliser into position so that the lug on the right clicks into place behind the guide.
Has this resolved the problem?
Ensure the machine is being reclined correctly
Press the foot pedal to release the Cleaner head and pull the handle towards you.

If the customer has stood directly on the Cleaner head, it will not lie flat on the floor surface. The stabiliser will also not retract and therefore the Brush bar will not operate.
Assembly instructions
Slide the Wand down inside hose until it clicks.

Attach the Wand handle and Wand.
Slot wand into top of the machine and click into place.

Wind cable anti-clockwise and secure with clip.

Click the tools into place.

How to use the Brush bar
Note: the Brush bar will automatically switch on when the machine is reclined into the vacuuming position.
Press the brush control button located next to the power switch to turn the Brush bar off for vacuuming delicate rugs, looped carpets and hard floors.
Press the button again to restart the Brush bar for vacuuming carpets.
Carrying your Dyson machine
Lift the machine only by the carry handle on the cyclone top.
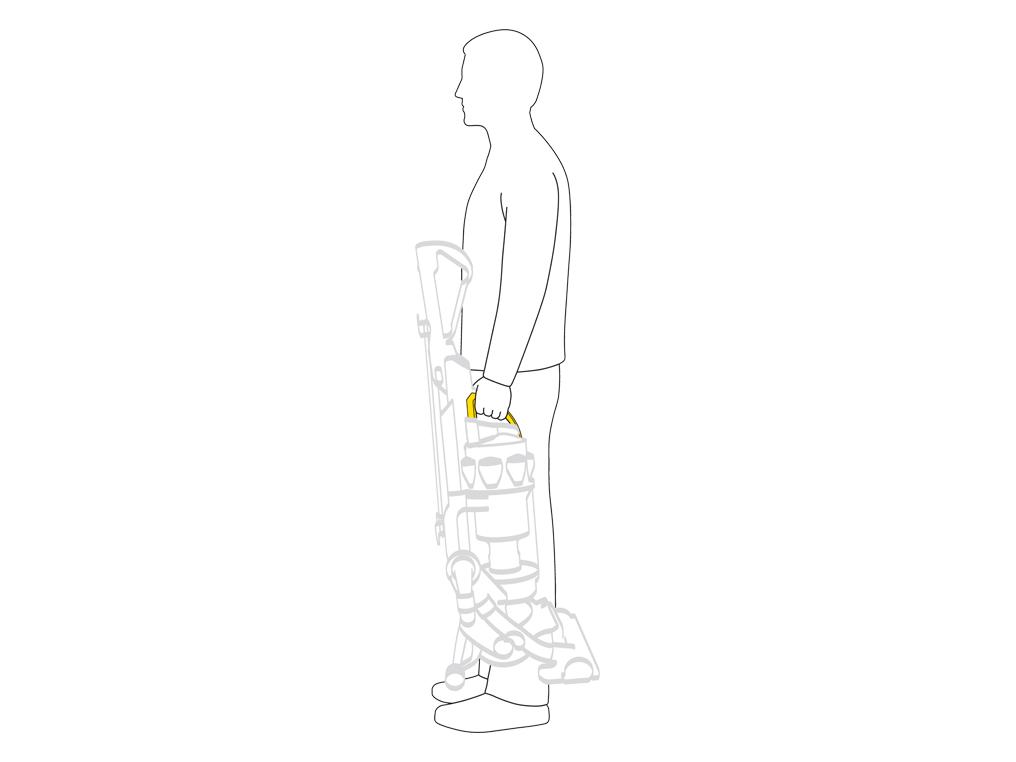
For the safety, do not press the cyclone release when carrying your machine.
How to start vacuuming
To begin:
- Plug the machine in
- Press the pedal at the back of the machine with your foot and lower the machine into the vacuuming position

Ensure that the stabilising wheels are fully retracted then press the On/Off switch.
Small movements of the wrist will create a zigzag motion in the Cleaner head allowing easier cleaning around furniture.

When finished, push the machine back into the upright position.

NB: Ensure the stabilising wheels are fully locked in place before letting go of the cleaner.
Please follow the next step.
Wand mode
Lift up the Wand cap and pull the metal tube from inside the Wand until it locks into place.

Press the button to release Hose and Wand handle from machine. To push the Wand back inside Hose, ensure Hose is straight. Press Wand release button and push Wand down into Hose.

Hose mode
First extend the Wand, then press side buttons to remove Wand handle from hose.
Tools can be fitted directly to the end of hose or wand.

Always work with the machine at the bottom of the stairs.

Empty the bin
Press the button at the top of the handle and remove the bin from the machine.
Press the button again to open the bin base and empty it of dust.
This can be done directly into a bin, or into a bag wrapped around the cyclone.
Turn the power off and unplug the machine.
Lift the filter release catch and remove the filter from the machine.
Wash the filter in cold water only.
WARNING: Please do not use detergent, do not wash in a dishwasher or washing machine.
Leave filter to dry in a warm place until completely dry. Do not dry the filter in a tumble dryer, microwave, oven, or near an open flame.
Make sure the filter is completely dry before replacing in the machine.
Replace the filter into the filter casing and then put back into the cyclone top.
This filter should be washed at least once every 3 months. The permanent filter located under the clear bin should last the lifetime of the machine and does not need to be washed.
Please do not remove this filter.


Further help
DC15 Allergy™