Let's get your machine working
DC16 Issey Miyake Exclusive™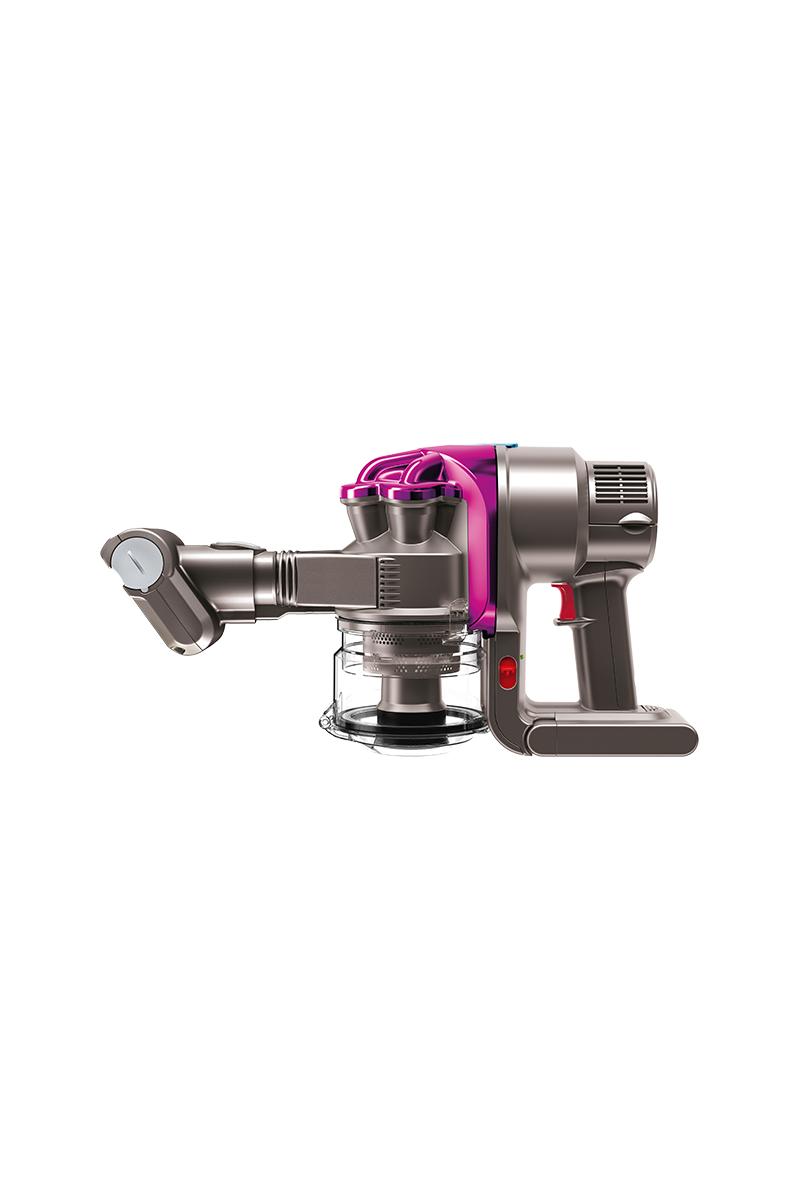
Let's get your machine working
DC16 Issey Miyake Exclusive™
Please select the appropriate option
Check the lights
To ensure we are providing you with the appropriate information, please check the number of indicator lights on your DC16.
One light

Three lights

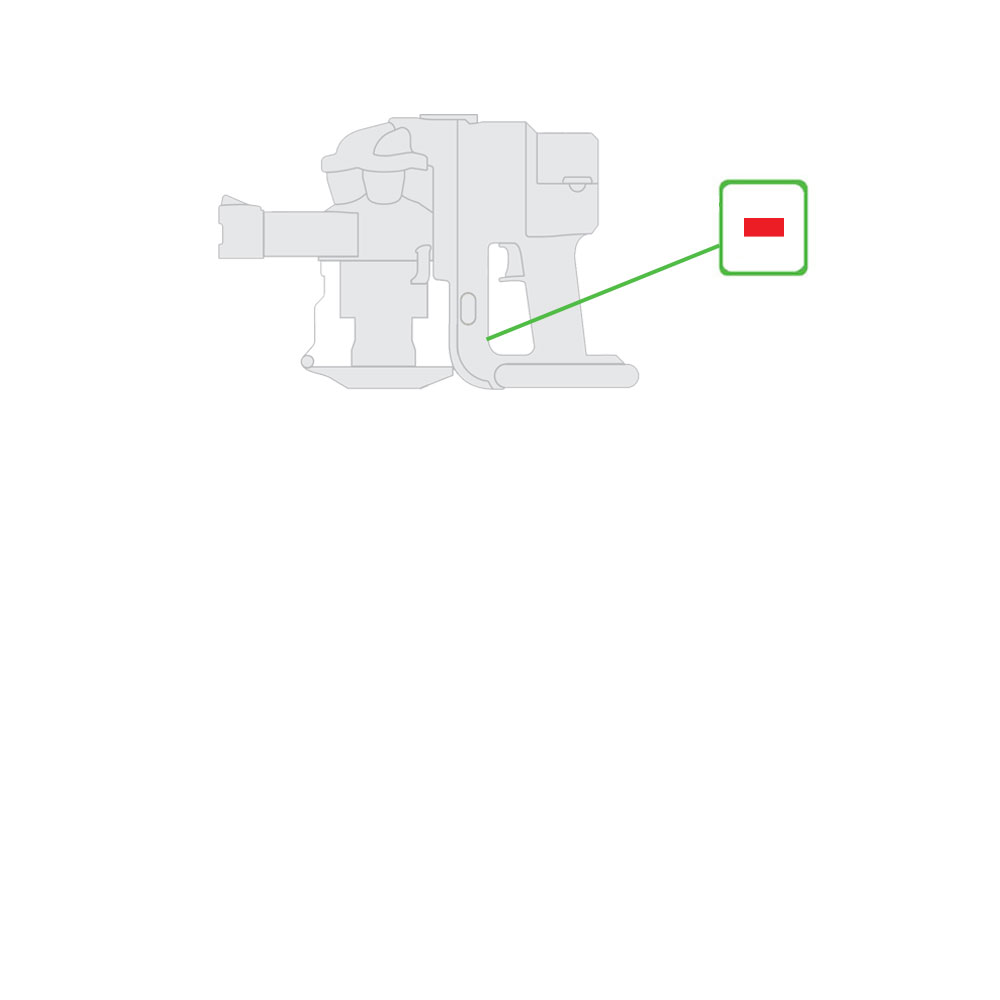
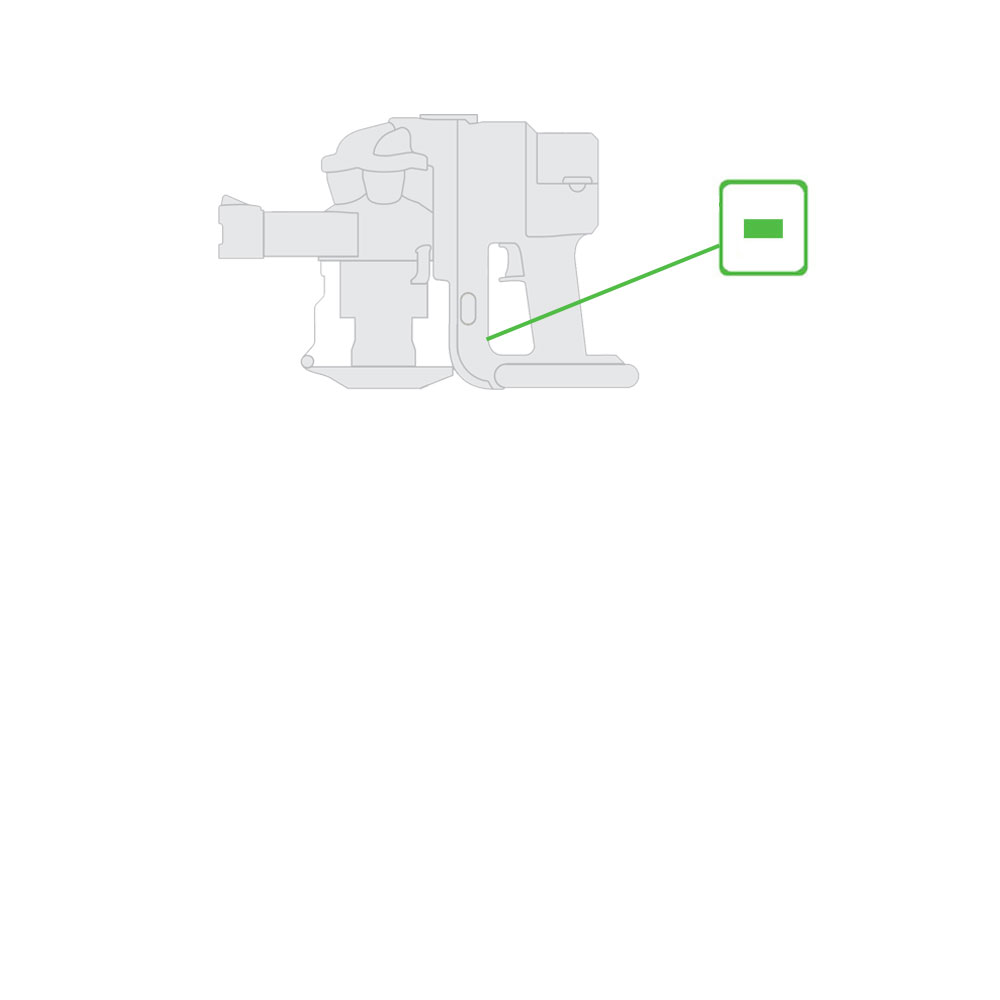
Is there one light or three lights on the Main body?
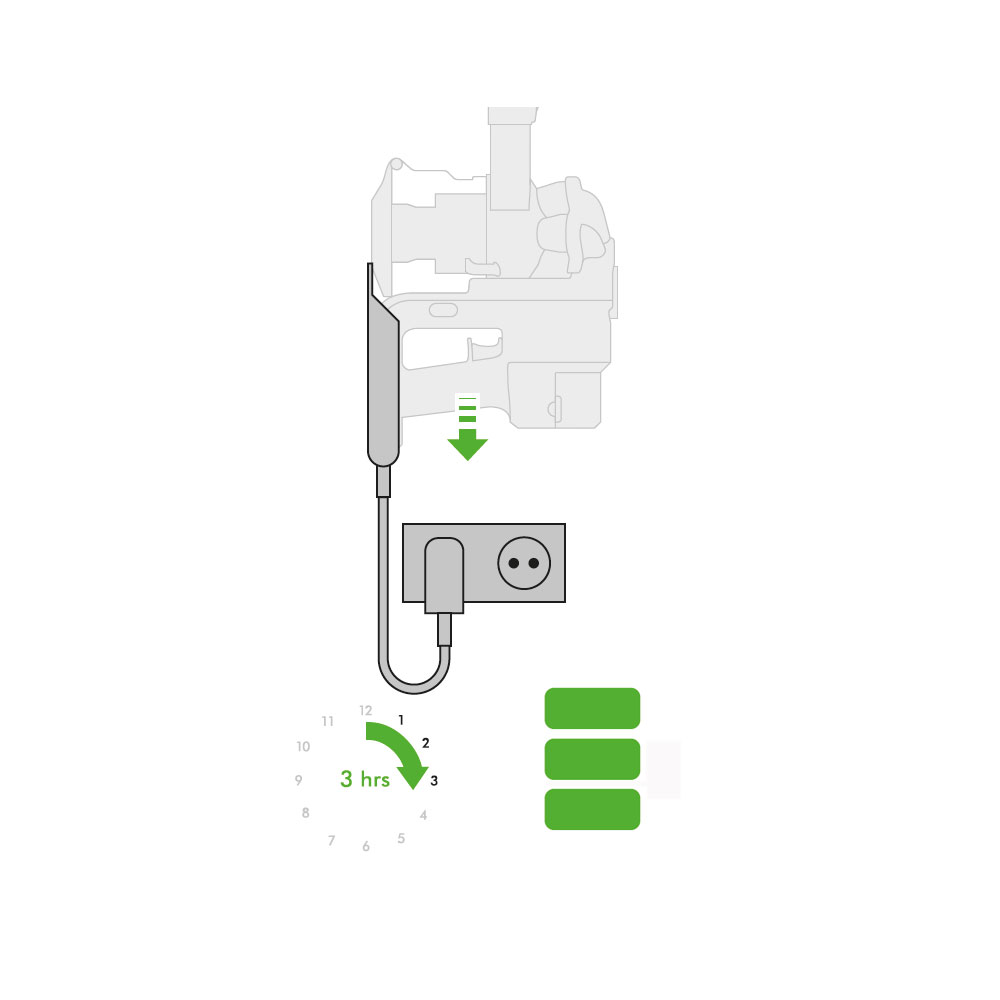
Charging the battery
To ensure your DC16 handheld is always ready to use, store it on the charger, with the charger powered.

When in use, the light on the handle indicates the level of charge. When the light changes to solid red, the battery is flat and needs recharging.
When connected to the charger, the solid red light will stay on until the machine is fully charged. The light will then change to green.
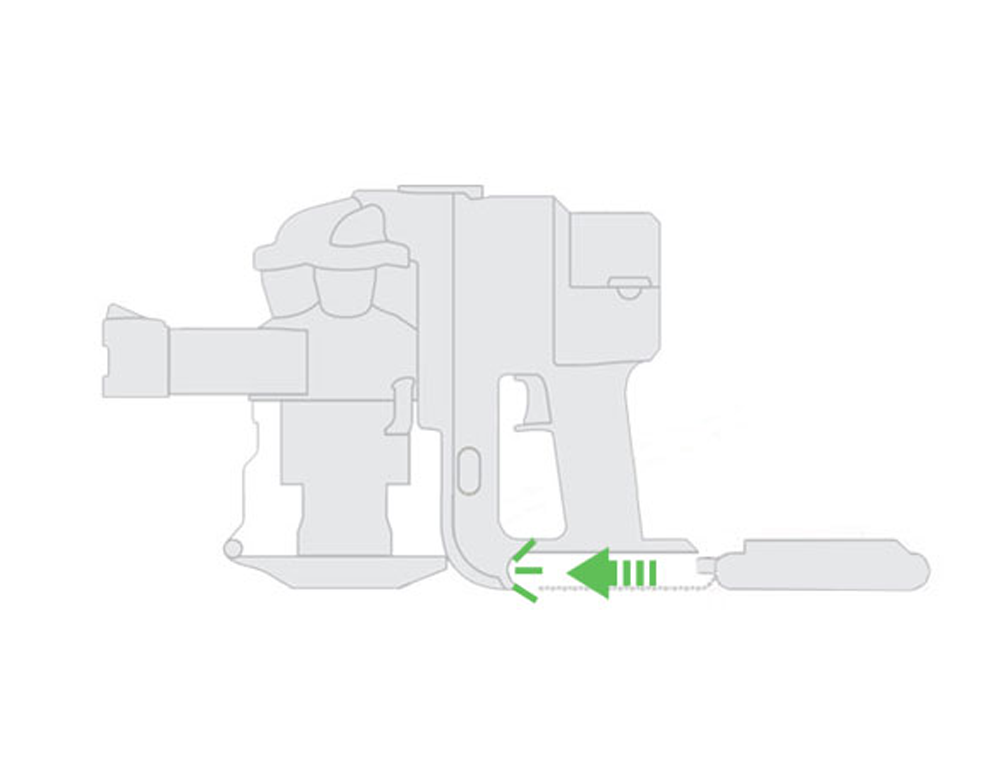
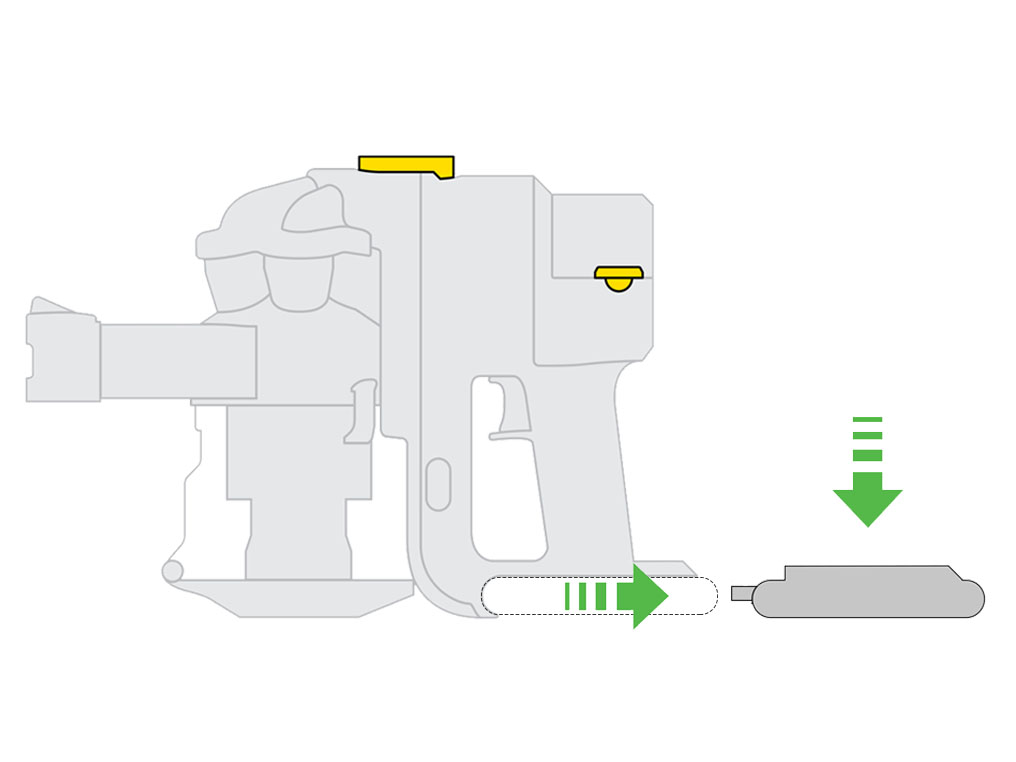
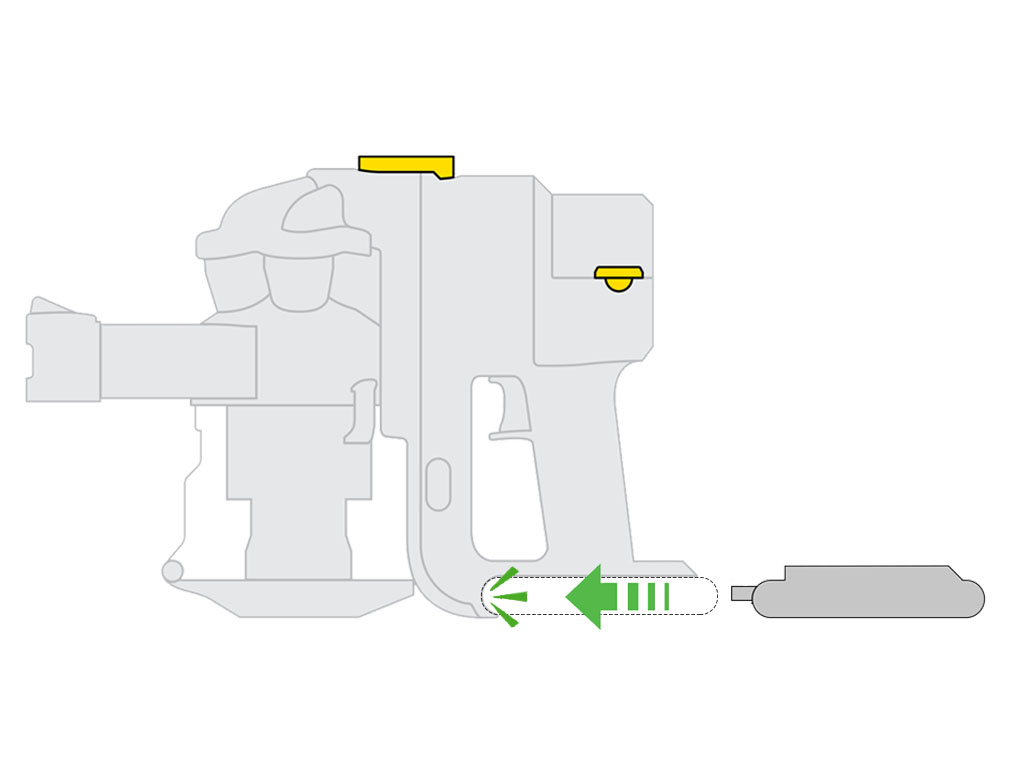
Slide the machine into the charger. The battery must be connected to the machine when charging.
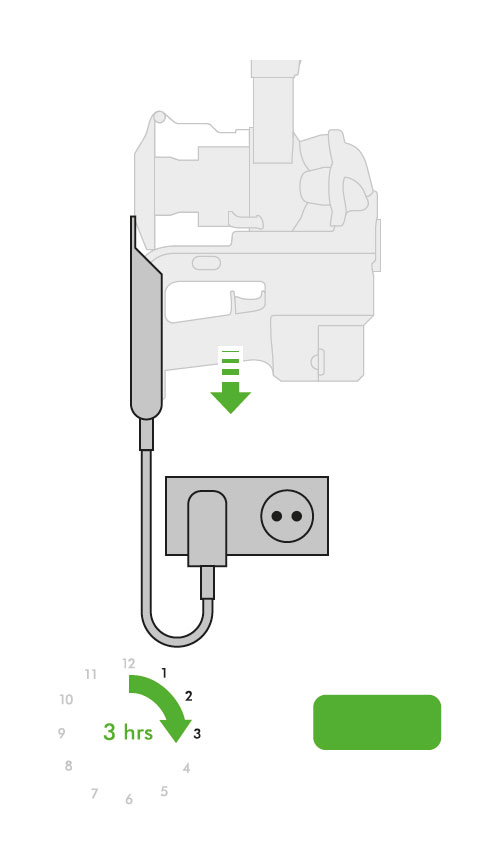
The battery must be charged for at least 3 hours or until the light changes to green.
Please select the appropriate option
Please select the appropriate option


Please select the appropriate option
Test the trigger
Separate the cyclone from the clear bin.

Press and hold the trigger whilst the cyclone and Main body are separated.
Check the bin and cyclone
Clean the bin with a damp cloth only. Do not use any detergents, polishes or air fresheners to clean the bin. Do not put the bin in the dishwasher.
Clean the cyclone with a dry cloth and shake or tap firmly to remove all dust from inside the fine dust collector. Check the cyclone and bin seals are not missing or damaged.
Reassemble and test the machine.
Please select the appropriate option
Test the suction
Check the inlet pipe on the cyclone for blockages and remove as necessary.

Press the trigger and place your hand over the inlet.

Is the suction strong or weaker than usual?
Check the tools
Ensure neither the crevice tool or combination tool are attached to the machine.

Look through both tools to check for blockages and remove any debris as necessary.

Check for blockages
Check the inlet for blockages and remove as necessary.
Open the bin lid to remove any debris inside the bin.
Remove the clear bin from the Main body by opening the bin lid and pulling the tab at the top of the clear bin.
Check the inlet, cyclone and shroud for any blockages.
Clean any debris from the shroud with a cloth or soft dry brush to remove the fluff and dust.

Replace the bin ensuring it clicks in to place.

Reassemble and test the machine.
Please ensure all parts are fitted correctly with no gaps between the bin and cyclone.

Wash the filters
To maintain your Dyson machine we recommend that you wash your filter(s) at least once every 3-6 months.
Please follow the steps in the video.
The model shown may vary from the product selected but the process remains the same.
If you are unable to view the video or prefer to follow a step by step guide, please select step by step guide.
Has washing the filters resolved the problem?
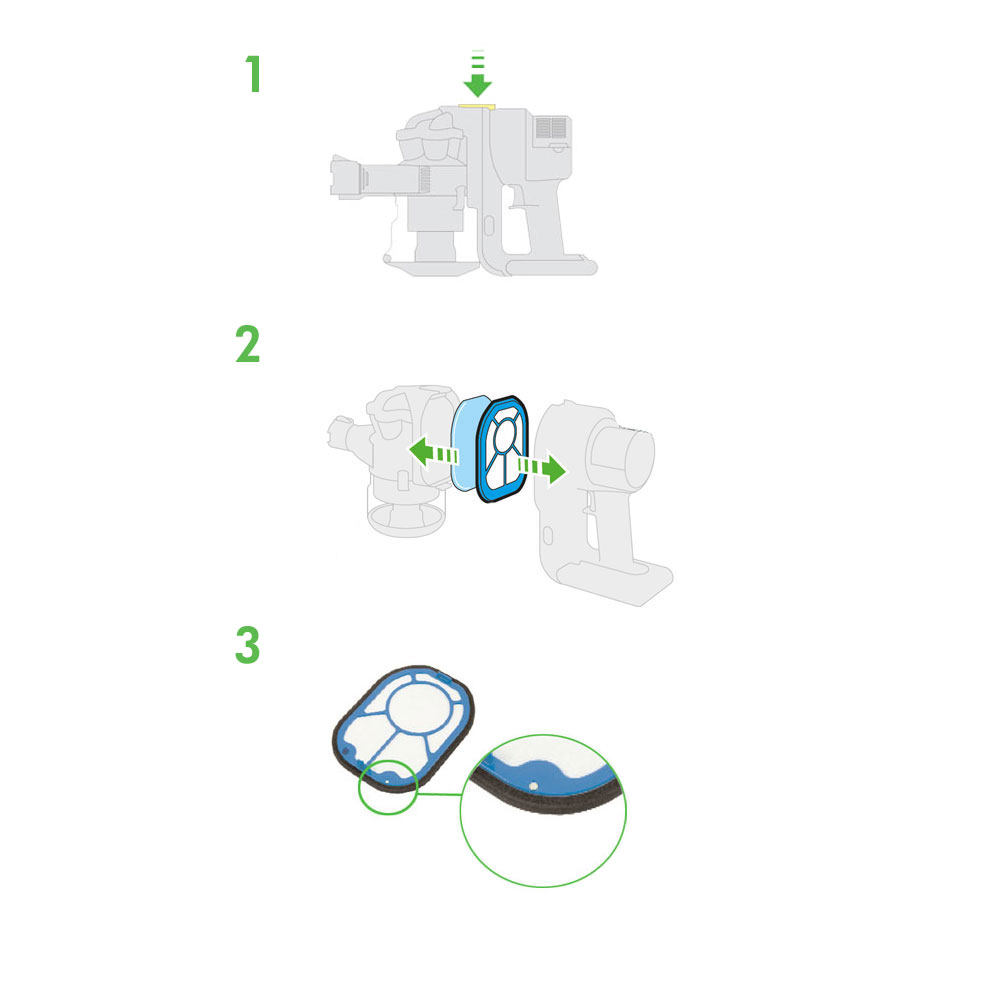
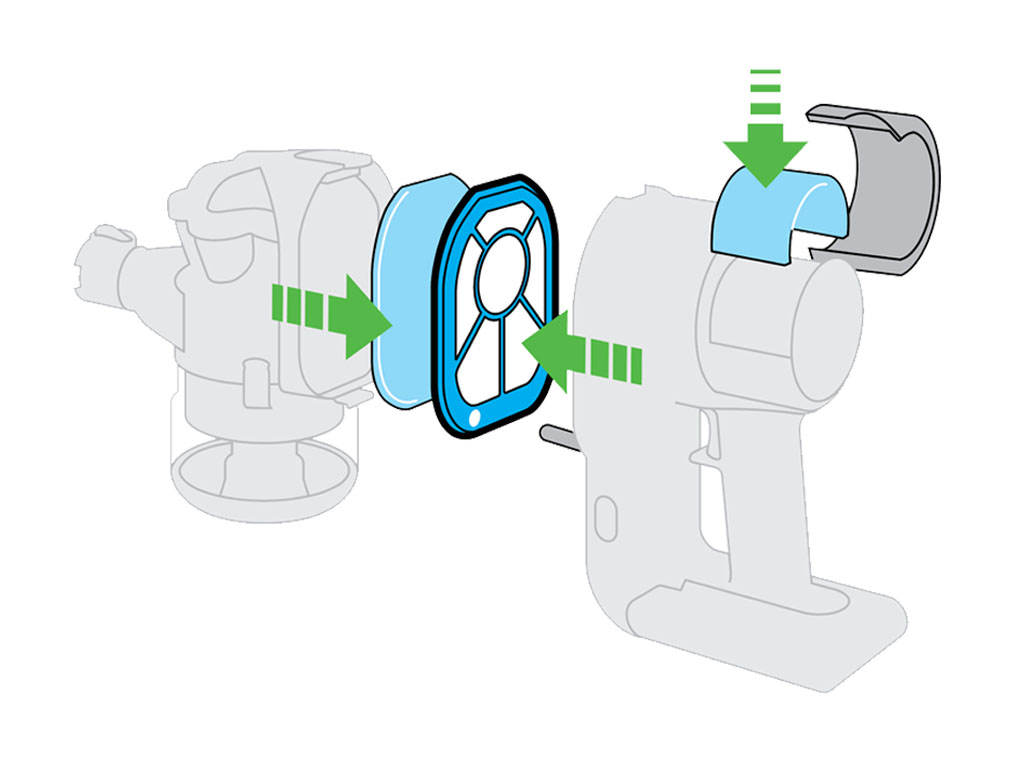
Remove the filters
Press the release catch at the top of the Main body to remove the pre-filter and undo the motor housing lid to remove the post-filter.
Remove the pre-filter foam pad, pre-filter casing and the post-filter foam pad.

Soak the filter in cold water for at least 5 minutes.
WARNING: Please do not use detergent, wash in a dishwasher or washing machine.

After 5 minutes rinse the filter under cold running water and squeeze gently, repeating until the water runs clear.

Leave the filter to dry in a warm place for 12 hours, until completely dry.
Do not dry the filter in a tumble dryer, microwave, oven or near a naked flame.

Reassemble the machine.

Check for blockages
Remove any accessory tools and check they are not blocked.
Remove the clear bin from the Main body by opening the bin lid and pulling the tab at the top of the clear bin.

If the shroud is blocked, clean with a cloth or a soft dry brush to remove the fluff and dust.
Check the cyclone for blockages and remove any dust or debris if applicable.
Reassemble and test the machine.
Please ensure all parts are fitted correctly with no gaps between the bin and cyclone.
Please select the appropriate option
Thermal cut out
Most Dyson vacuums have a built in safety system that stops the machine if it begins to overheat. This usually happens because the filters need washing or your machine is blocked.
If your machine cuts out, leave it for at least an hour to cool down and don't put the machine on charge.
Any non-domestic use may adversely affect the filter performance such as vacuuming up builders dust.
Check the lights
Check to see if your machine has one light.
Check to see if your machine has three lights.
Does your machine have one or three lights?
What does the light show?
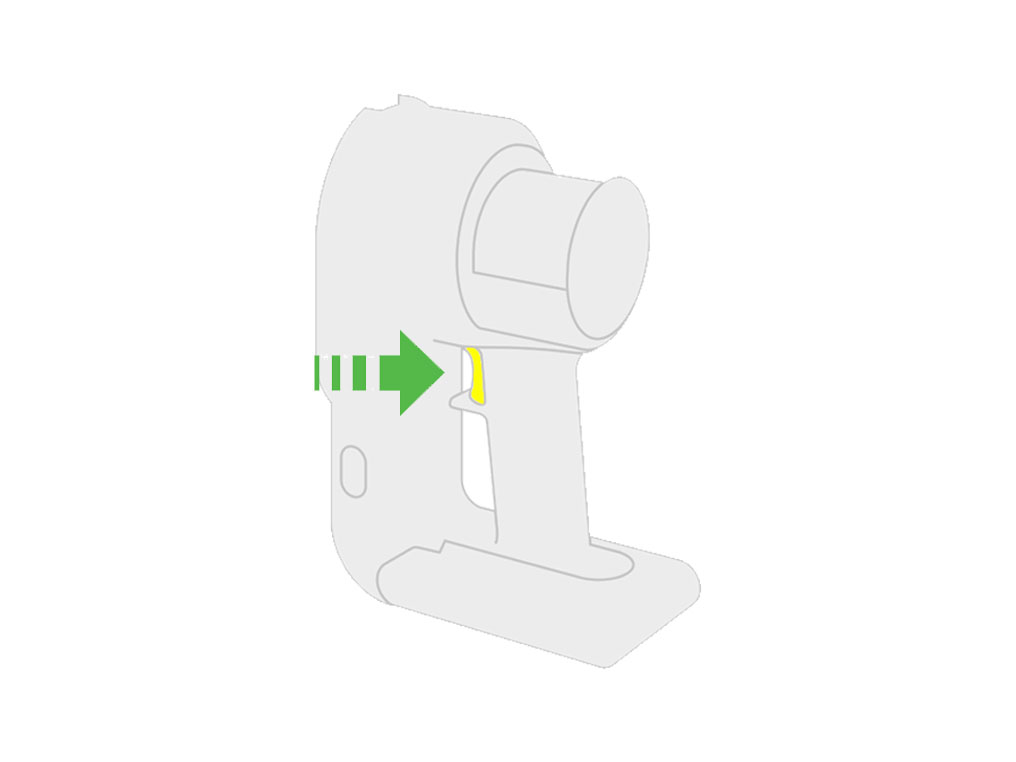
Flashing red light
A flashing red light when in use indicates that the filter is missing or fitted incorrectly.
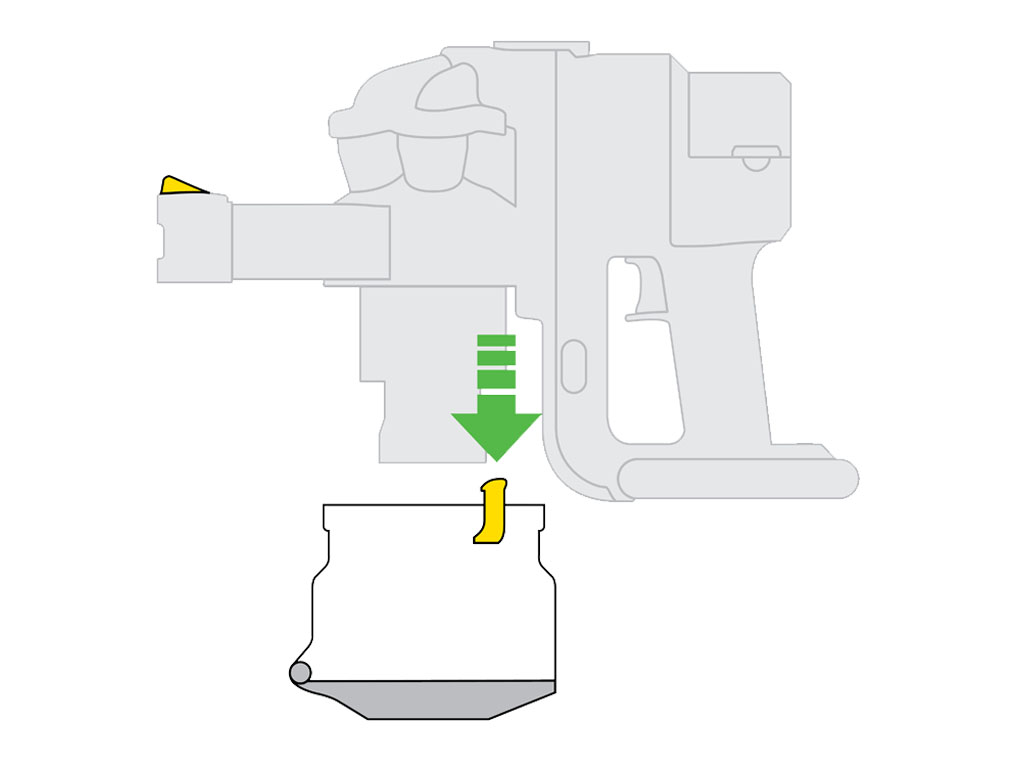
Separate the bin and cyclone from the Main body.
Remove the filter (sponge and casing) from the Main body.
Check the metal disc on the filter.
Replace the filter in the machine ensuring that the metal disc is facing the Main body in the bottom left hand corner of the Main body, when the machine is upright.
The filter should be washed at least once every 6 months.
If the filter is missing or damaged choose 'part broken'.
Has checking the filter resolved the problem?
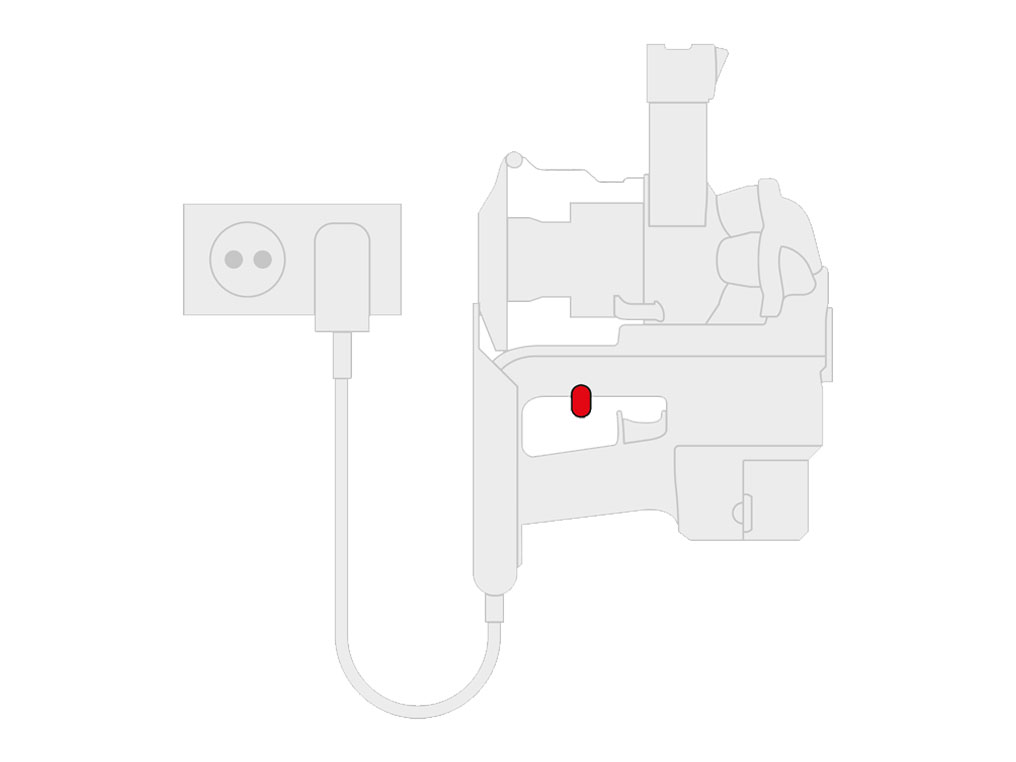
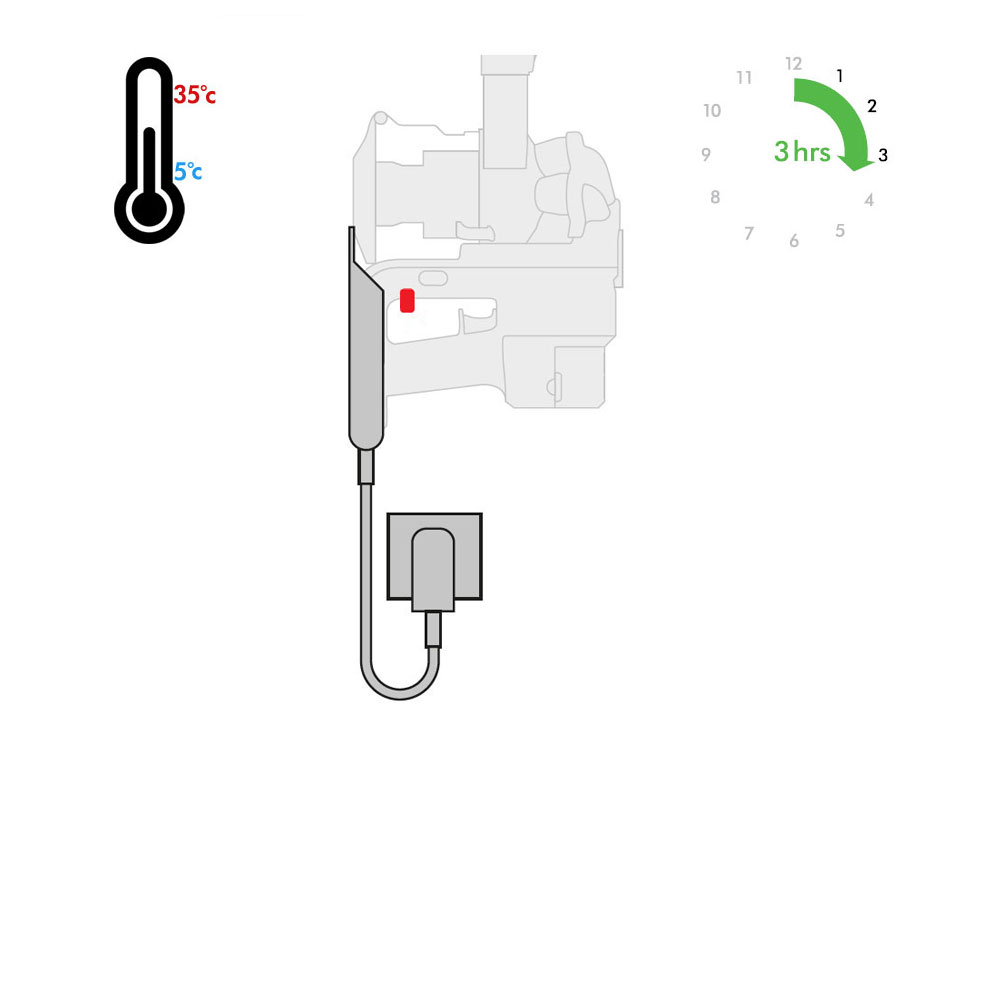
Temperature
This indicates that the machine is being charged/used outside of its optimum temperature range.
Correct temperature range 3c-35c.
Room temperature recommended.
Ensure the machine is charged for 3 hours at room temperature.
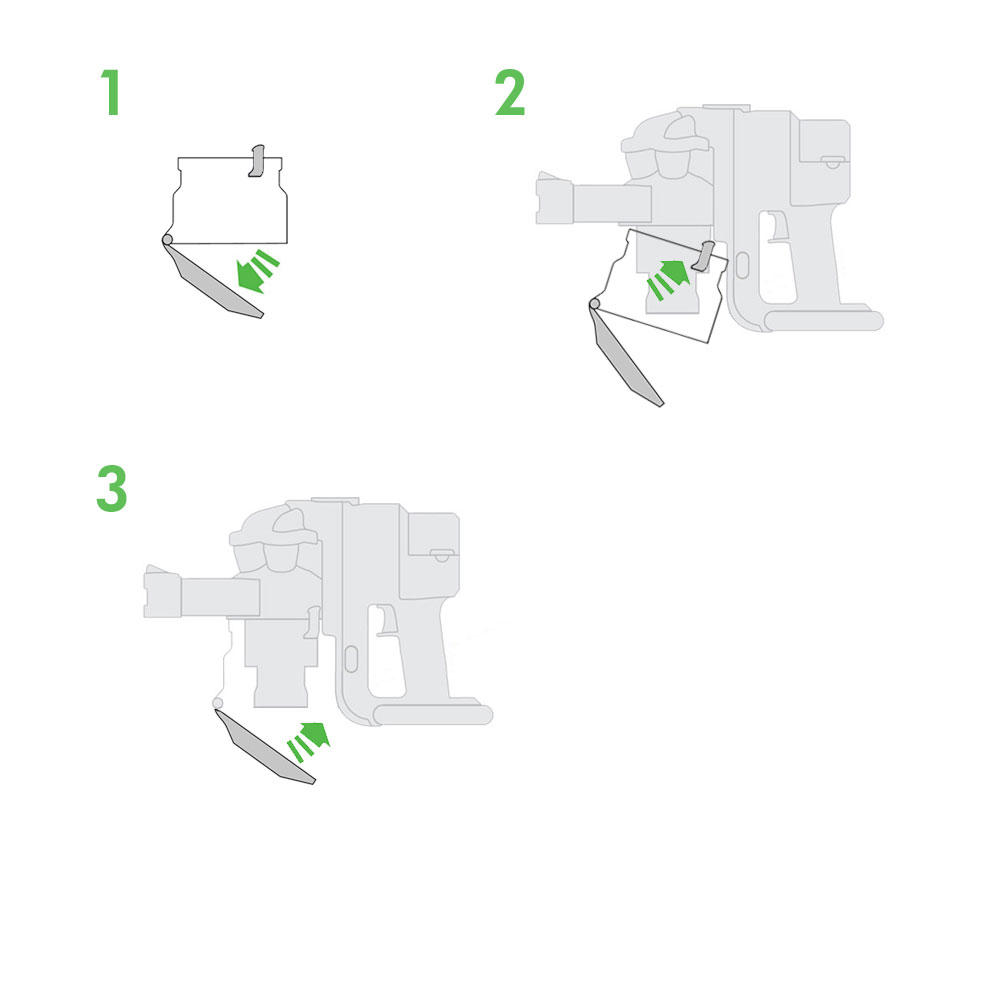
Remove the battery
Remove the battery from the machine.
Clean the contact points on the Main body and charger, and ensure that they are free from dirt or corrosion. Clean all contacts with a dry cloth.

Reinsert back into the machine, ensuring the battery clicks into place.
Test the machine.
Charge the machine
Put the machine on charge and check the light.
Solid green light
A solid green light indicates that the machine is in use and working normally.
Battery low
Please charge the machine for 3.5 hours.
Charge the machine
Place the machine on charge.
What does the light show?
Temperature
This indicates that the machine is being charged/used outside of its optimum temperature range.
Remove the battery
Remove the battery from the machine.
Clean the contact points on the Main body and charger, and ensure that they are free from dirt or corrosion. Clean all contacts with a dry cloth.
Reinsert back into the machine, ensuring the battery clicks into place.
Place the machine back on the charger.
Move the machine
Move the machine when in the charger.
Solid green light
This will indicate that the machine is fully charged.
Solid red light
A solid red light when on charge indicates that the battery is low and requires charging.
Please select the appropriate option
What are the lights showing?
Charge the machine
A flashing red light indicates that the battery is low or flat and needs charging.
Temperature
This indicates that the machine is being charged/used outside of its optimum temperature range.
Leave the machine in the charger at room temperature until the flashing stops.
What are the lights showing?
Battery low
Please charge the machine for 3.5 hours.
Three solid lights
3 solid lights (red, green, green) when in use indicates that the battery is fully charged.
Two solid lights (red, green)
2 solid lights (red, green) when in use indicates that the battery is partly charged.
Please select the appropriate option
What are the lights showing?
Temperature
This indicates that the machine is being charged/used outside of its optimum temperature range.

Check the temperature
Correct temperature range 3c-35c.
Room temperature recommended.
Ensure the machine is charged for 3 hours at room temperature.
What are the lights showing?
Solid red light
A solid red light when on charge indicates that the battery is low and requires charging.
Plug the machine in and leave it to charge for 3 hours before checking again.
Three solid lights
3 solid lights (red, green, green) when on charge indicates that the battery is fully charged.
Two solid lights
2 solid lights (red, green) when on charge indicates that the battery is partly charged.
Check the lights
Check to see if your machine has one light.
Check to see if your machine has three lights.
Does your machine have one or three lights?
Check the trigger
The machine should only operate when the trigger is pressed in.
Check the trigger for obstructions or debris and remove as necessary.
If the trigger still fails to operate correctly, this is most likely an issue with the Main body.
What sort of smell?
Damp or musty smell
A damp or musty smell is caused when dust in the cyclone has come into contact with water.
It may not be a direct contact with water, for example when vacuuming pet hair that is slightly damp, this moisture will combine with the dust in the cyclone causing the smell.
Additionally the smell may occur if the filter goes back into the machine wet.
Clean the bin
Clean the bin with a damp cloth only. Do not use any detergents, polishes or air fresheners to clean the bin. Do not put the bin in the dishwasher.
Ensure the clear bin is completely dry before replacing.
To replace the bin, push the bin up and in to the Main body of the machine, It will click into place.
Close the bin base so it clicks into place and is secure.
Washing the filter can also help to remove the smell.
Please select the appropriate option
Check the lights
Check to see if your machine has one light.
Check to see if your machine has three lights.
Does your machine have one or three lights?
Please select the appropriate option
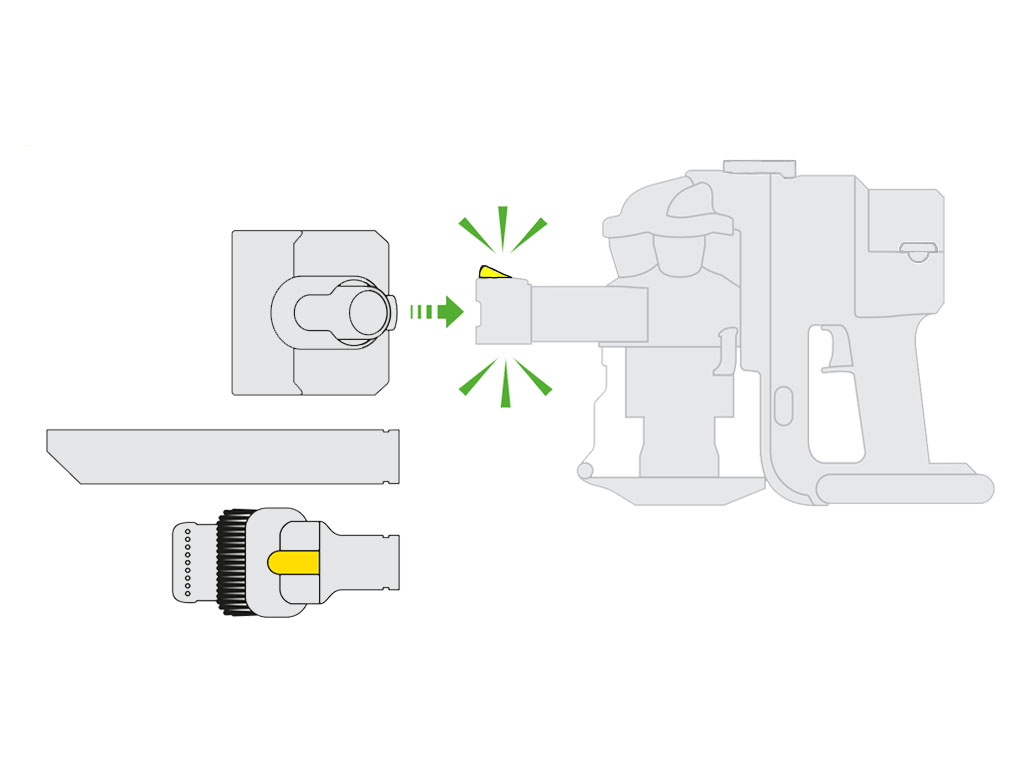
Which part do you need help fitting?
Fit the battery
Push on the battery release button.
Pull gently on the battery to release.
Reconnect battery by pushing into the Main body until it clicks into place.
Fit the bin
Open the bin base.

Tilt the bin at an angle and then push the bin in towards the Main body until it clicks.
Close the bin base.
Is there anything else we can help with?
Machine run time
Your Dyson handheld is designed to give constant suction. Unlike other handhelds, when fully charged DC16 will give 6 minutes of powerful constant suction.
The ideal amount of time for cleaning small areas of dust and debris around the home.
Full charge time within temperature range (3oC-40oC): 3 hours
Serial number
The serial number can be found on the Main body of the machine behind the bin.

Please open the PDF for the user guide.
Please select the appropriate option
Accessory tool video
The model shown may vary from the product selected but the process remains the same.
If you are unable to view the video, or prefer to follow a step by step guide, select the correct option.
Is there anything else we can help with?
Combination tool
To use the brush function, press the button on the brush section.
Slide the brush section towards the front of the combination tool.
Crevice tool
The brush must be positioned at the back of the combination tool to use the crevice function.
Slide the crevice tool into the inlet pipe on the cyclone until it ''clicks'' into position.
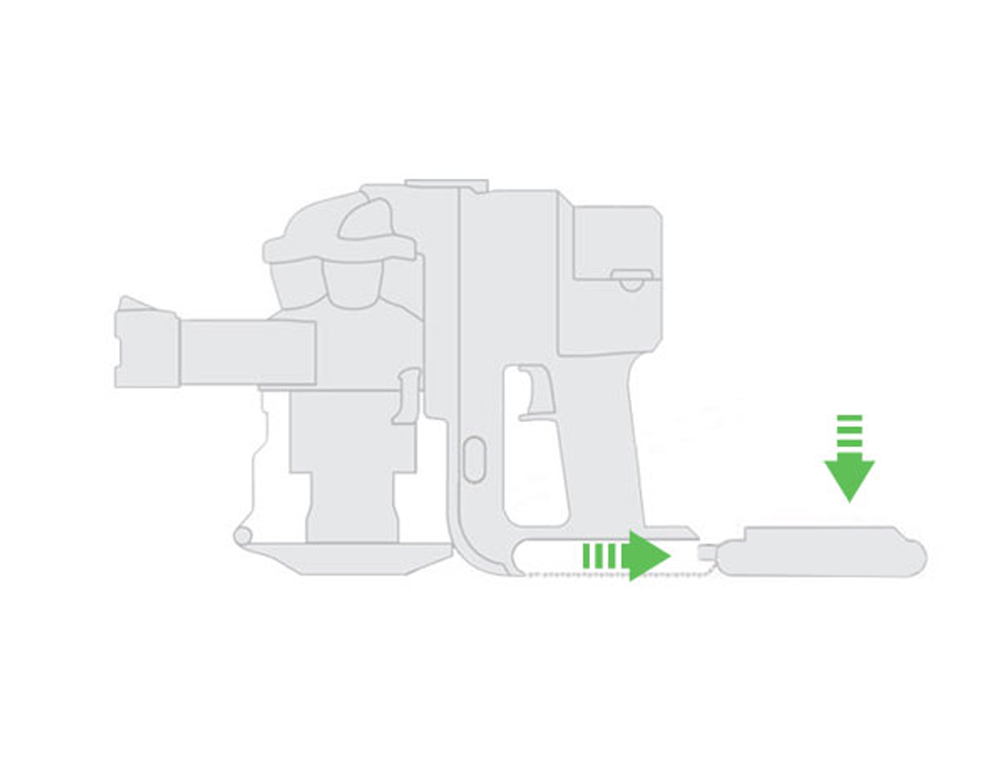
Emptying the bin
To ensure your machine continues to clean effectively, the bin must be emptied as soon as the dust reaches the MAX mark.
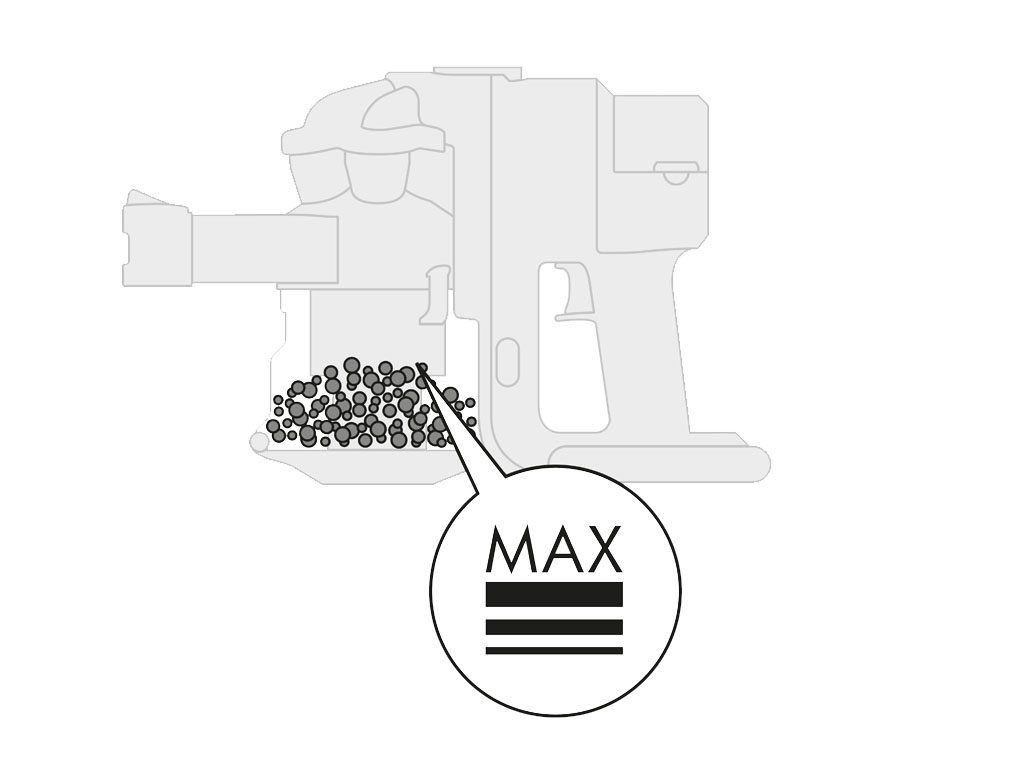
Push the button on the Main body of the machine downwards to release dust directly into a dustbin.
Shake or tap firmly to remove all dust from inside the fine dust collector.
Press firmly underneath the catch of the clear bin base to close.
How to wash the filters
To maintain your Dyson machine we recommend that you wash your filter(s) at least once every 3-6 months.
Please follow the steps in the video.
The model shown may vary from the product selected but the process remains the same.
If you are unable to view the video or prefer to follow a step by step guide, please select step by step guide.
Is there anything else we can help with?
Remove the filters
Press the release catch at the top of the Main body to remove the pre-filter and undo the motor housing lid to remove the post-filter.
Remove the pre-filter foam pad, pre-filter casing and the post-filter foam pad.
Soak the filter in cold water for at least 5 minutes.
WARNING: Please do not use detergent, wash in a dishwasher or washing machine.
After 5 minutes rinse the filter under cold running water and squeeze gently, repeating until the water runs clear.
Leave the filter to dry in a warm place for 12 hours, until completely dry.
Do not dry the filter in a tumble dryer, microwave, oven or near a naked flame.
Reassemble the machine.
Charging the battery
To ensure your handheld is always ready to use, store it on the charger, with the charger powered.
When in use, the lights on the handle indicate the level of charge. When the red light flashes, the battery is flat and needs recharging.
When connected to the charger, the red light will stop flashing, and the green bars will appear as the level of charge increases. If using the mains charger, ensure that the charger is plugged in and the power is switched on at the socket.
The battery must be charged for at least 3 hours or until all 3 LED lights are showing.
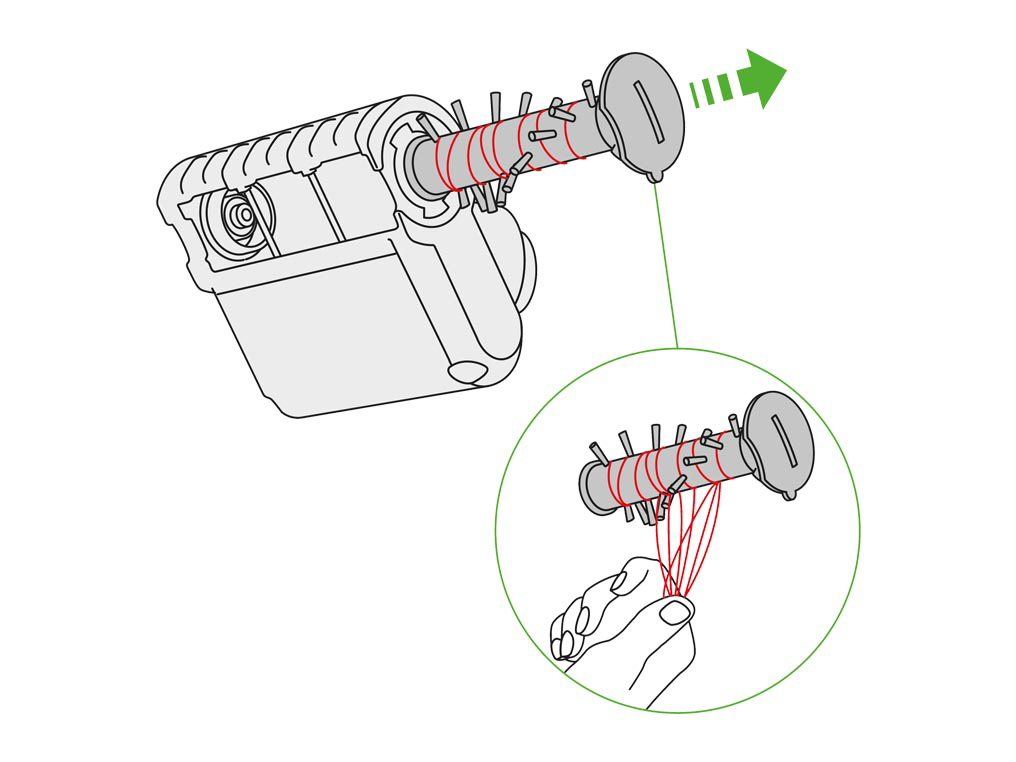
Maintaining the Motorised head
Remove the Motorised head from the machine using the release catch on the top of the inlet.

Using a coin, undo the end cap as shown and remove the Brush bar.

Ensure that the brush housing is clear of any blockages.
We need a little more information to help us solve your issue.
Please contact our customer service team on 01-475-7109, or directly on Live Chat through our Digital Assistant by clicking the purple icon at the bottom of the page. You can start a conversation with an Expert by clicking the agent icon at the bottom left of the chat window.
We're glad the problem's been solved.
Please let us know if there's anything else we can help you with.
The Dyson guarantee

'How to ' videos and tips

Exclusive owner benefits

Expert advice. 7 days a week.

Hassle-free repairs and replacement
Please get in touch.
Our experts are ready to help you.
UK based helpline open
8:00am- 8:00pm Monday to Friday
8:00am- 6:00pm Saturday and Sunday
Further help
DC16 Issey Miyake Exclusive™