Please select the appropriate option


Continuous monitoring
The continuous monitoring option is used for air quality, temperature and humidity data to be relayed to the machine and app at all times, even when you have turned the purifier off. The sensors have small fans that maintain airflow for continuous monitoring, but this should not cause any audible noise interference.
There may be instances when the display shows green, indicating high air quality, but the fan speed is still high. This is due to the machine constantly seeking to maintain a good air quality, and in scenarios such as rooms with leaky windows, the machine must work harder to maintain a good air quality.
This will only happen when the machine is set on auto. To turn off Auto mode, please select Manual mode, either using the remote control or on the app.

Please check the following on the app:
Swipe up to reveal the setting tab and tap to open options.
Swipe down to find the continuous monitoring option and tap to open.
Turn OFF the 'Collect data when in standby' option. (The icon will turn grey when turned off). Save the change by pressing 'Done' at the top right of the page.
Continuous monitoring can now also be turned on/off by pressing the 'Auto' button on the remote control for five seconds.
Retest the machine.
Has the noise stopped?
Ensure correct button on remote is being pressed to adjust the airflow.

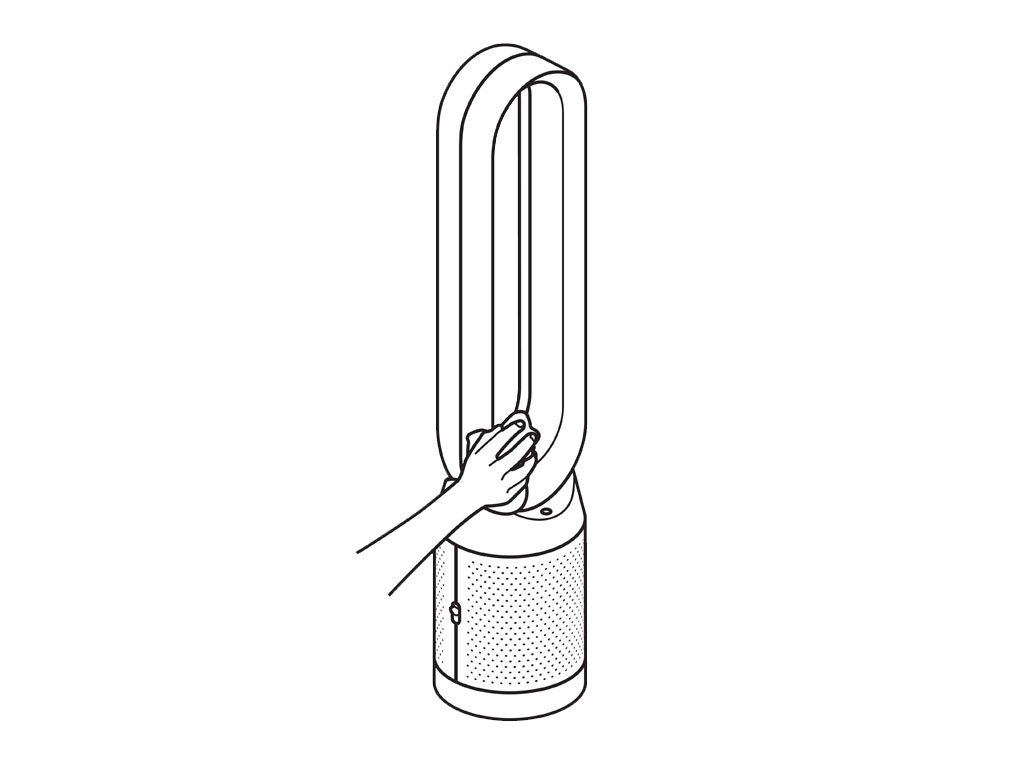
Check and clean loop amplifier
The following areas should be checked and cleaned to maintain the machine's performance.
Clean the loop amplifier with a dry or damp cloth.
Ensure that the narrow opening is free of obstructions.
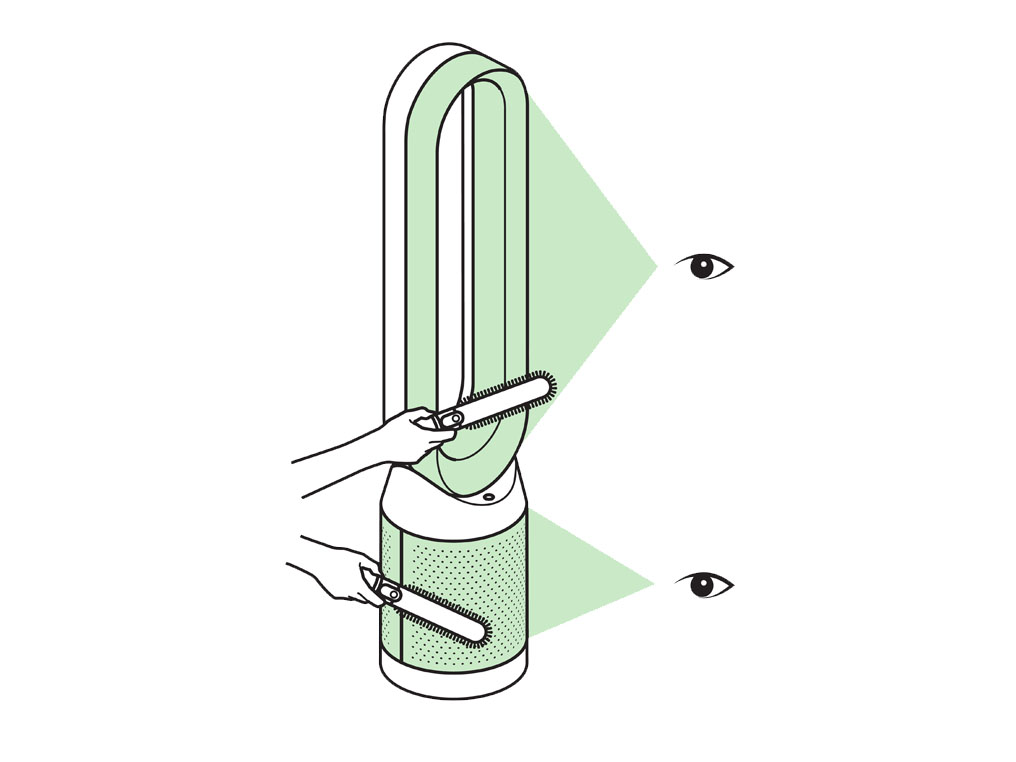
Check and clean Main body
Clean the shroud of the Main body with a dry cloth.
Use a soft brush to clear any blockages from the holes.
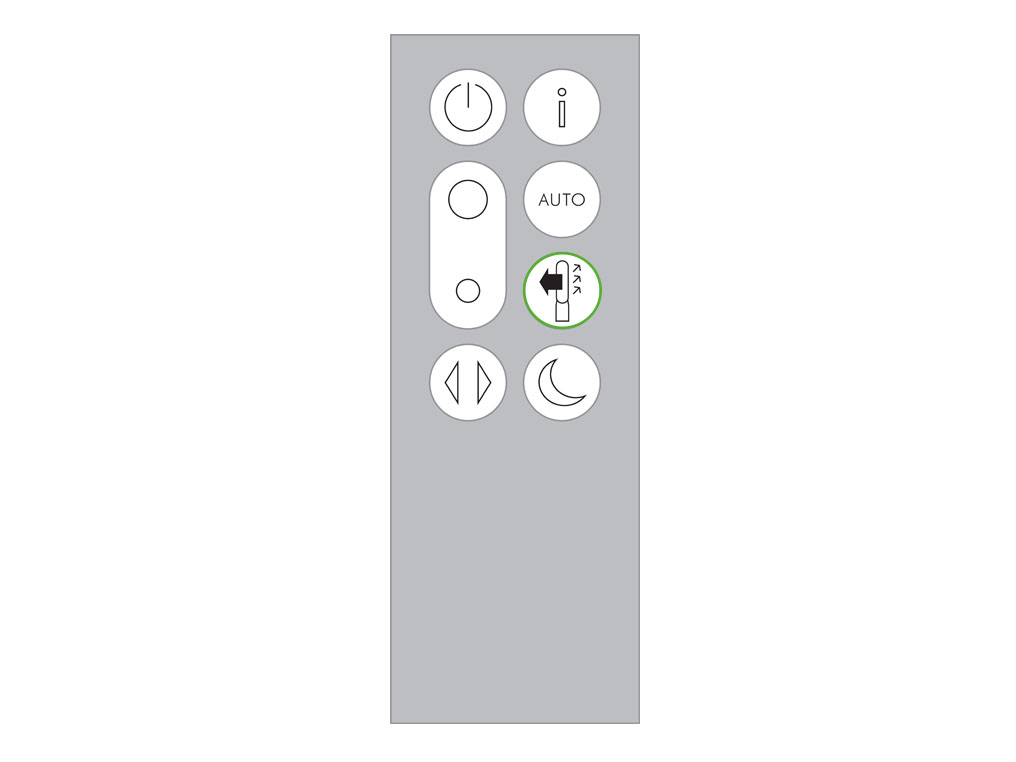
Check airflow direction
This product has dual airflow direction options. Please ensure you have directed the airflow to come out the front of the machine before beginning these checks.
You can do this by pressing the airflow direction button on the remote control.
Please select the appropriate option
Check the electrics
Check that the household electrics are on.
Check the plug and power cord for signs of damage.
Try the machine in a different plug socket.

Ensure the cable is firmly plugged into the back of the machine.
Has this resolved the problem?
Check using the remote control
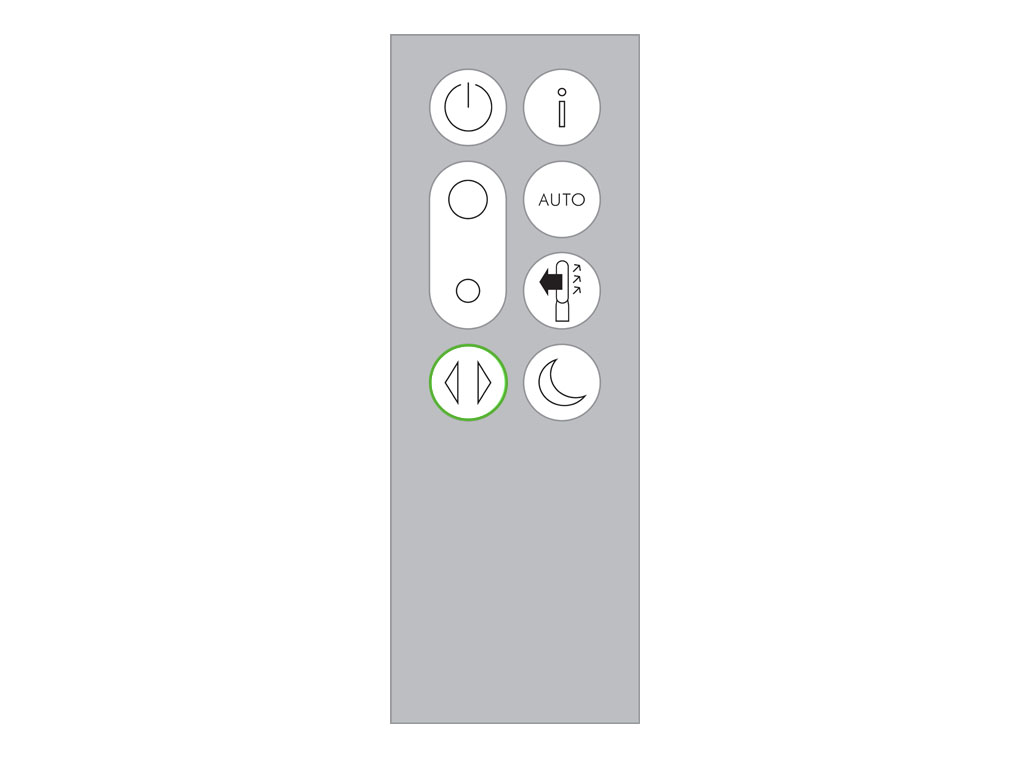
Press the oscillation button on the remote.
If the using the buttons on the remote doesn't work, try changing the batteries.
Check with the Dyson Link app
Try using the Dyson Link app to control the oscillation.
Has this resolved the problem?
Test the remote control
Ensure the correct button on the remote is being pressed.
Point the remote directly at the front of the machine while pressing the button.
Test the other remote buttons
Airflow speed

On/Off
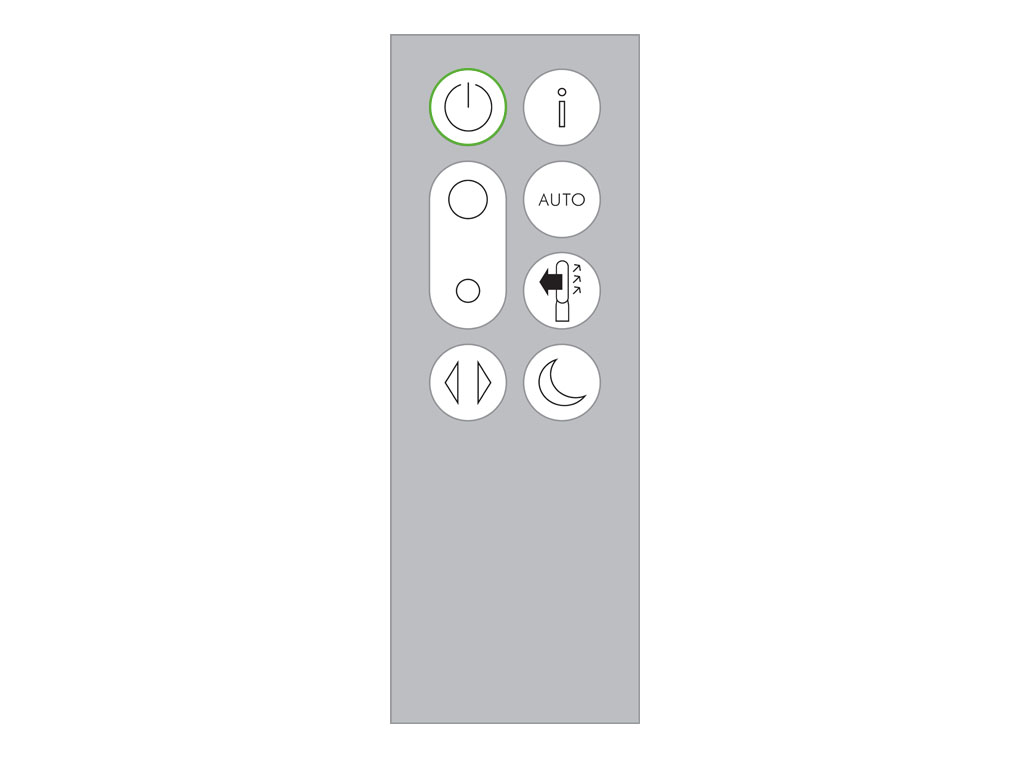
Press the ON/OFF button on the Main body of the machine.
Does the machine turn off?
Point the remote directly at the front of the machine while pressing the button.
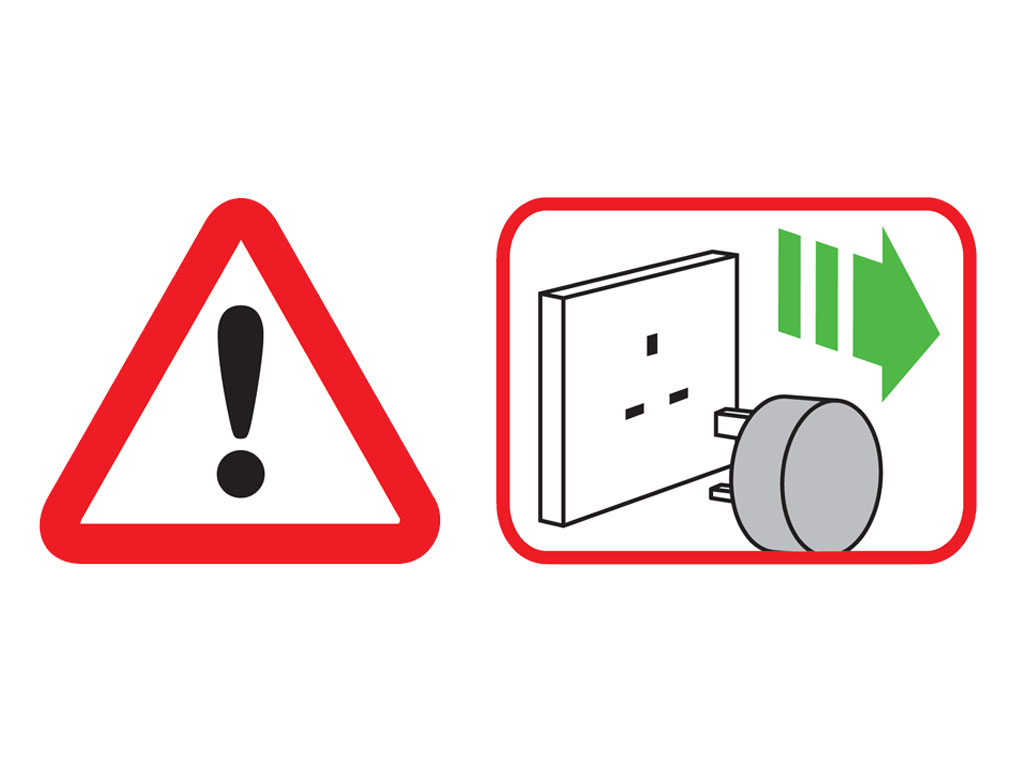
Important: Always unplug the machine before changing filters.
When the appliance detects that the nonwashable glass HEPA filters need replacing the display on the appliance will show an empty bar.
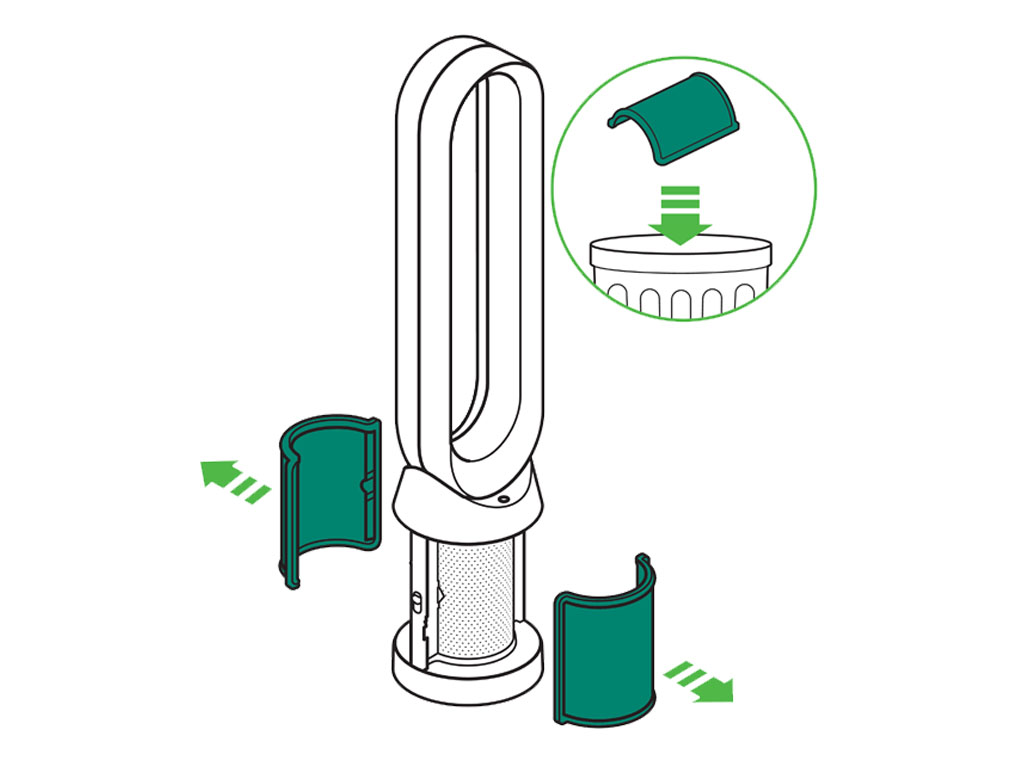
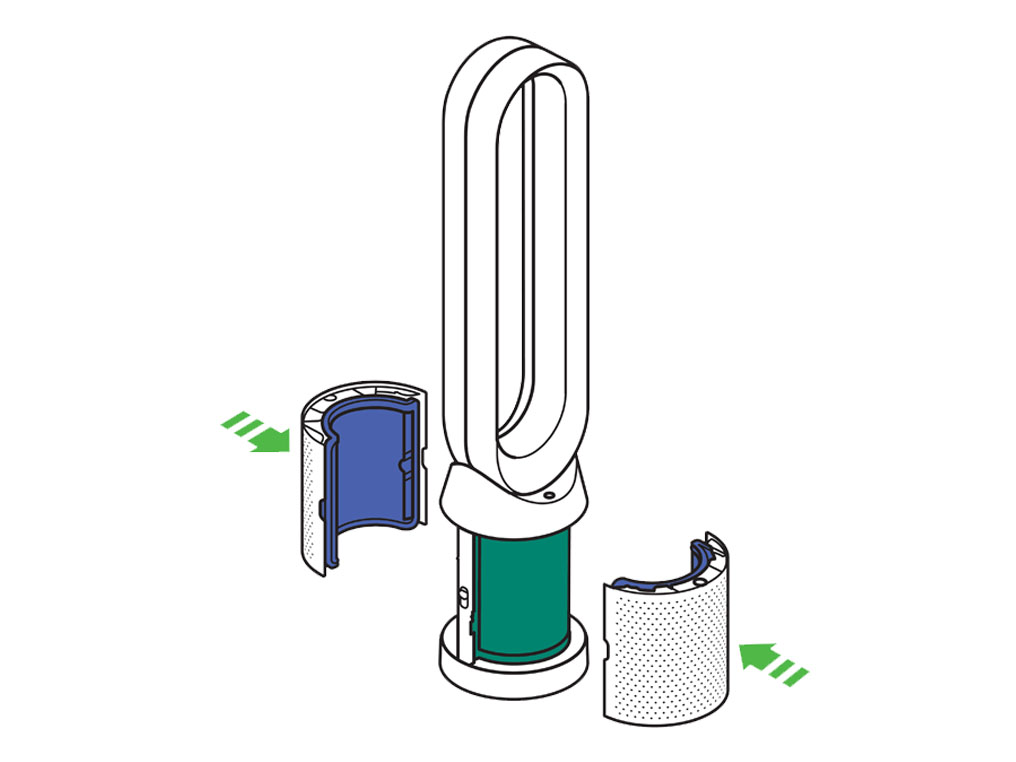
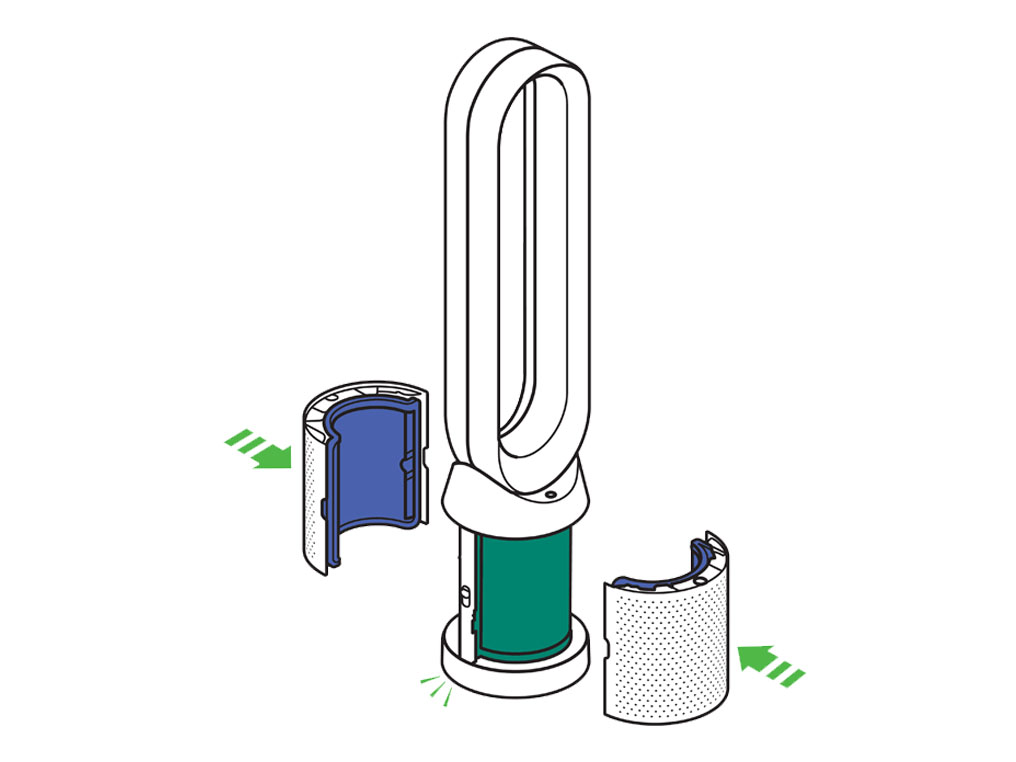
Unplug the appliance from the mains electricity supply. Slide the buttons down on either side of the shrouds.

The shrouds will release with the glass HEPA filters attached.
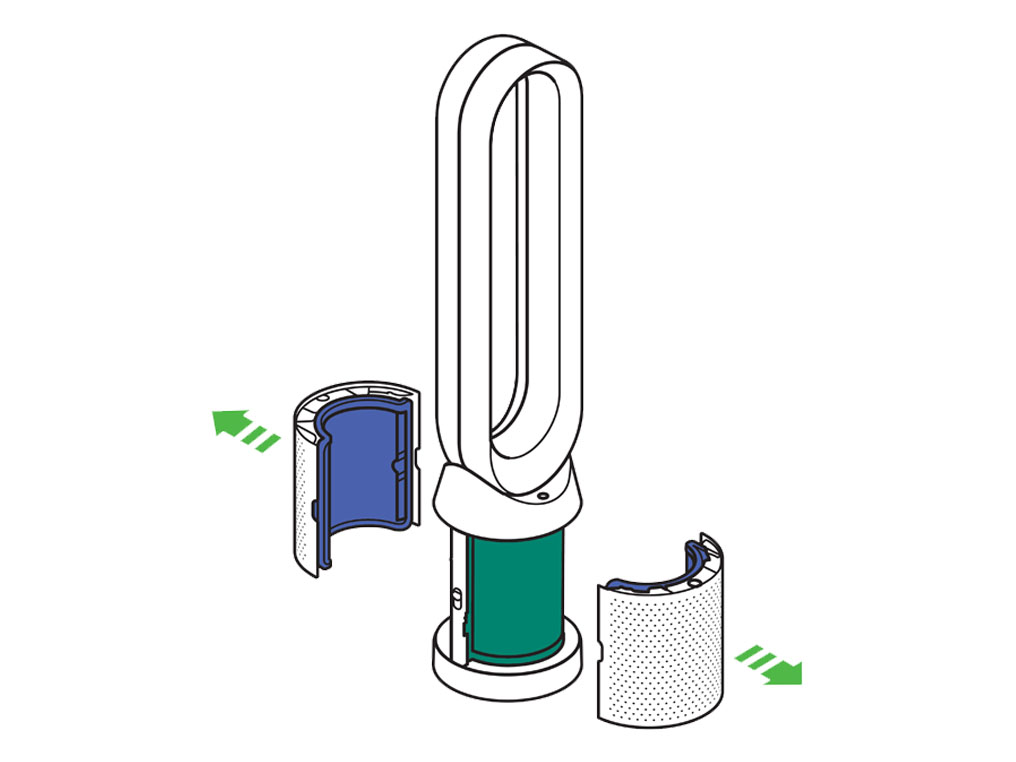
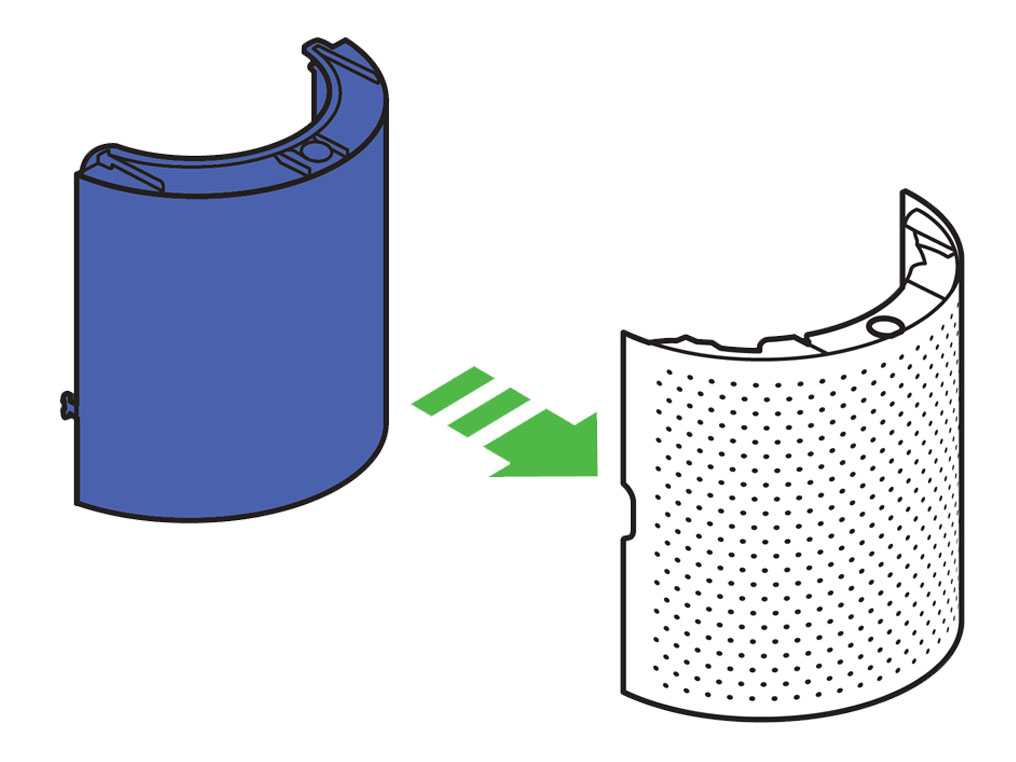
Empty the glass HEPA filters directly into the bin by pushing in both the purple tabs on the shrouds. Dispose of used filter units in accordance with local regulations.
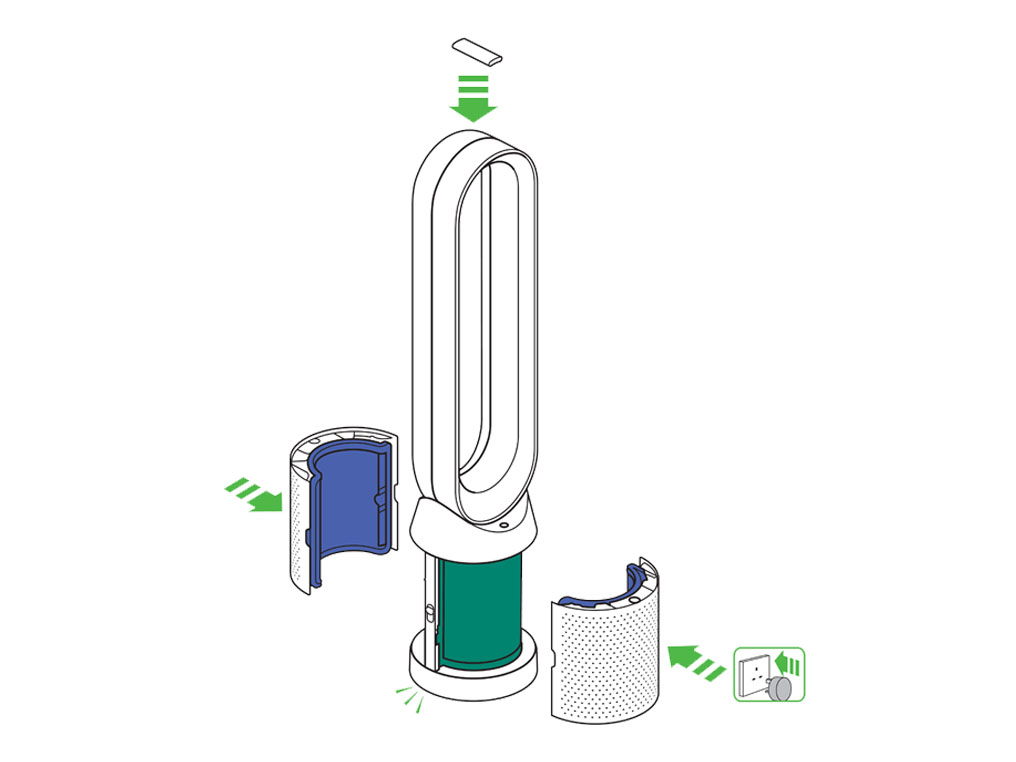
Push the new glass HEPA filters into the shrouds until secure. Push the shrouds until they click back into position in the base.
Plug the appliance in to the mains electricity supply and switch on.
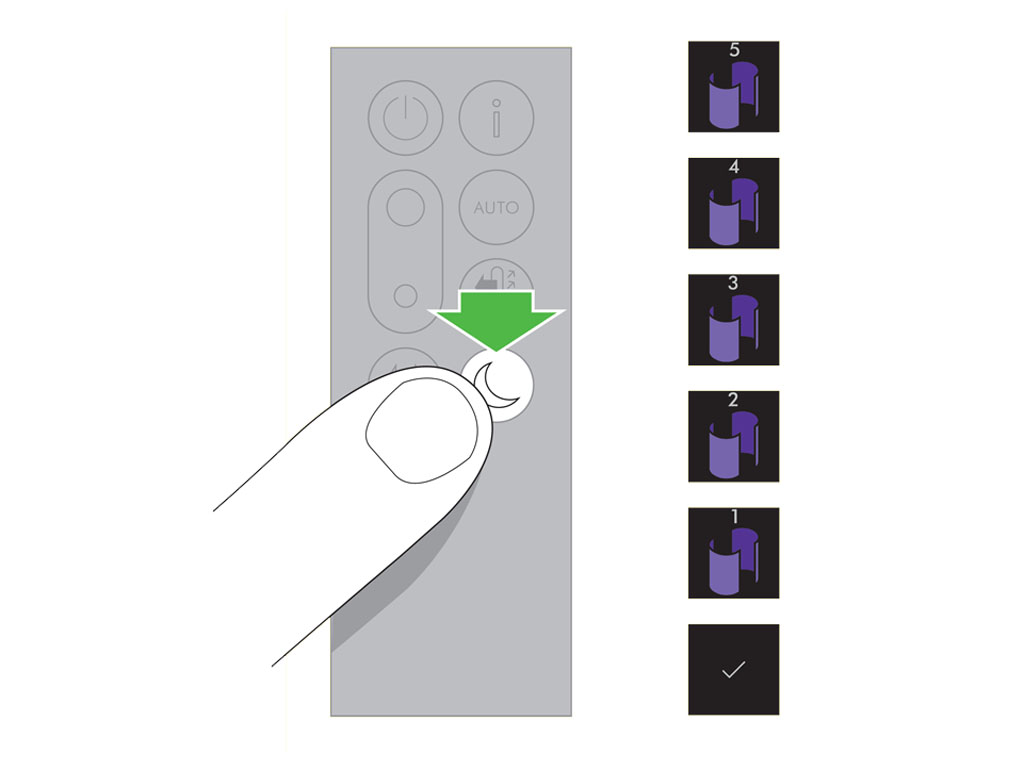
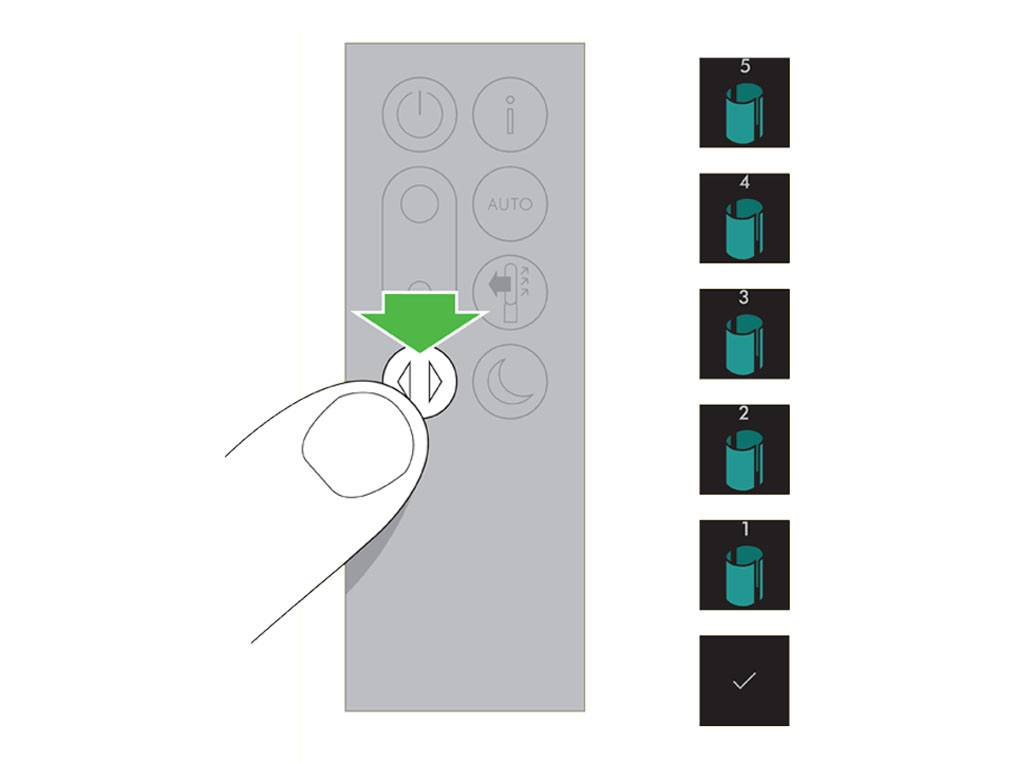
Press and hold the Night mode button on the remote control. The display on the appliance will countdown from five, finishing with the default screen. The glass HEPA filter level will be reset and the appliance is ready to use.
Important: Always unplug the machine before changing filters.
When the appliance detects that the non-washable carbon filters need replacing the display on the appliance will show an empty bar.
Unplug the appliance from the mains electricity supply. Slide the buttons down on either side of the shrouds. The shrouds will release with the glass HEPA filters attached.
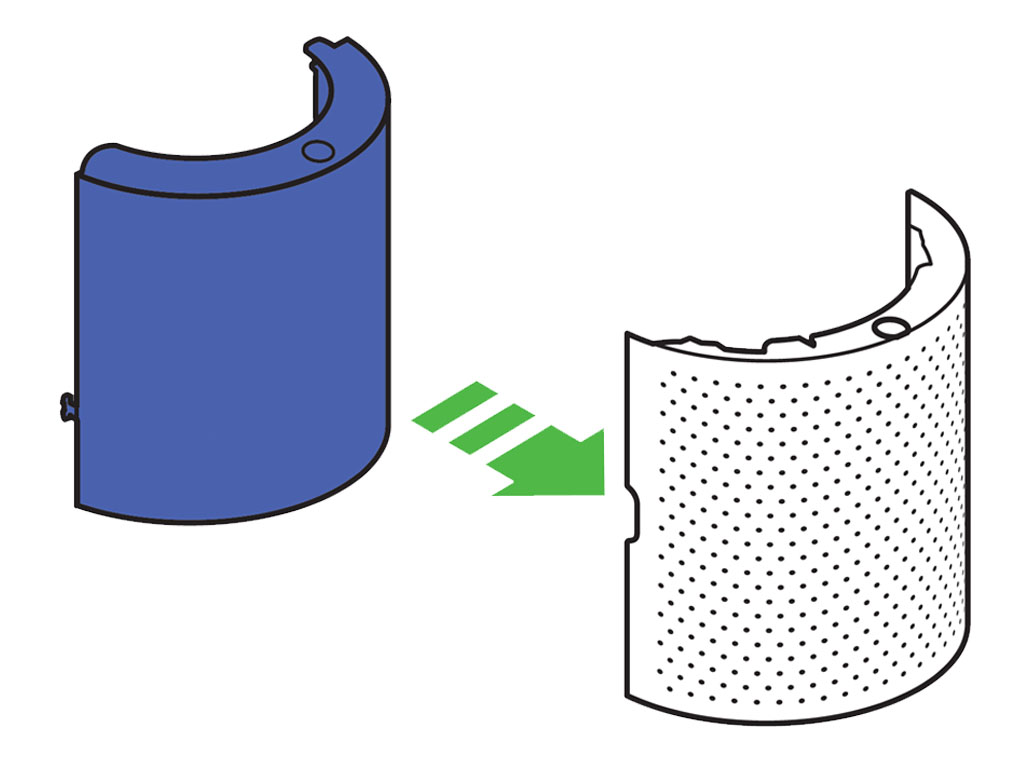
To remove the carbon filters: press the tabs on both sides of the filters.
Dispose of the carbon filters in the bin. Dispose of used filter units in accordance with local regulations.
Push the new carbon filters onto the base until secure.
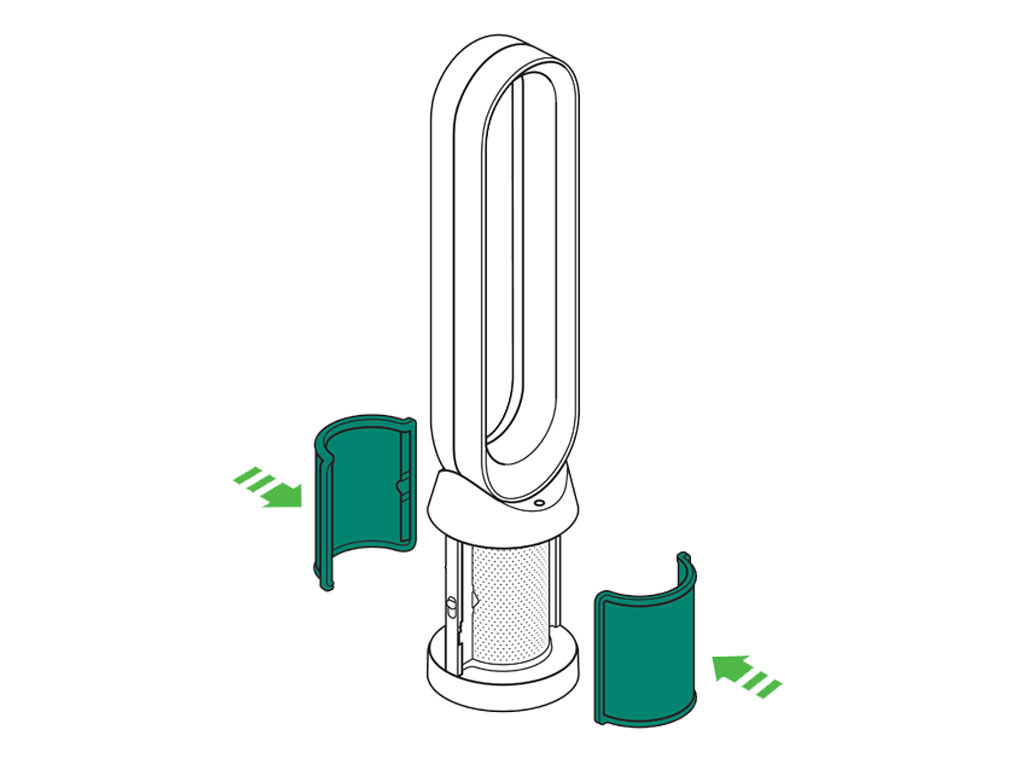
Push the shrouds until they click back into position in the base.
Plug the appliance in to the mains electricity supply and switch on.
Press and hold the Oscillation button on the remote control. The display on the appliance will countdown from five, finishing with the default screen. The carbon filter level will be reset and the appliance is ready to use.
Has changing the filter resolved the problem?


Ensure correct button on remote is being pressed.
On/Off
Airflow speed
Oscillation
Automatic mode
Information
Night mode
Airflow direction
Point the remote directly at the front of the machine while pressing the button.
Check other buttons
Test the other buttons on the remote.
Airflow speed
Airflow direction
Fault
Reset the machine.

Unplug the machine and leave it for 10 seconds.
Ensure the power cord is plugged into the centre of the base.
Plug the machine back in and retest.
Has this resolved the problem?
Restart the machine
Switch off and unplug the machine.
Ensure all outside doors and windows are closed.
Vacuum the two sensor slots to the left of the LCD screen with a Dyson brush attachment.

Plug in and test the machine.
My display is reading green but the fan is working at high speed
There may be times when the display is showing green but the fan speed is still high.
This is due to the machine always trying to maintain high air quality. For example, in a room with leaky windows, the machine has to work harder via a higher Fan speed to maintain a high air quality.
If you want the fan to be quieter, you can choose to change the airflow direction to face backwards, or turn the machine to manual mode and lower the airspeed.
Has this resolved the problem?
When the appliance detects that the nonwashable glass HEPA filters need replacing the display on the appliance will show an empty bar.
Unplug the appliance from the mains electricity supply. Slide the buttons down on either side of the shrouds.
The shrouds will release with the glass HEPA filters attached.
Empty the glass HEPA filters directly into the bin by pushing in both the purple tabs on the shrouds. Dispose of used filter units in accordance with local regulations.
Push the new glass HEPA filters into the shrouds until secure. Push the shrouds until they click back into position in the base.
Press and hold the Night mode button on the remote control. The display on the appliance will countdown from five, finishing with the default screen. The glass HEPA filter level will be reset and the appliance is ready to use.
When the appliance detects that the non-washable carbon filters need replacing the display on the appliance will show an empty bar.
Unplug the appliance from the mains electricity supply. Slide the buttons down on either side of the shrouds. The shrouds will release with the glass HEPA filters attached.
To remove the carbon filters: press the tabs on both sides of the filters.
Dispose of the carbon filters in the bin. Dispose of used filter units in accordance with local regulations.
Push the new carbon filters onto the base until secure.
Push the shrouds until they click back into position in the base.
Plug the appliance in to the mains electricity supply and switch on.
Press and hold the Oscillation button on the remote control. The display on the appliance will countdown from five, finishing with the default screen. The carbon filter level will be reset and the appliance is ready to use.
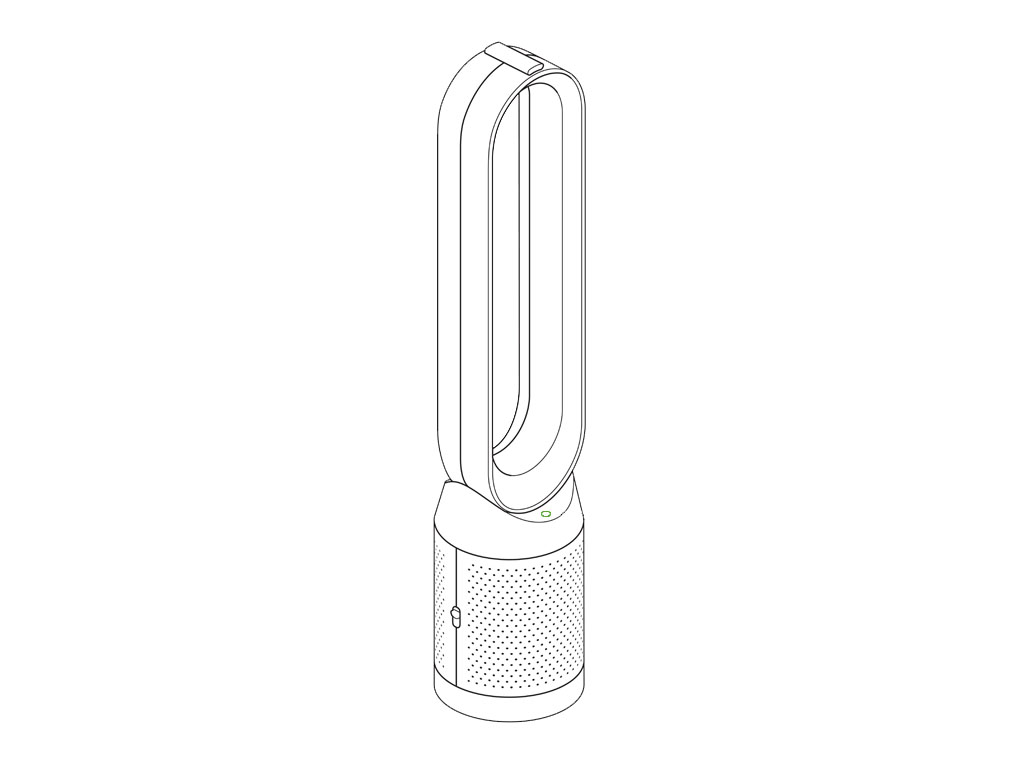
Use both hands to lift the appliance out of the box, taking care to hold by the base of the appliance only. Do not lift out by the loop amplifier.
Take the carbon filters out of the box and remove the protective packaging.
Attach both carbon filters to the appliance.
Remove the glass HEPA filters from their protective packaging and push into the shrouds until secure.
Position the shrouds onto the base and push gently until they click securely into place. Place the remote control on the top of the appliance with the buttons facing down. Plug in and switch ON.
The remote control can be magnetically attached to the top of the loop.
Using the remote control
To operate, point the remote control toward the front of the base.
On/Off
Press the power ON/OFF button on the appliance or remote control to stop the purifier. The appliance will continue to monitor the air quality.
Airflow speed
Press the Airflow speed button to increase and decrease the airflow speed.
Oscillation On/Off
Press the Oscillation button to scroll through the options from 0 to 350.
Customise your oscillation settings in the Dyson Link app and it will appear as an option as you scroll through.
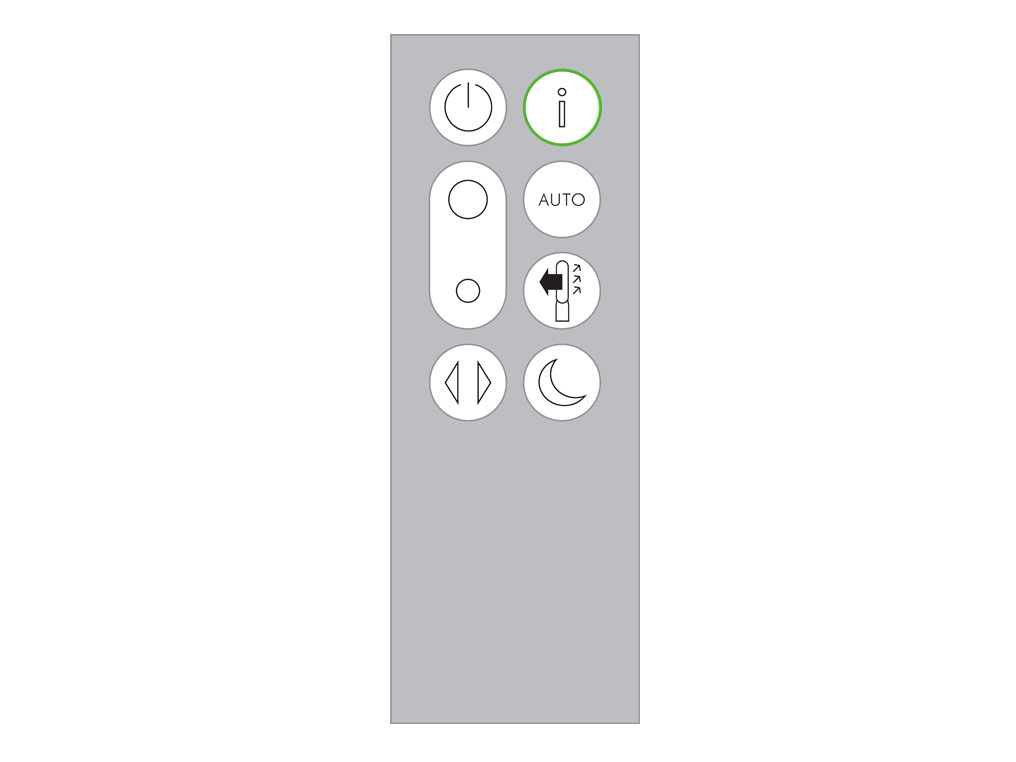
Information menu
Scroll through the options to monitor the performance of your appliance.
The menu will also allow you to access information about the pollutants in the air and the temperature and humidity levels.
When a particular type of pollutant causes air quality to decrease, the symbol for that pollutant will show in the display.
Auto mode
When Auto mode is selected the on-board sensors will intelligently adjust the settings of the appliance according to the quality of air. The appliance will pause once the sensors detect that the target air quality level has been reached. The sensors will continue to monitor the air quality, switching the appliance back on when air quality levels have dropped. Customise your Auto mode and air quality settings in the Dyson Link app.
Airflow direction
Air will be purified continuously, whether the air is set to flow from the front or the back.
For purification and cool airflow, select the airflow direction to the front.
For purification without cool airflow from the front, select the airflow direction to the back.
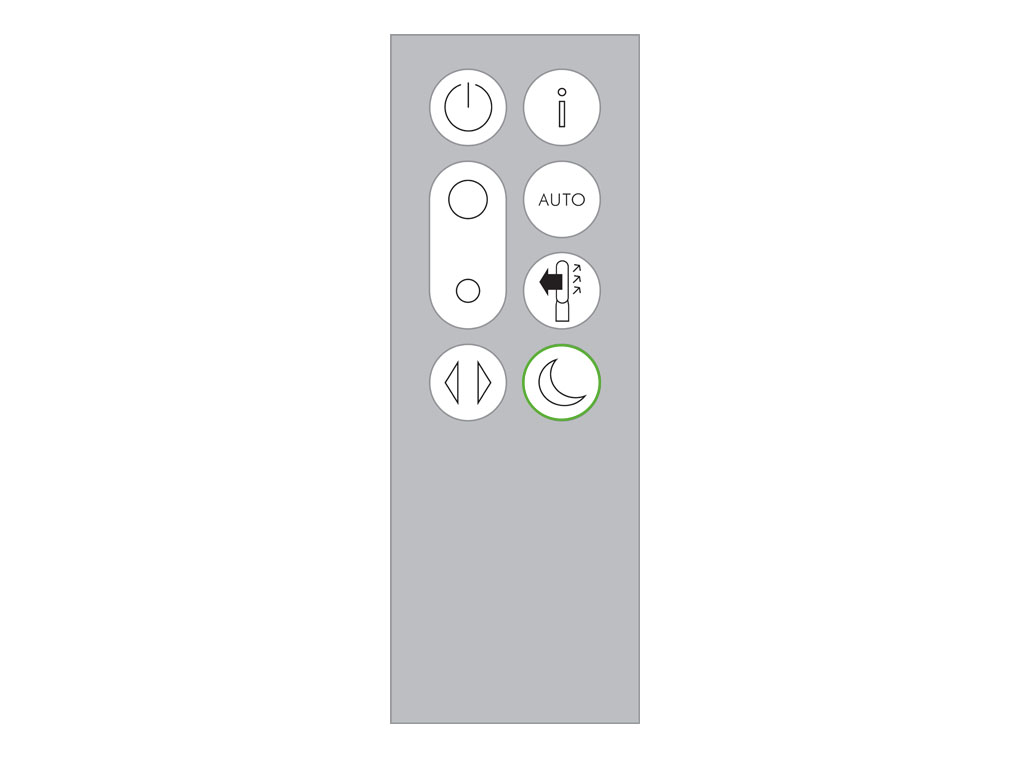
Night mode
Night mode will dim the display and the appliance will run more quietly, making it ideal for use while sleeping. If Auto mode has been set, Night mode will reduce airflow speeds to range from 1 to 4. You can manually change the airflow from 1-10. Customise your Night mode settings in the Dyson Link app.
If in manual mode, the power will reduce to level 4. When Night mode is activated, if it is already below level 4, it will remain the same. This can be manually changed if desired. The display will illuminate briefly, then fade as before. If in Auto mode the power will be reduced automatically.
Auto mode
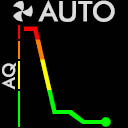
Auto mode adjusts the speed according to the air quality in the room. When Auto mode is enabled (indicated by a graph on the home screen showing the air quality, with ‘AUTO’ at the top), the on-board sensors will intelligently adjust the speed of the purifier according to the air quality. Increasing speed for poor air quality.
Reducing speed as the air quality improves.
If the air quality target is met, the air quality graph will show green. The air quality will continue to be monitored, with the fan running on a low speed in the background.
If the air quality worsens the air quality graph will show red and the purifier will automatically restart cleaning the room.
There may be times when the display shows green, but the fan speed is still high. This is due to the machine constantly maintaining a high air quality. If there is a factor in the environment such as leaky windows, the machine must work harder to sustain a high air quality.
Please select the appropriate option
Manual mode
Airflow can be set manually by the airflow buttons on the remote. You can choose a setting from 1 (low flow of air) through to 10 (high flow of air), and the machine home screen will show the fan speed when in manual mode.
Auto mode
Auto mode adjusts the speed according to the air quality in the room. When Auto mode is enabled (indicated by a graph on the home screen showing the air quality, with ‘AUTO’ at the top), the on-board sensors will intelligently adjust the speed of the purifier according to the air quality. Increasing speed for poor air quality.
Reducing speed as the air quality improves.
If the air quality target is met, the air quality graph will show green. The air quality will continue to be monitored, with the fan running on a low speed in the background.
If the air quality worsens the air quality graph will show red and the purifier will automatically restart cleaning the room.
There may be times when the display shows green, but the fan speed is still high. This is due to the machine constantly maintaining a high air quality. If there is a factor in the environment such as leaky windows, the machine must work harder to sustain a high air quality.
Indoor air quality - 12 seconds
Monitor the current air quality with a graph showing the last 12 seconds of data.
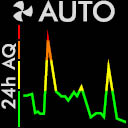
Indoor air quality - 24 hours
Monitor the air quality with a graph showing the last 24 hours of data.
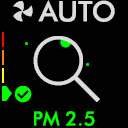
Particulate matter (PM2.5)
Microscopic particles up to 2.5 microns in size, suspended in the air we breathe. These include smoke, bacteria and allergens.
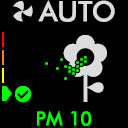
Particulate matter (PM10)
Larger microscopic particles up to 10 microns in size, suspended in the air we breathe. These include dust, mould and pollen.
Nitrogen dioxide and other oxidising gases
These potentially harmful gases are released into the air by combustion, for example the burning gas when cooking and in vehicle exhaust emissions.

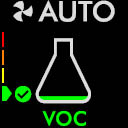
Volatile organic compounds
VOC’s are typically odours that may be potentially harmful. These can be found in cleaning products, paints and new furnishings.
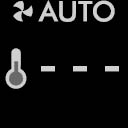
Indoor temperature
Monitor the ambient temperature to help maintain a comfortable environment.
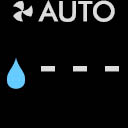
Indoor humidity
The amount of water vapour in the air, shown as a percentage of the maximum possible humidity at the current temperature.
Filters
The amount of pollution captured by the filters is shown in the display. When the filter is full, the display will flash to remind you which filter needs changing.

WiFi
The current status of the connection to the WiFi network.

Use both hands to lift the appliance out of the box, taking care to hold by the base of the appliance only. Do not lift out by the amplifier loop.
Take the carbon filters out of the box and remove the protective packaging.
Attach both carbon filters to the appliance.
Remove the glass HEPA filters from their protective packaging and push into the shrouds until secure.
Position the shrouds onto the base and push gently until they click securely into place. Place the remote control on the top of the appliance with the buttons facing down. Plug in and switch ON.
The remote control can be magnetically attached to the top of the loop.
Information menu
Scroll through the options to monitor the performance of your appliance.
The menu will also allow you to access information about the pollutants in the air and the temperature and humidity levels.
When a particular type of pollutant causes air quality to decrease, the symbol for that pollutant will show in the display.
Indoor air quality - 12 seconds
Monitor the current air quality with a graph showing the last 12 seconds of data.
Indoor air quality - 12 seconds
Monitor the air quality with a graph showing the last 24 hours of data.
Particulate matter (PM2.5)
Microscopic particles up to 2.5 microns in size, suspended in the air we breathe. These include smoke, bacteria and allergens.
Particulate matter (PM10)
Larger microscopic particles up to 10 microns in size, suspended in the air we breathe. These include dust, mould and pollen.
Nitrogen dioxide and other oxidising gases
These potentially harmful gases are released into the air by combustion, for example the burning gas when cooking and in vehicle exhaust emissions.
Volatile organic compounds
VOC’s are typically odours that may be potentially harmful. These can be found in cleaning products, paints and new furnishings.
Indoor temperature
Monitor the ambient temperature to help maintain a comfortable environment.
Indoor humidity
The amount of water vapour in the air, shown as a percentage of the maximum possible humidity at the current temperature.
Filters
The amount of pollution captured by the filters is shown in the display. When the filter is full, the display will flash to remind you which filter needs changing.
WiFi
The current status of connection to the WiFi network.


Further help
Dyson Pure Cool™ tower (White/Silver)