
The most common problem Dyson product owners face is the need to clean the filter. Regularly cleaning the filter helps prevent issues such as lack of heat, reduced airflow, and intermittent power, ensuring your device works at its best.
Please select the appropriate option


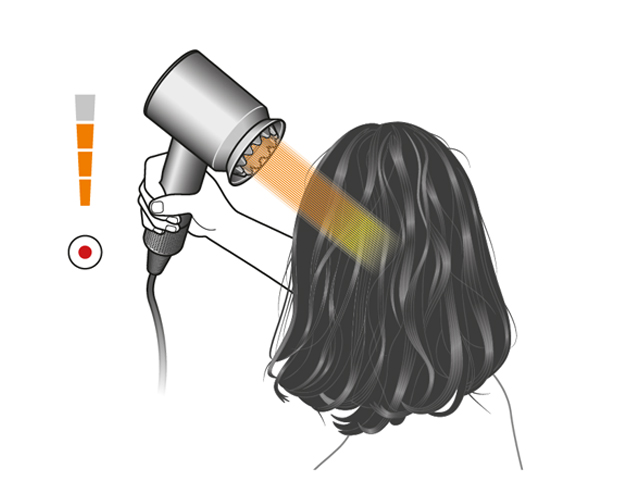
Airflow control
The direction of airflow from the Dyson Supersonic Nural™ hair dryer is from the opposite side to the controls.
To increase the airflow, press the 'Airflow control' button on the back of the appliance until you have three white LED lights.

The available settings are
One white light - Mild (Styling)

Two white lights - Gentle (Regular drying)

Three white lights - Fast (Fast drying)

Cleaning your filter - Step-by-step
Clean your filter regularly to maintain powerful airflow and keep your hair dryer performing at its best. We recommend cleaning once a month, or when the three LEDs flash continuously.
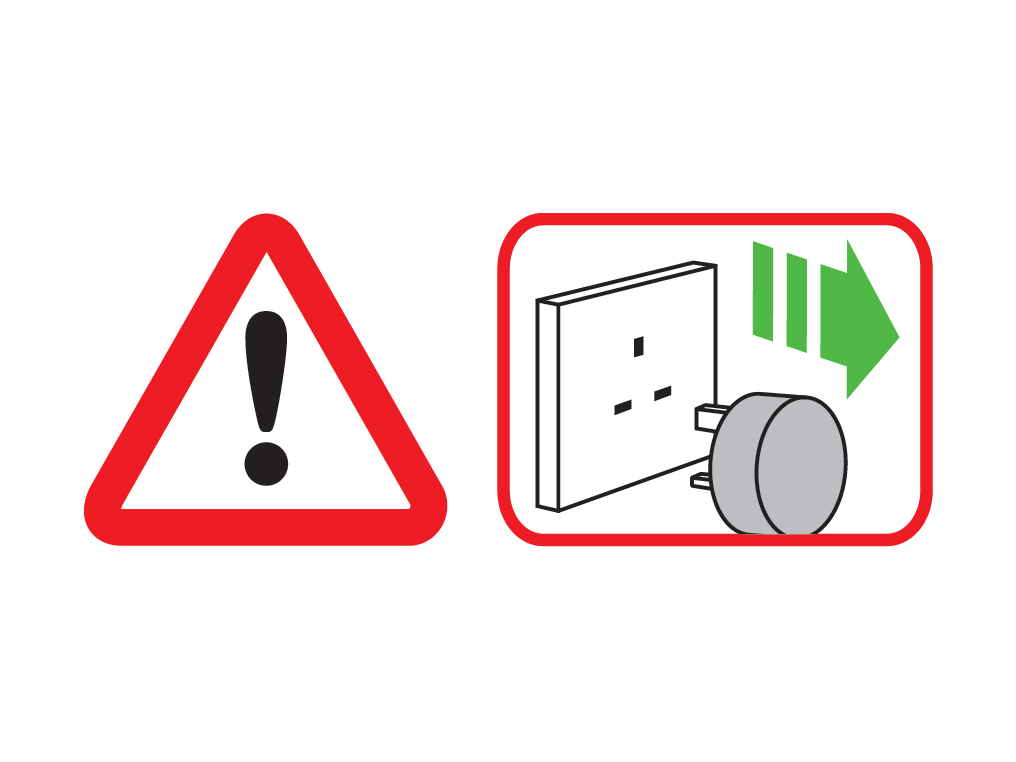
Unplug your machine from the mains electricity supply and allow to cool before cleaning your filter.
Step 1
To remove the filter cage, hold the handle firmly and gently rotate the filter cage anti-clockwise.

Step 2
Pull the filter cage down and away from the machine.

Step 3
Clean the filter mesh with a soft, dry toothbrush or a C-brush. Don't use chemicals or water.

Step 4
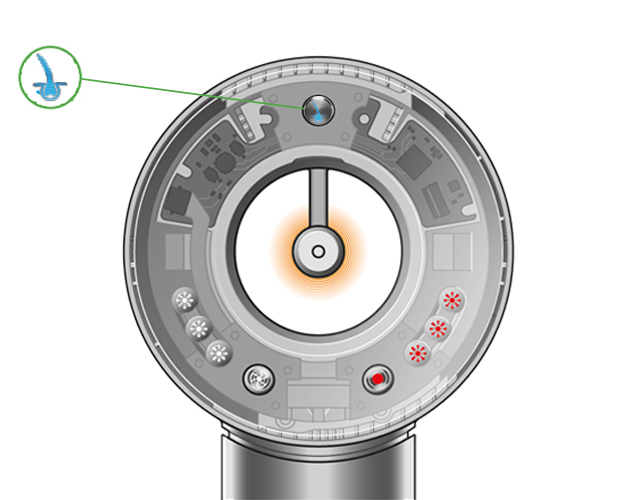
Clip the filter cage back onto the machine. Lock in place by ensuring the dot is below the closed circle.

Hot to touch
The air exit, metal ring, attachments, and area shaded in red may be hot during use. Allow them to cool before handling. The other areas of the appliance should not be hot during use.

Remove any protective packaging from the appliance before continuing with any further checks.
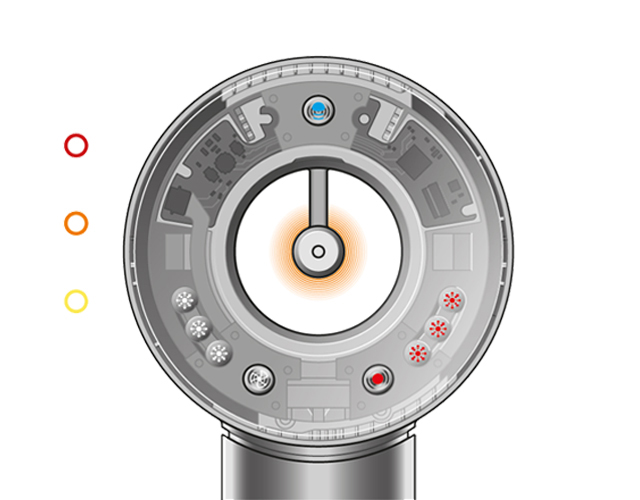
Capsule illumination
Capsule illumination LEDs will change dynamically between 'yellow, orange and red' depending on the distance the product is from the head.
Red - High heat
Orange - Medium heat
Yellow - Low heat
Blue - No heat
Blue pulsing - Pause detect
Temperature control
One red light - Low gentle drying
Two red lights - Medium 80°C/176°F (Regular drying)
Three red lights - High 100°C/212°F (Fast drying and styling)
When using no attachment, or the scalp protect enabled attachments (Gentle dryer, Styling concentrator or Smoothing concentrator) the temperature settings cannot be changed. The temperature and capsule illumination LEDs will change between yellow, orange, and red depending on the distance the product is from the head.

Airflow control
One white light - Mild (Styling)
Two white lights - Gentle (Regular drying)
Three white lights - Fast (Fast drying)
Understanding the alerts
The LEDs will flash continuously to let you know that the machine needs attention.
Three white lights - Clean filter
Three red lights - Contact Dyson
All lights flashing - Contact Dyson

Please select the appropriate option
Reset
Attach a valid Supersonic Nural™ attachment.
- Gentle dryer
- Styling concentrator
- Smoothing nozzle
- Flyaway smoother
- Diffuser

Perform a reset by unplugging the machine from the mains plug and plugging it back in.
Temperature
The Dyson Supersonic Nural™ hair dryer is intelligent. It has a clever microprocessor which regulates temperature to help prevent extreme heat damage to protect natural shine. The maximum operating temperature in normal working conditions is up to 105°C/221°F.
To increase the temperature, press the 'Temperature control' button on the back of the appliance until you have three red LED lights.

The available settings are
One red light - Low gentle drying

Two red lights - Medium 80°C/176°F (Regular drying)

Three red lights - High 100°C/212°F (Fast drying and styling)
When using no attachment, or the scalp protect enabled attachments (Gentle dryer, Styling concentrator or Smoothing concentrator) the temperature settings cannot be changed. The temperature and capsule illumination LEDs will change between yellow, orange, and red depending on the distance the product is from the head.
When using the other non-scalp protect enabled attachments (Diffuser or flyaway smoother) the temperature settings can be manually changed by using the temperature control button.
When using the other non-scalp protect enabled attachments (Wave+Curl diffuser, flyaway attachment or wide-tooth comb) the temperature settings can be manually changed by using the temperature control button.
Cleaning your filter - Step-by-step
Clean your filter regularly to maintain powerful airflow and keep your hair dryer performing at its best. We recommend cleaning once a month, or when the three LEDs flash continuously.
Unplug your machine from the mains electricity supply and allow to cool before cleaning your filter.
Step 1
To remove the filter cage, hold the handle firmly and gently rotate the filter cage anti-clockwise.
Step 2
Pull the filter cage down and away from the machine.
Step 3
Clean the filter mesh with a soft, dry toothbrush or a C-brush. Don't use chemicals or water.
Step 4
Clip the filter cage back onto the machine. Lock in place by ensuring the dot is below the closed circle.
Hot to touch
The air exit, metal ring, attachments, and area shaded in red may be hot during use. Allow them to cool before handling. The other areas of the appliance should not be hot during use.
ON/OFF switch
The machine is switched off using the sliding ON/OFF switch.

ON/OFF switch
The machine is switched off using the sliding ON/OFF switch.
Airflow selection
The level of sound from your appliance will vary depending on the airflow selected. To decrease the airflow, press the 'airflow control' button until you have 1 white LED light.
Remove attachments
The level of sound from your appliance will also vary depending on the attachment used. Remove all attachments before continuing to test.
Please select the appropriate option
Attachment learning
The hair dryer recognises your individual attachments and learns your preferred settings each time.
On first use, the Supersonic Nural™ will default to recommended temperature and airflow settings for each attachment. On next use if the heat, or airflow were changed, the hair dryer will remember the new settings.
Gentle dryer/ bare product - High heat/ High flow
Styling concentrator - High heat / Medium flow
Smoothing nozzle - Medium heat / Medium flow
Flyaway smoother - Low heat / High flow
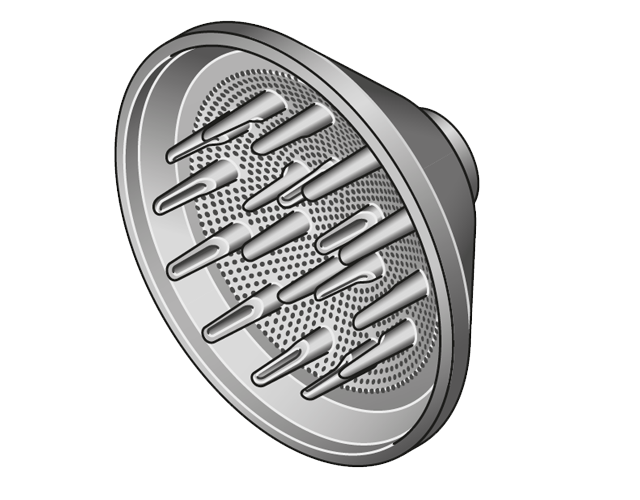
Diffuser - Low heat / Low flow
Flyaway attachment - Low heat / High flow
Wave+Curl diffuser - Low heat / Low flow
Wide-tooth comb - High heat / High flow

Pause detect
With pause detect when the user places the product either on a table or on the stand the capsule LED will change to 'blue' and will pulse.

To be sure pause detect has activated, place the machine down on a flat surface, or the stand, wait for the capsule LED to change to blue, start to pulse, and the motor sound to ramp down before lifting your hand off the hair dryer.
While using high airflow, before pause detect engages it may push items around the close area but the airflow will start to ramp down quickly.
Pause detect will only work with certain attachments and will not work when using the Wave+Curl diffuser.
Pause detect
Pause detect takes up to 2-seconds to engage.
Make sure the product is put down on a steady and firm flat surface.
Test with another pause detect enabled attachment.
Pause detect will not work when using the diffuser.
Pause detect will not work when using the Wave+Curl diffuser.
Please select the appropriate option
Replacement part required
This can be resolved by replacing the affected attachment.
Gentle dryer

Styling concentrator

Smoothing concentrator
Wide-tooth comb

Flyaway attachment
Please select the appropriate attachment
Scalp protect mode
The Supersonic Nural™ automatically adjusts air temperature by measuring distance to the hair to help protect the scalp.
Airflow temperature automatically decreases as the machine gets closer to the scalp.

Capsule illumination LEDs will change dynamically between 'yellow, orange and red' depending on the distance the product is from the head.
Scalp protect mode can be disabled/reenabled by pressing the mode button.
Scalp protect mode will only work with certain attachments and will not work when using the Wave+Curl diffuser, Flyaway attachment or Wide-tooth comb.
When using no attachment, or the scalp protect enabled attachments (Gentle dryer, Styling concentrator or Smoothing concentrator) the temperature settings cannot be changed. The temperature and capsule illumination LEDs will change between yellow, orange, and red depending on the distance the product is from the head.

When using the other non-scalp protect enabled attachments (Wave+Curl diffuser, flyaway attachment or wide-tooth comb) the temperature settings can be manually changed by using the temperature control button.
Scalp protect mode can be disabled/reenabled by pressing the mode button.
Please select the appropriate option
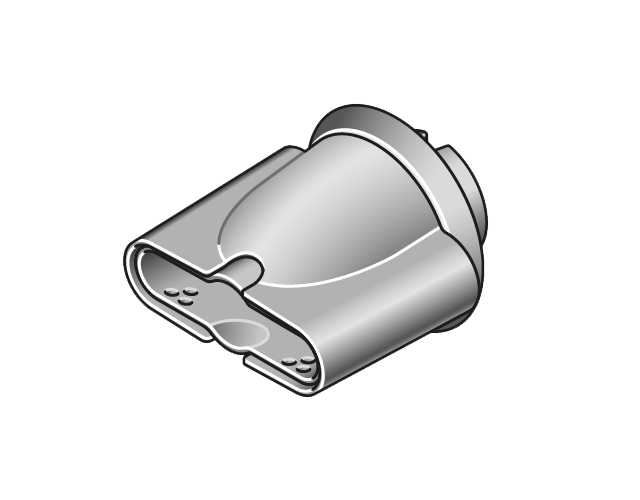
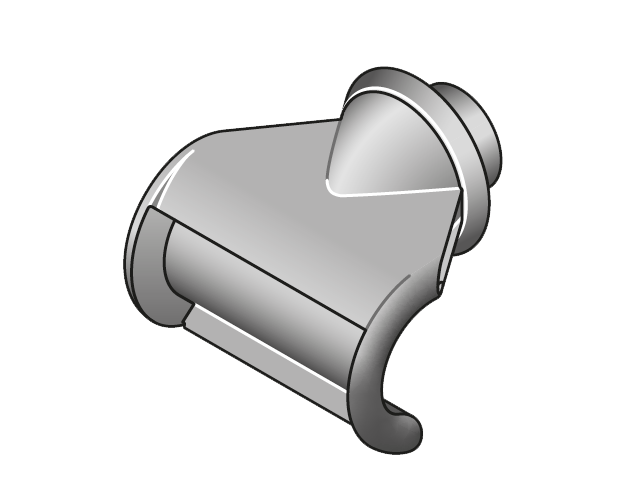
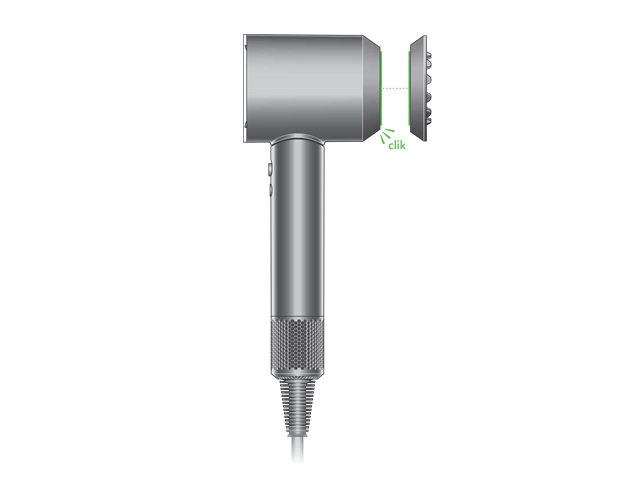
Using the accessories
The hair dryer accessories are magnetic and can be easily attached to the front of the appliance. They can be rotated 360 degrees so you can position them precisely where you need them.
Check all accessories
Please try to attach all accessories to the hair dryer.
Gentle dryer
Styling concentrator
Smoothing concentrator
Wide-tooth comb
Wave+Curl diffuser
Flyaway attachment
Please select the accessory that does not connect to the hair dryer
Wave+Curl diffuser
2 in 1 Attachment - Dries your curls without extreme heat. Enhances your natural curl definition and adds volume.
Reverse Flow (Inner diffuser removed) - To gently dry curls quickly without disturbance and frizz. Larger volume of hair at once.
Forward Flow - Diffuser insert maintains the high performance of the current diffuser.
Please select the appropriate option
Gentle dryer
Styling concentrator
Smoothing concentrator
Diffuser
Flyaway smoother

Wide-tooth comb
Wave+Curl diffuser
Flyaway attachment
Replacing the filter cover
Before beginning, turn off and unplug the appliance. Do not cut the power cord.

Secure the cord and broken filter cover in the cardboard packaging. Cut the filter cover with a pair of scissors.

Clip the replacement filter cover over the power cord. Ensure it is securely fastened.

Slide the filter cover over the filter

Twist to lock and check that the cover is secured onto the appliance.

The cardboard packaging and the metal filter cover are recyclable.

Please select the appropriate option
Clean the filter
Please follow the steps in the video.
Cleaning your filter - Step-by-step
Clean your filter regularly to maintain powerful airflow and keep your hair dryer performing at its best. We recommend cleaning once a month, or when the three LEDs flash continuously.
Unplug your machine from the mains electricity supply and allow to cool before cleaning your filter.
Step 1
To remove the filter cage, hold the handle firmly and gently rotate the filter cage anti-clockwise.
Step 2
Pull the filter cage down and away from the machine.
Step 3
Clean the filter mesh with a soft, dry toothbrush or a C-brush. Don't use chemicals or water.
Step 4
Clip the filter cage back onto the machine. Lock in place by ensuring the dot is below the closed circle.
Please select the appropriate option
How to attach the attachments
Magnetic attachments can be quickly and easily attached to the front of the machine. They can be rotated 360 degrees so you can position them precisely where you need them.

The hair dryer recognises the individual attachments and learns the preferred settings for each. On first use, the Supersonic Nural™ will default to recommended temperature and airflow settings for each attachment. On next use if the heat, or airflow were changed, the hair dryer will remember the new settings.
Gentle air attachment
Default settings - High heat/ High flow.
Evenly diffuses airflow for fast, yet gentle drying.

Styling concentrator
Default settings - High heat / Medium flow.
Fast, precise airflow for controlled styling, one section at a time.

Smoothing nozzle
Default settings - Medium heat / Medium flow.
Helps remove unwanted frizz and create a smooth, natural finish.

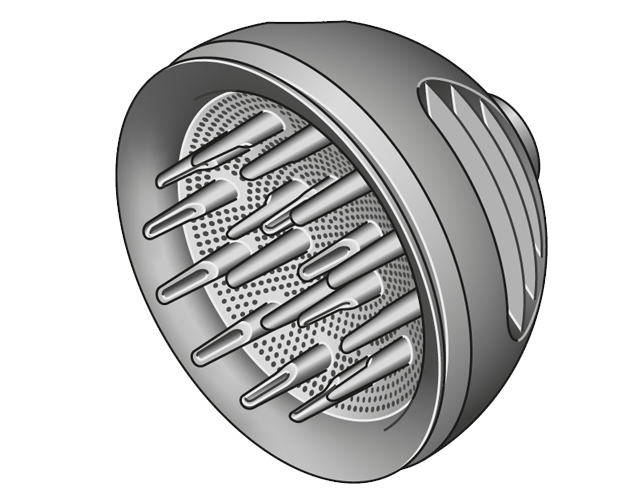
Wave+Curl diffuser
Default settings - Low heat / Low flow.
2 in 1 Attachment - Dries your curls without extreme heat. Enhances your natural curl definition and adds volume.
Reverse Flow (Inner diffuser removed) - To gently dry curls quickly without disturbance and frizz. Larger volume of hair at once.
Forward Flow - Diffuser insert maintains the high performance of the current diffuser.

Wide-tooth comb
Default settings - High heat / High flow.
Engineered for curly and textured hair. Lengthen hair, or tease out curls just a little bit.

Flyaway attachment
Default settings - Low heat / High flow.
The ideal finishing tool for sleek, straight styles. Hides flyaways under longer hair to give you a smooth shiny finish.

Understanding the alerts
The LEDs will flash continuously to let you know that the machine needs attention.
Three white lights - Clean filter

Three red lights - Contact Dyson

All lights flashing - Contact Dyson

Mode button
Disable/reenable scalp protect mode.

Temperature control
Four temperature settings.

Airflow control
Three speed settings.

Power
On/off.

Cold shot
Used to set style.

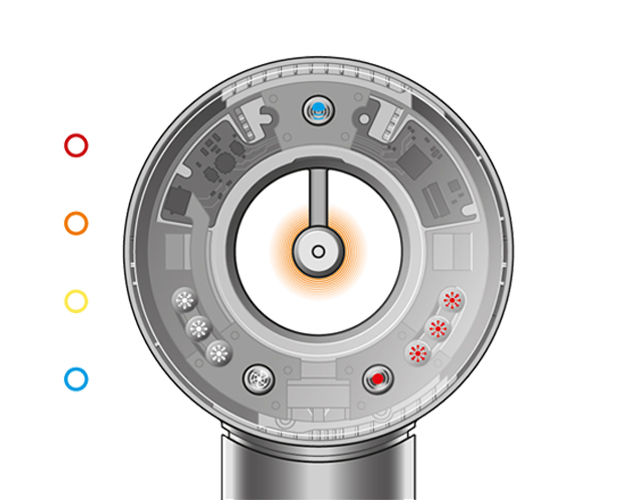
Capsule illumination
Capsule illumination LEDs will change dynamically between 'yellow, orange and red' depending on the distance the product is from the head.
Red - High heat
Orange - Medium heat
Yellow - Low heat
Blue - No heat
Blue pulsing - Pause detect

Temperature control
One red light - Low gentle drying
Two red lights - Medium 80°C/176°F (Regular drying)
Three red lights - High 100°C/212°F (Fast drying and styling)
When using no attachment, or the scalp protect enabled attachments (Gentle dryer, Styling concentrator or Smoothing concentrator) the temperature settings cannot be changed. The temperature and capsule illumination LEDs will change between yellow, orange, and red depending on the distance the product is from the head.
Airflow control
One white light - Mild (Styling)
Two white lights - Gentle (Regular drying)
Three white lights - Fast (Fast drying)
Attachment learning
The Supersonic Nural™ recognises your individual attachments and learns your preferred settings each time.
On first use, the Supersonic Nural™ will default to recommended temperature and airflow settings for each attachment. On next use if the heat, or airflow were changed, the hair dryer will remember the new settings.
Default settings
Gentle dryer/ bare product - High heat/ High flow
Styling concentrator - High heat / Medium flow
Smoothing nozzle - Medium heat / Medium flow
Flyaway smoother - Low heat / High flow
Diffuser - Low heat / Low flow

Flyaway attachment - Low heat / High flow
Wave+Curl diffuser - Low heat / Low flow
Wide-tooth comb - High heat / High flow

Pause detect
With pause detect when the user places the product either on a table or on the stand the capsule LED will change to 'blue' and will pulse.

To be sure pause detect has activated, place the machine down on a flat surface, or the stand, wait for the capsule LED to change to blue, start to pulse, and the motor sound to ramp down before lifting your hand off the hair dryer.
While using high airflow, before pause detect engages it may push items around the close area but the airflow will start to ramp down quickly.
Pause detect will only work with certain attachments and will not work when using the diffuser.

Pause detect will only work with certain attachments and will not work when using the Wave+Curl diffuser.
Scalp protect mode
The Supersonic Nural™ automatically adjusts air temperature by measuring distance to the hair to help protect the scalp.

Airflow temperature automatically decreases as the machine gets closer to the scalp.

Capsule illumination LEDs will change dynamically between 'yellow, orange and red' depending on the distance the product is from the head.

Scalp protect mode can be disabled/reenabled by pressing the mode button.

Scalp protect mode will only work with certain attachments and will not work when using the diffuser or flyaway smoother.

Scalp protect mode will only work with certain attachments and will not work when using the Wave+Curl diffuser, Flyaway attachment or Wide-tooth comb.
Accelerometer
Used with pause detect.
A motion-sensing accelerometer knows when it’s put down, automatically deactivating the heater, and decreasing airflow and noise.
Time of Flight sensor
Used with scalp protect mode.

A Time of Flight sensor measures distance, automatically reducing heat as it moves closer to your hair. To maintain a comfortable, consistent scalp temperature.
Cleaning your filter - Step-by-step
Clean your filter regularly to maintain powerful airflow and keep your hair dryer performing at its best. We recommend cleaning once a month, or when the three LEDs flash continuously.
Unplug your machine from the mains electricity supply and allow to cool before cleaning your filter.
Step 1
To remove the filter cage, hold the handle firmly and gently rotate the filter cage anti-clockwise.

Step 2
Pull the filter cage down and away from the machine.
Step 3
Clean the filter mesh with a soft, dry toothbrush or a C-brush. Don't use chemicals or water.

Step 4
Clip the filter cage back onto the machine. Lock in place by ensuring the dot is below the closed circle.


Further help
Dyson Supersonic Nural™ hair dryer (Ceramic Patina/Topaz)