Popular queries
Please select the appropriate option

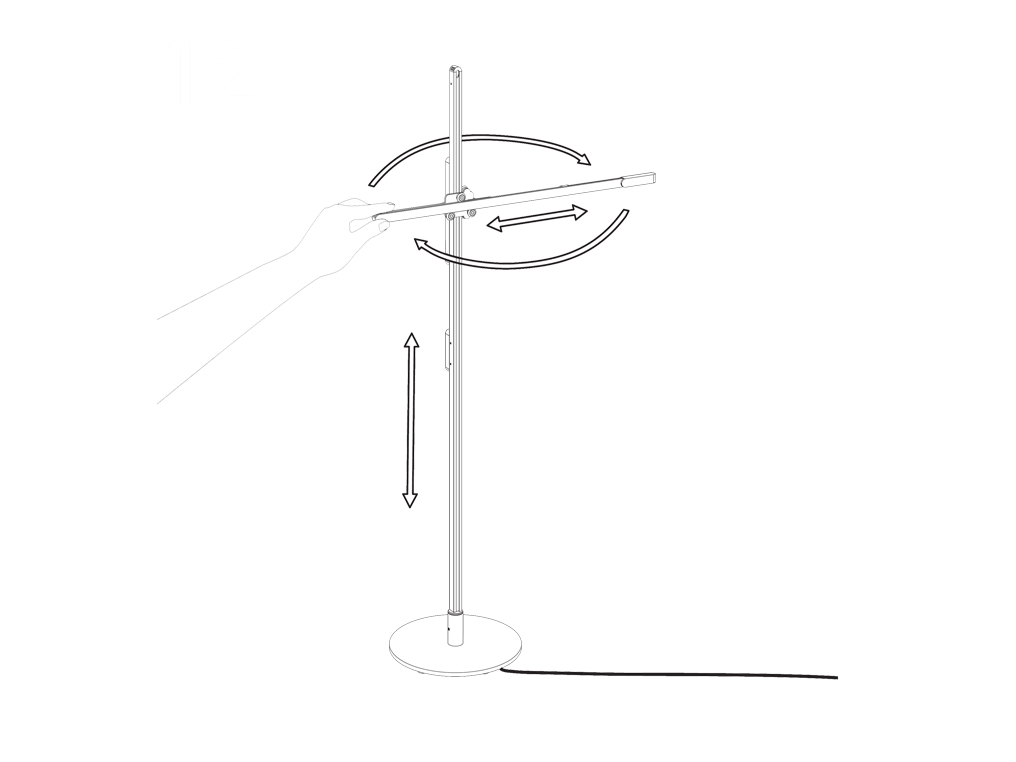
Carefully turn the light on its side.
Ensure the power cord is plugged into the centre of the base.

Carefully lay the cord through the indicated groove ensuring it does not become twisted.

Place the magnetic disc in the centre of the base.

Stand the light upright ensuring the cord remains in the slot.
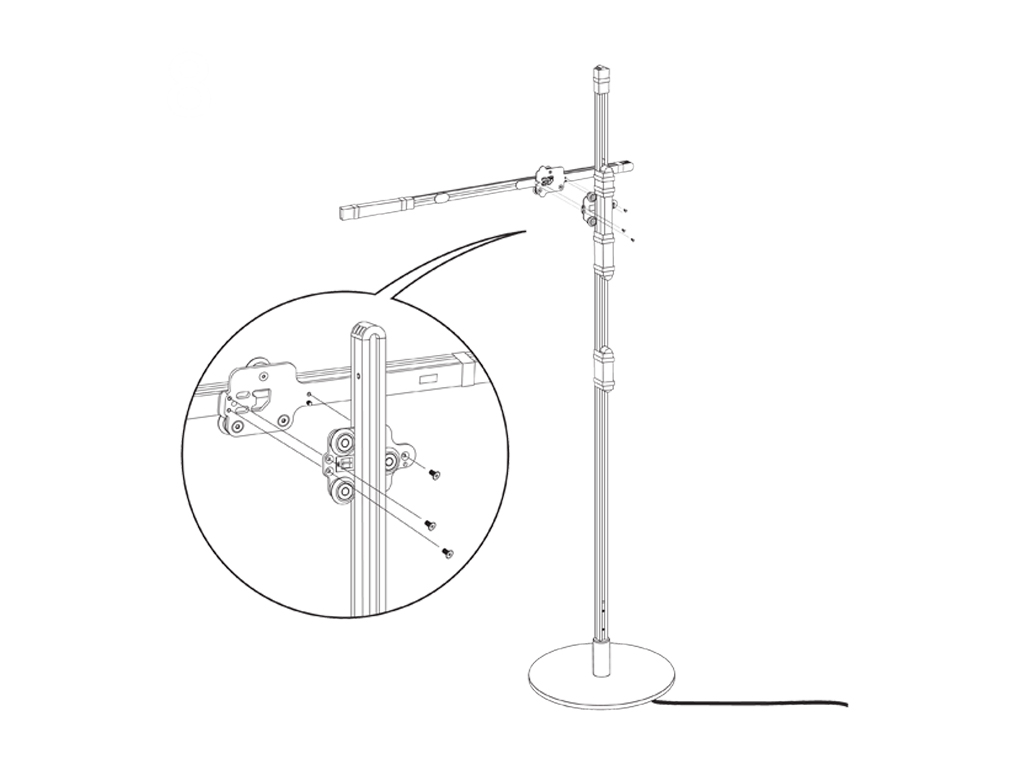
Check wheel carriage plates
Check that the wheel carriage plates are screwed together currently.
Follow the procedure image for correct assembly.
Disconnect the carriage plates
Ensure the following before starting the checks.
Ensure the light is at the top before carrying out the checks. Failure to do this will cause the weight to drop.
Use Hex key provided to remove the three screws.
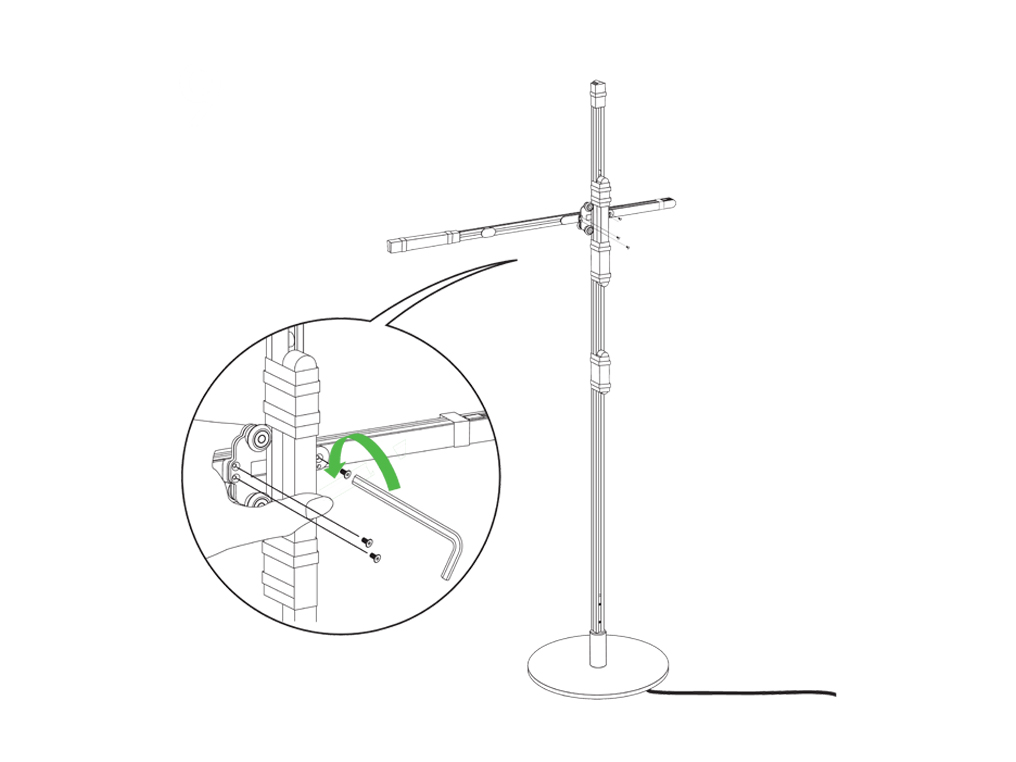
Be careful to capture all screws when they are loosened.
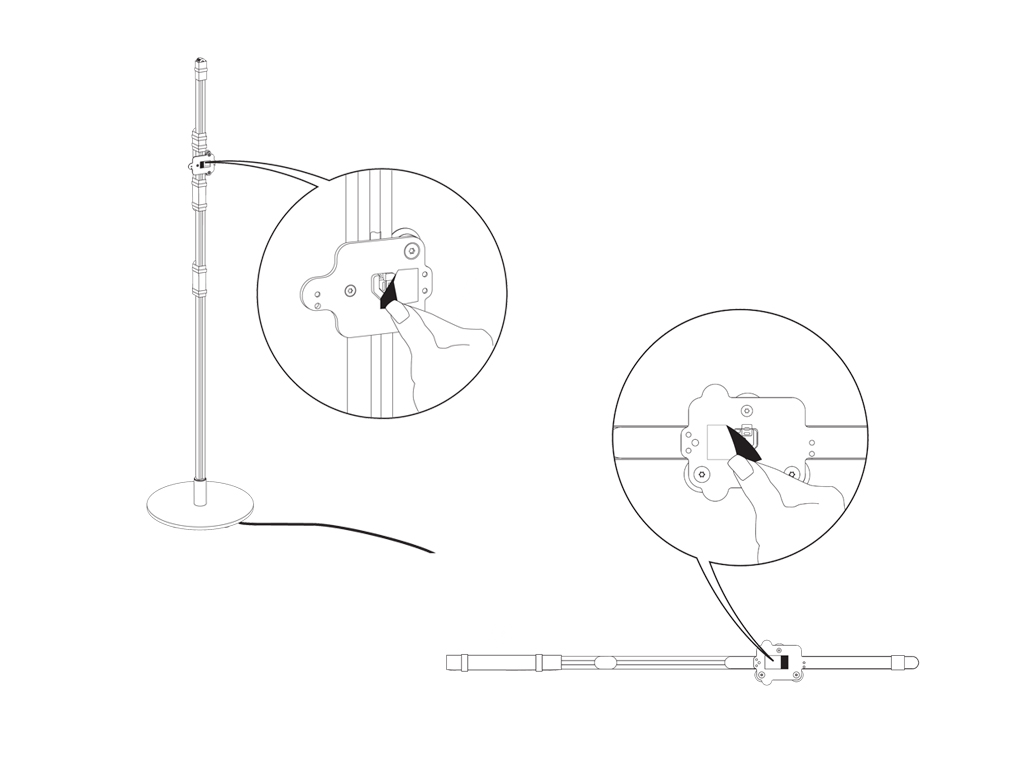
Hold the heat sink at all times when removing from the upright.
Ensure the red tape on the plates covering the contacts has been removed.
Please follow the next step.
Align the square shapes and screw holes on the heat sink arm and the upright.

Press the two parts together with one hand.
Loosely screw in the three screws.
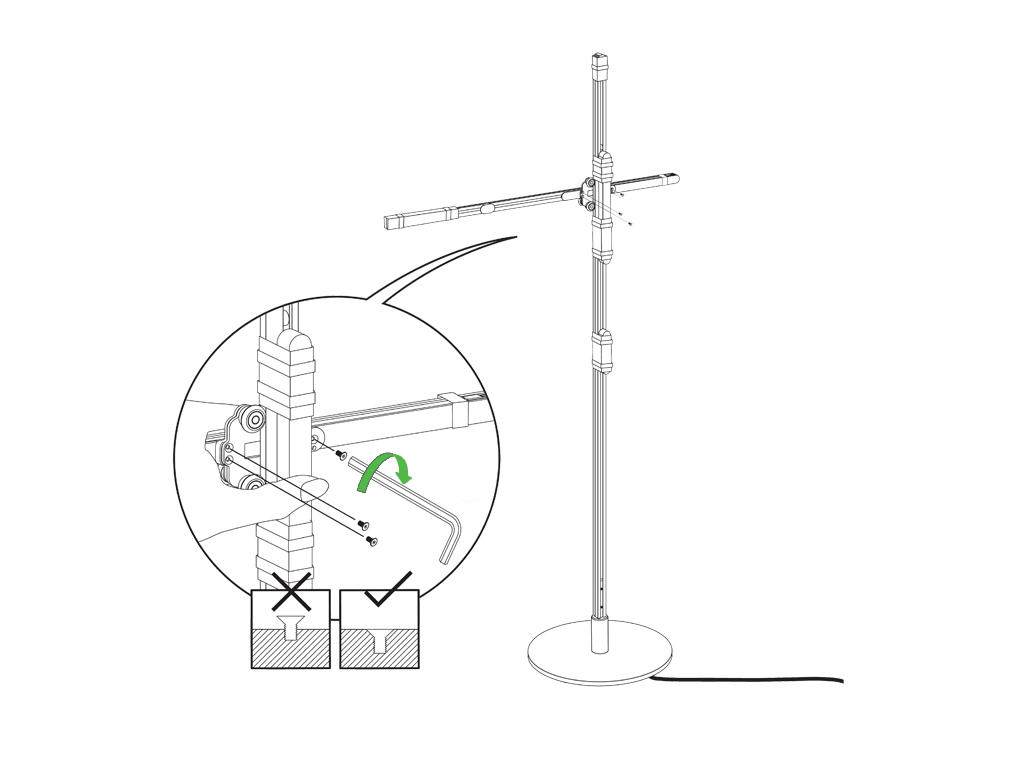
Recheck alignment.
Proceed to screw until securely clamped.
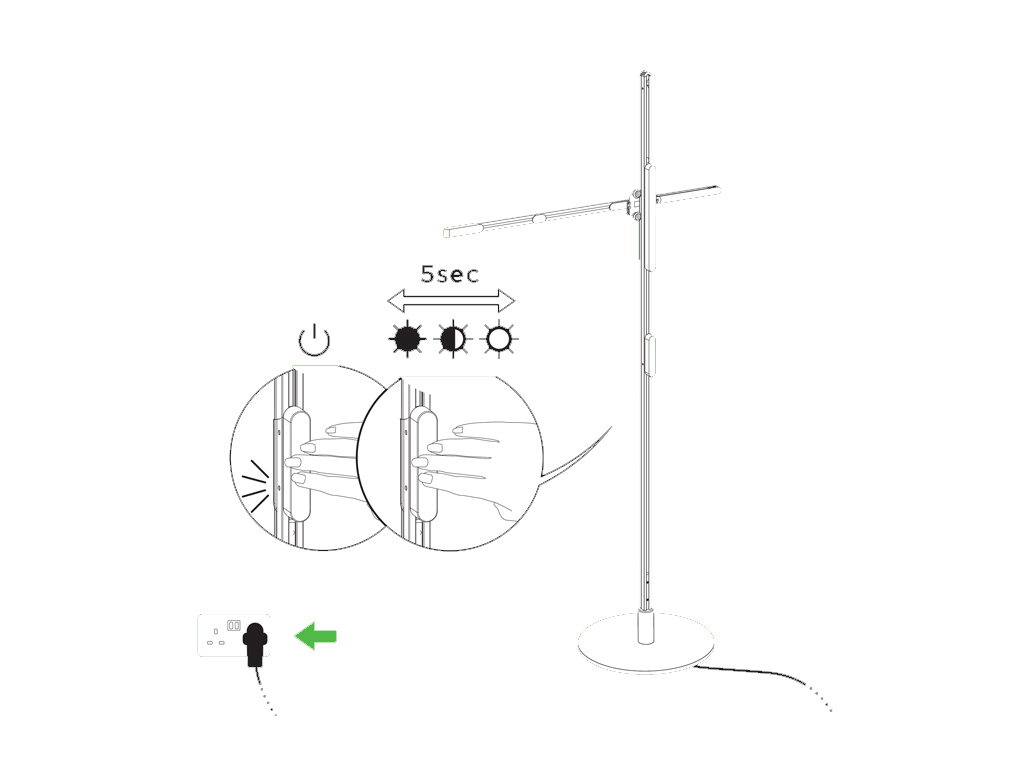
Unplug the light and leave for 5 minutes.

Plug the light in and switch on.
Check wheel carriage plates
Check that the wheel carriage plates are screwed together currently.
Follow the procedure image for correct assembly.
Disconnect the carriage plates
Ensure the following before starting the checks.
Ensure the light is at the top before carrying out the checks. Failure to do this will cause the weight to drop.
Use Hex key provided to remove the three screws.
Be careful to capture all screws when they are loosened.
Hold the heat sink at all times when removing from the upright.
Ensure the red tape on the plates covering the contacts has been removed.
Please follow the next step.
Reassemble the carriage plates
Align the square shapes and screw holes on the heat sink arm and the upright.
Press the two parts together with one hand.
Loosely screw in the three screws.
Recheck alignment.
Proceed to screw until securely clamped.
Carefully turn the light on its side.
Ensure the power cord is plugged into the centre of the base.
Carefully lay the cord through the indicated groove ensuring it does not become twisted.
Place the magnetic disc in the centre of the base.

Stand the light upright ensuring the cord remains in the slot.
Press the power button to switch on.
Hold the switch down to use the dimmer switch.
Unplug the light and leave for 5 minutes.
Plug the light in and switch on.
Check wheel carriage plates
Check that the wheel carriage plates are screwed together currently.
Follow the procedure image for correct assembly.
Ensure the red tape on the plates covering the contacts has been removed.
Disconnect the carriage plates
Ensure the following before starting the checks.
Ensure the light is at the top before carrying out the checks. Failure to do this will cause the weight to drop.
Use Hex key provided to remove the three screws.
Be careful to capture all screws when they are loosened.
Hold the heat sink at all times when removing from the upright.
How to use the dimmer
Press the power button to switch on.
Hold the switch down to use the dimmer switch.


Further help
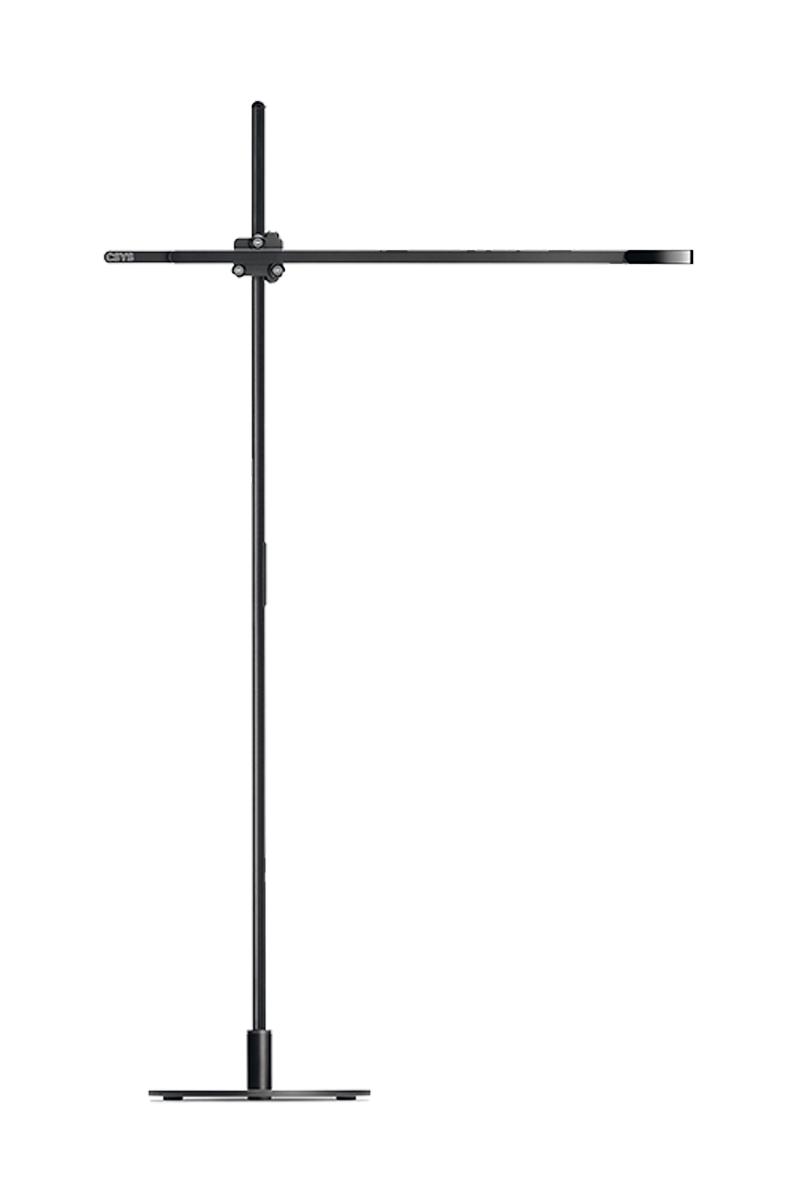
CSYS Floor light