Let's get your machine working
Dyson Pure Hot+Cool™ White/Silver
Let's get your machine working
Dyson Pure Hot+Cool™ White/Silver
Popular queries
Please follow the steps in the video.
Find the text version of the step-by-step guide instead, under "Is there anything else we can help you with?"
Is there anything else we can help you with?
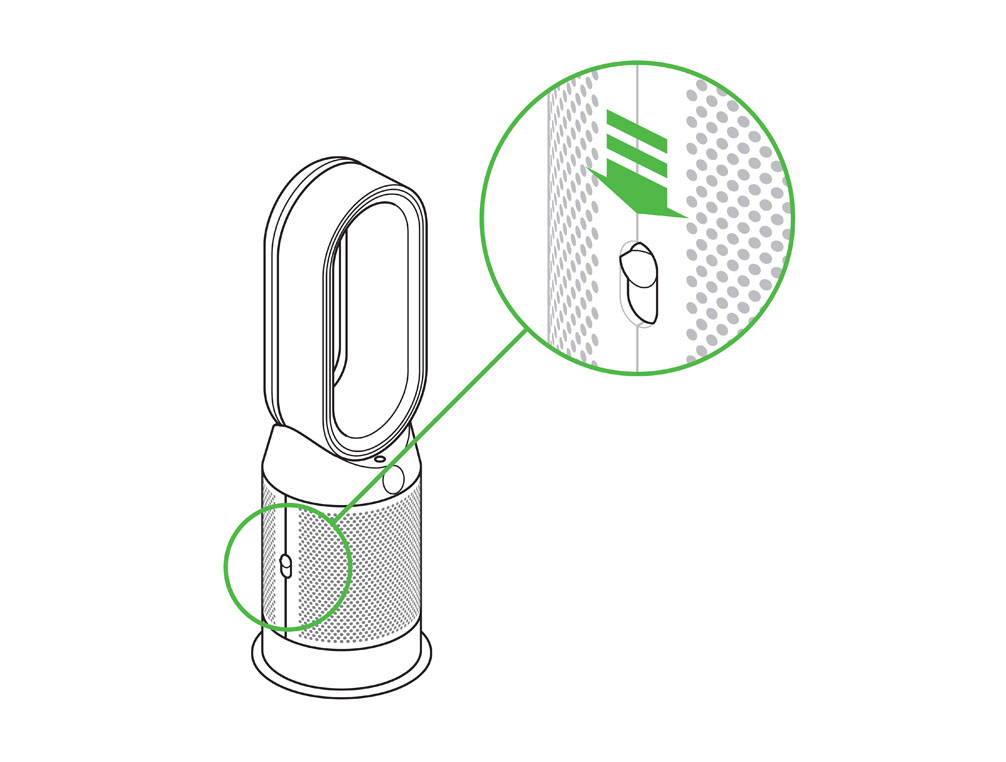
When the appliance detects that the non-washable carbon filters need replacing the display on the appliance will show a full bar.
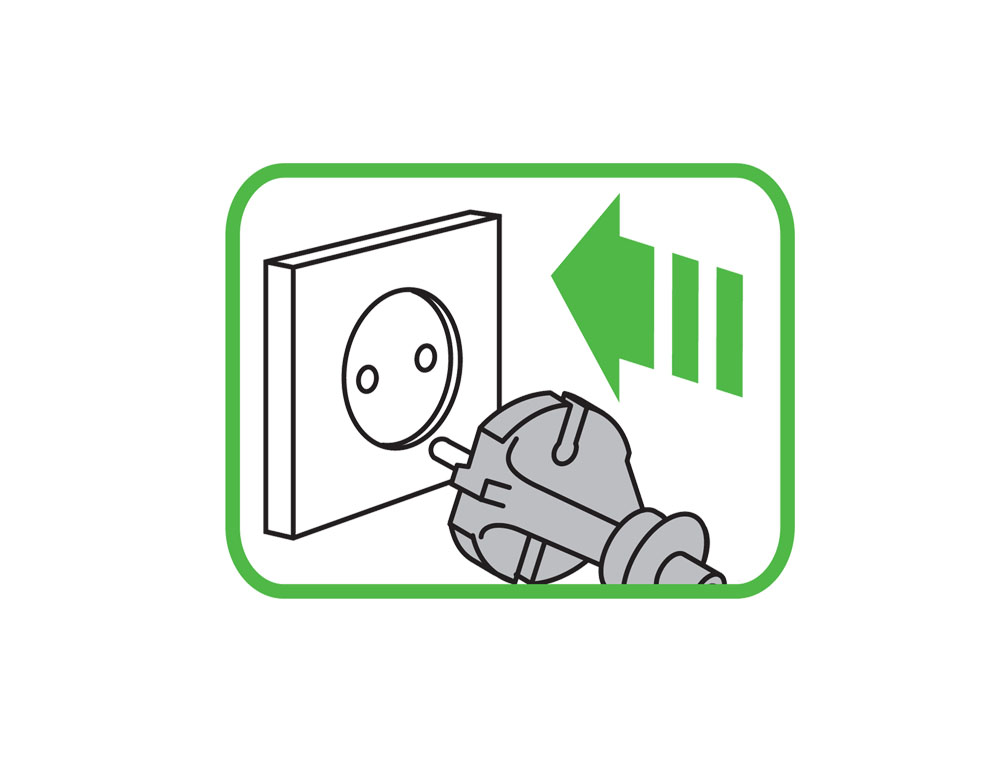
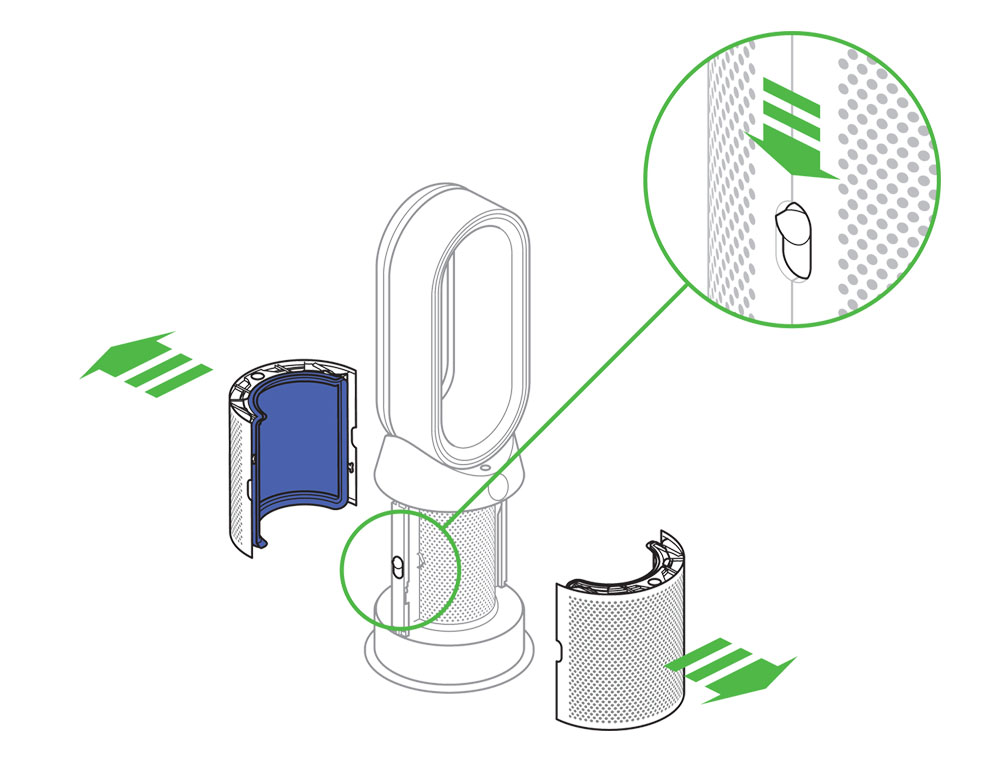
Unplug the appliance from the mains electricity supply. Slide the buttons down on either side of the shrouds. The shrouds will release with the glass HEPA filters attached.
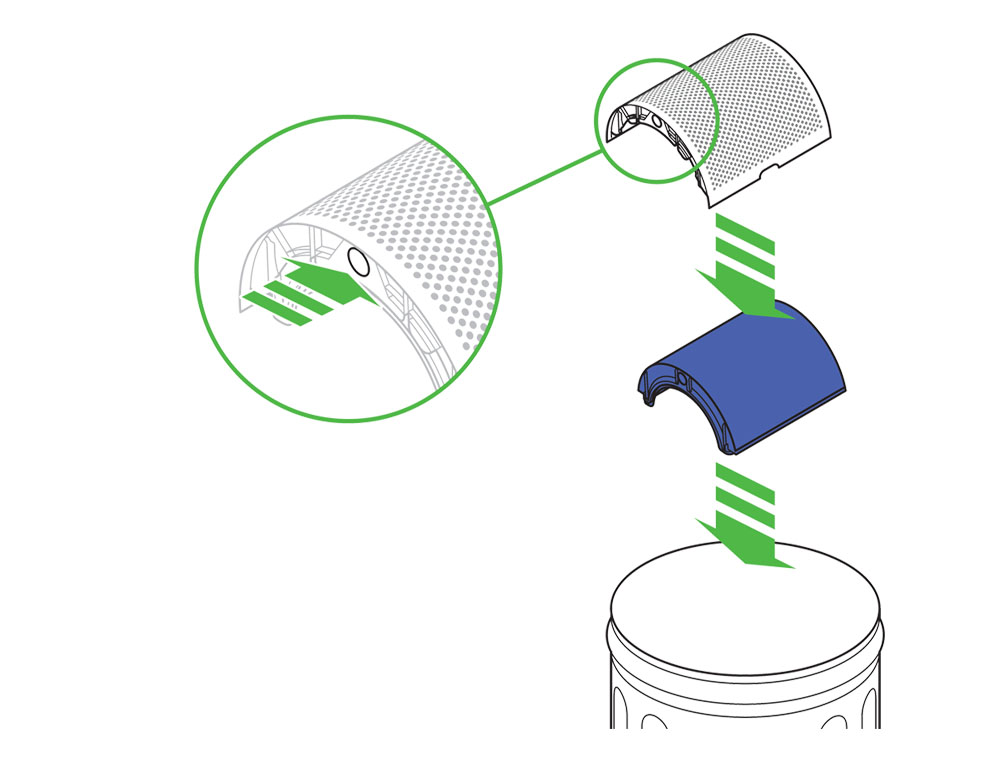
To remove the carbon filters: press the tabs on both sides of the filters.
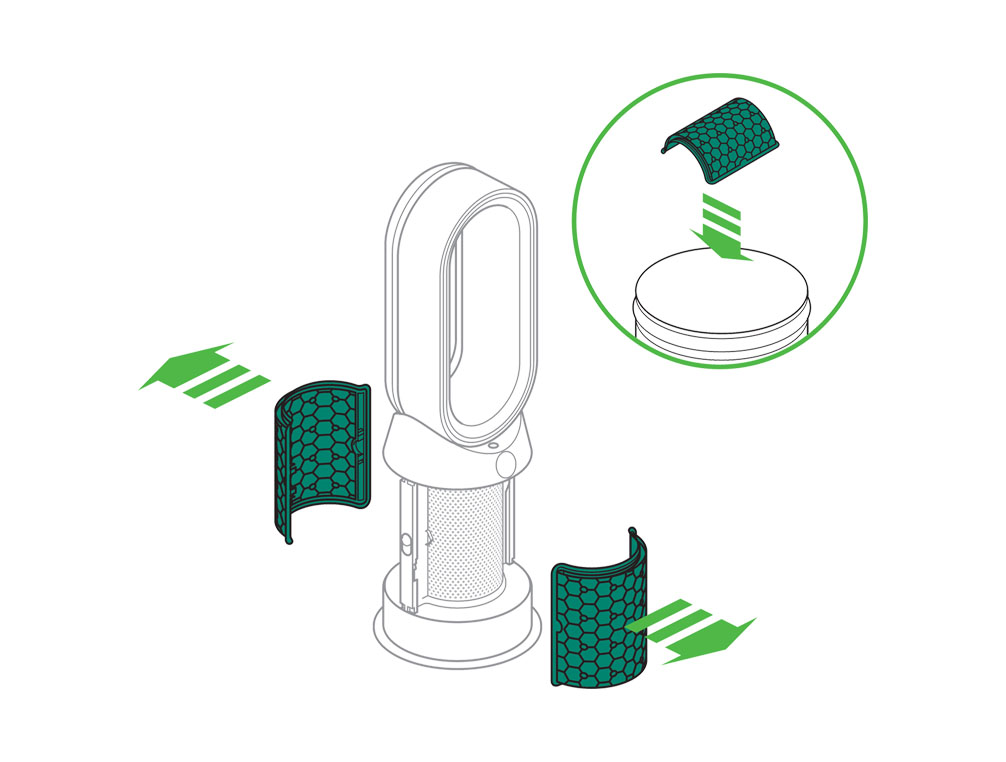
Dispose of the carbon filters in the bin. Dispose of used filter units in accordance with local regulations.
Push the new carbon filters onto the base until secure.
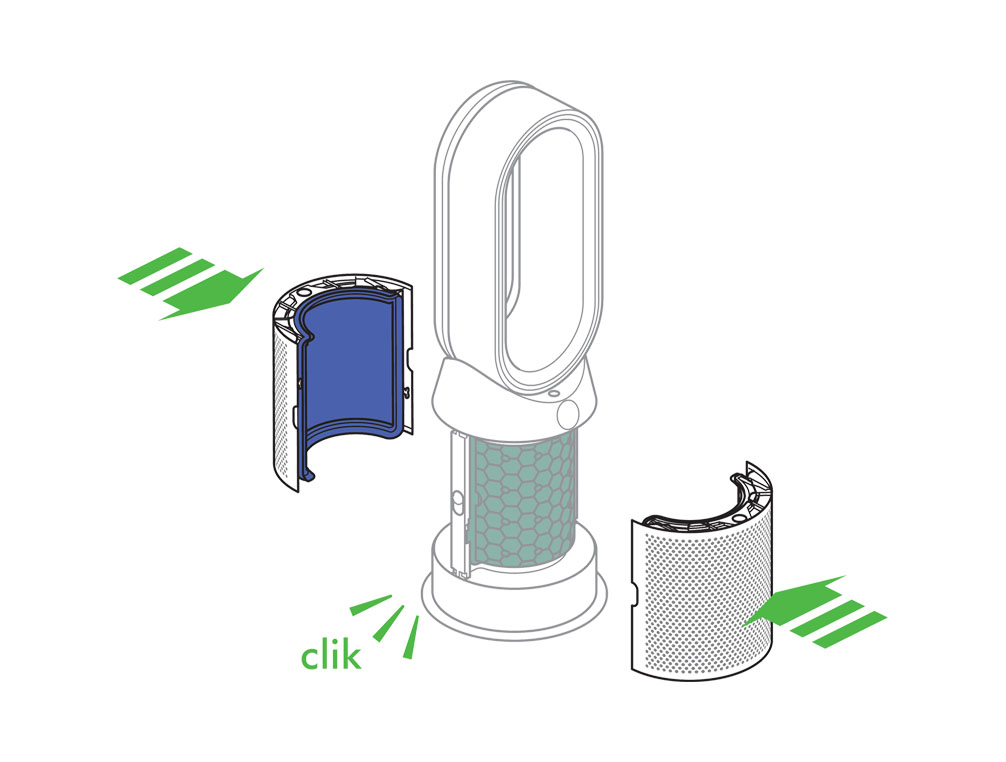
Push the shrouds until they click back into position in the base.
Plug the appliance in to the mains electricity supply and switch on.
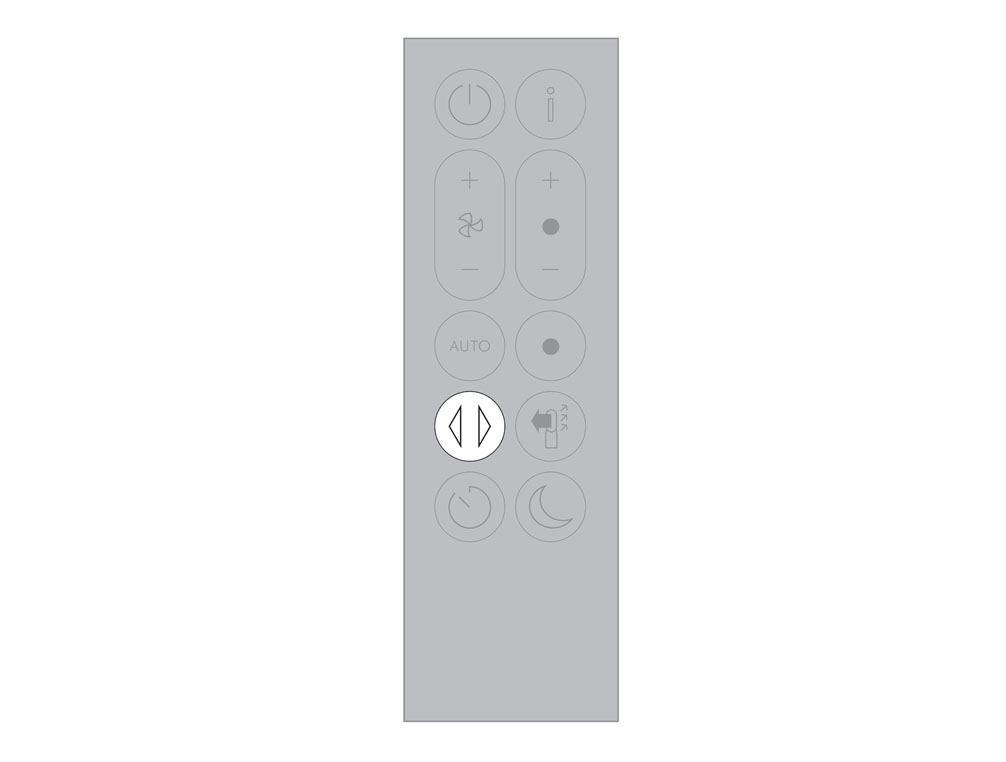
Press and hold the Oscillation button on the remote control. The display on the appliance will countdown from five, finishing with the default screen. The carbon filter level will be reset and the appliance is ready to use.
Please select the appropriate option
Please select the appropriate option
Please follow the steps in the video.
Find the text version of the step-by-step guide instead, under "Is there anything else we can help you with?"
Is there anything else we can help you with?
When the appliance detects that the nonwashable glass HEPA filters need replacing, the display on the appliance will show a full bar.
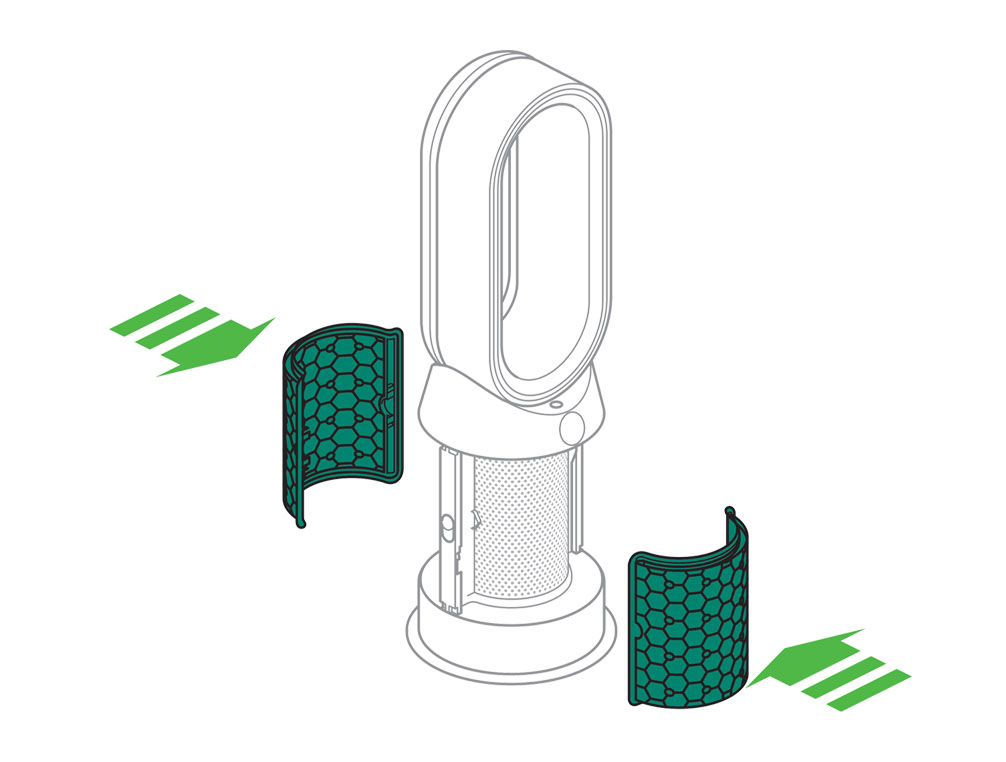
Unplug the appliance from the mains electricity supply. Slide the buttons down on either side of the shrouds.
The shrouds will release with the glass HEPA filters attached.
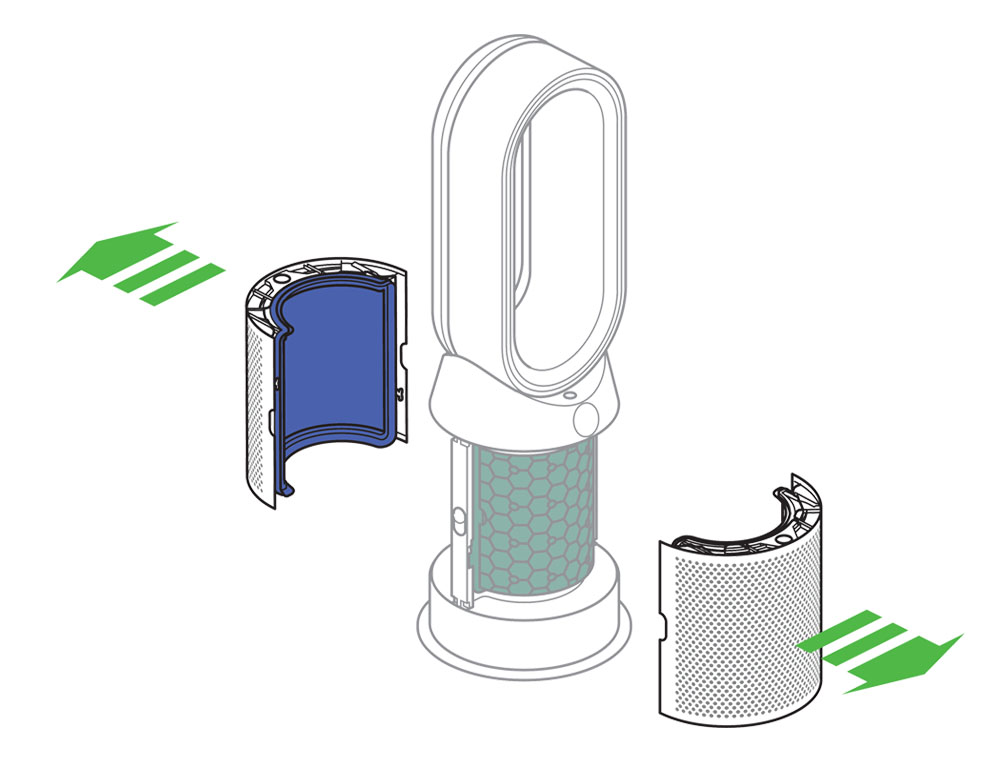
Empty the glass HEPA filters directly into the bin by pushing in both the purple tabs on the shrouds. Dispose of used filter units in accordance with local regulations.
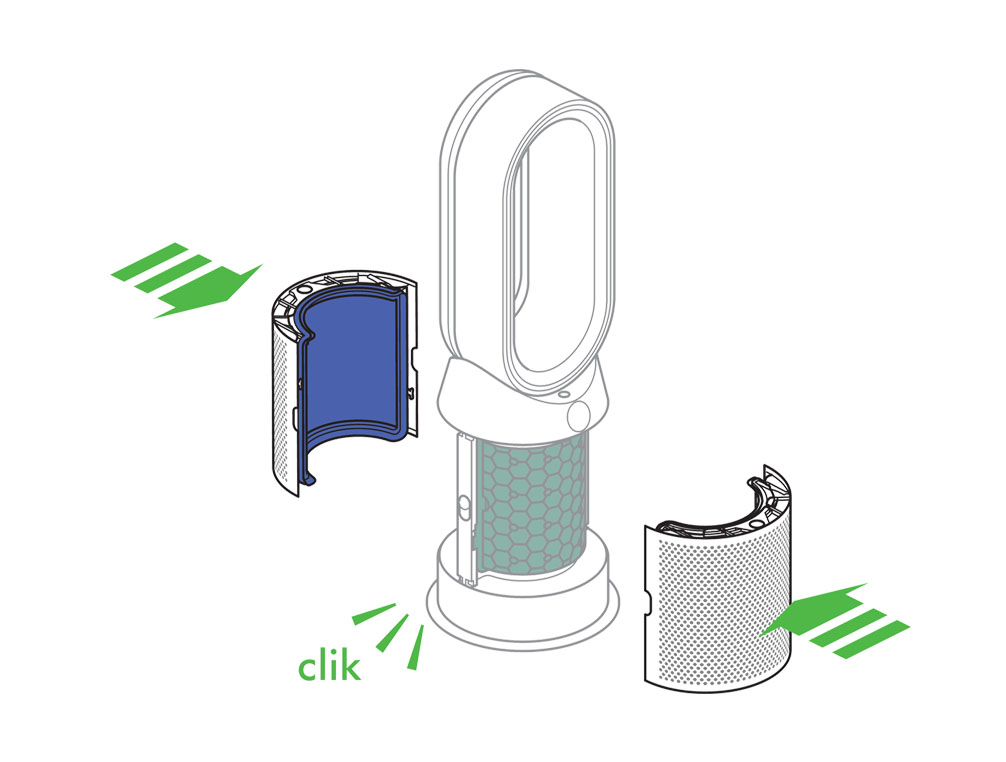
Push the new glass HEPA filters into the shrouds until secure. Push the shrouds until they click back into position in the base.
Plug the appliance in to the mains electricity supply and switch on.
Press and hold the Night mode button on the remote control. The display on the appliance will countdown from five, finishing with the default screen. The glass HEPA filter level will be reset and the appliance is ready to use.
Cleaning the machine
The following areas should be checked and cleaned to maintain the machine's performance:
Clean the loop amplifier with a dry or damp cloth.
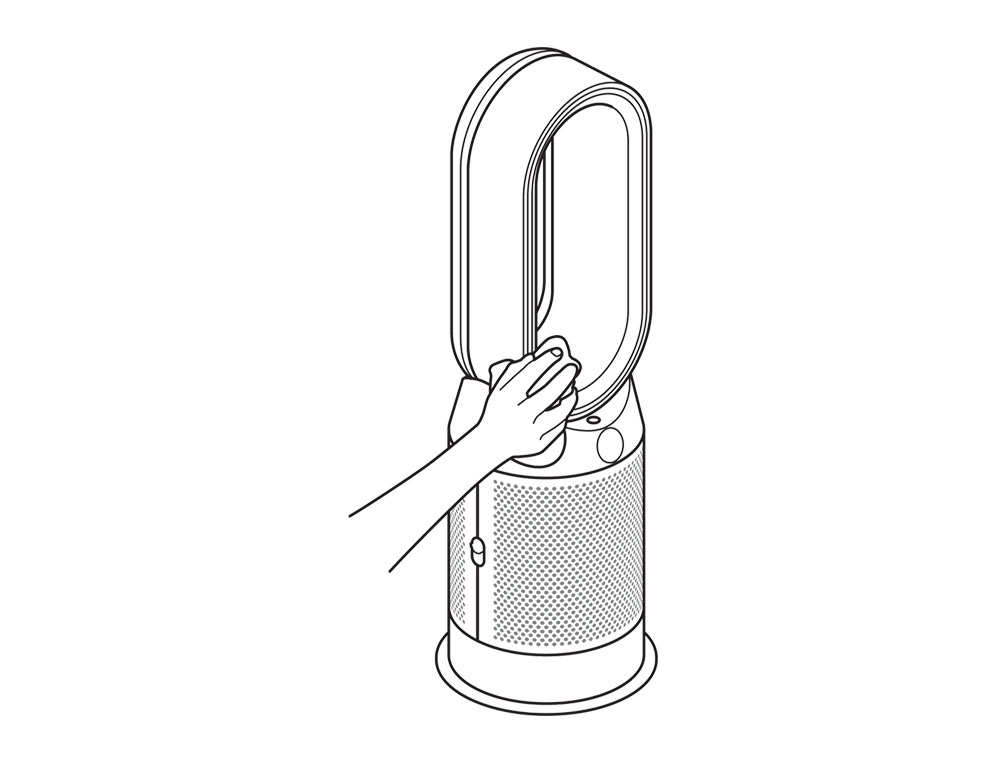
Clean the Main body with a dry cloth.

Clean the shroud with a dry cloth or soft brush.
Replacing the battery
Please follow the steps in the video.
Find the text version of the step-by-step guide instead, under "Is there anything else we can help you with?"
Is there anything else we can help you with?
Unscrew the remote control's battery compartment.
Loosen the base and pull it away from the remote. Replace the battery with type CR 2032.
Please select the appropriate option


Please select the appropriate option
Check that your machine has been connected
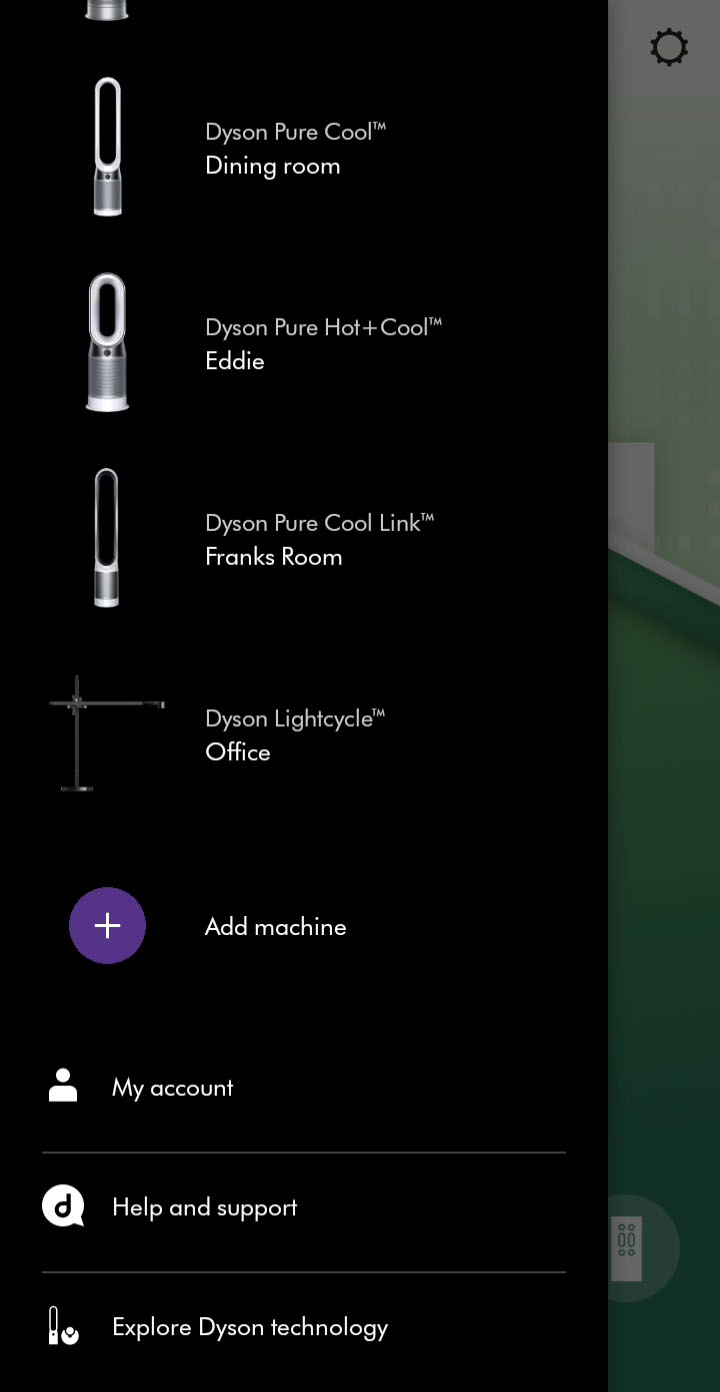
If you have previously connected your machine to the Dyson Link app, you should be able to see it on the app home screen. If you have multiple machines connected, you can switch between them using the burger menu in the top left of the home screen.

Has your machine been connected to the Dyson Link app?
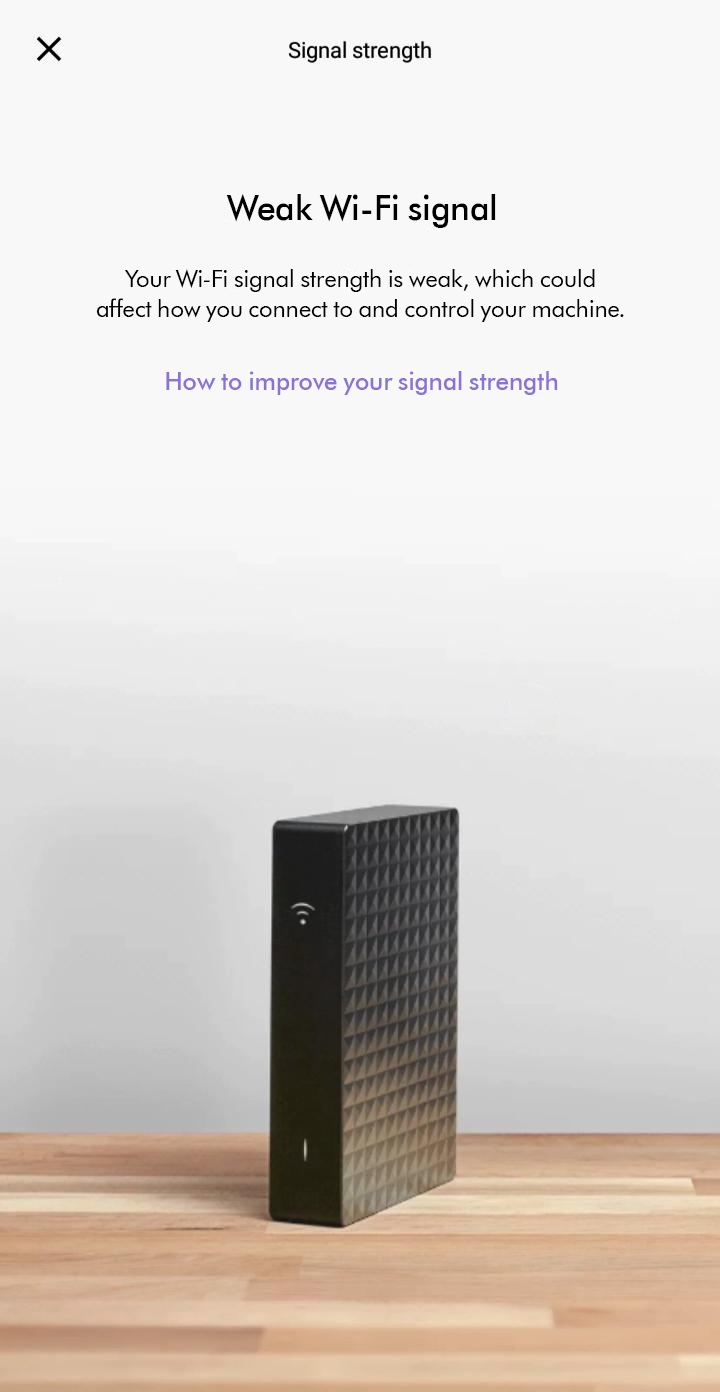
Connection unstable
Try moving the device and purifier closer to the router. If the Wi-Fi signal is poor your machine's connection may not be stable.
Software update required
Some Link app features may not be available if your machine is not up to date.
Please ensure auto-update is turned on. You can do this by going to your machine's settings.
This will ensure you automatically receive the latest features and your machine functions correctly.
It can take up to 24 hours for your machine to receive updates after it is enabled.

Offline
This message will show if your machine is switched off or unable to connect to the Dyson Cloud.
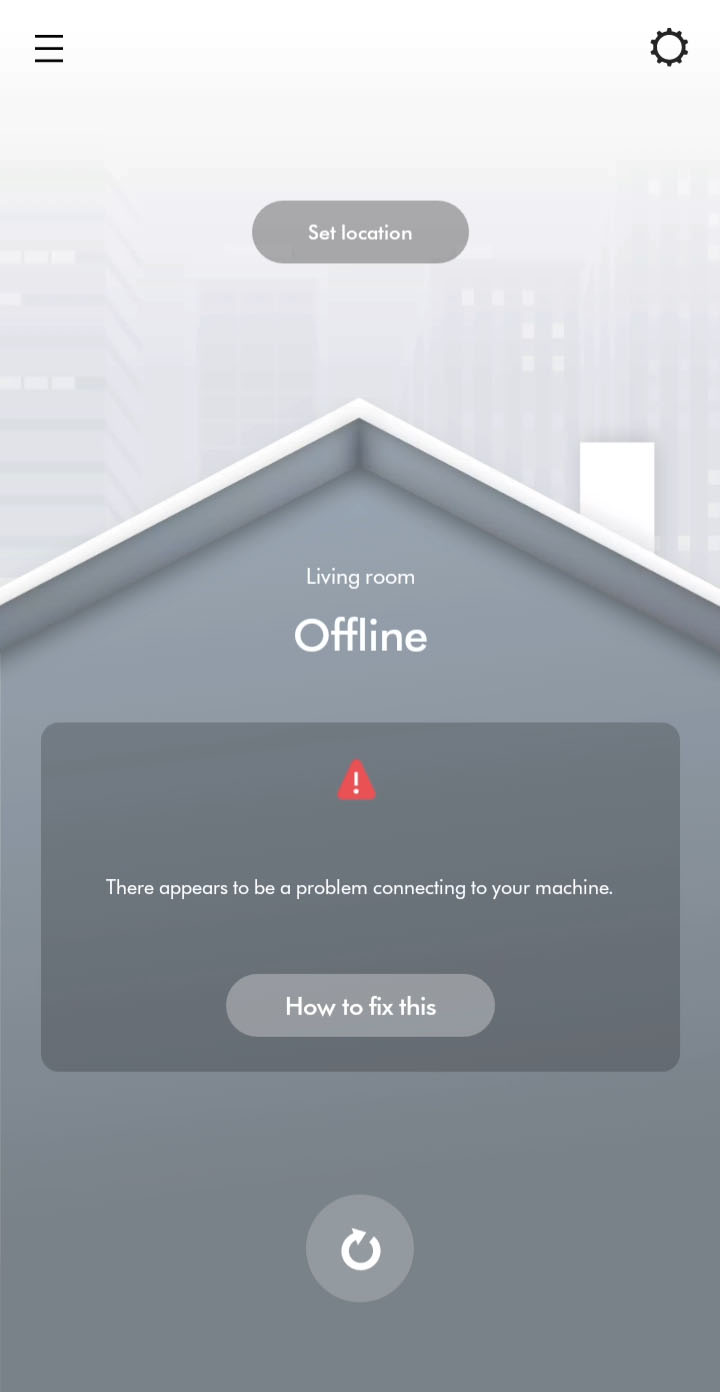
Turn off and unplug the machine
Please turn the machine off, unplug and leave it for 10 seconds.
Plug the machine in and switch it on.
Check your internet connection
Check that your Wi-Fi router or access point has an established internet connection. For the Link app to see your Dyson machine, your mobile device should also be connected to your home Wi-Fi or mobile broadband.
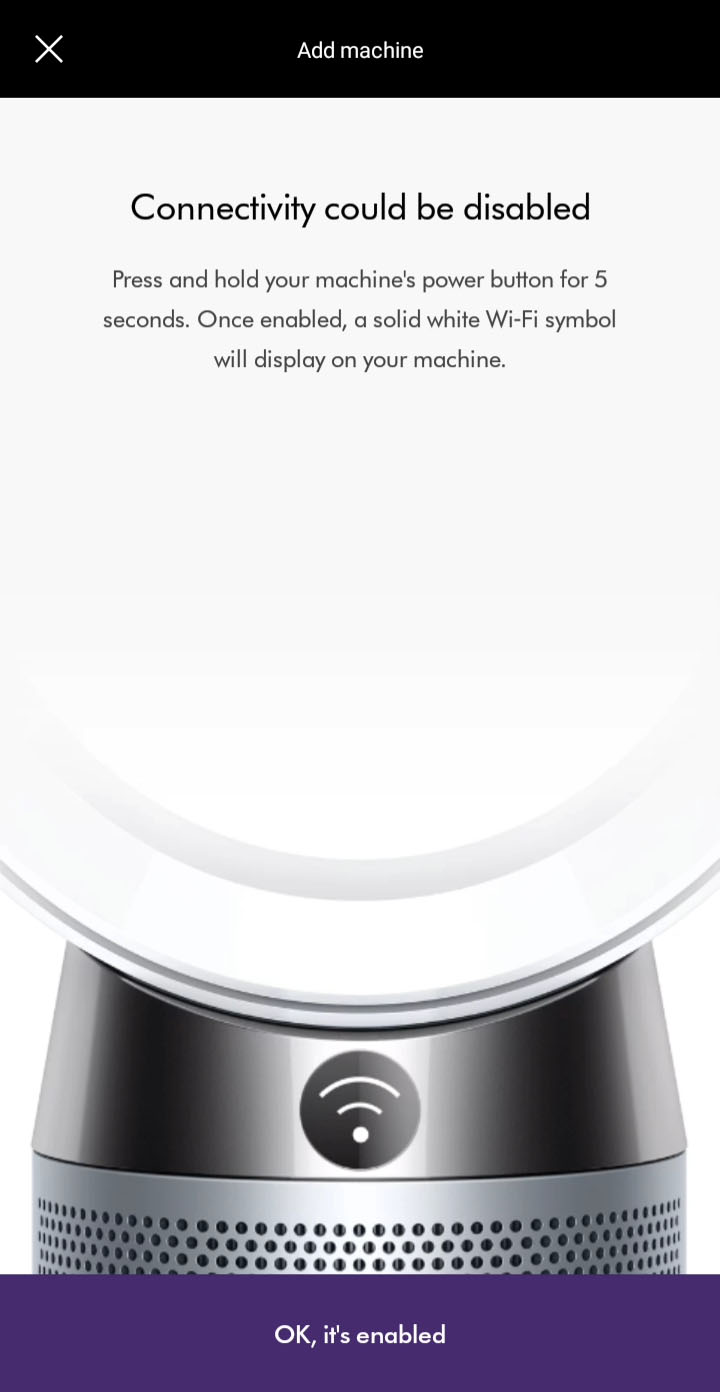
Connectivity disabled on purifier
If connectivity is disabled, press and hold your purifier's power button for 5 seconds. Once enabled, a solid white Wi-Fi symbol will display on your purifier. Repeat to toggle between enabled/disabled.
Enable auto-update
Please ensure auto-update is turned on. You can do this by going to your machine's settings through the settings icon.
This will make sure you automatically receive the latest features and your app functions correctly.
If auto-updates are already enabled, switch the machine off and unplug. Leave for 10 seconds, plug back in and switch on. Move your machine and device closer to the router.
Turn off and unplug
Please turn the machine off, unplug and leave for 10 seconds.
Move your machine and device closer to the router.
What stage of the connection journey are you having trouble with?
Please select the appropriate option
Slow response
The app will show an error if the connection has failed. Tap retry/continue to try connecting again. If the issue is resolved, continue to the next step.
Please follow the next step
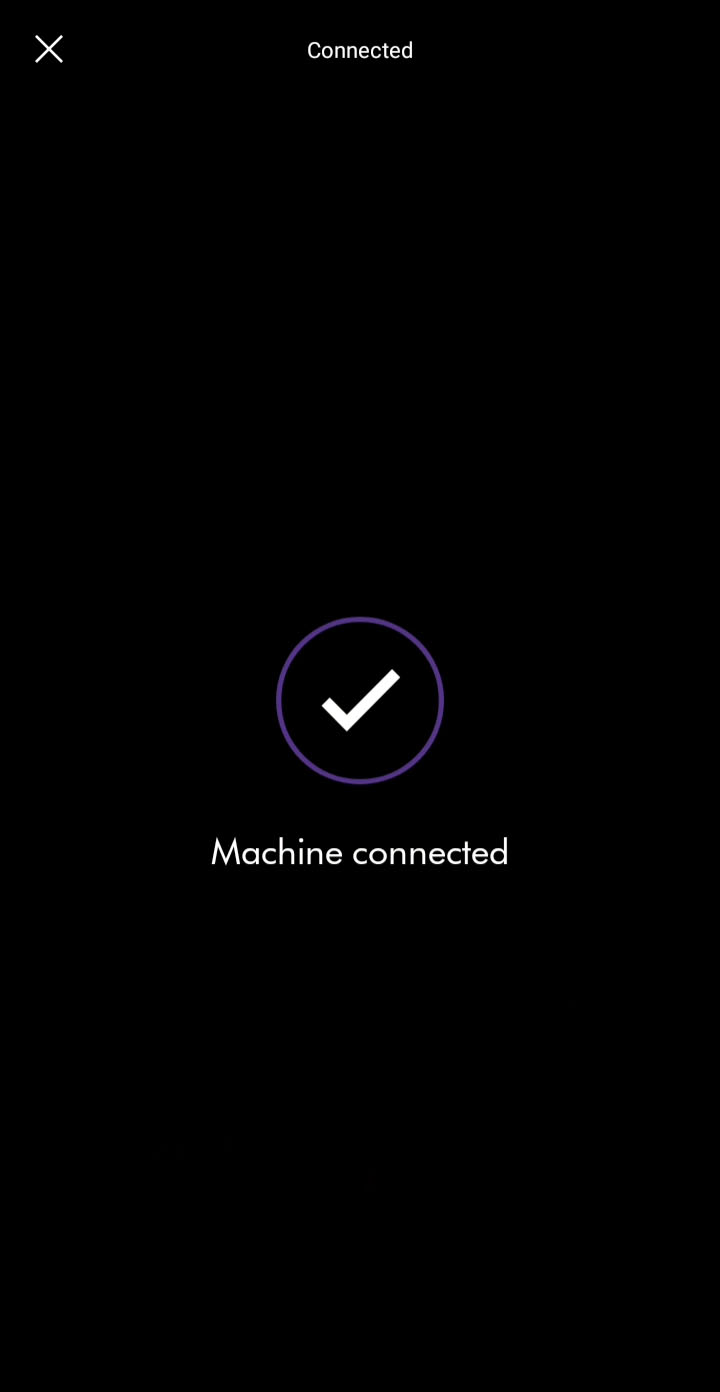
Machine connected
Your machine is now connected to your Dyson Link app.
Please follow the rest of the steps to complete the set-up process.
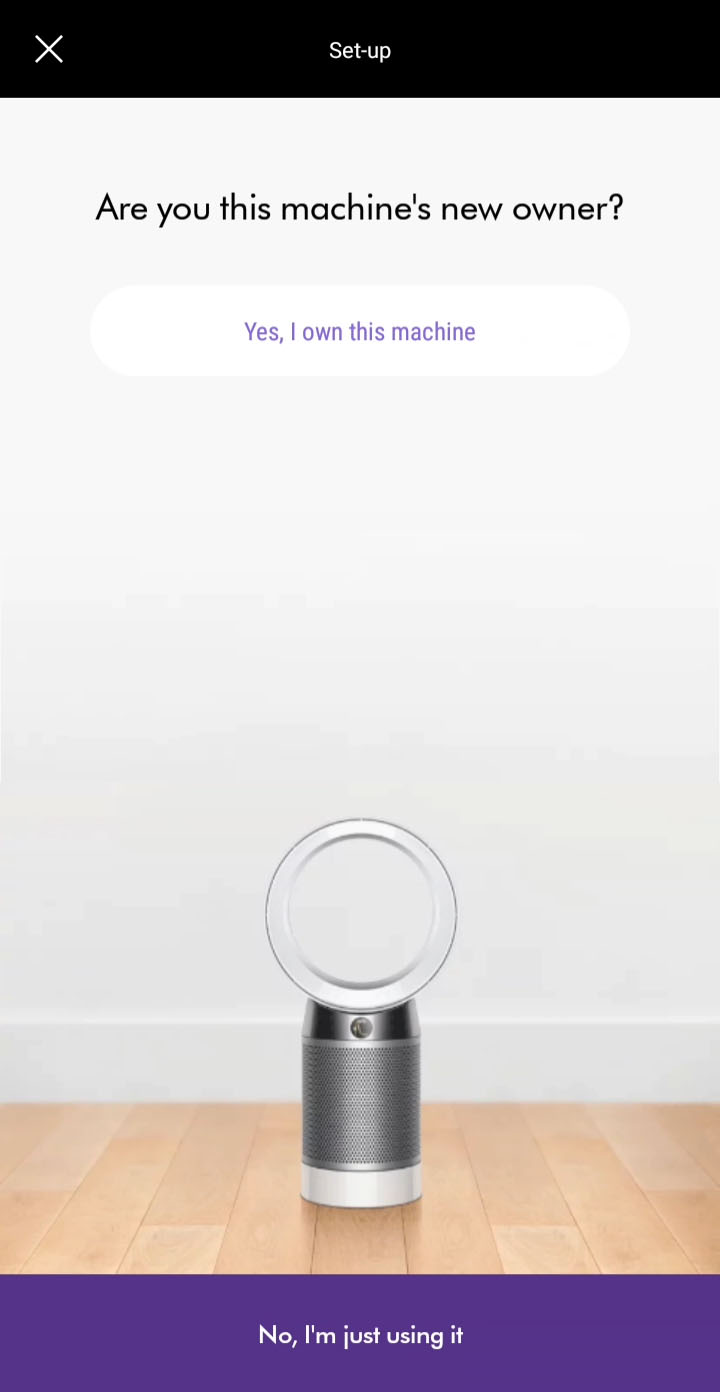
Taking ownership
If this product has been connected before and you decide to take ownership, the previous owner will be notified and will no longer be able to use this machine with their Dyson Link app.
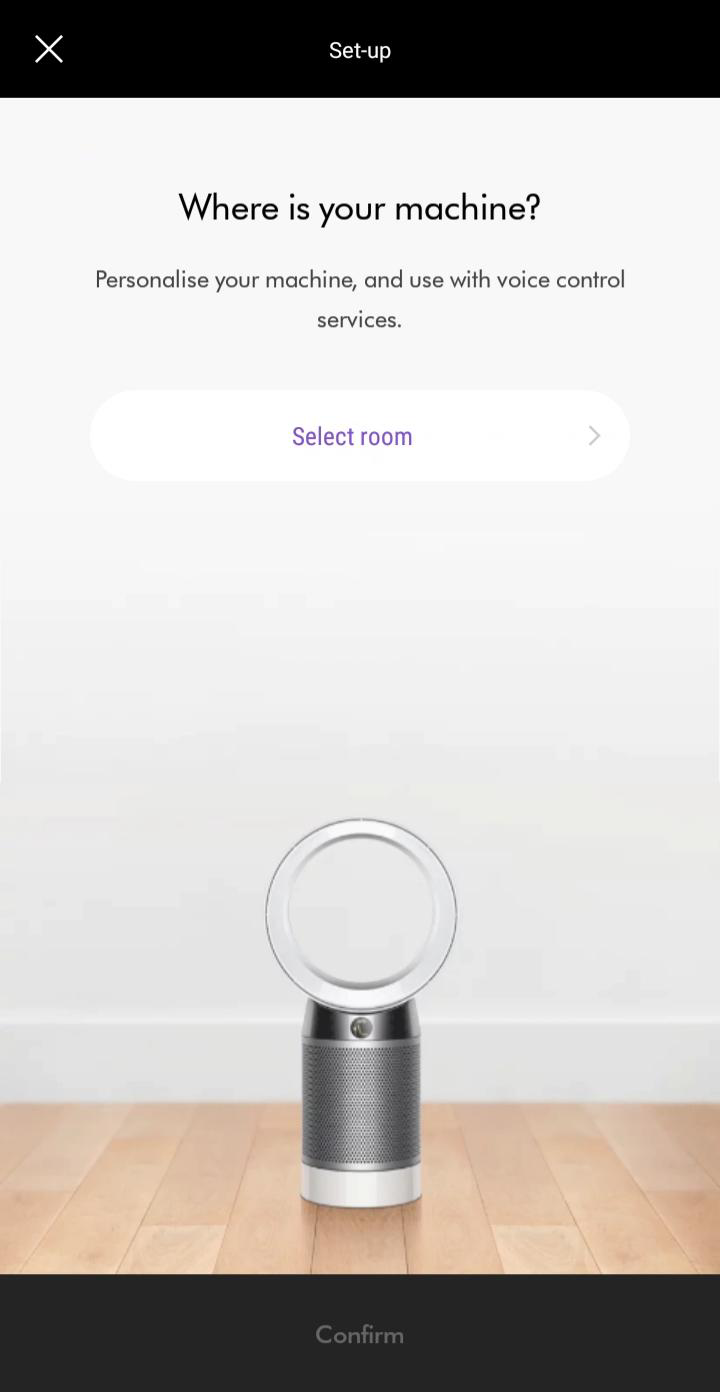
Where is the machine?
To personalise the machine and use with voice control services, select which room your machine is in.
Select location
Please select a location from the list shown on your device before submitting and confirming your selection.
Alternatively, if you want to choose a custom location, scroll to the bottom to edit it.
Purchase date
Enter the date of purchase. We'll need this for your guarantee.
It is recommended that you keep hold of your proof of purchase.
Auto update
Please ensure auto-update is turned on. You can do this by going to your machine's settings through the settings icon.
This will make sure you automatically receive the latest features and your app functions correctly.
If auto-updates are already enabled, switch the machine off and unplug. Leave for 10 seconds, plug back in and switch on. Move your machine and device closer to the router.
Set worldwide location
Set your location to display outdoor air quality information.

Setup complete
Your machine is now fully connected and setup.
Trouble connecting
Check your machine is plugged in and switched on.
Keep your device close to the machine and try again.
If the connection continues to fail, re-start the connection. Select 'Connecting your machine.' If this has already been tried, select 'Issue not resolved'
Please follow the next step
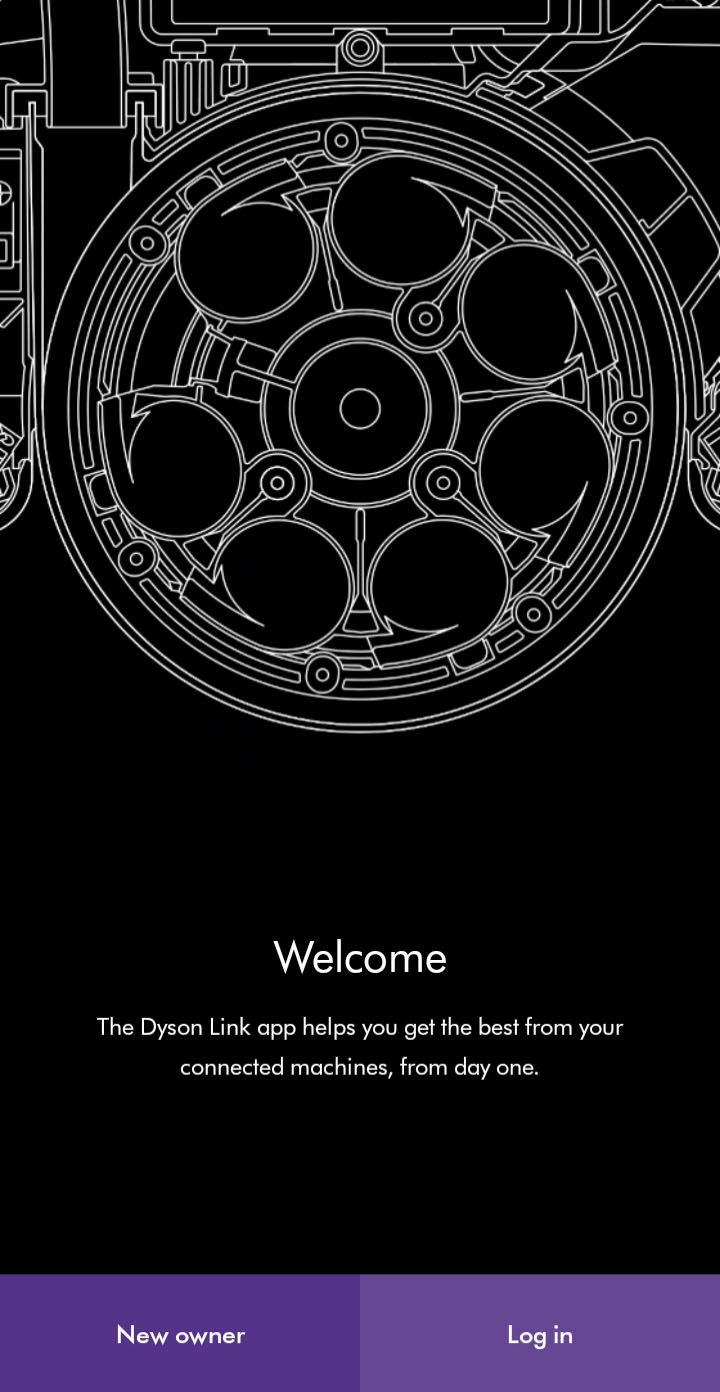
Dyson Link app
You'll need to have the Dyson Link app installed to connect to your machine.
Ensure Bluetooth and Wi-Fi are enabled on your device.

You have the option to create a new account or log in if you have previously created a Dyson account on the app or online. Select the appropriate option
Plug the machine in and switch it on.
Please follow the next step
Add machine
You can add a machine from the hamburger menu or from the main screen if no machines are registered. If bluetooth is not enabled, you will be prompted to enable it.
Location services
To scan for Wi-Fi networks, we'll need to access your device's location services. Allow this when prompted.
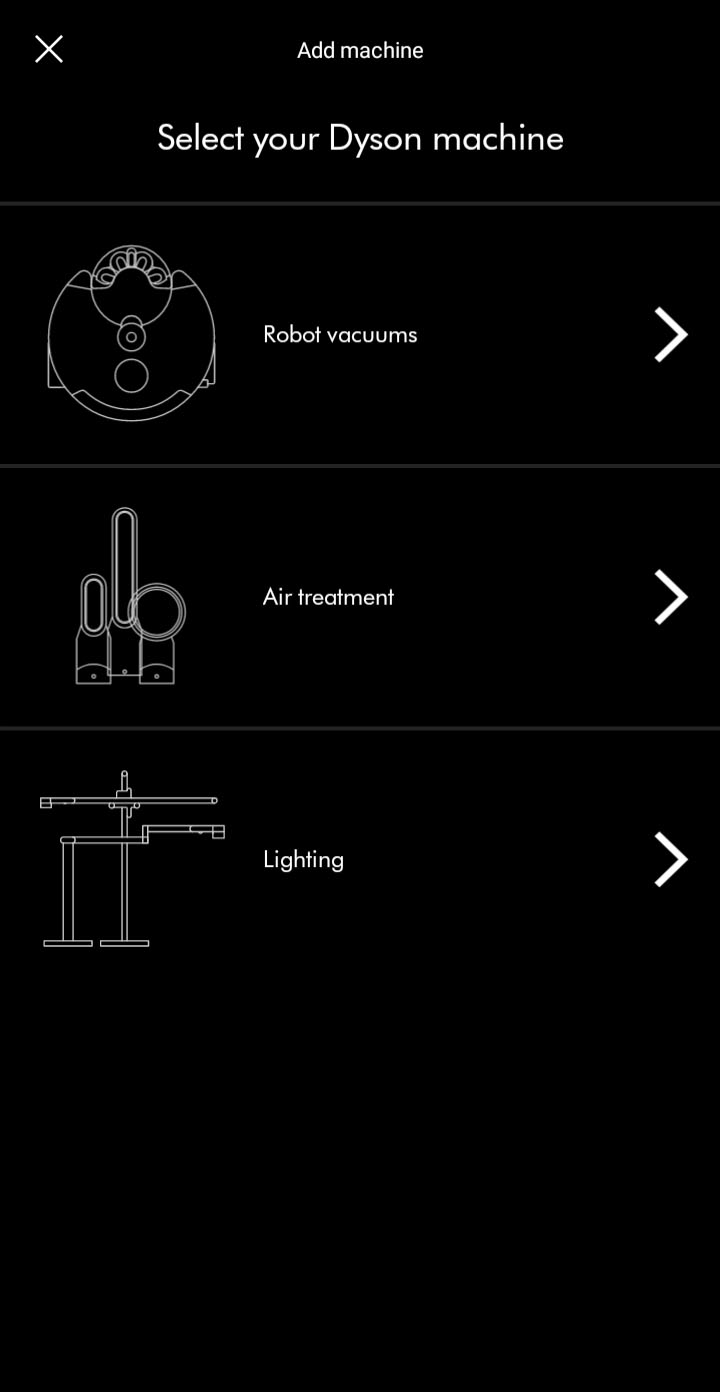
Select machine
Select your machine when it appears. The app will display its serial number.
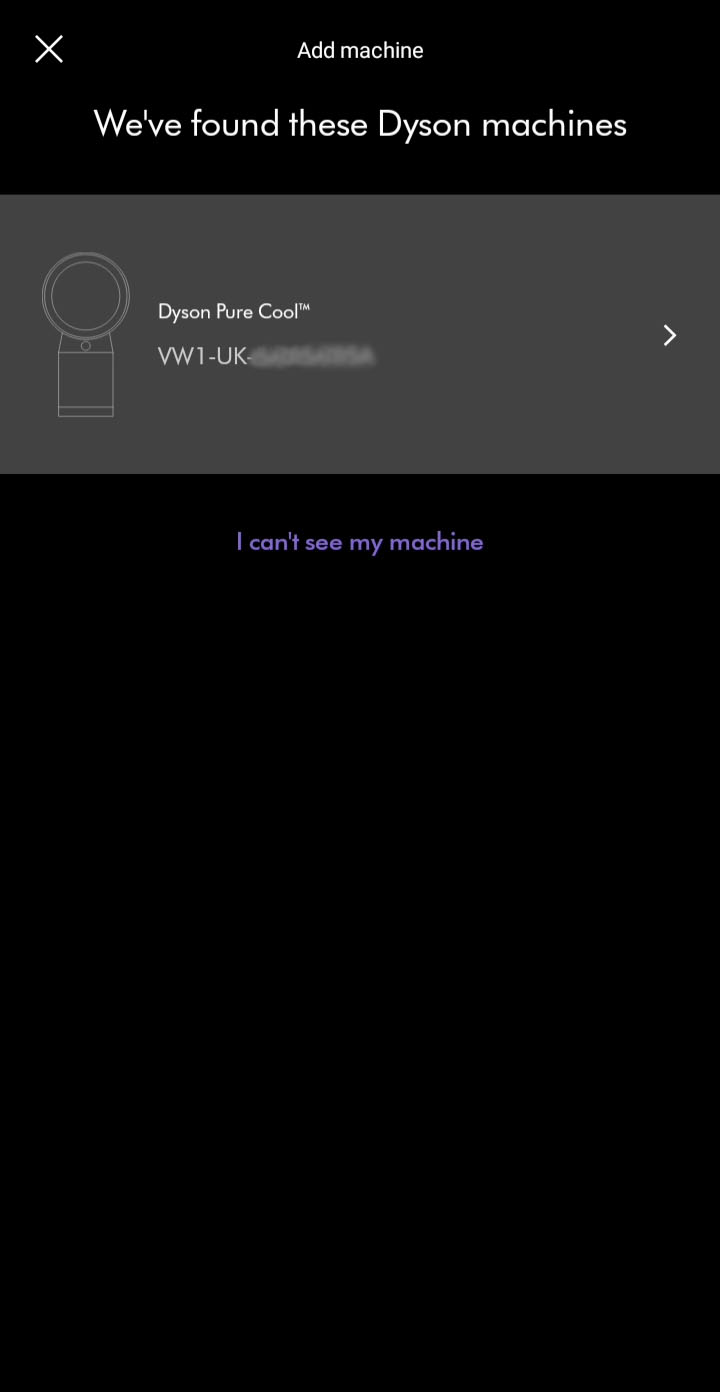
Please follow the next step
Pairing
Hold your device next to your machine's display
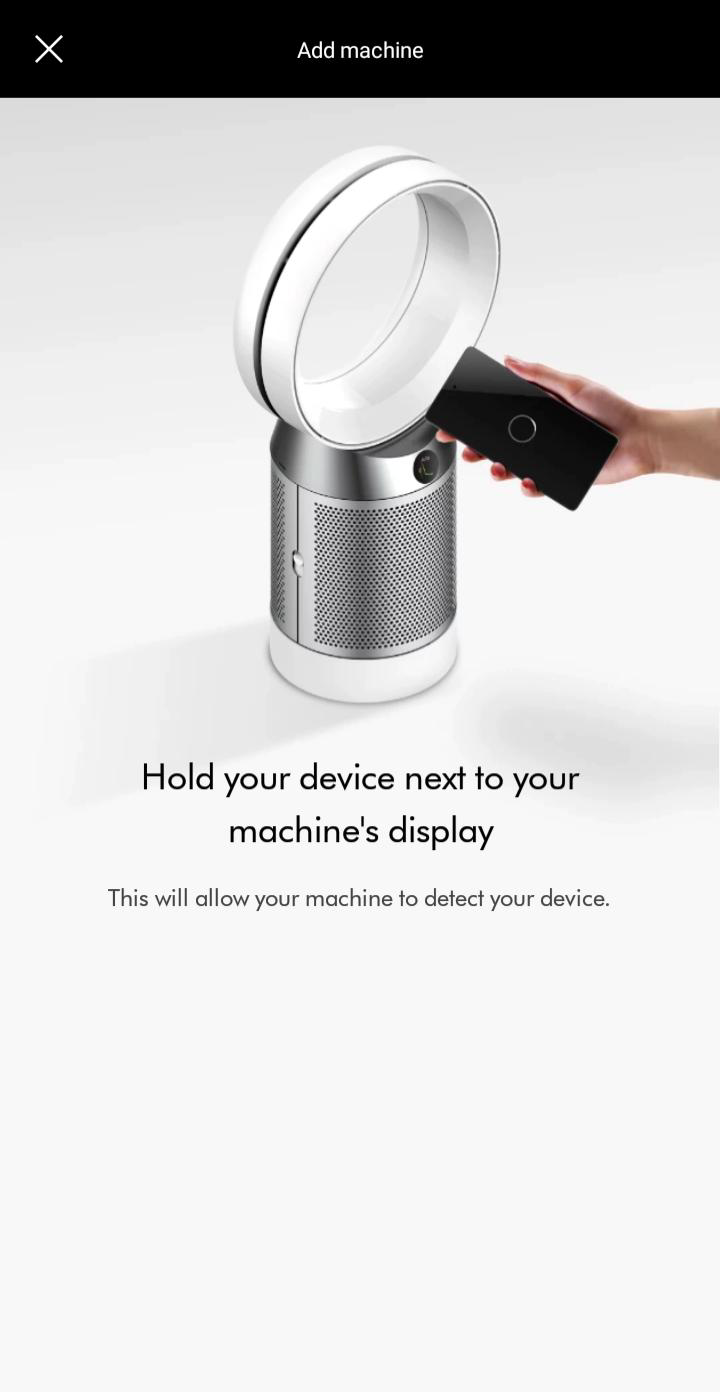
Press the power button when prompted on your machine to activate pairing.
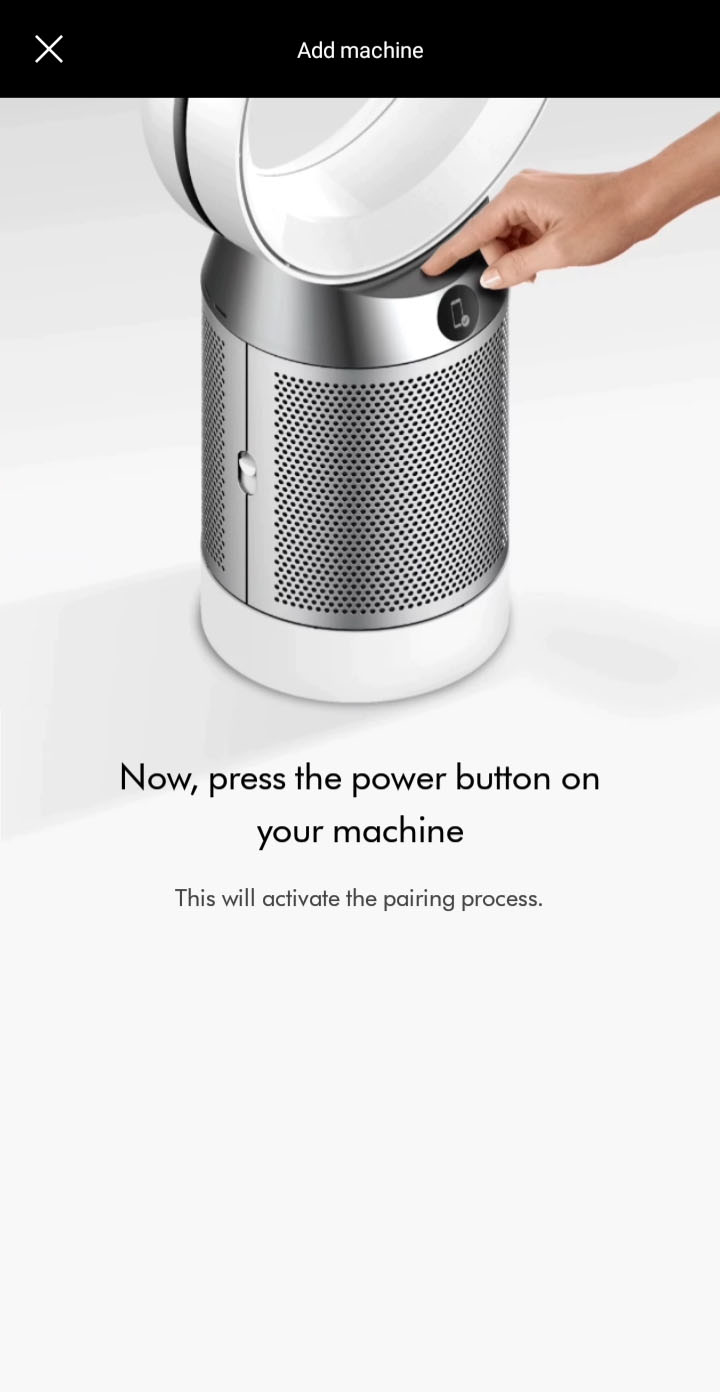
Once paired, continue to the next step.
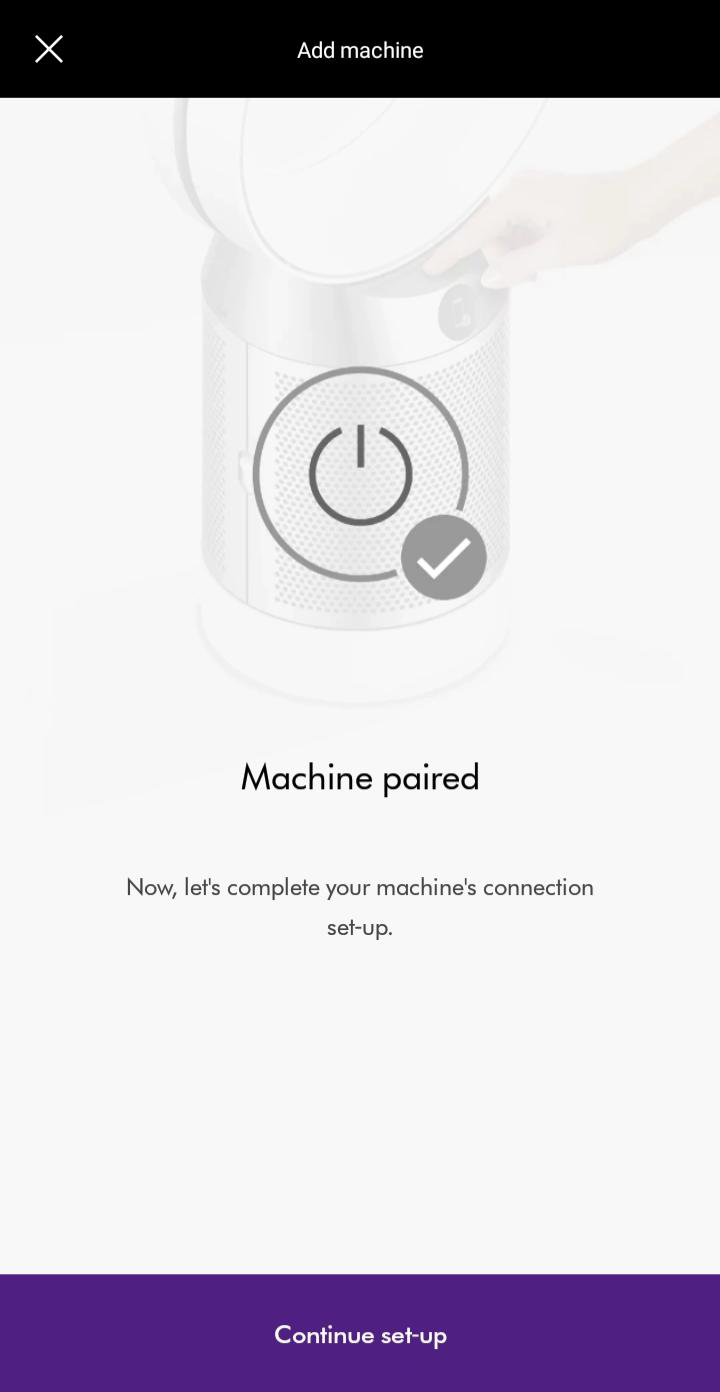
Please follow the next step
Manual pairing
If you are still not able to pair the machine, follow the on screen prompts to manually pair.
You will need your machine's 8-digit code located on the machine behind the filter.
Enter your machine's code to continue.
Please follow the next step
If you have previously connected your machine to your Wi-Fi network and you are not prompted to enter Wi-Fi details, select ‘Complete the set up’.
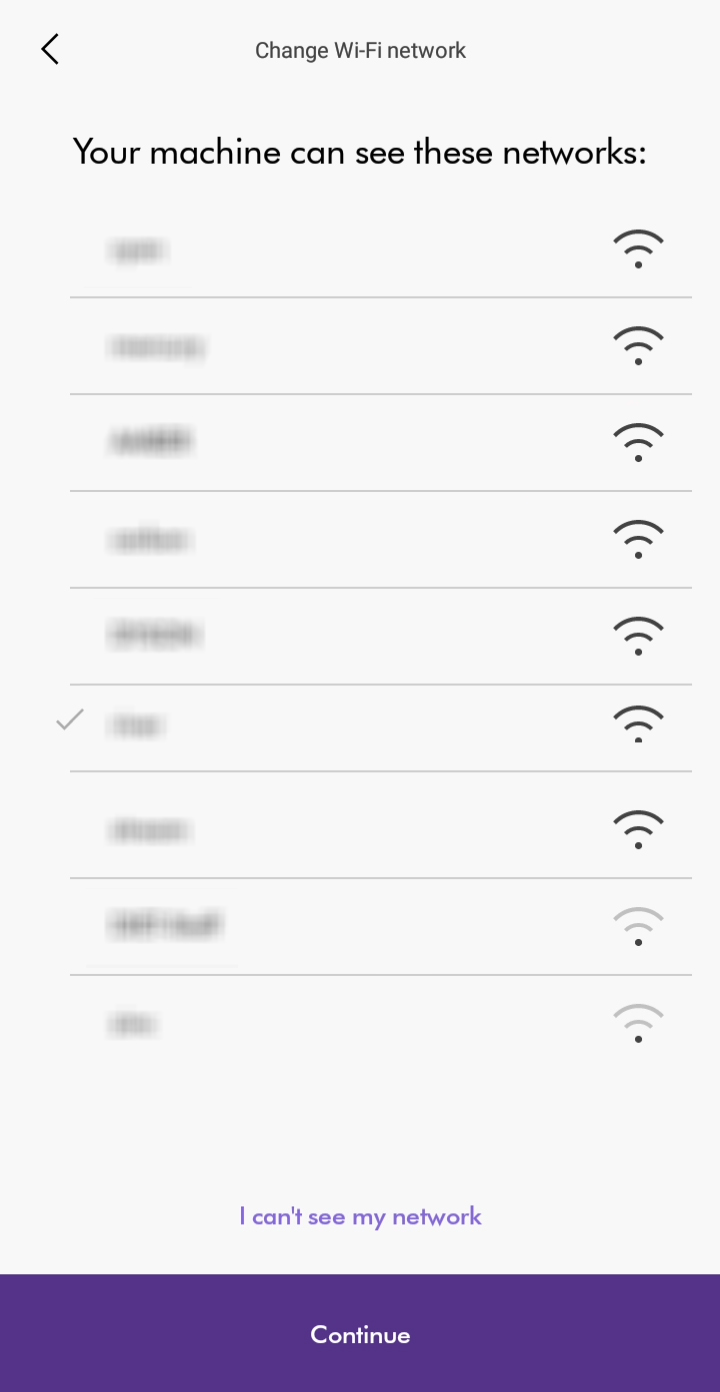
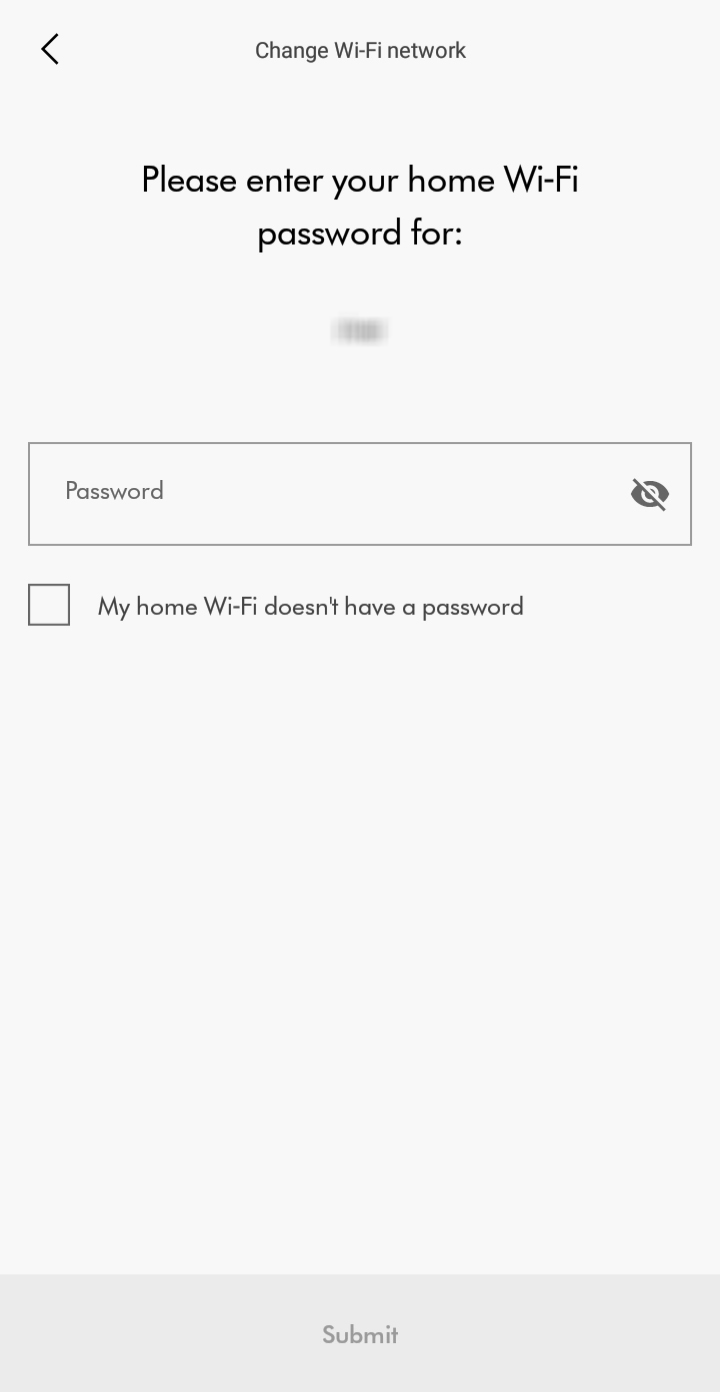
Enter network details
Select your network from the list of available networks.
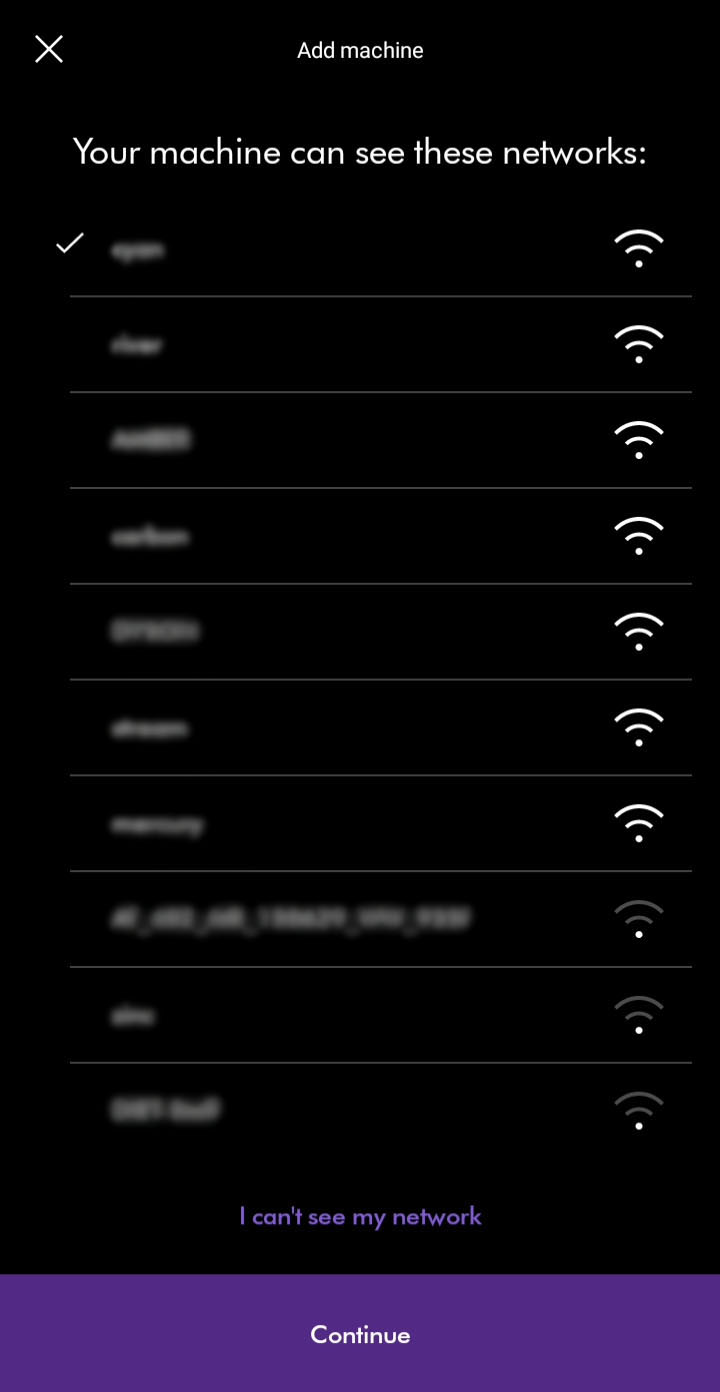
Enter the Wi-Fi passord for the chosen network.
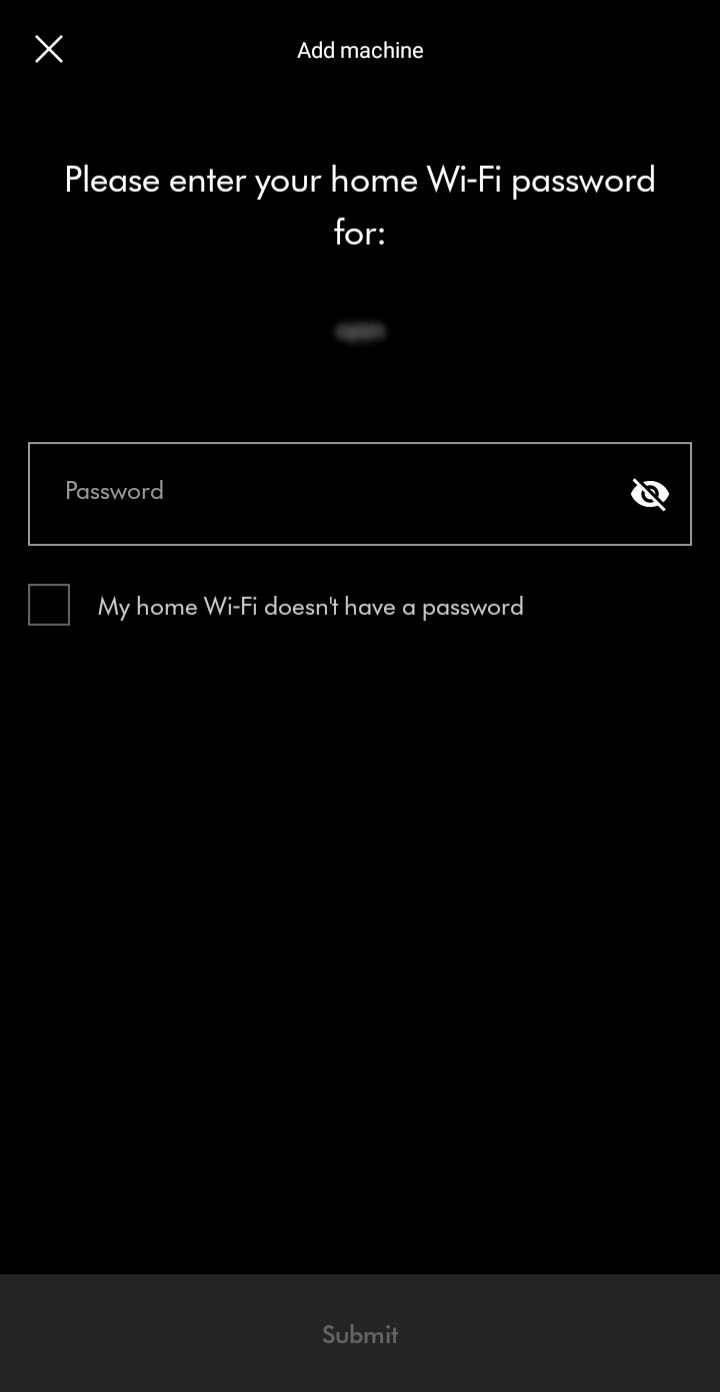
Please follow the next step
Connection stage
You should see a confirming connection message. The connection progress is represented by purple dots at the top of the screen.
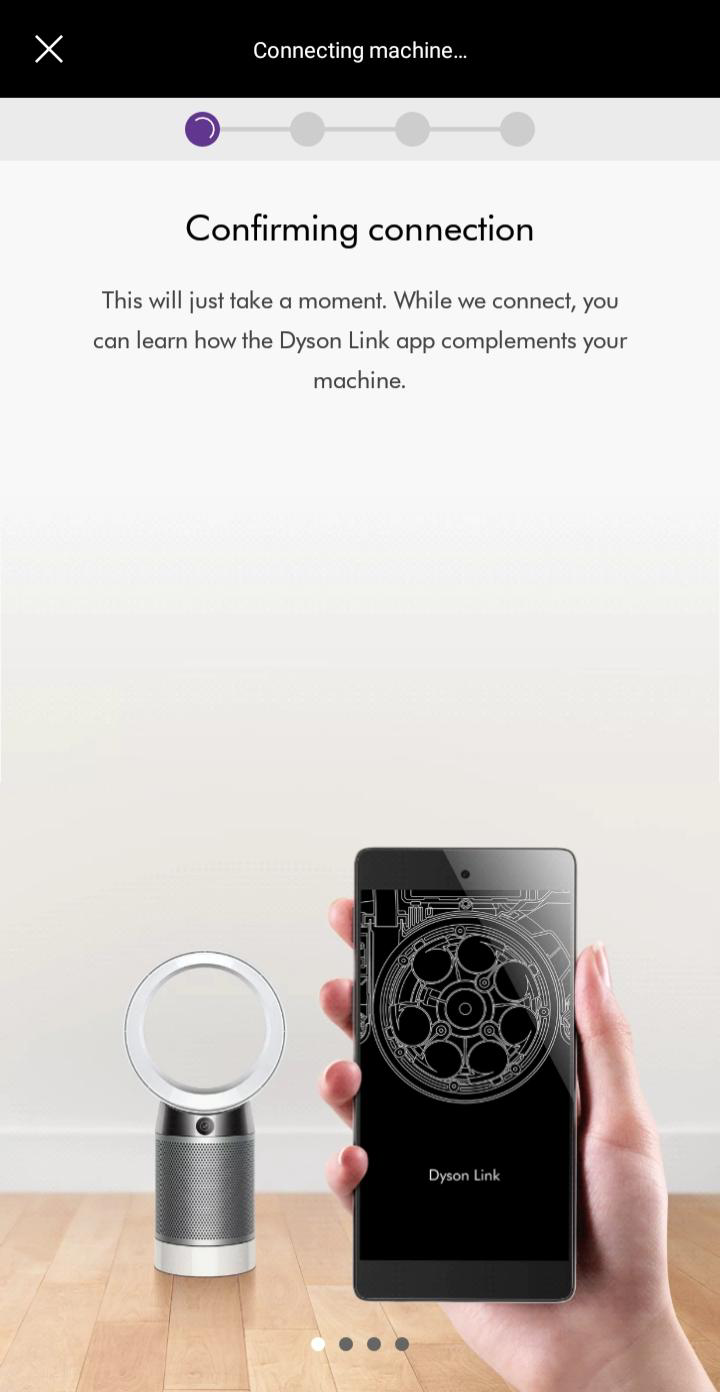
Please follow the next step
Network not found
If you are not able to see your network, you can select it using the prompts in the app.
Please ensure your machine is in range of your Wi-Fi and your network is working correctly.
Refresh the network list.
Please follow the next step
Unable to find machine
If you are not able to see your machine, you can select it using the prompts in the app.
Ensure Bluetooth and Wi-Fi are enabled on your device.
Plug the machine in and switch it on.
Keep your device close to the machine during this process.
Select machine
Select your machine when it appears. The app will display its serial number.
Please follow the next step
Please select the appropriate option
Two-factor authentication
Check that the email address shown on the login screen is correct. The code will be sent to the address shown.
The email may have incorrectly been marked as spam or junk. Please check any junk folders for the code email.
Please note that the authentication code will expire 5 minutes after being sent. Codes will also expire when a new one is sent.
If you enter the password or authentication code incorrectly more than four times, your account will be locked. It will be automatically unlocked after 30 minutes.
Dyson Link app
Download the latest version of the Dyson Link app from the app store on your phone. For users of Android phones, it can be downloaded from major Android app stores.
Minimum requirements:
- iOS 12
- Android 7.0 Nougat
Your My Dyson account
Once you have downloaded and updated the Dyson Link App, please login or register a My Dyson account.
To set up an account you will require a valid email address and password.
Password reset
If the password has recently been changed, a 30 minutes period will need to pass before you are able to log back into the Dyson Link app account.
If you enter the password or authentication code incorrectly more than four times, your account will be locked. It will be automatically unlocked after 30 minutes.
Dyson Link app
You'll need to have the Dyson Link app installed to connect to your machine.
Ensure Bluetooth and Wi-Fi are enabled on your device.
You have the option to create a new account or log in if you have previously created a Dyson account on the app or online. Select the appropriate option.
Plug the machine in and switch it on.
Please follow the next step
Switching Wi-Fi
Plug the machine in and switch it on.
Check that the Bluetooth and Wi-Fi are still enabled on your device.
Change your Wi-Fi network by going to your machine’s settings through the settings icon.
Select the network you want to connect to from the list of available networks.
Ensure your device remains close to the machine while switching networks.
Enter the Wi-Fi password to connect.
Historical data
With your machine selected, swipe up to view your air quality.
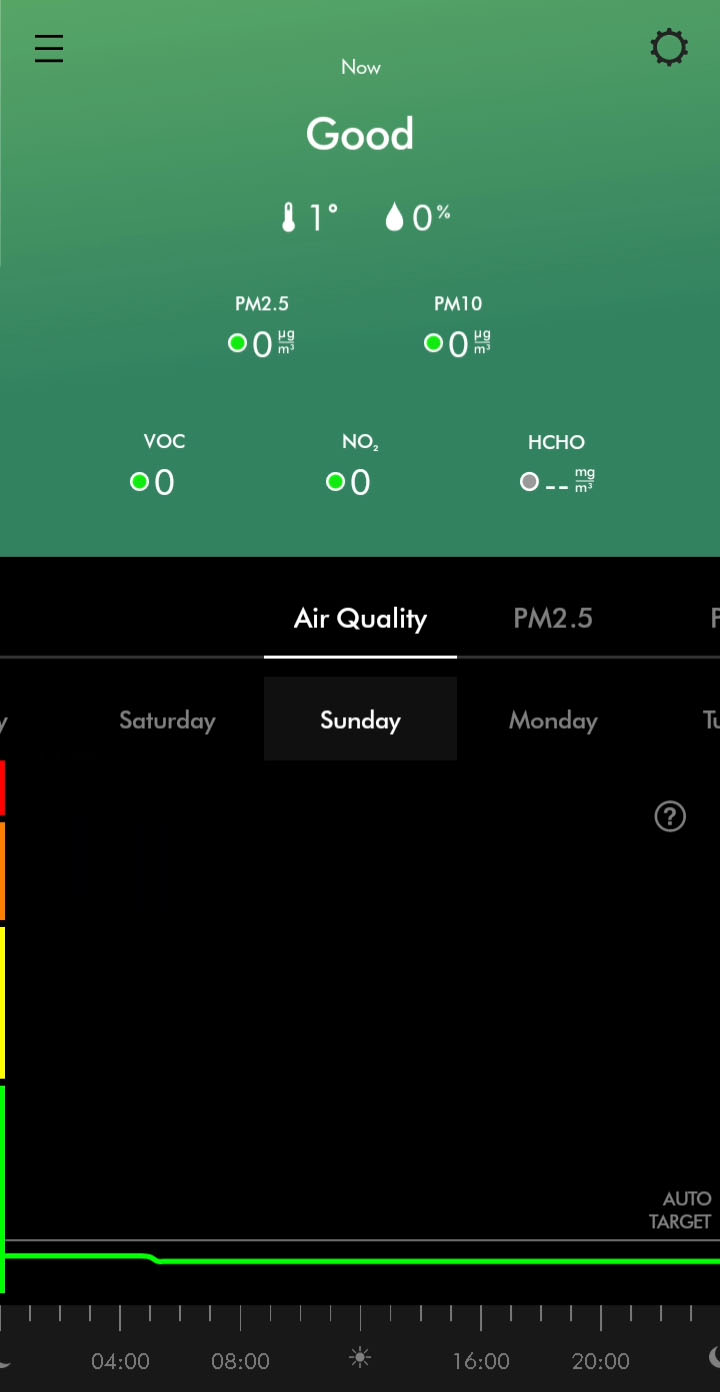
The following options are available.
- Daily or Weekly graph
- Switch days/weeks to view
- Ability to switch from showing;
- Air Quality
- PM2.5
- PM10
- VOC
- NO2
- Temperature
- Humidity
More information is available by selecting the options above.
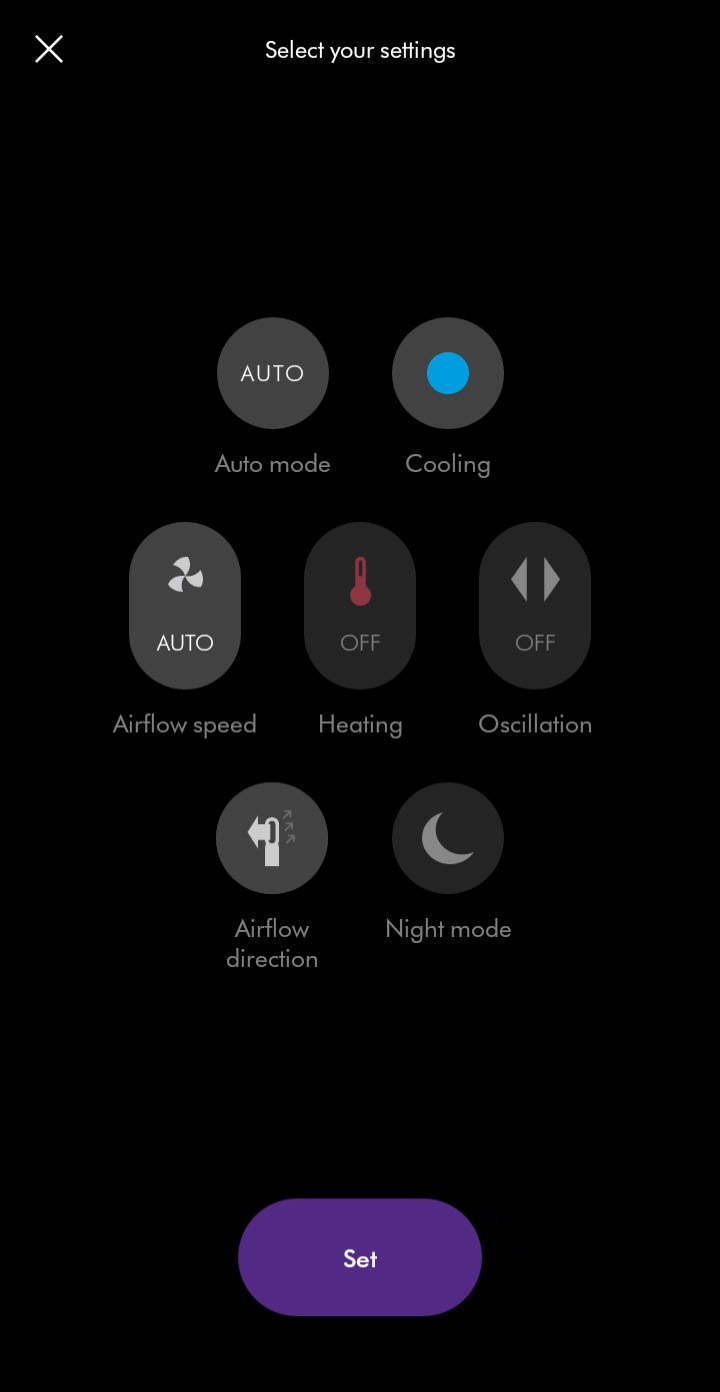
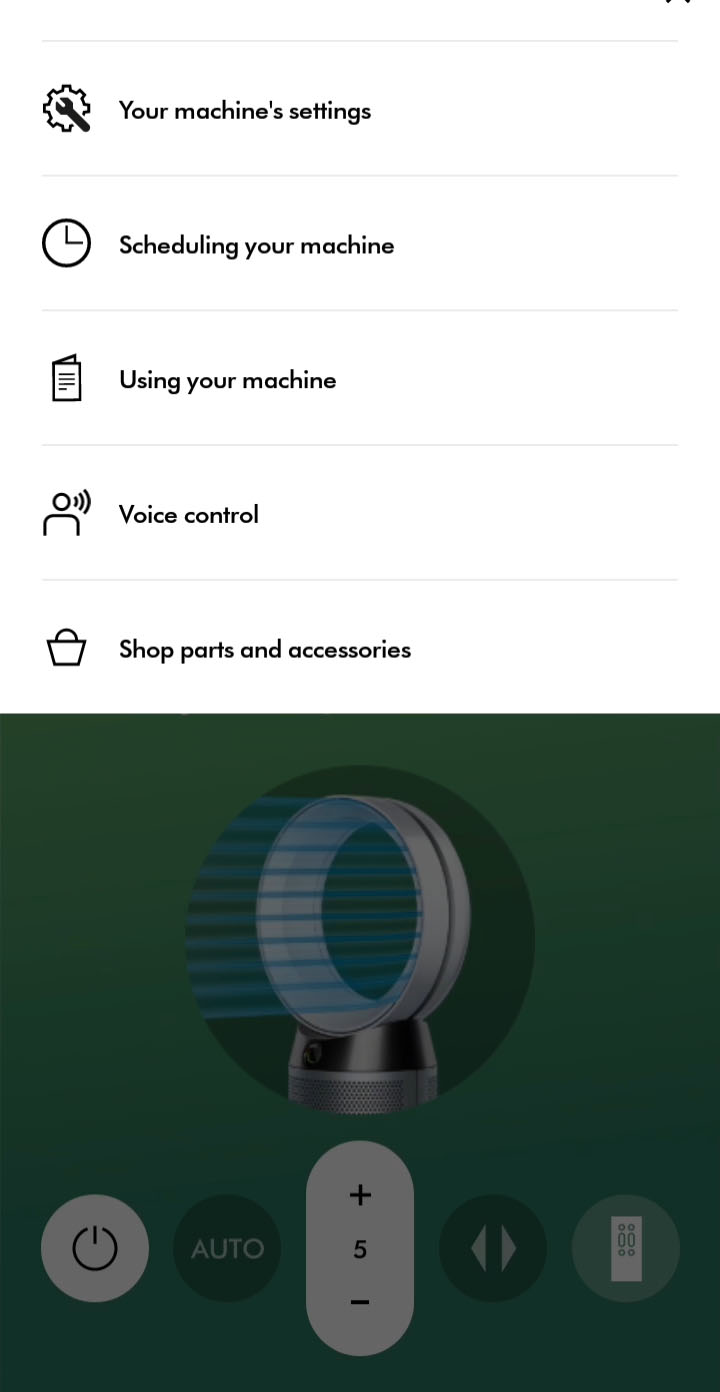
Machine controls
Your machine's controls are available through the home screen of the app.
You can control the following;
- Turn on/off
- Set the airflow speed
- Set the temperature target
- Turn on and customise oscillation
- Set a timer
- Turn auto mode on/off
- Change airflow direction
Machine schedules
Schedules can be added or changed in your machine's settings.
Add events to set a schedule for when your machine should switch on and off. You can also set the following.
- Auto mode enabled/disabled
- Airflow speed
- Temperature target
- Oscillation
- Airflow direction
- Night mode enabled/disabled

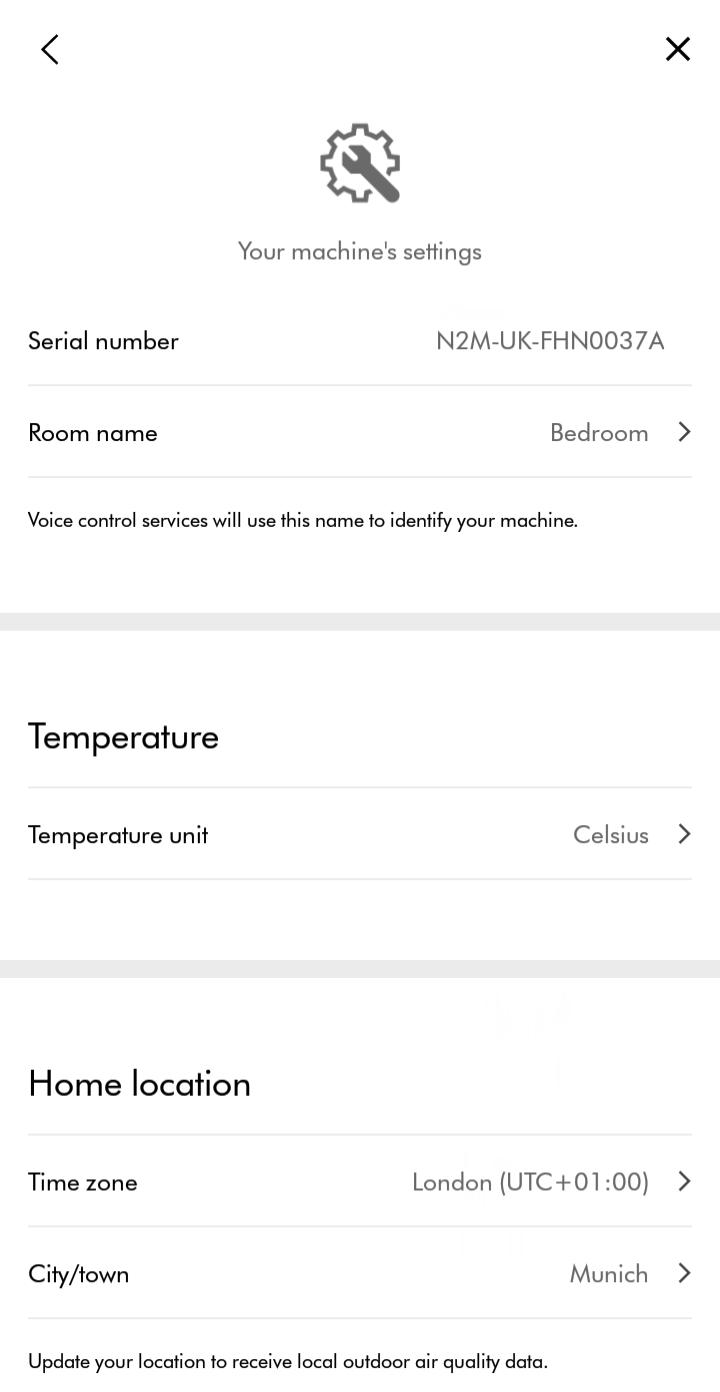
Accessing the settings
To access your machine’s settings, select your machine from the hamburger menu and then select the settings menu icon.

Temperature unit setting
The temperature unit can be changed in your machine's settings.
The temperature unit can be changed between Celsius and Fahrenheit.
Continuous monitoring setting
Enabling/disabling continuous monitoring can be changed in your machine's settings.
Continuous monitoring allows your machine to collect environmental information. Once selected, this feature is active at all times.
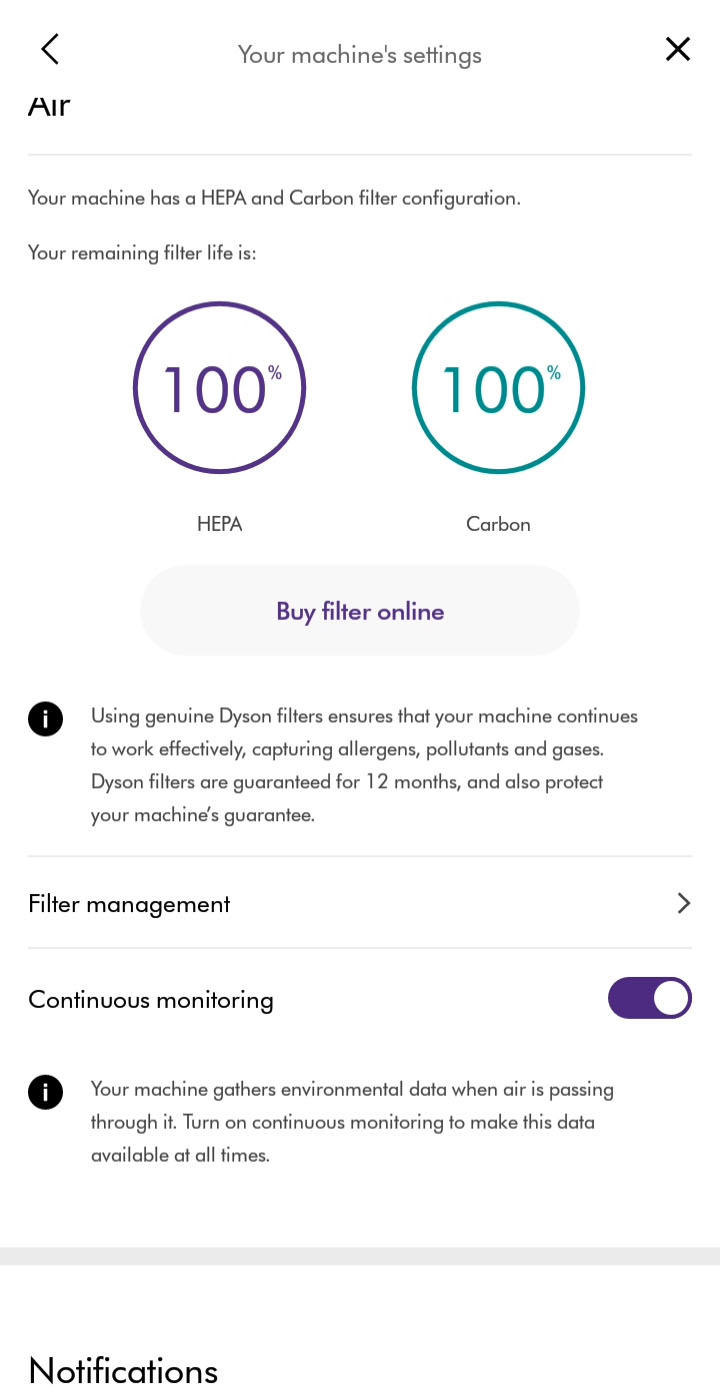
Filter management
The filter life can be checked in your machine's settings.
Selecting filter management will show you how to replace your filter and allow you to reset filter life. Resetting filter life should only be done after you have replaced the filter.
Location setting
Your home location can be changed by selecting the appropriate time zone.

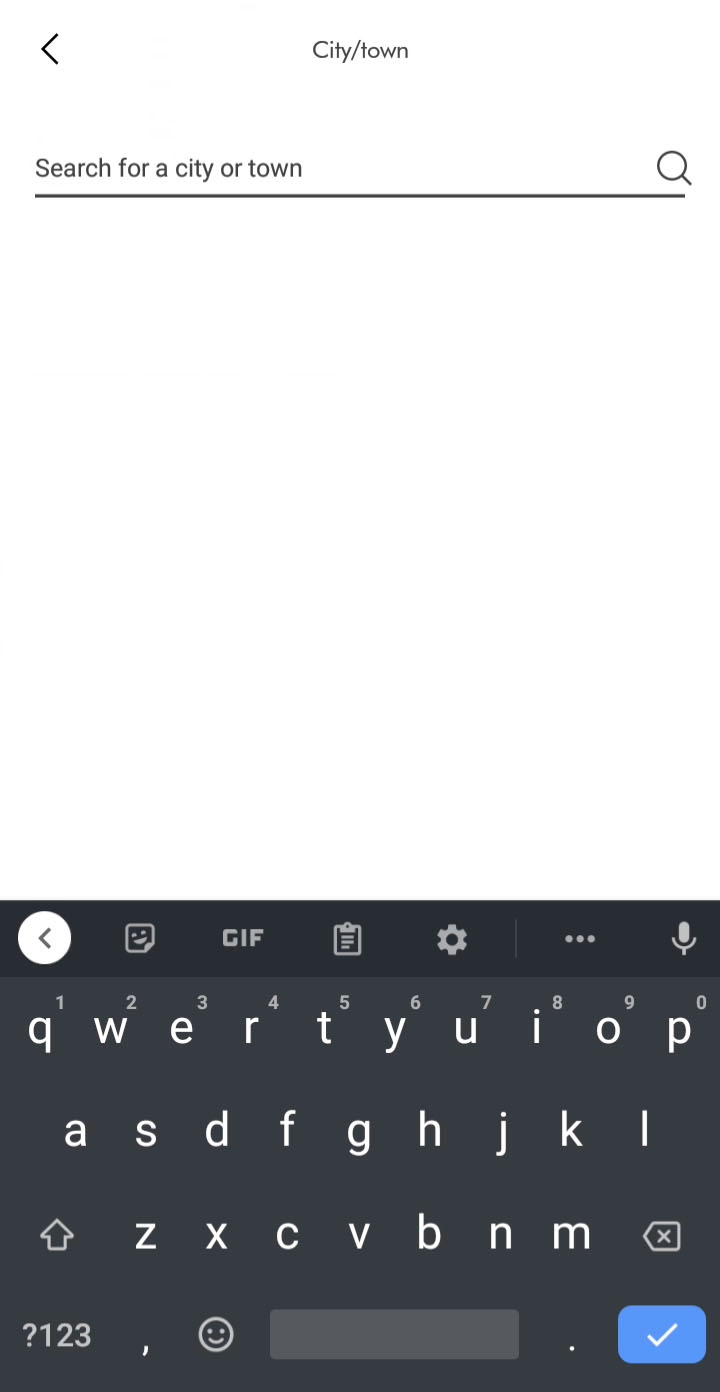
Select location from the list. You can also search for a location to filter the list.
Once a new location has been chosen, update to save.
Room name setting
The room name can be changed in your machine's settings.
Select room location from the available list or enter a custom name.
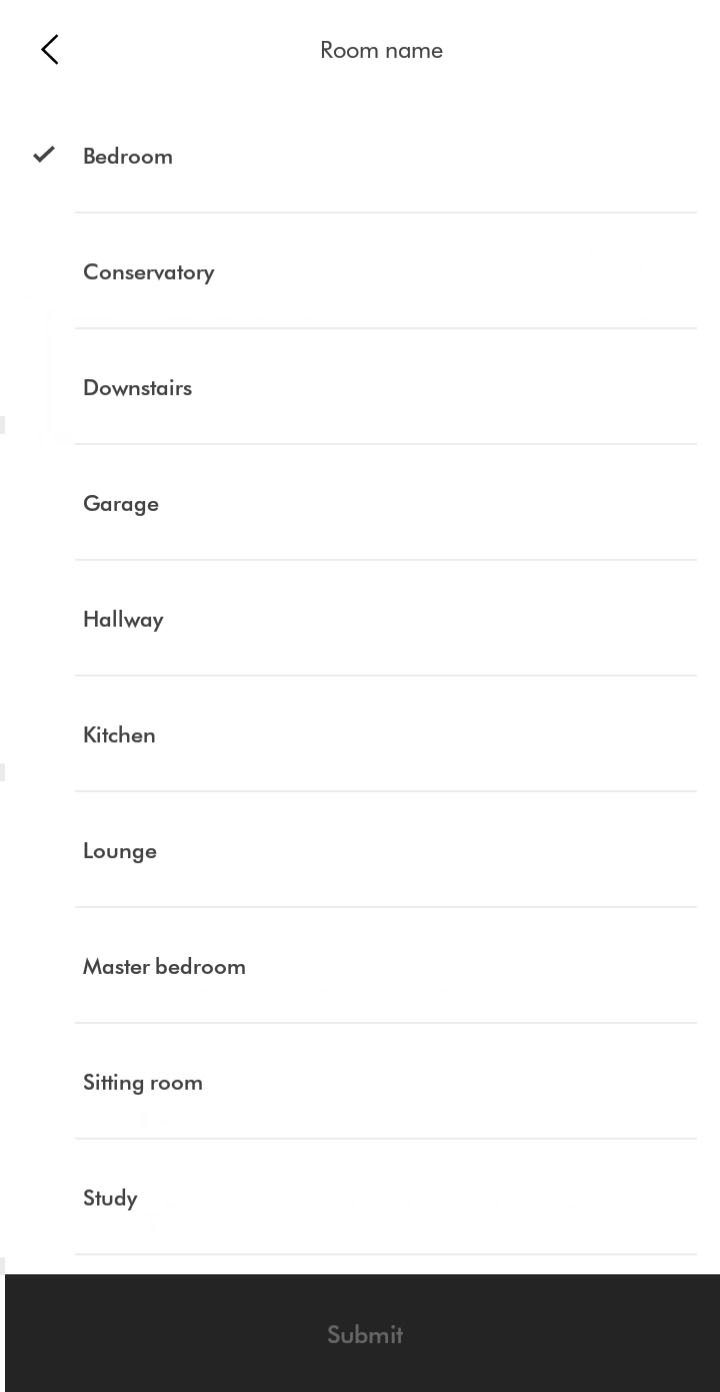
Once a new room name has been selected, follow the prompts in the app to change.
Switching machines
To switch between your machines, select the hamburger menu. A list of your machines will show on the left.
You can also swipe between your connected machines by swiping the sides of your screen. For Android users, screen gestures may need to be disabled for this feature to work.
Switching Wi-Fi
You can change to a different router or access point in your machine's settings.
Plug the machine in and switch it on.
Check that the Bluetooth and Wi-Fi are still enabled on your device.
Select the network you want to connect to from the list of available networks.
Ensure your device remains close to the machine while switching networks.
Enter the Wi-Fi password to connect.
Please select the appropriate option
On/Off
Ensure the machine is switched on.
Ensure correct button on remote is being pressed.
Point the remote directly at the front of the machine while pressing the button.
Remote control
Point the remote directly at the front of the machine while pressing the button.
Test cooling mode.
Test the heating control.
Test the oscillation.

Test the sleep timer.
Changing the battery
Unscrew the remote control's battery compartment.
Replacing the remote control battery
Loosen the base and pull it away from the remote. Replace the battery with type CR 2032.
App airflow control
Access the App to control the airflow.
Change settings within the app.
Has using the app resolved the problem?
Test airspeed change using the Dyson link app.
Heating elements
The heating elements turn on one at a time and so this is to be expected when the machine first turns on.
Run the purifier for 1 minute at the highest temperature setting.
NB: The heating elements will only work with the airflow facing forwards.
Target temperature
The heater will not operate unless the target temperature is above the room temperature. The temperature set on the machine is the target temperature of the room, not the temperature of the fan; the temperature from the fan when in heating mode will not change.
Press the red temperature control button until the digital display on the Main body shows 37°C.
Reduced airflow
When using heating mode, the machine is working harder to both heat and circulate the air. Whilst doing so, the machine intelligently monitors the current drawn so it doesn't trip the domestic circuit.
The machine will prioritise heating the air, so you may find the airflow feels reduced in heating mode.
Check and clean loop amplifier
The following areas should be checked and cleaned to maintain the machine's performance.
Clean the loop amplifier with a dry or damp cloth.
Ensure that the narrow opening is free of obstructions.
Check and clean Main body
Clean the shroud of the Main body with a dry cloth.
Use a soft brush to clear any blockages from the holes.
Please select the appropriate option
Intermittent power
Dyson fan heaters and hot and cool purifiers have a positive safety feature where the machine deliberately switches off after 9 hours of continuous heating. This would also occur if the machine is set to auto and providing heat constantly for 9 hours. NB: This feature cannot be switched off.
Please select the appropriate option
Check using the remote control
Press the oscillation button on the remote.
If the using the buttons on the remote doesn't work, try changing the batteries.
Removing the battery
Unscrew the remote control's battery compartment.
Loosen the base and pull it away from the remote.
Replace the battery with type CR 2032.
Check with the Dyson Link app
Try using the Dyson Link app to control the oscillation.
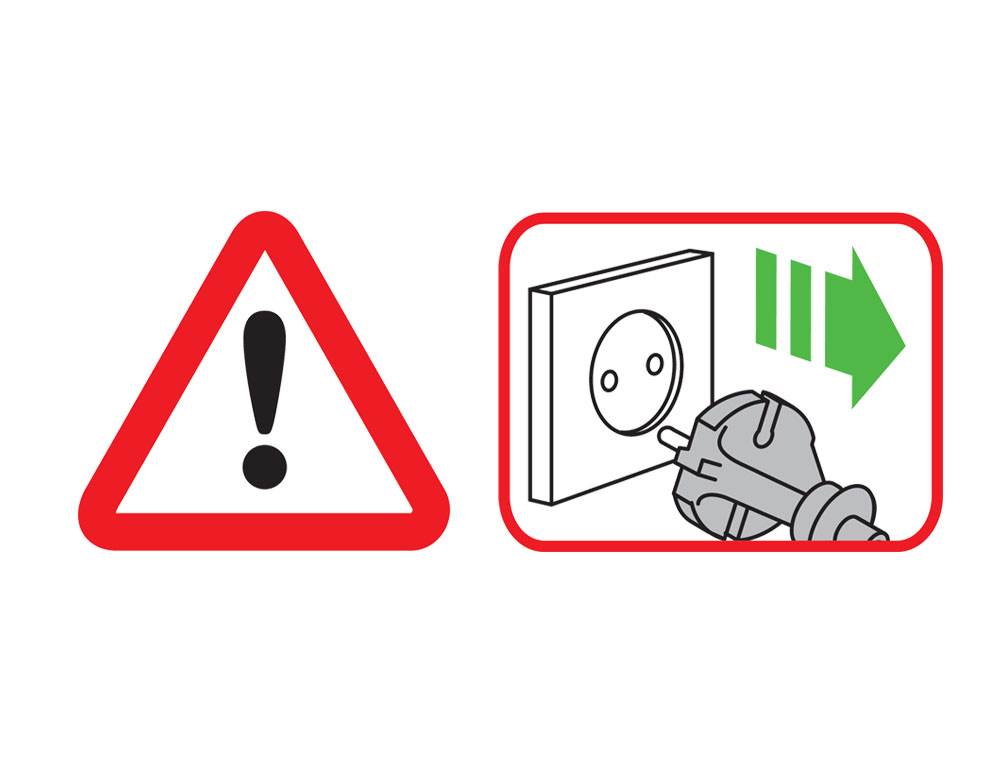
Check the electrics
Check that the household electrics are on.
Check the plug and power cord for signs of damage.
Try the machine in a different plug socket.
Ensure the cable is firmly plugged into the back of the machine.
NB: There will be a 3 second delay when switching on after plugging in for the first time or when changing plug sockets.
Has this resolved the problem?
Remote control check
Are you using a remote control for other appliances (such as a TV) near the machine?
Is the machine under direct sunlight or flourescent light?
The sensor on the machine that receives the infrared signal from the remote control may malfunction when exposed to direct sunlight or fluorescent light.
Please move the machine so that is not under direct sunlight or fluorescent light.
Unplug the machine
The operation of the remote control for other appliances is likely interfering with your Dyson machine.
To prevent further interference, unplug your Dyson machine when not in use.
Press the ON/OFF button on the Main body of the machine.
Point the remote directly at the front of the machine while pressing the button.
Open the Dyson Link app.
Under your Purifier, open the remote on the app and press the ON/OFF button.
Open the Dyson Link app.
Under your Purifier, open the remote on the app and press the ON/OFF button.
Check and clean machine
The following areas should be checked and cleaned to maintain the machine's performance.
Clean loop amplifier with a dry or damp cloth.
Clean the Main body with a dry cloth.
Clean inlet grille with a dry cloth or soft brush.
Your filter may need replacing.
Check filter life within the app, on the display screen, or for excessive build up of dust within the inlet.
Has this resolved the problem?
Please select the appropriate option
Please follow the steps in the video.
Find the text version of the step-by-step guide instead, under "Has this resolved the problem?"
Has this resolved the problem?
When the appliance detects that the non-washable carbon filters need replacing the display on the appliance will show a full bar.
Unplug the appliance from the mains electricity supply. Slide the buttons down on either side of the shrouds. The shrouds will release with the glass HEPA filters attached.
To remove the carbon filters: press the tabs on both sides of the filters.
Dispose of the carbon filters in the bin. Dispose of used filter units in accordance with local regulations.
Push the new carbon filters onto the base until secure.
Push the shrouds until they click back into position in the base.
Plug the appliance in to the mains electricity supply and switch on.
Press and hold the Oscillation button on the remote control. The display on the appliance will countdown from five, finishing with the default screen. The carbon filter level will be reset and the appliance is ready to use.
Please follow the steps in the video.
Find the text version of the step-by-step guide instead, under "Has this resolved the problem?"
Has this resolved the problem?
When the appliance detects that the nonwashable glass HEPA filters need replacing the display on the appliance will show a full bar.
Unplug the appliance from the mains electricity supply. Slide the buttons down on either side of the shrouds.
The shrouds will release with the glass HEPA filters attached.
Empty the glass HEPA filters directly into the bin by pushing in both the purple tabs on the shrouds. Dispose of used filter units in accordance with local regulations.
Push the new glass HEPA filters into the shrouds until secure. Push the shrouds until they click back into position in the base.
Press and hold the Night mode button on the remote control. The display on the appliance will countdown from five, finishing with the default screen. The glass HEPA filter level will be reset and the appliance is ready to use.
Please select the appropriate option
When your purifier switches from front to rear airflow there may be a clicking sound as the motor adjusts direction.
This is a normal sound for the purifier to make and is not an indicator of anything wrong with your machine.
Check base
Check around the base of the machine for any debris or obstructions.
Please try taking the filters off, then reattaching them to ensure they are correctly clicked into place. When attaching the filters, press in and up, and check there are no gaps or loose areas.
If the filters are not attached correctly, a triangle warning may show on your screen. If this happens, please reattach the filters securely.
Continuous monitoring
The continuous monitoring option is used for air quality, temperature and humidity data to be relayed to the machine and app at all times, even when you have turned the purifier off. The sensors have small fans that maintain airflow for continuous monitoring, but this should not cause any audible noise interference.
There may be instances when the display shows green, indicating high air quality, but the fan speed is still high. This is due to the machine constantly seeking to maintain a good air quality, and in scenarios such as rooms with leaky windows, the machine must work harder to maintain a good air quality.
This will only happen when the machine is set on auto. To turn off Auto mode, please select Manual mode, either using the remote control or on the app.
Please check the following on the app:
Swipe up to reveal the setting tab and tap to open options.
Swipe down to find the continuous monitoring option and tap to open.
Turn OFF the 'Collect data when in standby' option. (The icon will turn grey when turned off). Save the change by pressing 'Done' at the top right of the page.
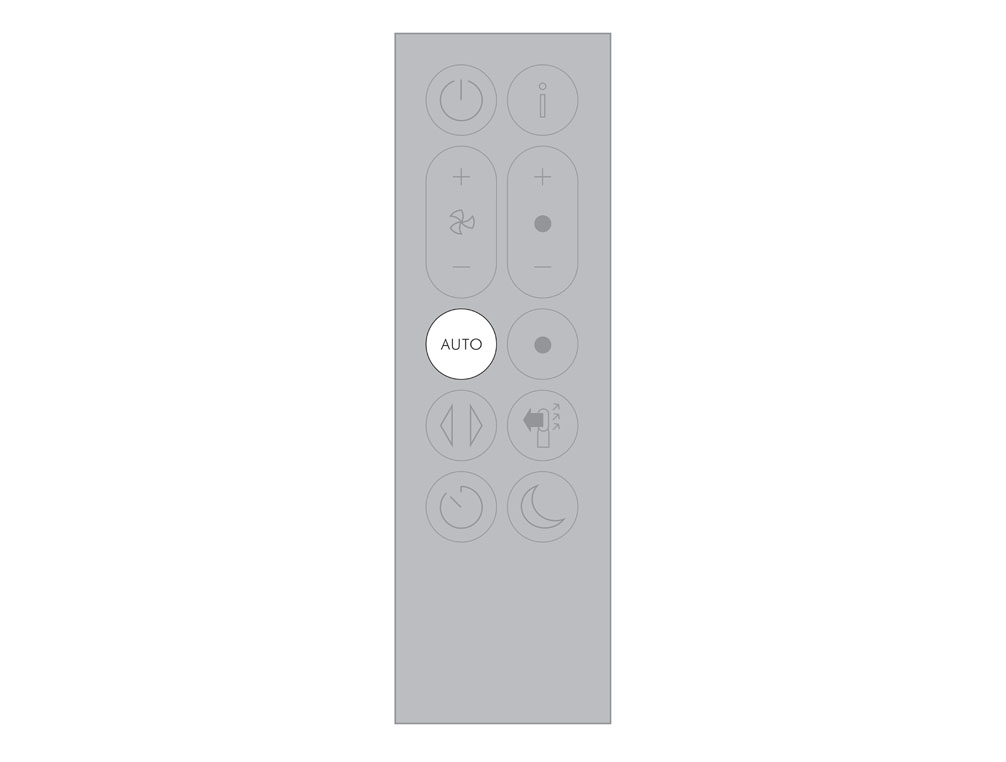
Continuous monitoring can now also be turned on/off by pressing the 'Auto' button on the remote control for five seconds.
Retest the machine.
Restart the machine
Unplug the machine and leave it for 10 seconds.
Ensure the power cord is plugged into the centre of the base.
Plug the machine back in and retest.
Check and clean loop amplifier
The following areas should be checked and cleaned to maintain the machine's performance.
Clean the loop amplifier with a dry or damp cloth.
Ensure that the narrow opening is free of obstructions.
Check and clean Main body
Clean the shroud of the Main body with a dry cloth.
Use a soft brush to clear any blockages from the holes.
Unplug the appliance from the mains electricity supply. Slide the buttons down on either side of the shrouds.
The shrouds will release with the glass HEPA filters attached.
Plug the machine back in and retest.
When not in use, unplug from the mains electricity supply.
To remove the carbon filters: press the tabs on both sides of the filters.

Plug the machine back in and retest.
Please ensure you have the most up to date software downloaded before beginning any checks. We strongly recommended enabling auto-updates in your Dyson Link app settings, to allow the most up to date software to be installed as soon as it is available.
Please select the appropriate option
Please select the appropriate option

The colour of the numbers and readings on the display are linked to the air quality of the respective category.
Green denotes a high air quality, with low pollutants, and red, low air quality with a high amount of pollutants.
Different categories can have different levels of pollutants at the same time, and will therefore display in different colours.
Night mode
When in Night mode, your machine will automatically sense the ambient light level and adjust the resting screen brightness accordingly.
If the room is bright, (for example, the lights are on), the screen's display will be set to minimum brightness. If the room is dark (lights off) the screen is turned off.
In both scenarios, when the machine is interacted with, the screen brightness will uplift.
The interface is designed to stay on the screen you select. Please ensure the remote is not being accidentally pressed.
There may be times when the display is showing green but the fan speed is still high.
This is due to the machine always trying to maintain high air quality. For example, in a room with leaky windows, the machine has to work harder via a higher Fan speed to maintain a high air quality.
If you want the fan to be quieter, you can choose to change the airflow direction to face backwards, or turn the machine to manual mode and lower the airspeed.
Fault
Reset the machine.

Unplug the machine and leave it for 10 seconds.
Plug the machine back in and retest.
Night mode is not working
When in Night mode, your machine will automatically sense the ambient light level and adjust the resting screen brightness accordingly.
If the room is bright, (for example, the lights are on), the screen's display will be set to minimum brightness. If the room is dark (lights off) the screen is turned off.
In both scenarios, when the machine is interacted with, the screen brightness will uplift.
If your screen is not displaying correctly (incorrect reading, white screen etc), please ensure you have updated all the software to the latest version.
When setting up a product, we strongly recommend enabling auto-updates, to allow your machine to easily download the latest software.
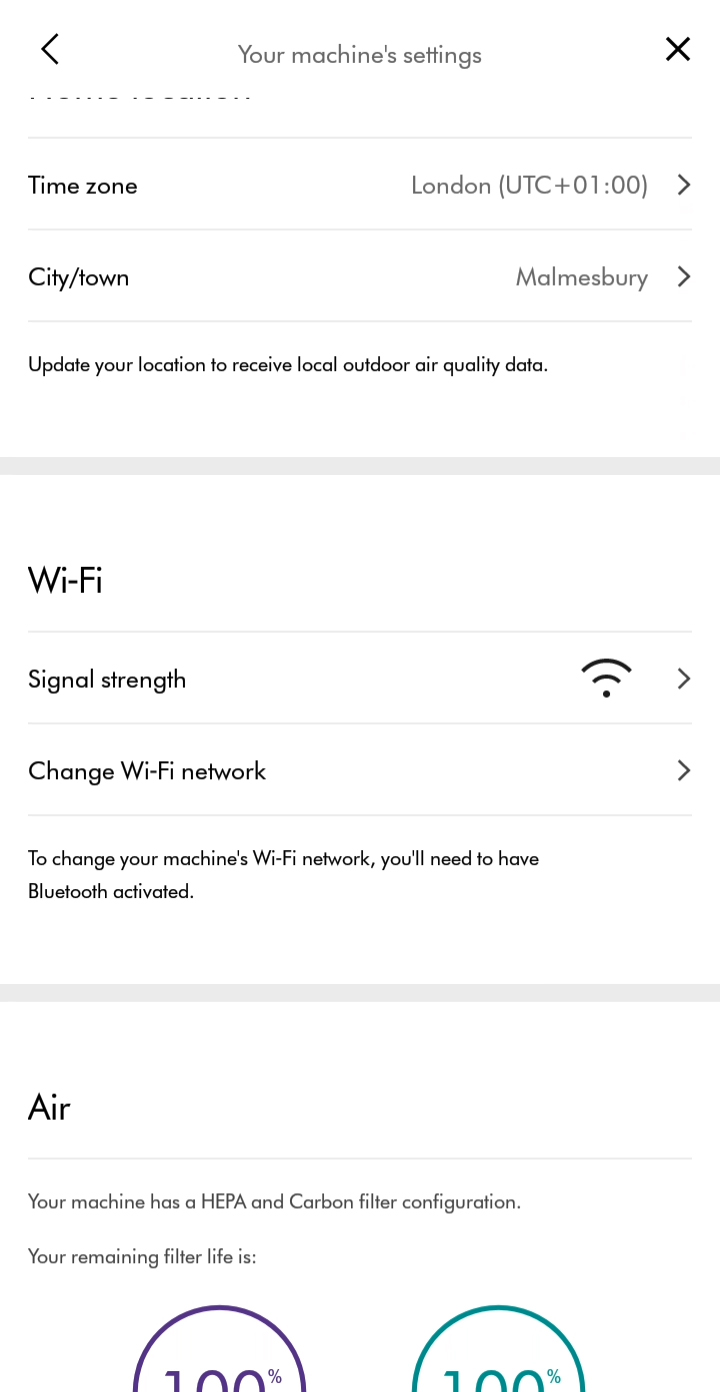
To enable auto-updates, open the Dyson Link app and click the cog at the top right of the home screen.
Click 'Your Purifier's settings'.
Scroll down to 'Software' and enable Auto-update.
Restart the machine
Switch off and unplug the machine.
Ensure all outside doors and windows are closed.
Vacuum the two sensor slots to the left of the LCD screen with a Dyson brush attachment.

Plug in and test the machine.
Switch off and unplug the machine.
Move the machine to another room.
Plug in and test the machine.
Continuous alert triangle
Switch off and unplug your machine.
Leave for 10 seconds and then plug your machine back in and switch it on.
Temporary alert triangle
If the alert appears on the LCD screen and then disappears, continue to use your machine.
The first time your purifier is turned on, the gas sensors will perform a self-calibration which takes one hour after which time they will work normally.
If the power cuts out within the hour, the initialisation period will continue from where it left off.
How long has your purifier been turned on for?
If your machine is new out the box and has not been turned on for over an hour, please allow a full hour to complete, with your purifier plugged into a secure power source.
Once the full hour has elapsed, turn the machine off and then on again, either with the main power button on the machine, or the remote control.
If your purifier has been plugged into a stable power source for over one hour, and the VOC and/or NO2 screens still do not show, please unplug your machine from the wall, leave for one minute, plug back in, and then turn on using either the main power button, or the button on the remote.
Please select the appropriate option
Oscillating range
The machine should oscillate within 350 degrees from one side to another.
Check remote control
Ensure the correct button on the remote is being pressed.
Remote control
Point the remote directly at the front of the machine while pressing the button.
Test cooling mode.
Test the heating control.
Test the airflow.
Test the sleep timer.
Changing the battery
Unscrew the remote control's battery compartment.
Loosen the base and pull it away from the remote. Replace the battery with type CR 2032.
Check with the Dyson Link app
Open the app and set the machine to oscillate.
If you do not have the Dyson Link app set up, please select 'No' as the next option.
Check machine base
Ensure all the feet are attached to the base of the machine.
Place the purifier on a flat, non-slip surface.
Check remote control
Ensure the correct button on the remote is being pressed.
Point the remote at the base of the purifier and test the controls.
Check if the Dyson Link app is working.
Changing the battery
Unscrew the remote control's battery compartment.
Loosen the base and pull it away from the remote. Replace the battery with type CR 2032.
Use both hands to lift the appliance out of the box, taking care to hold by the base of the appliance only. Do not lift out by the loop amplifier.
Slide the buttons down on either side of the shrouds. The shrouds will release with the glass HEPA filters attached.
Take the carbon filters out of the box and remove the protective packaging.
Attach both carbon filters to the appliance.

Position the shrouds onto the base and push gently until they click securely into place. Place the remote control on the top of the appliance with the buttons facing down. Plug in and switch ON.

Information menu
Scroll through the options to monitor the performance of your appliance.
The menu will also allow you to access information about the pollutants in the air and the temperature and humidity levels.
When a particular type of pollutant causes air quality to decrease, the symbol for that pollutant will show in the display.
Indoor air quality - 12 seconds
Monitor the current air quality with a graph showing the last 12 seconds of data.
Indoor air quality - 24 hours
Monitor the air quality with a graph showing the last 24 hours of data.
Particulate matter (PM2.5)
Microscopic particles up to 2.5 microns in size, suspended in the air we breathe. These include smoke, bacteria and allergens.
Particulate matter (PM10)
Larger microscopic particles up to 10 microns in size, suspended in the air we breathe. These include dust, mould and pollen.
Nitrogen dioxide and other oxidising gases
These potentially harmful gases are released into the air by combustion, for example the burning gas when cooking and in vehicle exhaust emissions.
Volatile organic compounds
VOC’s are typically odours that may be potentially harmful. These can be found in cleaning products, paints and new furnishings.
Indoor temperature
Monitor the ambient temperature to help maintain a comfortable environment.
Indoor humidity
The amount of water vapour in the air, shown as a percentage of the maximum possible humidity at the current temperature.
Filters
The amount of pollution captured by the filters is shown in the display. When the filter is full, the display will flash to remind you which filter needs changing.
WiFi
The current status of connection to the WiFi network.
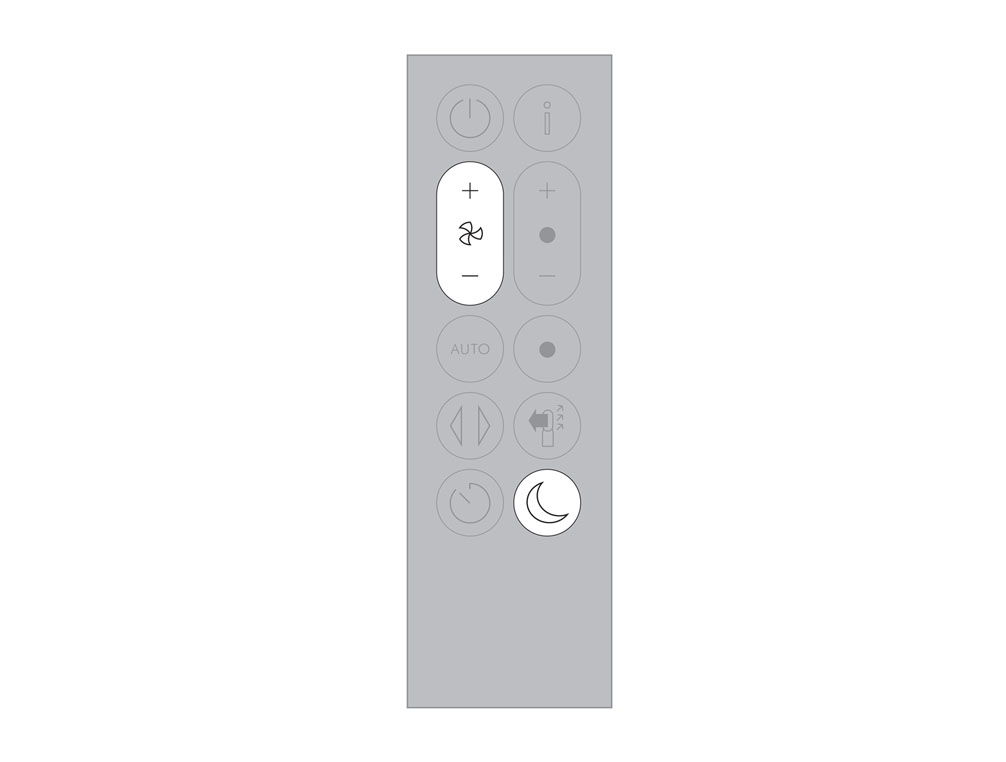
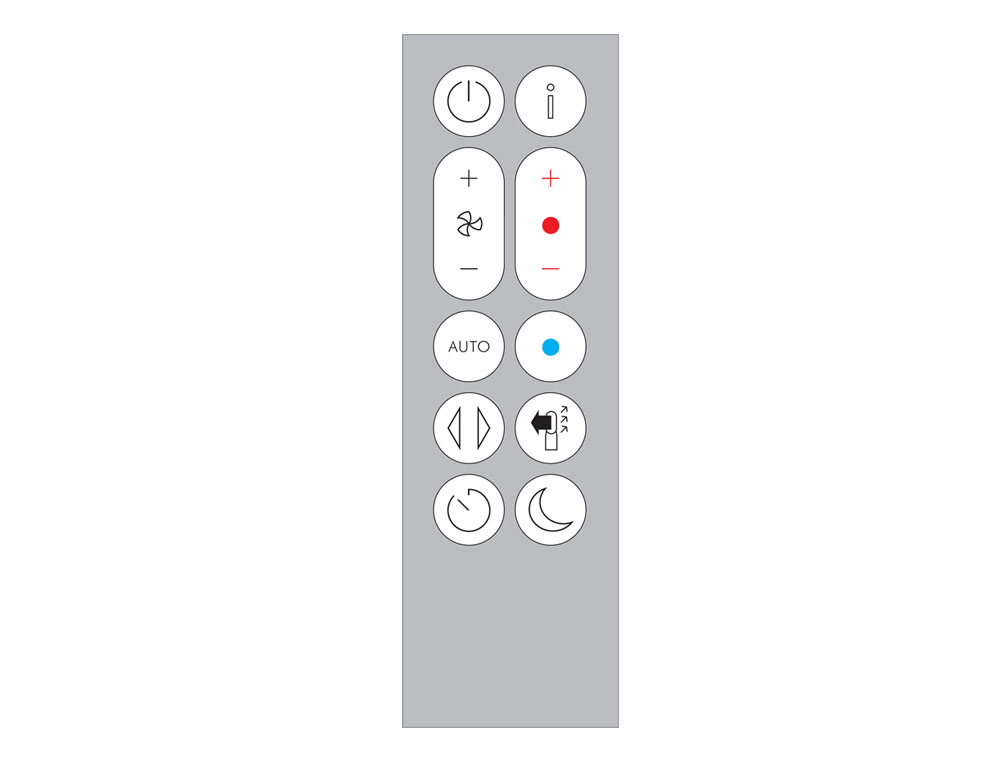
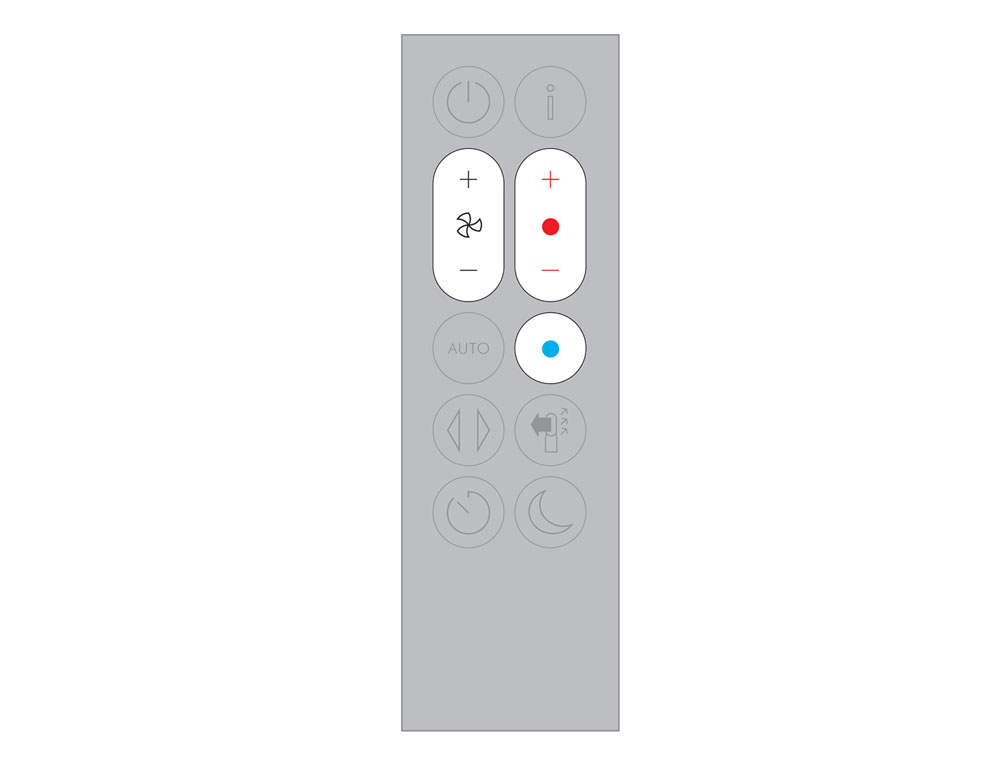
Using the remote control
To operate, point the remote control toward the front of the base.
On/Off
Press the power ON/OFF button on the appliance or remote control to stop the purifier. The appliance will continue to monitor the air quality.

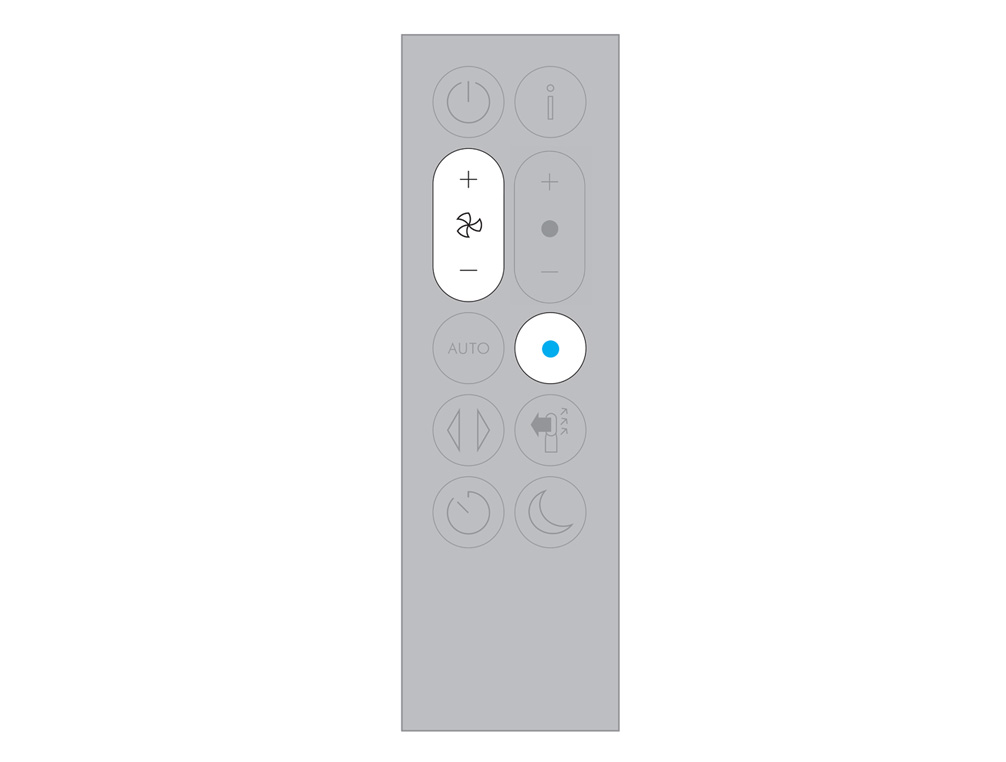
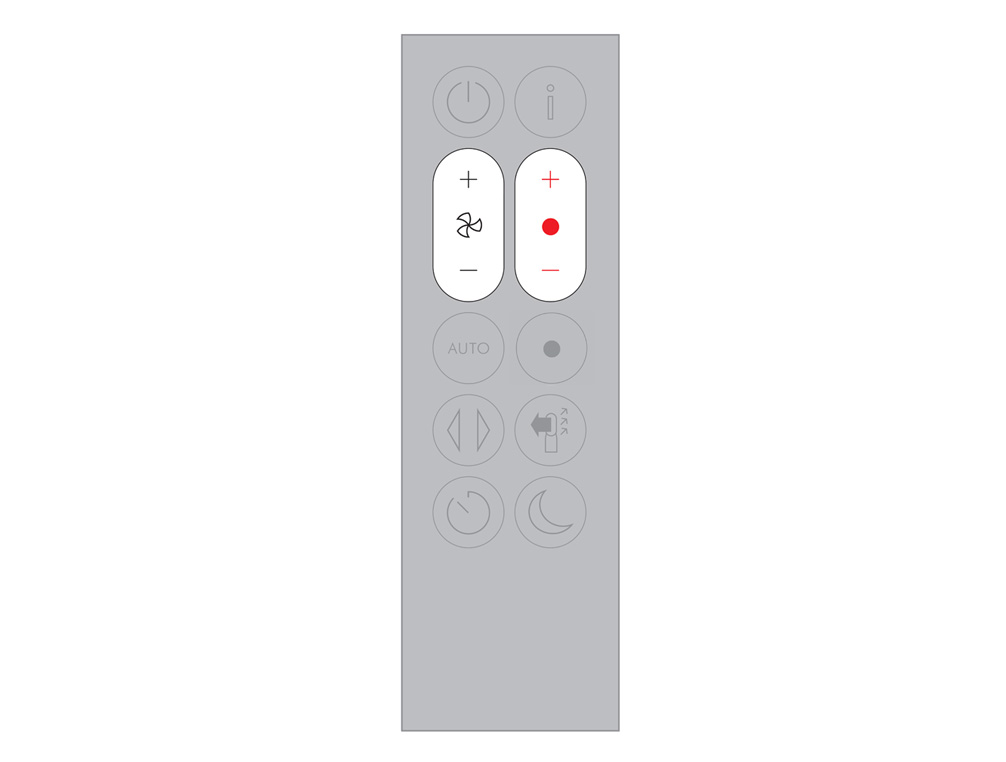
Airflow speed
Press the Airflow speed button to increase and decrease the airflow speed.
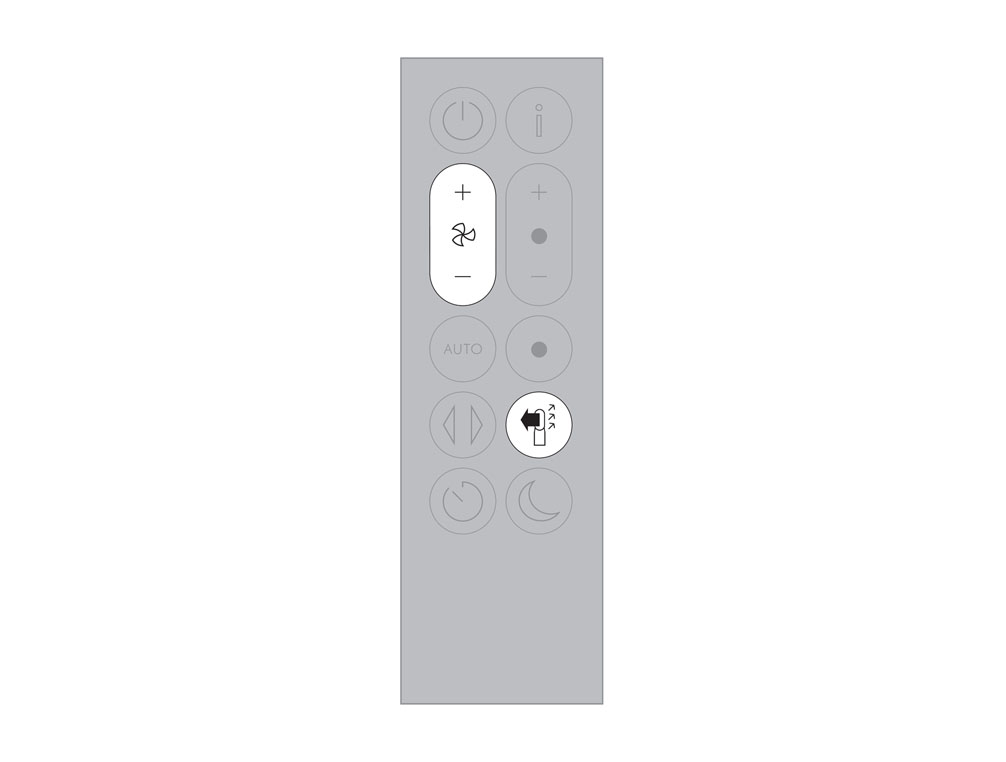
Oscillation On/Off
Press the Oscillation button to scroll through the options from 0 to 350.
Customise your oscillation settings in the Dyson Link app and it will appear as an option as you scroll through.
Information menu
Scroll through the options to monitor the performance of your appliance.
The menu will also allow you to access information about the pollutants in the air and the temperature and humidity levels.
When a particular type of pollutant causes air quality to decrease, the symbol for that pollutant will show in the display.

Auto mode
Set your appliance to Auto mode and the on-board sensors will intelligently adjust the settings of the appliance according to the air quality.
Air quality: your appliance will pause when the target air quality has been reached, switching on again when the air quality levels drop.
Airflow speed: The airflow speed will increase until the target air quality and temperature have been reached.
Night mode: Your appliance will only run with Airflow speeds from 1 to 4.
Airflow direction
Press the Airflow direction button to change the direction of airflow from front to back.
Your appliance will continue to purify in both settings.
Heating mode will only function when the airflow direction is set to the front. If airflow direction is changed to the back, your purifier will change to cooling mode.
Night mode
Night mode will dim the display and the appliance will run more quietly, making it ideal for use while sleeping. If Auto mode has been set, Night mode will reduce airflow speeds to range from 1 to 4. You can manually change the airflow from 1-10. Customise your Night mode settings in the Dyson Link app.
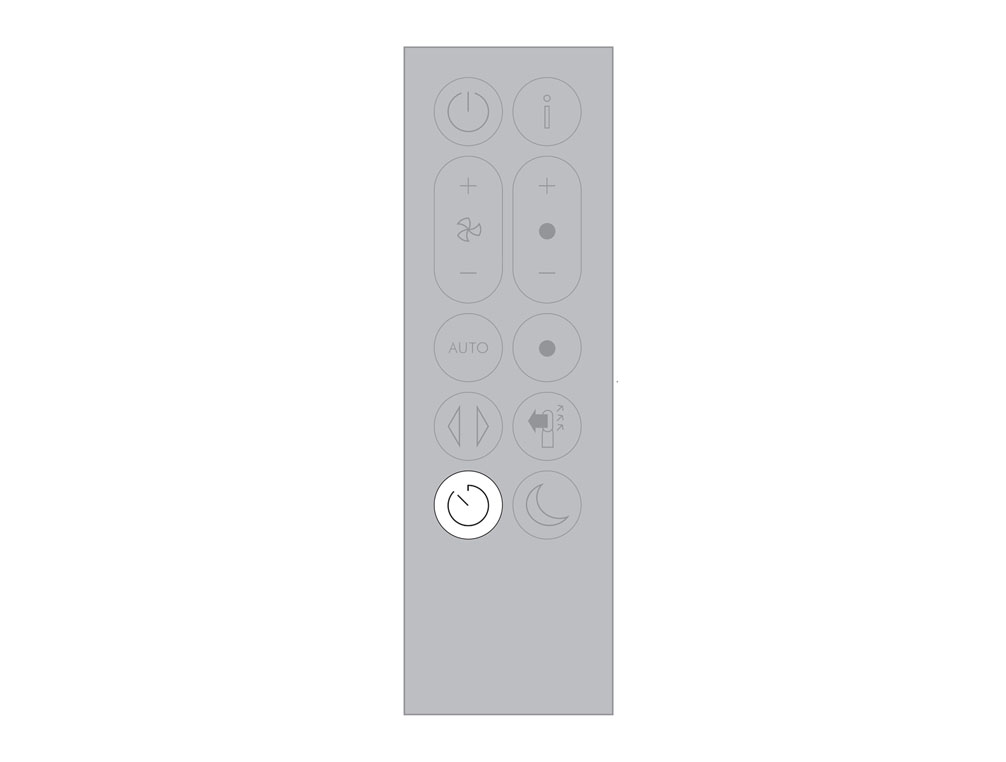
Sleep timer
Your appliance will turn off automatically after the selected amount of time.
To set the time: Press the button to scroll through the time options.
Once activated press the Sleep timer button once to see the time selected.
To cancel the Sleep timer: Press the Sleep timer button twice.
Cooling mode
Press the blue Cooling mode button to enter Cooling mode.
To adjust the airflow speed use the airflow control button or use the auto purification mode for automatic control.
Heating control
Use the heating control to set the desired room temperature. The appliance will then automatically manage the temperature until the target has been reached.
Finding the machine serial number
The serial number and WiFi information can be found in the following locations:
On the front of the user guide.
On a removable sticker on the front of the purifier.
On your purifier, located underneath the filter.
We need a little more information to help us solve your issue.
Please contact our customer service team on 01-475-7109, or directly on Live Chat through our Digital Assistant by clicking the purple icon at the bottom of the page. You can start a conversation with an Expert by clicking the agent icon at the bottom left of the chat window.
We're glad the problem's been solved.
Please let us know if there's anything else we can help you with.
The Dyson guarantee

'How to ' videos and tips

Exclusive owner benefits

Expert advice. 7 days a week.

Hassle-free repairs and replacement
Please get in touch.
Our experts are ready to help you.
UK based helpline open
8:00am- 8:00pm Monday to Friday
8:00am- 6:00pm Saturday and Sunday
Further help
Dyson Pure Hot+Cool™ White/Silver