Popular queries
Remove the bin and cyclone
Press the release to remove the cyclone assembly from the cylinder.

Remove the pre-filter
With the bin removed, pull the pre-filter out from the top of the cyclone.

Remove the post-filter
Turn the central locking dial on the outer cover of the ball anti-clockwise until the cover is released.
Lift off the cover, place your fingers under the two raised tabs and lift out the filter.

Wash the pre-filter
Run cold water through the open end of the filter for approximately 10 seconds.
Turn the filter up side down and tap 10 times.
Squeeze and twist the filter.
Repeat until clean.

Wash the post-filter
Run cold water through the filter until the water runs clear.
Tap the filter on the plastic rim only to ensure all excess water is removed.

Drying the pre-filter
Stand the filter on its wide, open end to dry. Leave to dry completely for a minimum of 24 hours.

Drying the post-filter
Leave to dry completely for a minimum of 24 hours.

Refit the pre-filter
Reinsert the pre-filter into the top of the cyclone and close the lid on the assembly.

Refit the post-filter
Replace the post-filter and post-filter cover.

Refit the bin
Refit the cyclone back onto the cylinder and ensure it clicks into place.
Please select the appropriate option


Test the suction
When checking the suction it's normal to hear a pulsating noise; this is a protection feature of the digital motor.
Remove the floor tool from the extension tube by pressing the release catch on the end of the extension tube.

Press the release catch on the extension tube to extend fully, ensuring it 'clicks' into place.

Place your hand over the end of the extension tube and test the suction.

Is the suction strong or weaker than usual?
Check for blockages
Checking the Turbine head openings.
With the Turbine head removed, check the openings on the tool for blockages and remove as necessary.

Unlock the Brush bar end cap
Use a coin to unlock the fastener marked with a padlock.

Remove the Brush bar
Carefully remove the Brush bar and clear any debris.

Please follow the next step.
Remove the base plate
To gain access to blockages in the floor tool, remove the soleplate by using a coin to loosen the screw marked with a padlock.

Check the opening for blockages and remove as necessary.

Refit the base plate and lock it in place.

Refit the Brush bar and end cap.

Test the machine
Reassemble and test the machine.
Has this resolved the problem?
Check the extension tube, Wand handle and hose
Separate the extension tube from the Wand handle by pressing the release catch on the Wand handle.

Remove the Wand handle from the hose by pressing the release catch on the hose.

Remove the hose by pressing the release catch.

Check the extension tube, Wand handle and hose for blockages and remove as necessary.

Check the duct and hose inlet
Press the release button at the top of the handle and remove the bin from the machine.

Check the duct grille and hose inlet for damage or blockages and remove as necessary.

Check the cyclone and bin for damage or blockages and remove as necessary.

Reassemble and test the machine.
Has this resolved the problem?
Remove the bin and cyclone
Press the release to remove the cyclone assembly from the cylinder.
Remove the pre-filter
With the bin removed, pull the pre-filter out from the top of the cyclone.
Remove the post-filter
Turn the central locking dial on the outer cover of the ball anti-clockwise until the cover is released.
Lift off the cover, place your fingers under the two raised tabs and lift out the filter.
Wash the pre-filter
Run cold water through the open end of the filter for approximately 10 seconds.
Turn the filter up side down and tap 10 times.
Squeeze and twist the filter.
Repeat until clean.
Wash the post-filter
Run cold water through the filter until the water runs clear.
Tap the filter on the plastic rim only to ensure all excess water is removed.
Drying the pre-filter
Stand the filter on its wide, open end to dry. Leave to dry completely for a minimum of 24 hours.
Drying the post-filter
Leave to dry completely for a minimum of 24 hours.
Refit the pre-filter
Reinsert the pre-filter into the top of the cyclone and close the lid on the assembly.
Refit the post-filter
Replace the post-filter and post-filter cover.
Refit the bin
Refit the cyclone back onto the cylinder and ensure it clicks into place.
Has this resolved the problem?
Check the extension tube, Wand handle and hose
Separate the extension tube from the Wand handle by pressing the release catch on the Wand handle.
Remove the Wand handle from the hose by pressing the release catch on the hose.
Remove the hose by pressing the release catch.
Check the extension tube, Wand handle and hose for blockages and remove as necessary.
Check the duct and hose inlet
Press the release button at the top of the handle and remove the bin from the machine.

Check the duct grille and hose inlet for damage or blockages and remove as necessary.
Check the cyclone and bin for damage or blockages and remove as necessary.
Reassemble and test the machine.
Did checking the tube and hose for blockages resolve the problem?
Removing the bin
Empty as soon as the dirt reaches the level of the MAX mark – do not overfill.
To remove the cyclone and clear bin, push the release button to the side of the carrying handle, as shown.
The carrying handle will be released. Remove the cyclone and clear bin unit.
Emptying the bin
To release the dirt, press the red bin release button.
NB: To minimise dust/allergen contact when emptying, encase the clear bin tightly in a plastic bag and empty. Remove the clear bin carefully. Seal the bag tightly, dispose as normal.

Separate the bin and cyclone
To access the shroud, ensure the bin is empty and bin base is open. Press release button to remove bin.
Clean the shroud
WARNING: Do not use detergents, polishes or air fresheners to clean the clear bin.
Clean the cyclone shroud with a dry cloth or brush. Do not use water to clean the cyclone.
Clean the bin
The clear bin can be cleaned using clean water.
Ensure the bin is completely dry before reassembling the machine.
Refitting the bin
Close the clear bin base so that it clicks into place and is secure.
When refitting, locate the slot on the bottom of the bin onto a large tab on the lower duct.
Close the handle down until it clicks into place.
Has this resolved the problem?
Test the suction
A whistle suggests that air is escaping due to a missing seal or blockage.
Remove the floor tool from the extension tube by pressing the release catch on the end of the extension tube.
Press the release catch on the extension tube to extend fully, ensuring it 'clicks' into place.

Place your hand over the end of the extension tube and test the suction.
Is the suction strong or weaker than usual?
Test the suction
Remove the floor tool from the extension tube by pressing the release catch on the end of the extension tube.
Press the release catch on the extension tube to extend fully, ensuring it 'clicks' into place.
Place your hand over the end of the extension tube and test the suction.
Please select the appropriate option
A damp or musty smell is caused when dust in the cyclone has come into contact with water.
It may not be a direct contact with water, for example when vacuuming pet hair that is slightly damp, this moisture will combine with the dust in the cyclone causing the smell.
Additionally the smell may occur if the filter goes back into the machine wet.
Removing the bin
Empty as soon as the dirt reaches the level of the MAX mark – do not overfill.
To remove the cyclone and clear bin, push the release button to the side of the carrying handle, as shown.
The carrying handle will be released. Remove the cyclone and clear bin unit.
Emptying the bin
To release the dirt, press the red bin release button.
NB: To minimise dust/allergen contact when emptying, encase the clear bin tightly in a plastic bag and empty. Remove the clear bin carefully. Seal the bag tightly, dispose as normal.
Separate the bin and cyclone
To access the shroud, ensure the bin is empty and bin base is open. Press release button to remove bin.
Clean the shroud
WARNING: Do not use detergents, polishes or air fresheners to clean the clear bin.
Clean the cyclone shroud with a dry cloth or brush. Do not use water to clean the cyclone.
Clean the bin
The clear bin can be cleaned using clean water.
Ensure the bin is completely dry before reassembling the machine.
Refitting the bin
Close the clear bin base so that it clicks into place and is secure.
When refitting, locate the slot on the bottom of the bin onto a large tab on the lower duct.
Close the handle down until it clicks into place.
Has this resolved the problem?
Check for blockages
Checking the Turbine head openings.
With the Turbine head removed, check the openings on the tool for blockages and remove as necessary.
Unlock the Brush bar end cap
Use a coin to unlock the fastener marked with a padlock.
Remove the Brush bar
Carefully remove the Brush bar and clear any debris.
Please follow the next step.
Keep hold of the plug as you press the button down, and allow the cord to feed back into the machine.
Using the cable
Ensure the machine is switched off.

Unplug the machine before rewinding the cable.

If the cable does not rewind, firmly pull it out and fully extend it until the red tape is visible.
The cord rewind button needs to be pressed down firmly to retract the cord for storage after use. When the button is pressed down far enough you should feel and hear a click, and the cord will retract.

Has this resolved the problem?
Test the suction
If the machine is spitting out dust, there may be a blockage.
Remove the floor tool from the extension tube by pressing the release catch on the end of the extension tube.

Press the release catch on the extension tube to extend fully, ensuring it 'clicks' into place.
Place your hand over the end of the extension tube and test the suction.

Is the suction strong or weaker than usual?
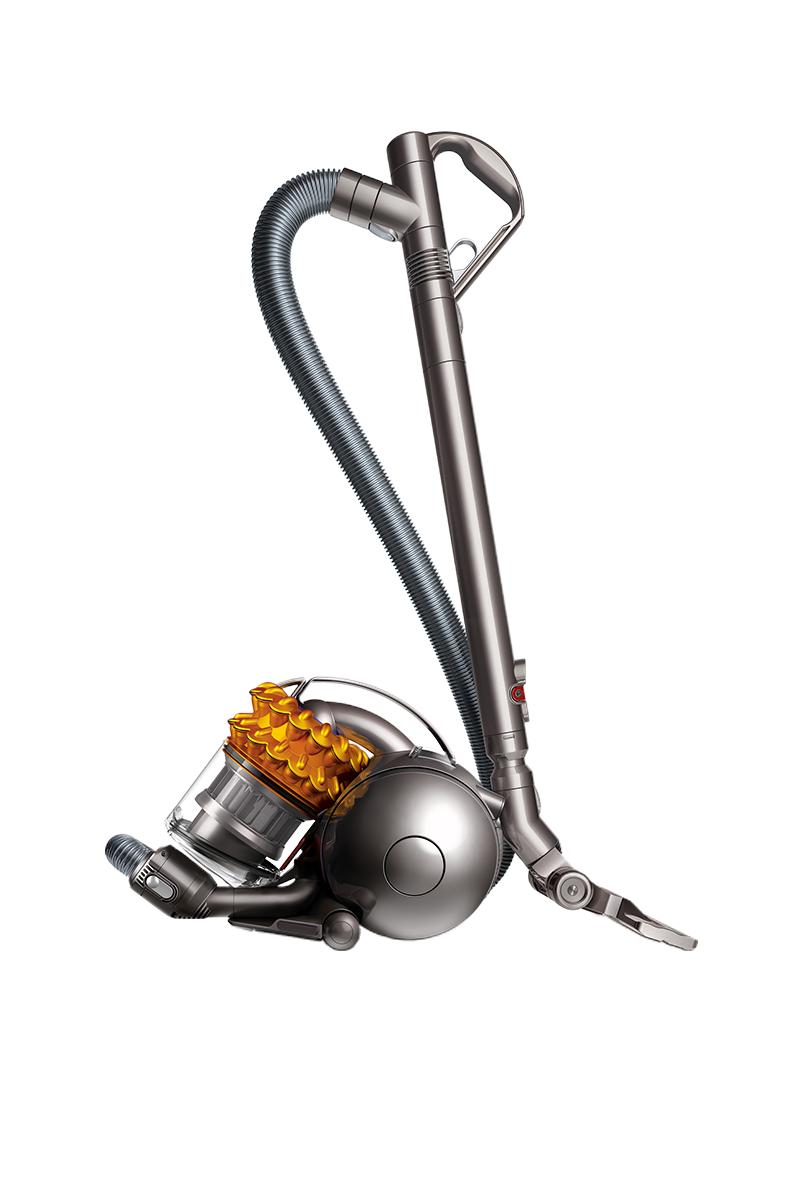
What's in the box?
- Vacuum cleaner.
- Extension tube.
- Wand handle.
- Dual cavity flat head
- Hose assembly.
- Accessory tools.
- User guide.
Assembling your machine
Attach the hose to the hose inlet on the front of the machine.
Clip the hose to the rear of the Wand handle.
Clip the Wand handle to the extension tube.
Press the release catch on the extension tube to extend, ensuring it 'clicks' into place.
Attach the floor tool to the extension tube.
Insert the tools into the holster and attach to the extension tube.

How to start vacuuming
- Always extend the power cord fully to the red tape before use.
- To switch 'ON' or 'OFF' press the power button located as shown.

Tools
Attach the accessory tools to either the extension tube, Wand handle or the hose as shown below, ensuring they click into place.

How to attach the accessories
Attach the accessory tools to either the extension tube, Wand handle or the hose as shown below, ensuring they click into place.
Using the extension tube
Press the release catch on the extension tube to extend fully, ensuring it 'clicks' into place.
Hold the plug when rewinding onto cable reel. Do not allow the plug to whip when rewinding.
Rewinding the cable
Ensure the machine is switched off.
Unplug the machine before rewinding the cable.
To retract the cable, press the button firmly until it clicks and the cable rewinds.
Storing the tools
- Attach the tools to the tool holster.
- Clip the tool holster to the extension tube.

- Press the red button and collapse the extension tube fully.
- Store the floor tool by inserting it in the clip at the back of the Main body.

Carrying your Dyson machine
Carry the machine by the main handle on the body.
Do not press the cyclone release button or shake the machine when carrying or the cyclone could disengage, fall off and cause injury.

Serial number location
Underneath the machine between the wheels.

Removing the bin
Empty as soon as the dirt reaches the level of the MAX mark – do not overfill.
To remove the cyclone and clear bin, push the release button to the side of the carrying handle, as shown.
The carrying handle will be released. Remove the cyclone and clear bin unit.
Emptying the bin
To release the dirt, press the red bin release button.
NB: To minimise dust/allergen contact when emptying, encase the clear bin tightly in a plastic bag and empty. Remove the clear bin carefully. Seal the bag tightly, dispose as normal.
Separate the bin and cyclone
To access the shroud, ensure the bin is empty and bin base is open. Press release button to remove bin.
Clean the shroud
WARNING: Do not use detergents, polishes or air fresheners to clean the clear bin.
Clean the cyclone shroud with a dry cloth or brush. Do not use water to clean the cyclone.
Clean the bin
The clear bin can be cleaned using clean water.
Ensure the bin is completely dry before reassembling the machine.
Refitting the bin
Close the clear bin base so that it clicks into place and is secure.
When refitting, locate the slot on the bottom of the bin onto a large tab on the lower duct.
Close the handle down until it clicks into place.
Removing the bin
Empty as soon as the dirt reaches the level of the MAX mark – do not overfill.
To remove the cyclone and clear bin, push the release button to the side of the carrying handle, as shown.
The carrying handle will be released. Remove the cyclone and clear bin unit.
Emptying the bin
To release the dirt, press the red bin release button.
NB: To minimise dust/allergen contact when emptying, encase the clear bin tightly in a plastic bag and empty. Remove the clear bin carefully. Seal the bag tightly, dispose as normal.
Close the clear bin base so it clicks into place and is secure.
Refitting the bin
Place the clear bin and cyclone into position on the front of the Main body. The recess in the base of the clear bin must fit onto the lug on the locator bracket.
Push the carrying handle down so it clicks into place on the top of the clear bin and cyclone, ensuring it is secure.


Further help
DC47 Multi Floor Complete™