Let's get your machine working
Dyson Pure Cool Me™ (White/Fuchsia)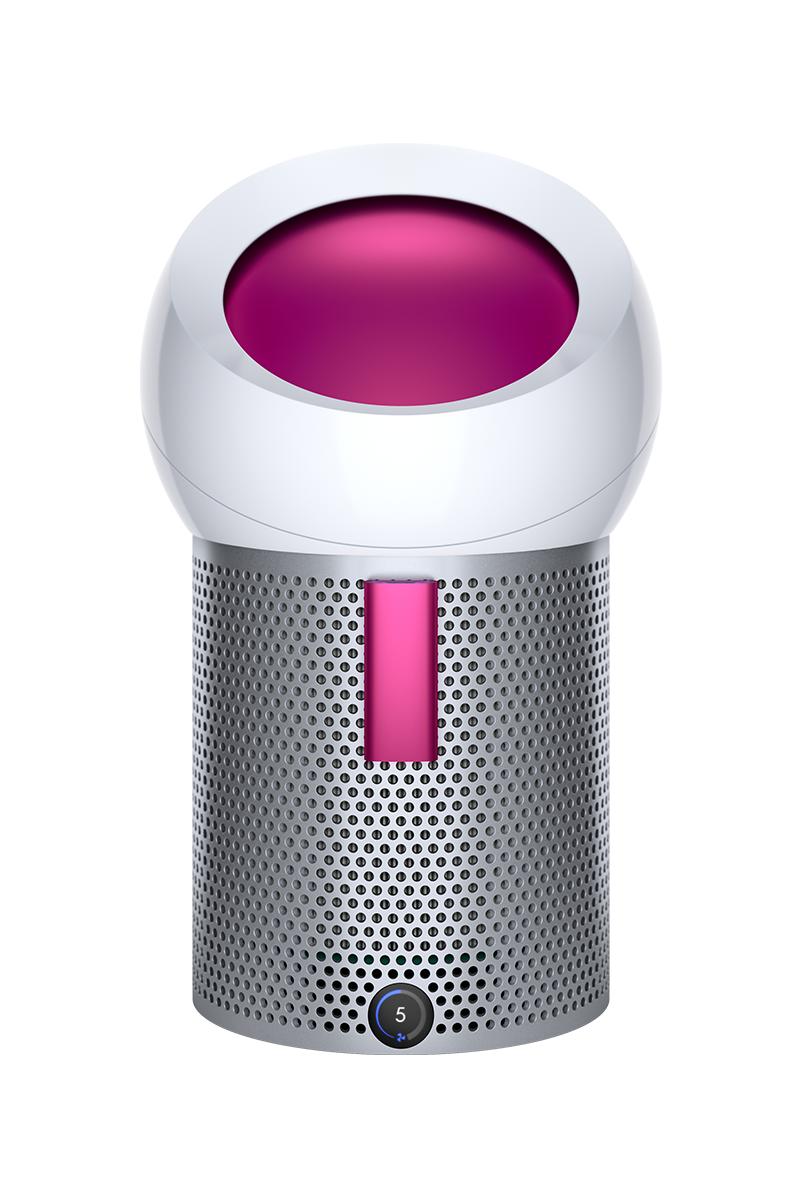
Let's get your machine working
Dyson Pure Cool Me™ (White/Fuchsia)
-
-
Cleaning the machine
-
More help required
-
There is a problem with my machine
-
Unusual noise
-
Unusual noise from Airflow
-
Check the airspeed
-
Issue not resolved, please speak to our Customer Support Team
-
Check the machine
-
Issue resolved
-
Yes
-
Refit the filter
-
Clicking noise
-
Clicking when oscillating
-
Unusual noise from Oscillation
-
Oscillation noise
-
Rattle noise
-
Performance
-
Airflow control
-
The airflow speed is not as powerful as it used to be
-
The airspeed is not as powerful as it used to be
-
The airflow speed won't change
-
Test the remote control
-
Test the other remote buttons
-
Changing the battery
-
Replacement part required
-
Issue not resolved, please speak to our Customer Support Team
-
Unable to change the direction of airflow
-
Check the airflow controls
-
Oscillation
-
The oscillation won't turn off
-
Check other remote functions
-
Changing the battery
-
Issue not resolved, please speak to our Customer Support Team
-
Issue not resolved, please speak to our Customer Support Team
-
Stopping oscillating
-
Issue resolved
-
Machine won't oscillate
-
Power or electrical issue
-
Oscillation with no power or airflow
-
Changing the battery
-
Test the machine
-
Issue not resolved, please speak to our Customer Support Team
-
Test the remote control
-
Check the other buttons on the remote control
-
Issue not resolved, please speak to our Customer Support Team
-
The other buttons on the remote do not work
-
Issue not resolved, please speak to our Customer Support Team
-
Does the machine turn off?
-
Machine starts operating on its own
-
Lighting issues
-
Lighting issues
-
Unplug the machine
-
Intermittent power
-
Issue not resolved, please speak to our Customer Support Team
-
Issue not resolved, please speak to our Customer Support Team
-
No power
-
Airflow but no oscillation
-
Test the remote control
-
No power to machine
-
Issue not resolved, please speak to our Customer Support Team
-
Issue not resolved, please speak to our Customer Support Team
-
Press the button
-
Unusual smell
-
Issue not resolved, please speak to our Customer Support Team
-
Unusual smell
-
Check the age of the filter
-
The filter needs replacing
-
Issue not resolved, please speak to our Customer Support Team
-
Spare filter
-
Changing the filter
-
Changing the filter - step by step
-
Visible issue
-
There is an issue with the display
-
Issue not resolved, please speak to our Customer Support Team
-
Fault
-
Issue not resolved, please speak to our Customer Support Team
-
Information screens
-
Fan speed indicator
-
Test the other buttons on the remote
-
Change the battery in the remote
-
Fan speed sleep timer icon
-
Filter information
-
Filter change indicator
-
Reset machine
-
Filter life measure
-
Filter reset icon
-
Oscillation
-
Sleep timer
-
Wrong power supply
-
Try a different plug socket
-
Triangle alert icon
-
Unable to remove filter from machine
-
No
-
Remote does not attach to the machine
-
Oscillation problem
-
Issue not resolved, please speak to our Customer Support Team
-
Part broken/replacement part
-
Replacement part required
-
Replacement part required
-
Replacement part required
-
Replacement part required
-
Replacement part required
-
Replacement part required
-
Remote Control not working
-
Unable to remove ball
-
Unable to attach the ball
-
Changing the filter
-
Changing the filter - step by step
-
Issue resolved
-
How to change the direction of airflow
-
User guide
-
Information screens
-
Fan speed indicator
-
Filter screen
-
Calibrating your filter
-
Filter change
-
Measuring the filter life
-
Oscillation mode
-
Sleep timer
-
Fan speed with sleep timer
-
Quick start guide
-
Getting started - step by step
-
How to use the remote control
-
Serial number location
-
Replacing the remote control battery
-
Replacing the remote control battery - step by step
-
Issue not resolved, please speak to our Customer Support Team
-
Popular queries
We need a little more information to help us solve your issue.
Please contact our customer service team on 01-475-7109, or directly on Live Chat through our Digital Assistant by clicking the purple icon at the bottom of the page. You can start a conversation with an Expert by clicking the agent icon at the bottom left of the chat window.
We're glad the problem's been solved.
Please let us know if there's anything else we can help you with.
The Dyson guarantee

'How to ' videos and tips

Exclusive owner benefits

Expert advice. 7 days a week.

Hassle-free repairs and replacement
We need a little more information to help us solve your issue.
But our Customer Support Team will be able to solve your problem.
Please contact our customer service team on 01-475-7109, or directly on Live Chat through our Digital Assistant by clicking the purple icon at the bottom of the page. You can start a conversation with an Expert by clicking the agent icon at the bottom left of the chat window.
You might need a replacement part.
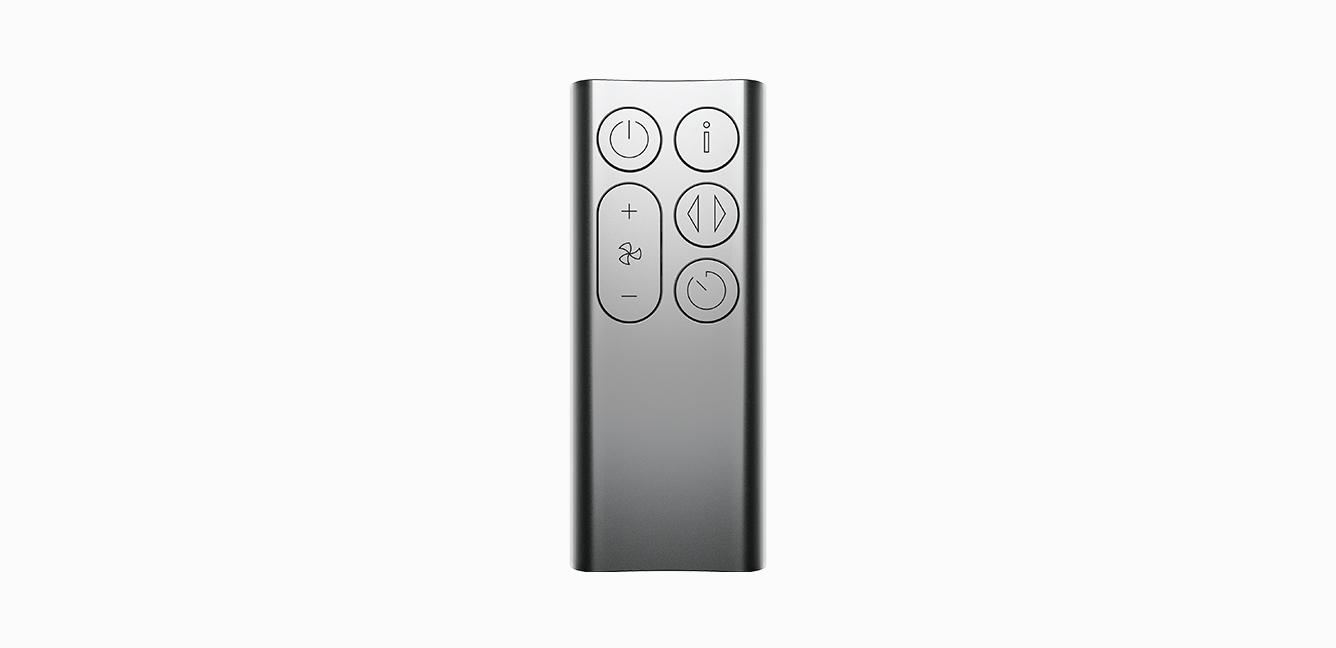
It looks like the Remote control is not working. You can solve this by ordering a new one below.
Remote control
Part no. 970192-04
Replacement remote control for your Dyson purifier.
€46.12
Remote control
Part no. 970192-04
Replacement remote control for your Dyson purifier.
€46.12
€46.12
We need a little more information to help us solve your issue.
Please contact our customer service team on 01-475-7109, or directly on Live Chat through our Digital Assistant by clicking the purple icon at the bottom of the page. You can start a conversation with an Expert by clicking the agent icon at the bottom left of the chat window.
We're glad the problem's been solved.
Please let us know if there's anything else we can help you with.
The Dyson guarantee

'How to ' videos and tips

Exclusive owner benefits

Expert advice. 7 days a week.

Hassle-free repairs and replacement
We need a little more information to help us solve your issue.
But our Customer Support Team will be able to solve your problem.
Please contact our customer service team on 01-475-7109, or directly on Live Chat through our Digital Assistant by clicking the purple icon at the bottom of the page. You can start a conversation with an Expert by clicking the agent icon at the bottom left of the chat window.
We need a little more information to help us solve your issue.
But our Customer Support Team will be able to solve your problem.
Please contact our customer service team on 01-475-7109, or directly on Live Chat through our Digital Assistant by clicking the purple icon at the bottom of the page. You can start a conversation with an Expert by clicking the agent icon at the bottom left of the chat window.
We need a little more information to help us solve your issue.
But our Customer Support Team will be able to solve your problem.
Please contact our customer service team on 01-475-7109, or directly on Live Chat through our Digital Assistant by clicking the purple icon at the bottom of the page. You can start a conversation with an Expert by clicking the agent icon at the bottom left of the chat window.
We're glad the problem's been solved.
Please let us know if there's anything else we can help you with.
The Dyson guarantee

'How to ' videos and tips

Exclusive owner benefits

Expert advice. 7 days a week.

Hassle-free repairs and replacement
Please select the appropriate option
Cleaning the machine
Please clean the machine and check for blockages.
Unplug your Dyson personal purifying fan from the mains electricity supply before cleaning your machine.
Look for blockages in the air inlet holes on the shroud and the ball.
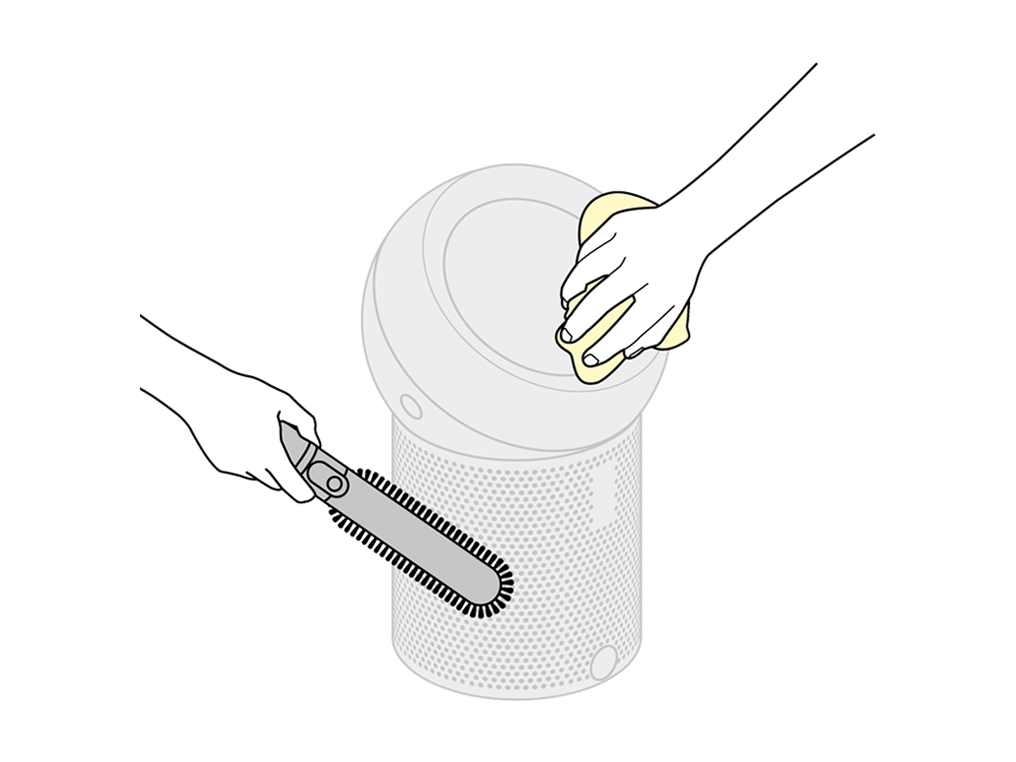
Brush the outside of your machine with a soft brush to remove any debris from the shroud. Use a soft, dry, lint-free cloth to clean the ball and dome.
Deep clean
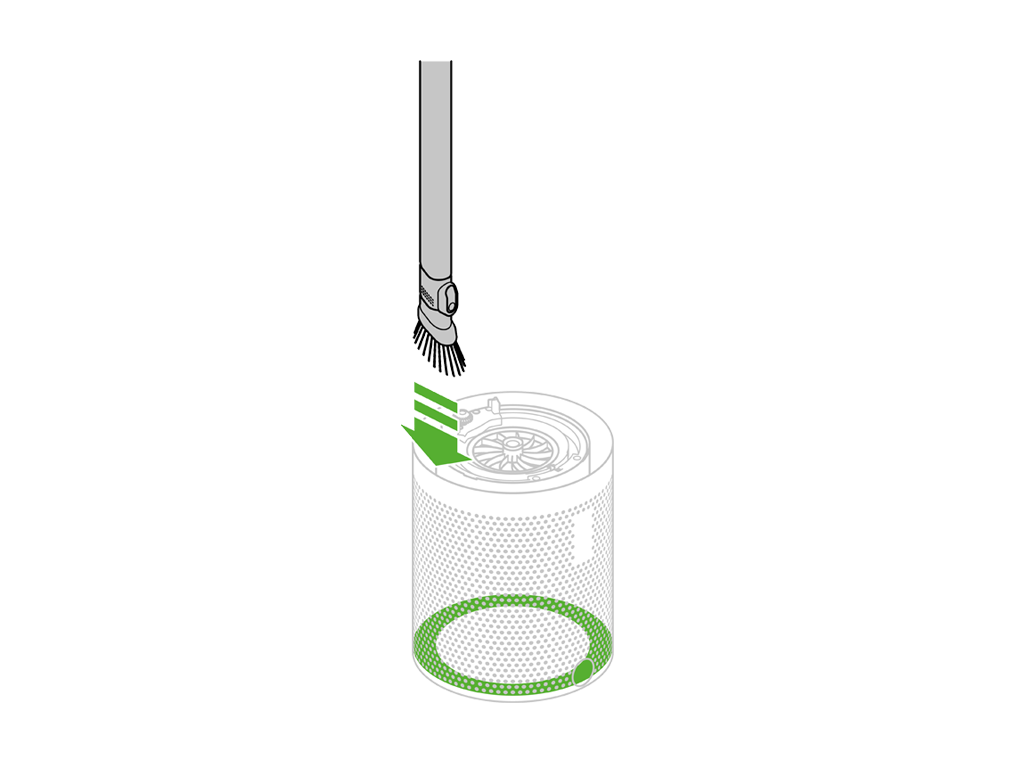
When changing your filter, give your machine a thorough clean. With the filter removed, use a Dyson flexi crevice tool (or long handled clean paint brush) to remove any debris from the base of the machine.
Do not use detergents or polishes to clean the appliance.
Dust may accumulate on the surface of the machine. Wipe dust from the dome and ball, shroud and other parts with a dry or damp cloth.
Please select the appropriate option
Please select the appropriate option
Please select the appropriate option
Test the remote control
Test the airflow button on the remote.
Airflow
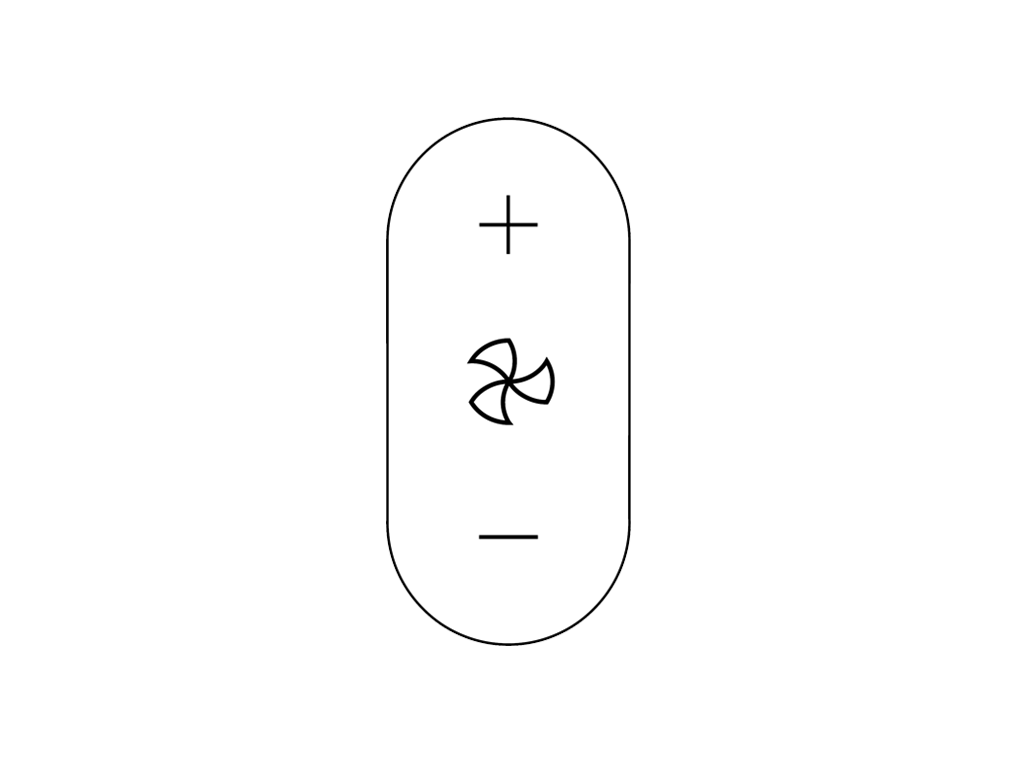
Point the remote directly at the front of the machine while pressing the button.
Check the ball
Remove the ball, push the side buttons at the same time to release the ball.

Check there are no signs of blockage around the machine and ball.
Use a soft brush to remove any debris.
Check the dome
Check the dome airflow controls on the ball to ensure there are no signs of blockage.
Check filter
Lift the filter out of the machine.
Refit the filter by dropping it into the base of the machine ensuring that it's in place securely.
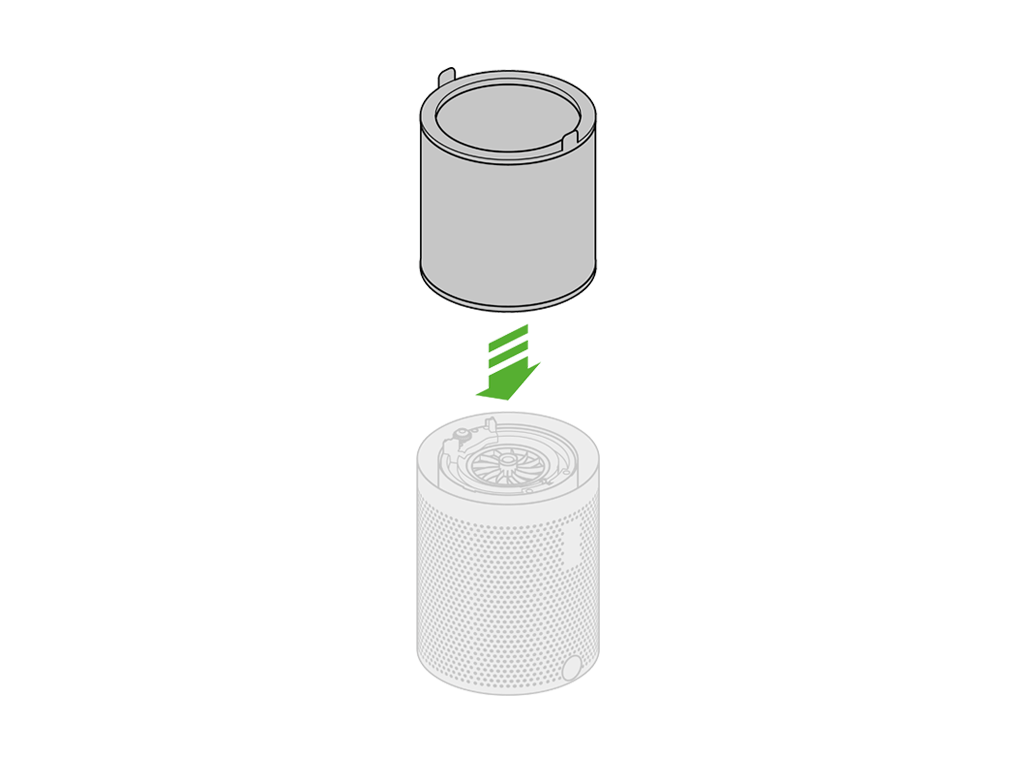
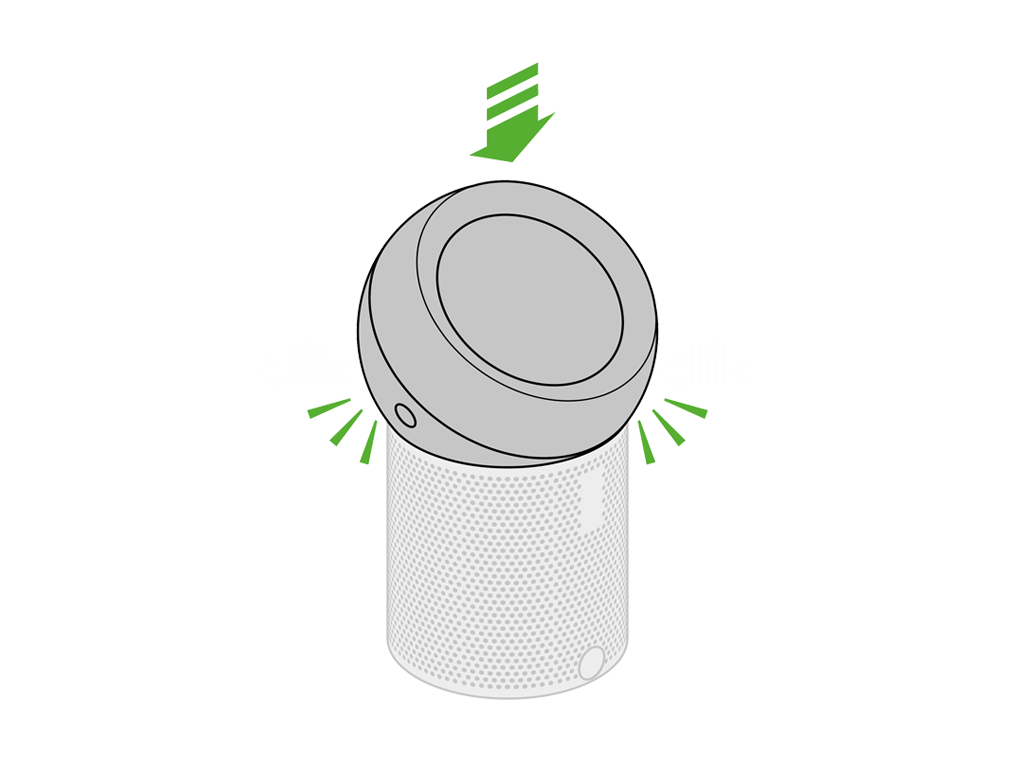
Refit by firmly pushing the ball back into position, making sure it clicks securely into place with the ball aligned with the Dyson logo on the Main Body.
Check the ball
Remove the ball, push the side buttons at the same time to release the ball.

Check there are no signs of blockage around the machine and ball.
Use a soft brush to remove dust and debris.
Check the dome
Check the dome airflow controls on the ball to ensure there are no signs of blockage.
Refit by firmly pushing the ball back into position, making sure it clicks securely into place with the ball aligned with the Dyson logo on the Main Body.

Check the filter
Remove the ball, push the side buttons at the same time to release the ball.

Try lifting the filter out of the machine using its tabs.
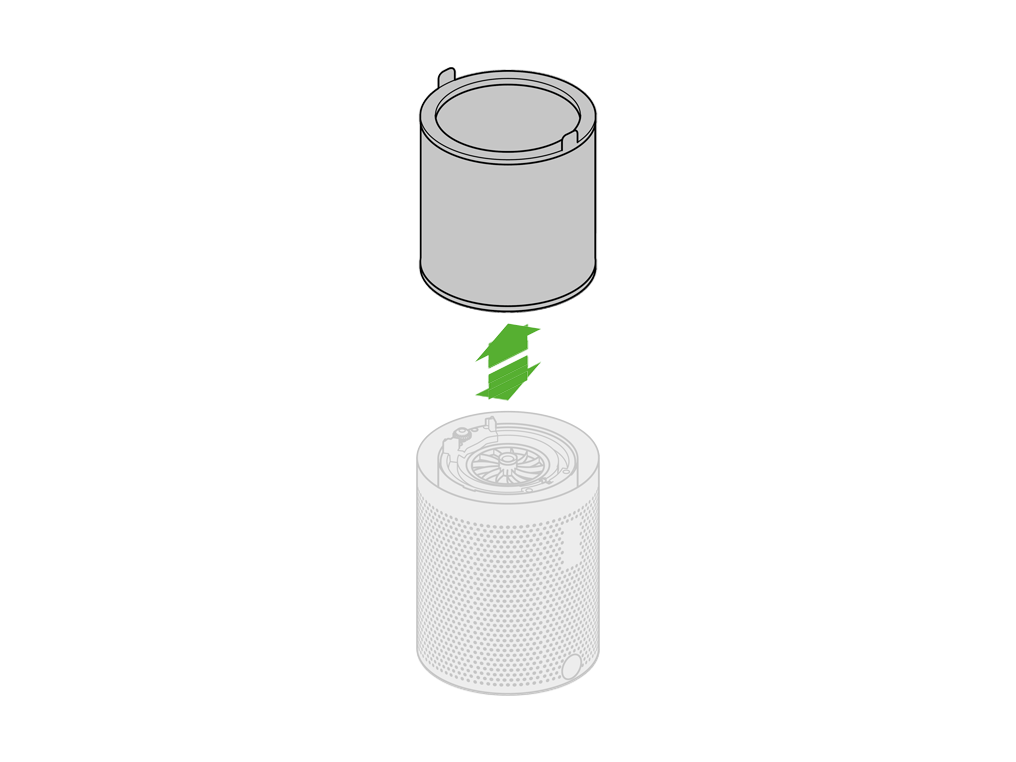
Refit the filter by dropping it into the base of the machine ensuring that it's in place securely.

Refit by firmly pushing the ball back into position, making sure it clicks securely into place with the ball aligned with the Dyson logo on the Main Body.

Check ball
Remove the ball and check around the ball of the machine for any debris or obstructions.
Please remove the filter, then refit it to ensure it is correctly in place.
Please refit the filter securely by dropping it into the base of the machine.
Test oscillation
Press the oscillation button on the remote.
Oscillation
Point the remote directly at the front of the machine while pressing the button.
Check ball
Remove the ball from the machine by pressing the side buttons at the same time.

Check there are no foreign objects or debris within the ball's mechanism.
Use a soft brush to remove any debris.
Check the machine
Lift the filter out of the machine.

Turn the machine upside down to remove any foreign objects or debris which may have fallen into the base of the machine.
Refit your filter by dropping it into the base of the machine whilst ensuring its securely in place.

If the filter is not attached correctly, a warning triangle may show on your screen. If this happens, please refit the filter securely.
Refit by firmly pushing the ball back into position, making sure it clicks securely into place with the ball aligned with the Dyson logo on the Main Body.

Check ball
Remove the ball from the machine by pressing the side buttons at the same time.

Check there are no foreign objects or debris within the ball's mechanism.
Use a soft brush to remove any debris.
Check the machine
Try lifting the filter out of the machine using its tabs.

Turn the machine upside down to remove any foreign objects or debris which may have fallen into the base of the machine.
Refit your filter by dropping it into the base of the machine whilst ensuring its securely in place.

If the filter is not attached correctly, a warning triangle may show on your screen. If this happens, please refit the filter securely.
Refit by firmly pushing the ball back into position, making sure it clicks securely into place with the ball aligned with the Dyson logo on the Main Body.

Please select the appropriate option
Please select the appropriate option
Check the airflow
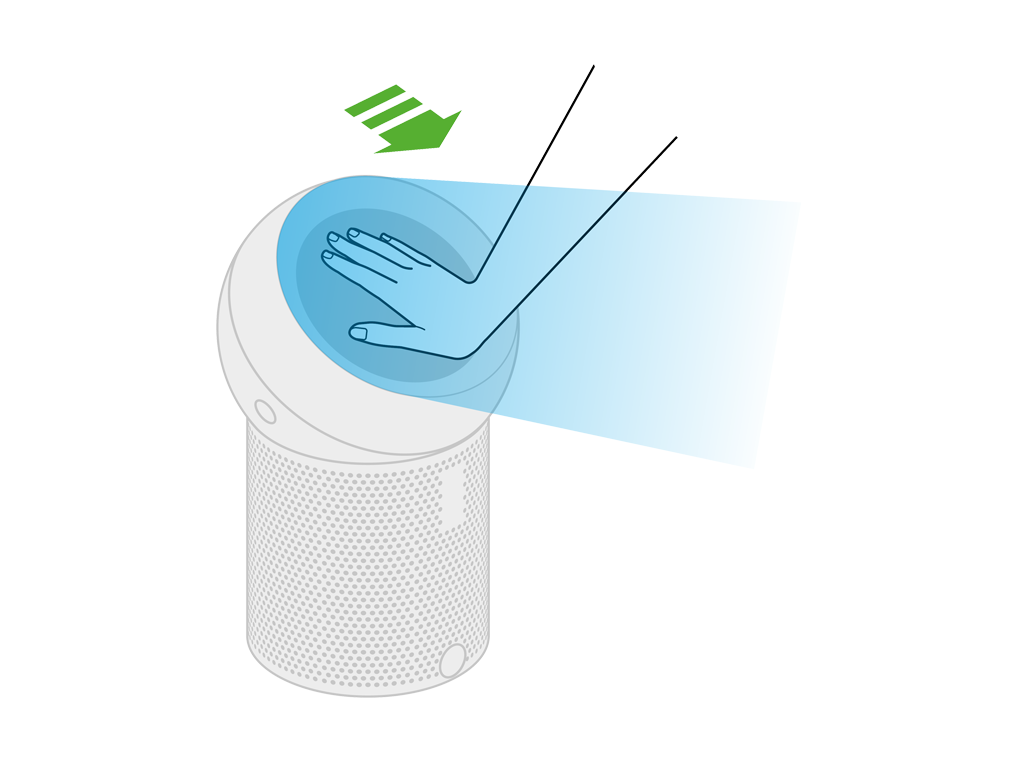
To change the direction of airflow, place your hand on the dome.
Slide the dome away from you to move the airflow upwards.
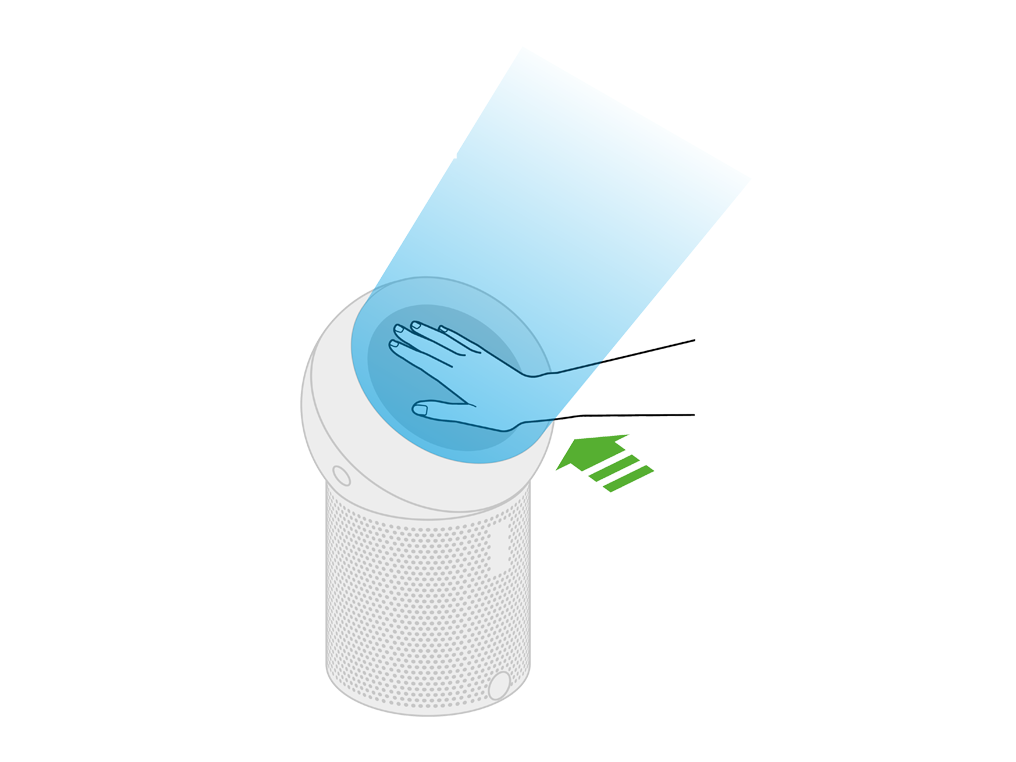
Slide the dome towards you to move the airflow downwards.
Check and clean the machine
This issue could be caused by a blockage in your machine. Please clean the machine and check for blockages.
Unplug your Dyson personal purifying fan from the mains electricity supply before cleaning the filter.
Look for blockages in the air inlet holes on the shroud and the dome.

Use a soft brush to remove dust and debris.

Do not use detergents or polishes to clean the appliance.

Dust may accumulate on the surface of the machine. Wipe dust from the dome, shroud and other parts with a dry or damp cloth.

Main power button
Press the On/Off button on the Main Body of the machine (located at the rear of the machine).
The ON/OFF button on the Main Body has two functions:
Press the button to turn the machine on or off.
Press and hold the button to adjust the airflow speed
Remote control
Ensure the machine is switched on.
Ensure correct button on remote is being pressed.
Airflow

Point the remote directly at the front of the machine while pressing the button.
Test the remote control
Test the other buttons on the remote.
On/Off
Airflow

Oscillation

Information menu
Sleep timer
Point the remote directly at the front of the machine while pressing the button.
Changing the battery
Unscrew the remote control's battery compartment.
Loosen the base and pull it away from the remote. Replace the battery with type CR 2032.
Airflow direction won't change
To change the direction of airflow, place your hand on the dome.
Slide the dome away from you to move the airflow upwards.

Slide the dome towards you, to move the airflow downwards.

Check ball
Remove the ball from the machine by pressing the side buttons at the same time to release the ball.

Check there are no foreign objects or debris within the ball's mechanism.
Check there are no foreign objects or debris within the dome airflow control on the ball.
Use a soft brush to remove any debris.
Refit by firmly pushing the ball back into position, making sure it clicks securely into place with the ball aligned with the Dyson logo on the Main Body.

Please select the appropriate option
Check remote control
Ensure correct button on remote is being pressed.
Oscillation

Point the remote directly at the front of the machine while pressing the button.
Check other buttons
Test the other buttons on the remote.
On/Off

Information menu

Airflow

Sleep timer

Point the remote directly at the front of the machine while pressing the button.
Changing the battery
Unscrew the Remote Control's battery compartment.
Loosen the base and pull it away from the remote. Replace the battery with type CR 2032.
Oscillating mode
If your machine stops oscillating, this could be because the filter is not fitted correctly. Please follow the below steps.
Push the side buttons at the same time to release the ball.

Lift the filter out of the machine.

Check the filter and refit the filter.

Refit by firmly pushing the ball back into position, making sure it clicks securely into place with the ball aligned with the Dyson logo on the Main Body.

Check the machine
Remove the ball from the machine by pressing the side buttons at the same time.

Ensure there are no signs of blockage or debris.
Refit by firmly pushing the ball back into position, making sure it clicks securely into place with the ball aligned with the Dyson logo on the Main Body.

Check Remote Control
Ensure correct button on remote is being pressed.
Check airflow direction
Please ensure you have directed the airflow to come out the machine before beginning these checks.
Use the airflow dome on the machine to select the airflow direction.
Airflow direction
To change the direction of airflow, place your hand on the dome. Slide the dome away from you to move the airflow upwards or Slide the dome towards to you, to move the airflow downwards.
Please select the appropriate option
Machine display icons
Filter information
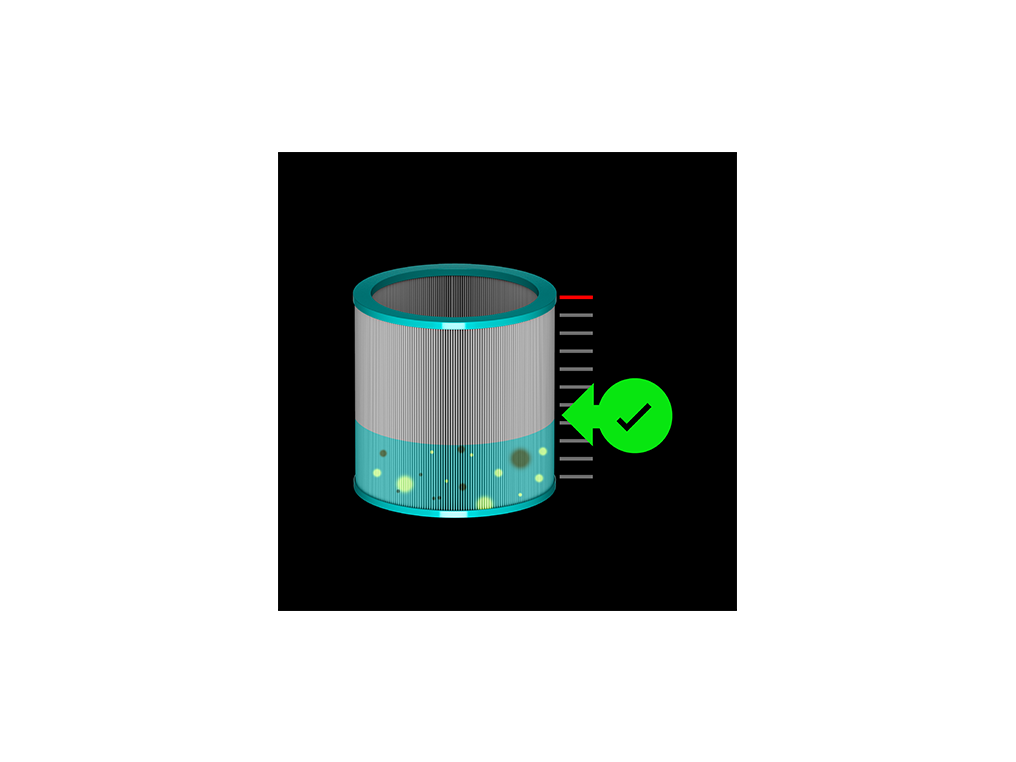
Fan speed
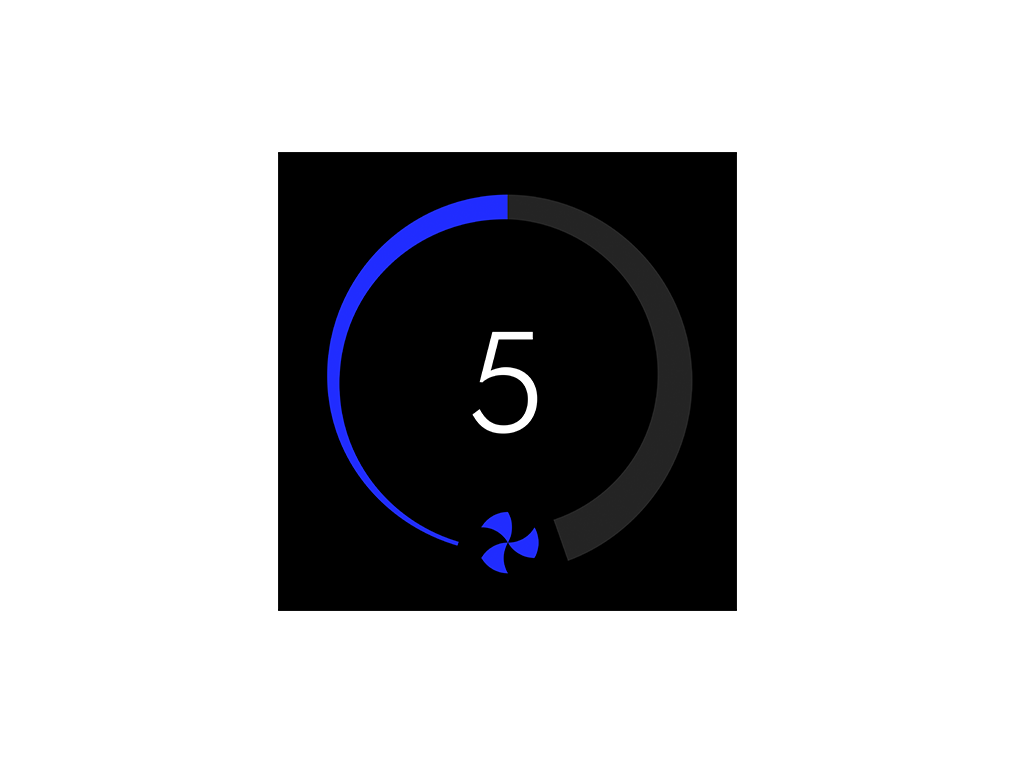
Fan speed with sleep timer
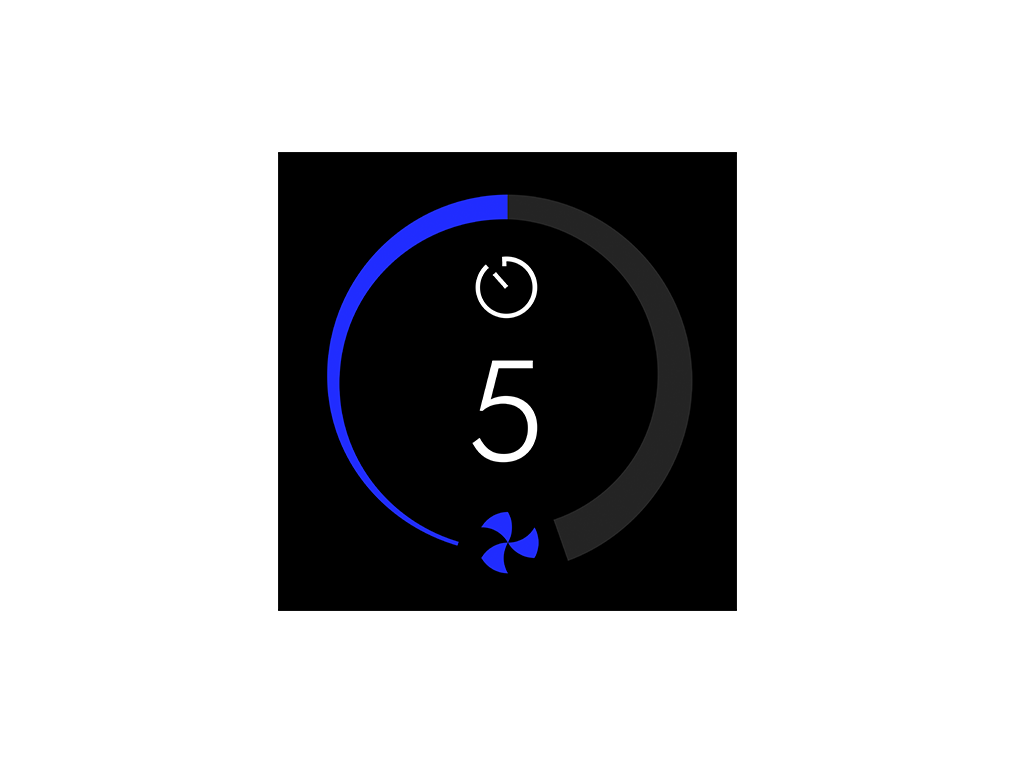
Sleep timer countdown
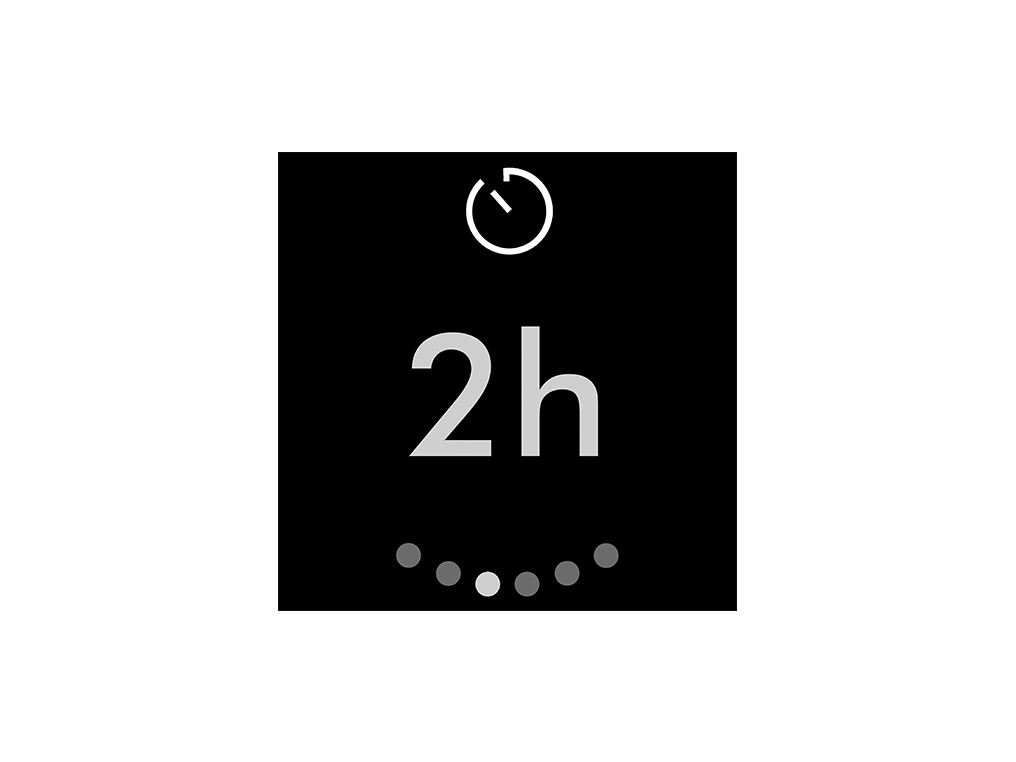
Sleep timer options

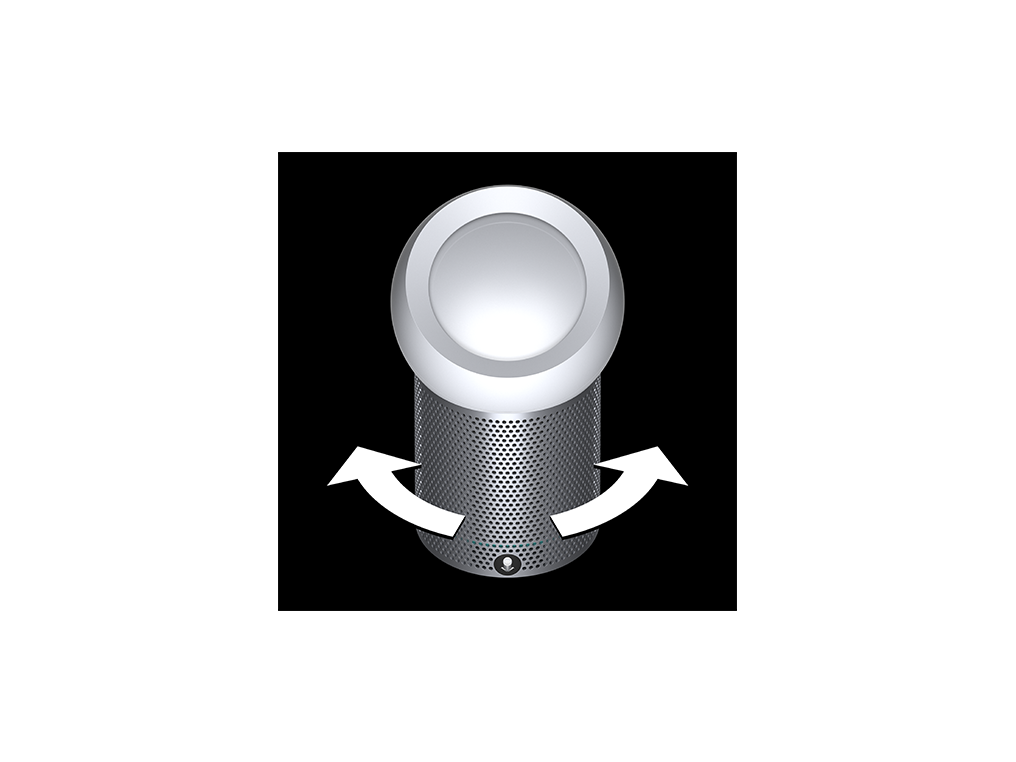
Oscillation
Exclamation mark

Wrong PSU (Power Supply Unit)
No display
Changing the battery
Unscrew the Remote Control's battery compartment.
Loosen the base and pull it away from the remote. Replace the battery with type CR 2032.
Main Body button
Test the button on the Main Body of the machine (located at the rear of the machine).
The ON/OFF button on the Main Body has two functions:
Press the button to turn the machine on or off.
Press and hold the button to adjust the airflow speed.
Test the Remote Control
Ensure the correct button on the remote is being pressed.

Point the remote directly at the front of the machine while pressing the button.
Check Remote Control
Ensure correct button on remote is being pressed.
On/Off

Airflow

Information menu

Oscillation

Sleep timer

Point the remote directly at the front of the machine while pressing the button.
Replace the battery
This suggests the battery in the Remote Control may need replacing. Please replace the battery and try the buttons again.
Remote control check
Are you using a remote control for other appliances (such as a TV) near the machine?
Is the machine under direct sunlight or flourescent light?
The sensor on the machine that receives the infrared signal from the remote control may malfunction when exposed to direct sunlight or fluorescent light.
Please move the machine so that is not under direct sunlight or fluorescent light.
Unplug the machine
The operation of the remote control for other appliances is likely interfering with your Dyson machine.
To prevent further interference, unplug your Dyson machine when not in use.
Check the power cord
Try moving the power cord back and forth.
Please select the appropriate option
Check Remote Control
Press the oscillation button on the remote.

Remote Control
Point the remote directly at the front of the machine while pressing the button.
Test the remote control
Test the other buttons on the remote.
On/Off

Airflow

Information menu

Oscillation

Sleep timer

Point the remote directly at the front of the machine while pressing the button.
Check the electrics
Ensure the cable is firmly plugged into the back of the machine.
Check the plug and power cord for signs of damage.
Try the machine in a different plug socket.
Check that the household electrics are on.
NB: There will be a 3 second delay when switching on after plugging in for the first time or when changing plug sockets.
Has this resolved the problem?
Main power button
Press the On/Off button on the Main Body of the machine (located at the rear of the machine).
The ON/OFF button on the Main Body has two functions:
Press the button to turn the machine on or off.
Press and hold the button to adjust the airflow speed
What sort of smell?
Do not use polish or detergent on any part of the machine.
Check and clean machine
This issue could be caused by a blockage in your machine. Please clean the machine and check for blockages.
Unplug your Dyson personal purifying fan from the mains electricity supply before cleaning.
Look for blockages in the air inlet holes on the shroud and the dome.
Use a soft brush to remove dust and debris.

Do not use detergents or polishes to clean the machine.
Dust may accumulate on the surface of the machine. Wipe dust from the dome, shroud and other parts with a dry or damp cloth.
Clean the filter
Push the side buttons at the same time to release the ball from the machine.

Try lifting the filter out of the machine using its tabs.

With the filter removed, use a Dyson flexi crevice tool (or long handled clean paint brush) to remove any debris from inside the base of the machine.

Brush the outside of the filter with a soft brush to remove any debris.
Refit your filter by dropping into the base of the machine.

Refit by firmly pushing the ball back into position, making sure it clicks securely into place with the ball aligned with the Dyson logo on the Main Body.

Your filter may need replacing
Check filter life on the display screen.
Please follow the next step.
Replacing the filter
Please follow the steps in the video.
Find the text version of the step-by-step guide instead, under "Has this resolved the problem?"
Has this resolved the problem?
When the machine detects that the filter needs replacing the display on the machine will show an empty filter.
Unplug the machine from the mains electricity supply. Push the side buttons at the same time to release the ball.

Try lifting the filter out of the machine using its tabs.
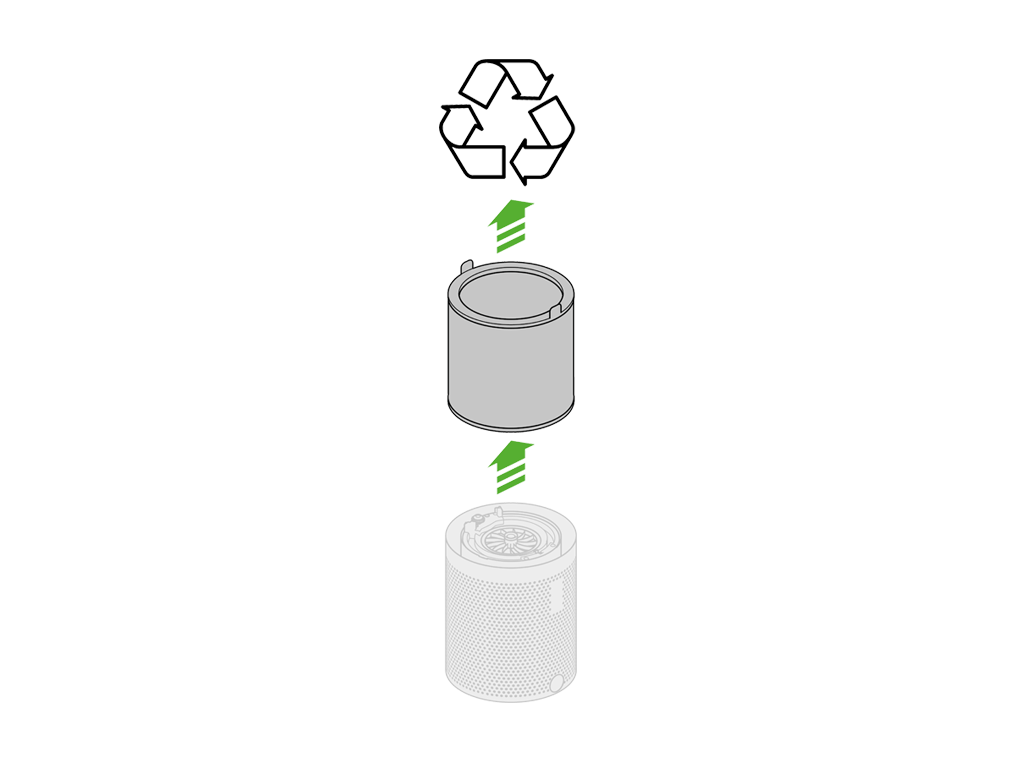
Empty the filter directly into the bin. Dispose of used filter in accordance with local regulations.
Insert your new filter. Firmly push the ball back into position ensuring that the ball is aligned with the Dyson logo on the Main Body, making sure it clicks securely into place.

N.B. The filter can be fitted either way.
Plug the appliance in to the mains electricity supply and switch on.
Press and hold the power button on the Remote Control for five seconds to reset the filter life.
Please select the appropriate option
Please select the appropriate option
Restart the machine
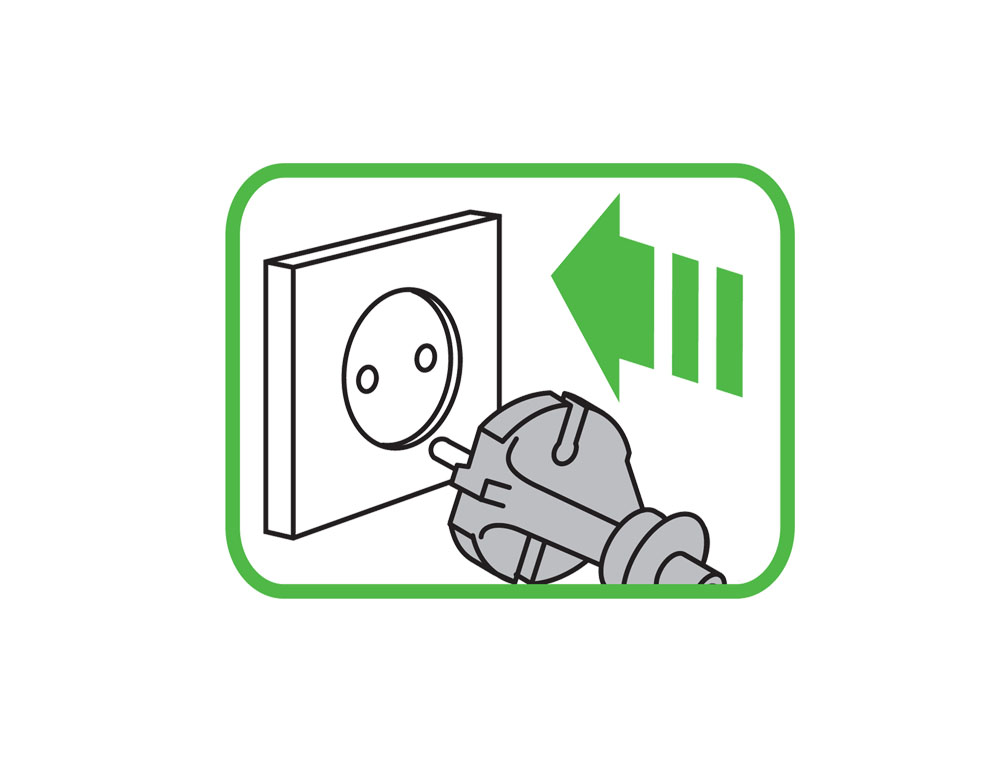
Unplug the machine and leave it for 10 seconds.
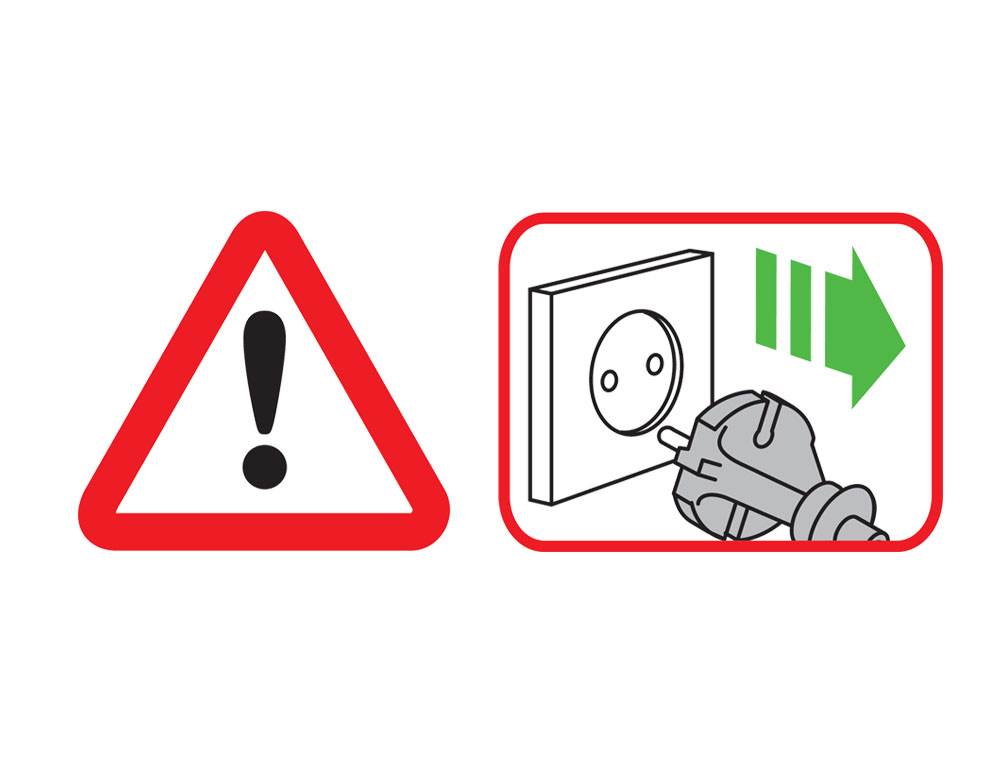
Ensure the power cord is plugged into the centre of the base.
Plug the machine back in and retest.
Please select the appropriate option
Fan speed
This icon will be displayed to inform you which fan speed the machine is currently on.

This can be changed by pressing the airflow button on the remote.
Airflow

Check Remote Control
Test other buttons on the remote.
On/Off

Airflow

Oscillation

Information menu

Sleep timer

Point the remote directly at the front of the machine while pressing the button.
Changing the battery
Unscrew the Remote Control's battery compartment.
Loosen the base and pull it away from the remote. Replace the battery with type CR 2032.
Fan speed sleep timer
This icon will be displayed to inform you that the sleep timer function is set.

NB: The fan speed operates between 1 (minimum) and 10 (maximum).
Press the sleep timer button on the remote to activate this function for following times:

30 minutes
1 hour
2 hours
4 hours
8 hours
Point the remote directly at the front of the machine while pressing the button.
Please select the appropriate option
Filter change indicator
This icon will be displayed to inform you that your filter needs replacing. Please follow the steps below:

Unplug your Dyson personal purifying fan from the mains electricity supply before replacing the filter.
Push the side buttons at the same time to release the ball from the machine.

Try lifting the filter out of the machine using its tabs.

Insert your new filter.

Refit by firmly pushing the ball back into position, making sure it clicks securely into place with the ball aligned with the Dyson logo on the Main Body.

Reset the machine
Unplug the machine.
Plug the machine back in and retest.
Filter life display
This icon will be displayed to inform you of the life remaining in your filter.

This icon will display automatically when your filter needs replacing.

Filter reset
This icon will be displayed to inform you that your filter is being reset.

Pressing the power button on the remote for 5 seconds will activate the countdown.
Filter reset 5 second countdown.
Filter reset complete confirmation.
Oscillation display
This icon will be displayed to inform you that the oscillation mode is On/Off.

Press the oscillation button on the remote to turn this mode On/Off

Oscillation On
Oscillation Off
Sleep timer
This icon will be displayed to inform you which sleep timer mode the machine is currently set on. You can cycle through the different modes by pressing the airflow button.

Off
30 minutes
1 hour
2 hours
4 hours
8 hours
Sleep timer
Display shows sleep time remaining.
Wrong PSU connected
Please use the PSU (Power Supply Unit) supplied with the machine in the country it was purchased in.
Try a different plug socket
Try the machine in a different plug socket.
NB: Ensure the power supply is firmly connected to the back of the machine and the plug socket before turning on.
Continuous alert triangle
Switch off and unplug your machine.
Leave for 10 seconds and then plug your machine back in and switch it on.
Temporary alert triangle
If the alert appears on the LCD screen and then disappears, continue to use your machine.
Check the filter
Remove the ball from the machine by pressing the side buttons at the same time.

Vacuum the edges of the machine where the filter sits.
Remove the filter
Try lifting the filter out of the machine using its tabs.

Further checks required
With the ball still removed, turn the machine upside down and shaking it to remove any foreign objects.
Attach your remote to the machine
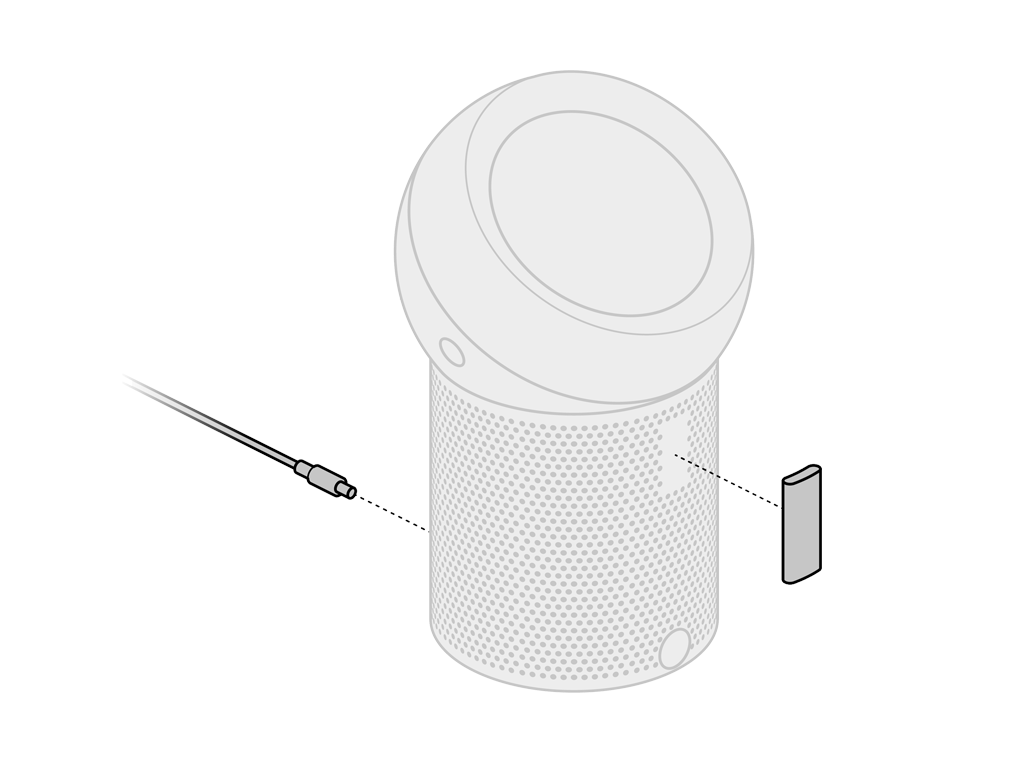
Your Remote Control can be stored magnetically on the front of the machine.
Place the Remote Control with the buttons facing the machine, on the magnetic plate located on the front of the machine directly below the ball.
Please select the appropriate option
Which part is lost or missing?
Check Remote Control
Ensure correct button on remote is being pressed.
On/Off

Airflow

Oscillation

Information menu

Sleep timer

Point the remote directly at the front of the machine while pressing the button.
Removing the ball from the machine
Push the side buttons (located on either side of the ball) whilst lifting upwards to remove from the machine.

Refitting the ball to the machine
Ensure there are no obstructions around where the ball fits onto the machine.
Refit by firmly pushing the ball back into position, making sure it clicks securely into place with the ball aligned with the Dyson logo on the Main Body.

Changing the filter
Please follow the steps in the video.
Find the text version of the step-by-step guide instead, under "Is there anything else we can help you with?"
Is there anything else we can help you with?
When the machine detects that the filter need replacing the display on the machine will show an empty filter.
Unplug your Dyson personal purifying fan from the mains electricity supply.
Push the side buttons at the same time to release the ball from the machine.

Try lifting the filter out of the machine using its tabs.

Empty the filter directly into the bin. Dispose of used filter in accordance with local regulations.
Insert your new filter. Firmly push the ball back into position, making sure it clicks securely into place.

Plug the appliance in to the mains electricity supply and switch on.
Press and hold the Power button on the Remote Control for five seconds to reset the filter life.
Changing the airflow direction
You can change the direction of airflow.
To change the direction of airflow, place your hand on the dome.
Slide the dome away from you to move the airflow upwards.

Slide the dome towards to you, to move the airflow downwards.

Please select the appropriate option
Fan speed
Your purifier has speed options from the minimum of 1 to max speed 10.
Please select the appropriate option
Filter calibration
When you replace your filter, you must hold down the power button on the Remote Control for 5 seconds to ensure the new filter is calibrated.
Filter change indicator
This indicates when it is time to order a new filter for your Dyson purifier and replace the old one.
Filter life measure
This display shows the amount of filter life remaining in your purifier.

Oscillation mode
Press the Oscillation button on the Remote Control to turn Oscillation ON.

Press the Oscillation button again to turn Oscillation OFF.

Sleep timer
Press the Sleep timer button on the Remote Control to cycle through the timer options.

30 minutes
1 hour
2 hours
4 hours
8 hours
OFF
Fan speed with sleep timer
Your machine will display a timer icon with its speed options (minimum of 1 to maximum speed 10) when the sleep timer is active.

Quick start guide
Please follow the steps in the video.
Find the text version of the step-by-step guide instead, under "Is there anything else we can help you with?"
Is there anything else we can help you with?
Use both hands to lift the machine out of the box, taking care to hold by the base of the machine only.
Take the filter out of the box and remove the protective packaging. Fit the filter to the machine.
Place the Remote Control on the front of the machine with the buttons facing the machine. Plug in and switch on.

Your Remote Control can be stored, magnetically, on the front of your Dyson personal purifying fan.
Using the remote control
To operate, point the Remote Control towards the front of the machine.
On/Off
Press the Power On/Off button on the Remote Control to start the machine.

Information menu
Press the Information menu button to check the life of your filter.

Airflow speed
Press the Airflow speed button to increase and decrease the airflow speed.

Oscillation On/Off
Press the Oscillation On/Off button on the Remote Control to Oscillate the machine.

Sleep timer
To set the sleep timer, select the desired time (30 minutes, 1 hour, 2 hours, 4 hours or 8 hours). To cancel the sleep timer, increase the time until the 'timer off' icon appears.
The sleep timer will turn your machine off once the time set has passed.

Finding the machine serial number
The serial number can be found in the following locations:
On the box of the machine.
On the base, underneath your machine.
Replacing the battery
Please follow the steps in the video.
Find the text version of the step-by-step guide instead, under "Is there anything else we can help you with?"
Is there anything else we can help you with?
Further help
Dyson Pure Cool Me™ (White/Fuchsia)


