Let's get your machine working
Dyson Purifier Humidify+Cool™ PH3A Autoreact (White/Silver)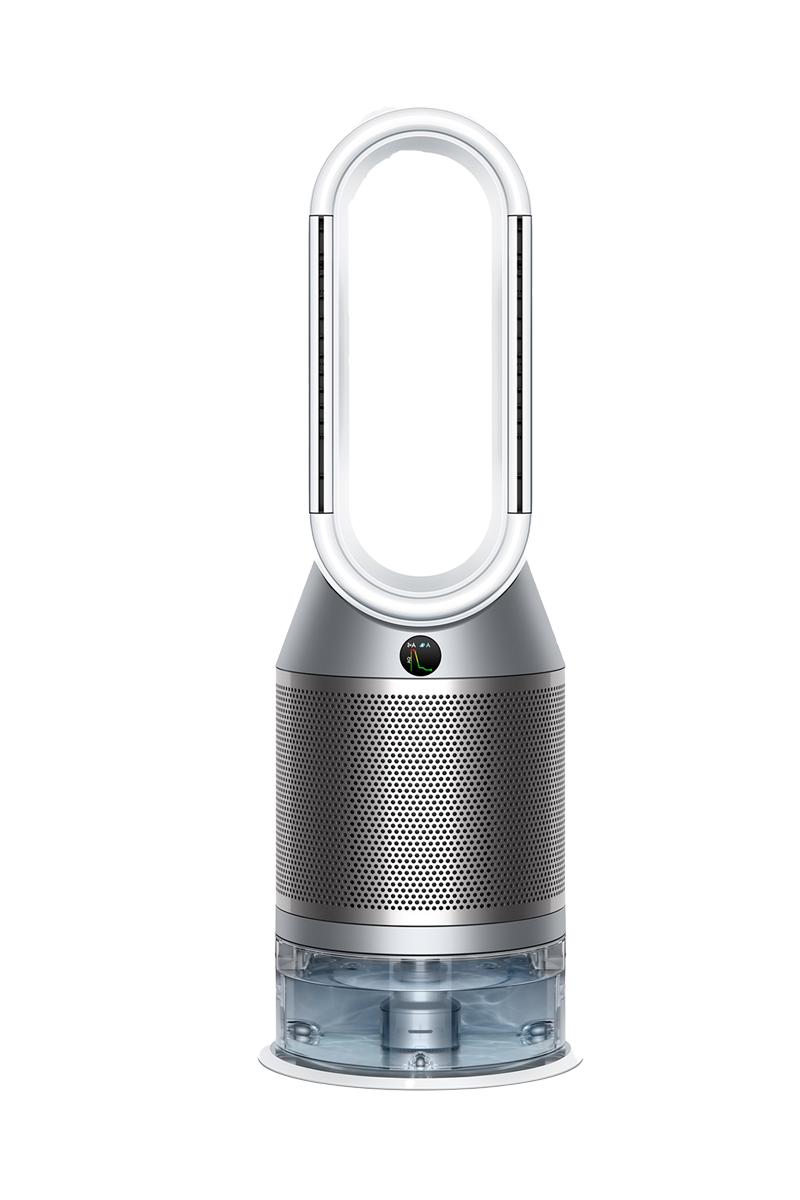
Let's get your machine working
Dyson Purifier Humidify+Cool™ PH3A Autoreact (White/Silver)
-
-
Replacing the remote control battery
-
Issue resolved
-
Replacing the remote control battery - step by step
-
More help required
-
Troubleshooting
-
Unusual noise
-
Grating or grinding noise
-
Issue resolved
-
Issue not resolved, please speak to our Customer Support Team
-
Trickling or gurgling noise
-
Deep cleaning your machine
-
Deep clean cycle - step-by-step
-
Whining or whistling noise
-
Performance
-
Airflow
-
Airflow is not as powerful
-
The airflow speed won't change
-
Test the other remote buttons
-
Changing the battery
-
Issue not resolved, please speak to our Customer Support Team
-
Replacing the remote control battery - step by step
-
Issue not resolved, please speak to our Customer Support Team
-
Machine not completing deep cleaning procedure
-
Deep clean cycle - step-by-step
-
Issue not resolved, please speak to our Customer Support Team
-
Humidity
-
Not reaching target humidity
-
Deep cleaning your machine
-
Deep clean cycle - step-by-step
-
No visible mist
-
The water level is not changing
-
Auto mode
-
Test Manual mode
-
The water level is not changing
-
Manual mode
-
The machine has stopped humidifying
-
Display showing an alert
-
Wrong PSU warning
-
Issue not resolved, please speak to our Customer Support Team
-
Using PSU supplied
-
Issue not resolved, please speak to our Customer Support Team
-
Occurrence question
-
Issue not resolved, please speak to our Customer Support Team
-
Broken pump column
-
Issue not resolved, please speak to our Customer Support Team
-
Drip tray overflow
-
Deep cleaning your machine
-
Deep clean cycle - step-by-step
-
Pump rotor failure
-
Deep cleaning your machine
-
Deep clean cycle - step-by-step
-
Tank empty
-
Tank missing
-
Tank missing
-
Issue not resolved, please speak to our Customer Support Team
-
Tank missing
-
Too cold
-
Updating screen
-
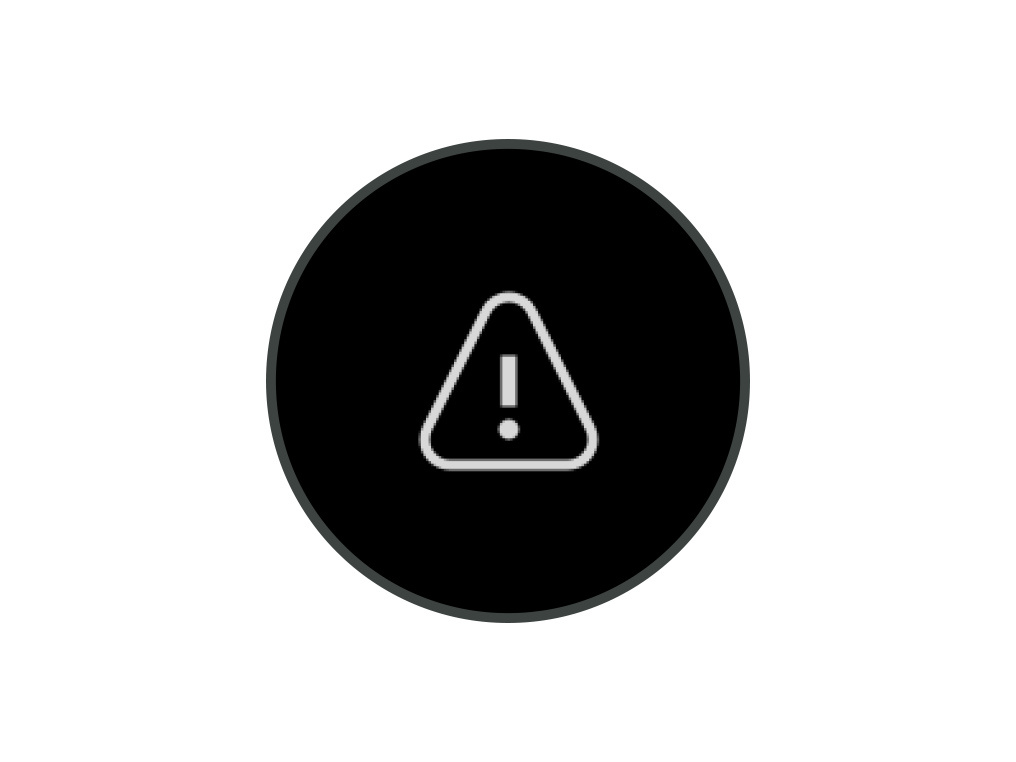
Triangle alert icon
-
Continuous alert triangle
-
Continuous alert triangle deep clean
-
Triangle alert icon
-
Temporary alert triangle
-
Triangle alert icon not oscillating
-
Power cycle
-
Triangle alert icon
-
Oscillation
-
Oscillation
-
The machine won't oscillate
-
Test the other remote buttons
-
Changing the battery
-
Replacing the remote control battery - step by step
-
The machine won't stop oscillating
-
Test the other remote buttons
-
Purification
-
The machine has stopped purifying whilst in Auto mode
-
My readings are showing in different colours
-
Power or electrical issue
-
Intermittent power
-
No power
-
Will not switch off
-
Check the remote
-
Test the other remote buttons
-
Issue not resolved, please speak to our Customer Support Team
-
Changing the battery
-
Replacing the remote control battery - step by step
-
Unusual smell
-
Burning
-
Dusty or unpleasant
-
Deep cleaning your machine
-
Occurrence question
-
Issue not resolved, please speak to our Customer Support Team
-
Deep clean cycle - step-by-step
-
Visible issue
-
Algae is growing inside the tank
-
Deep cleaning your machine
-
Deep clean cycle - step-by-step
-
There is an issue with the display
-
No Display
-
Night mode is not working
-
Part broken
-
Replacement part required
-
Replacement part required
-
Replacement part required
-
Replacement part required
-
Replacement part required
-
Replacement part required
-
Replacement part required
-
Replacement part required
-
Replacement part required
-
Remote control doesn't work
-
Test the other remote buttons
-
Changing the battery
-
Replacing the remote control battery - step by step
-
Display showing an alert
-
Evaporator full
-
Deep cleaning your machine
-
Deep clean cycle - step-by-step
-
Filling the water tank
-
Assembling your machine
-
How to use the information menu
-
Information menu icons
-
Other display icons
-
Knowing your machine
-
Continuous monitoring
-
Using the remote control
-
User guide
-
Cleaning your machine
-
Changing your filters
-
Changing the filters - step-by-step
-
Water hardness
-
Popular queries
We're glad the problem's been solved.
Please let us know if there's anything else we can help you with.
The Dyson guarantee

'How to ' videos and tips

Exclusive owner benefits

Expert advice. 7 days a week.

Hassle-free repairs and replacement
We're glad the problem's been solved.
Please let us know if there's anything else we can help you with.
The Dyson guarantee

'How to ' videos and tips

Exclusive owner benefits

Expert advice. 7 days a week.

Hassle-free repairs and replacement
We need a little more information to help us solve your issue.
Please contact our customer service team on 01-475-7109, or directly on Live Chat through our Digital Assistant by clicking the purple icon at the bottom of the page. You can start a conversation with an Expert by clicking the agent icon at the bottom left of the chat window.
We need a little more information to help us solve your issue.
But our Customer Support Team will be able to solve your problem.
Please contact our customer service team on 01-475-7109, or directly on Live Chat through our Digital Assistant by clicking the purple icon at the bottom of the page. You can start a conversation with an Expert by clicking the agent icon at the bottom left of the chat window.
We need a little more information to help us solve your issue.
But our Customer Support Team will be able to solve your problem.
Please contact our customer service team on 01-475-7109, or directly on Live Chat through our Digital Assistant by clicking the purple icon at the bottom of the page. You can start a conversation with an Expert by clicking the agent icon at the bottom left of the chat window.
We need a little more information to help us solve your issue.
But our Customer Support Team will be able to solve your problem.
Please contact our customer service team on 01-475-7109, or directly on Live Chat through our Digital Assistant by clicking the purple icon at the bottom of the page. You can start a conversation with an Expert by clicking the agent icon at the bottom left of the chat window.
We need a little more information to help us solve your issue.
But our Customer Support Team will be able to solve your problem.
Please contact our customer service team on 01-475-7109, or directly on Live Chat through our Digital Assistant by clicking the purple icon at the bottom of the page. You can start a conversation with an Expert by clicking the agent icon at the bottom left of the chat window.
Please select the appropriate option
Replacing the remote control battery
Please follow the steps in the video.
Find the text version of the step-by-step guide instead, under "Is there anything else we can help with?"
Is there anything else we can help with?
Unscrew the remote control's battery compartment.
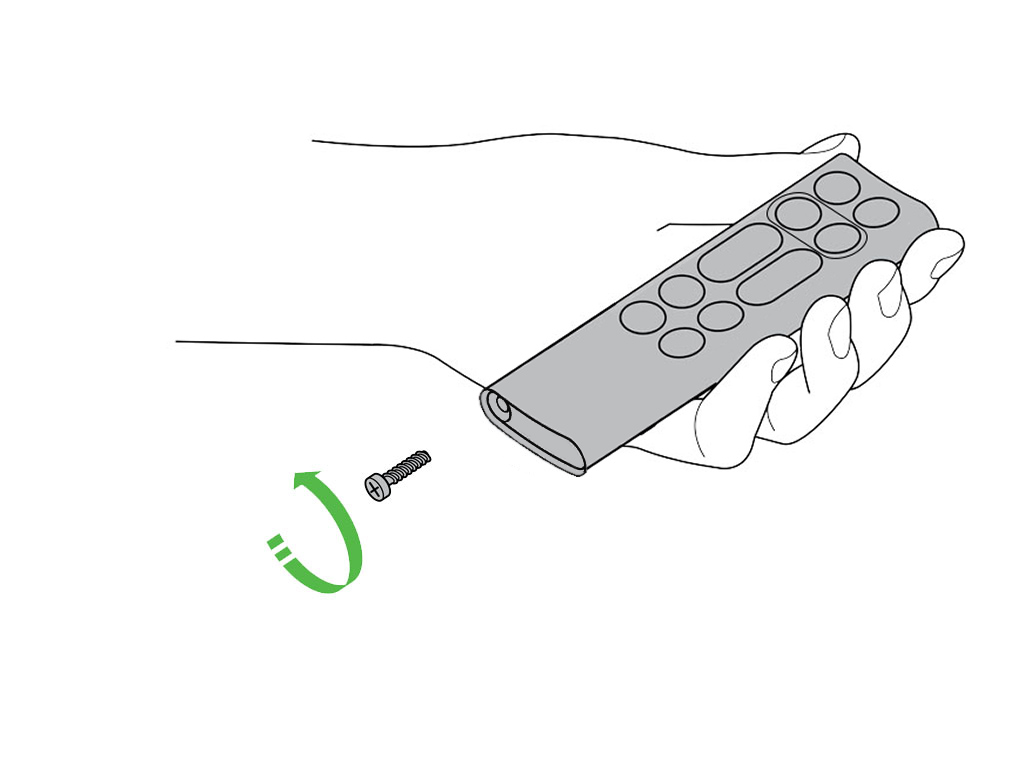
Loosen the base and pull it away from the remote. Replace the battery with type CR 2032.
Please select the appropriate option
Please select the appropriate option
Using the product with a filter or evaporator not produced by Dyson may have a detrimental effect on the functionality of the machine. Any issues therefore caused by using one or both of these, will not be covered under the products guarantee.
Please select the appropriate option
Check and clean the machine
A grating or grinding noise could be caused by a blockage.
To always get the best performance from your Dyson purifying humidifying fan, it's important to regularly clean it and check for blockages.
Cleaning your machine
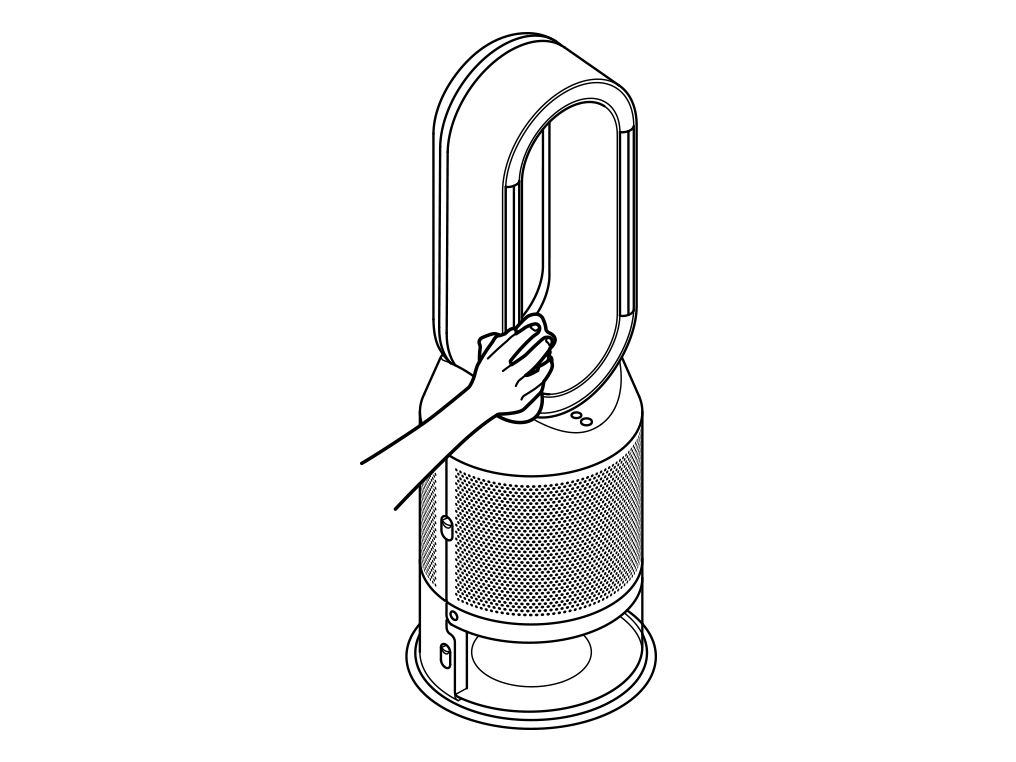
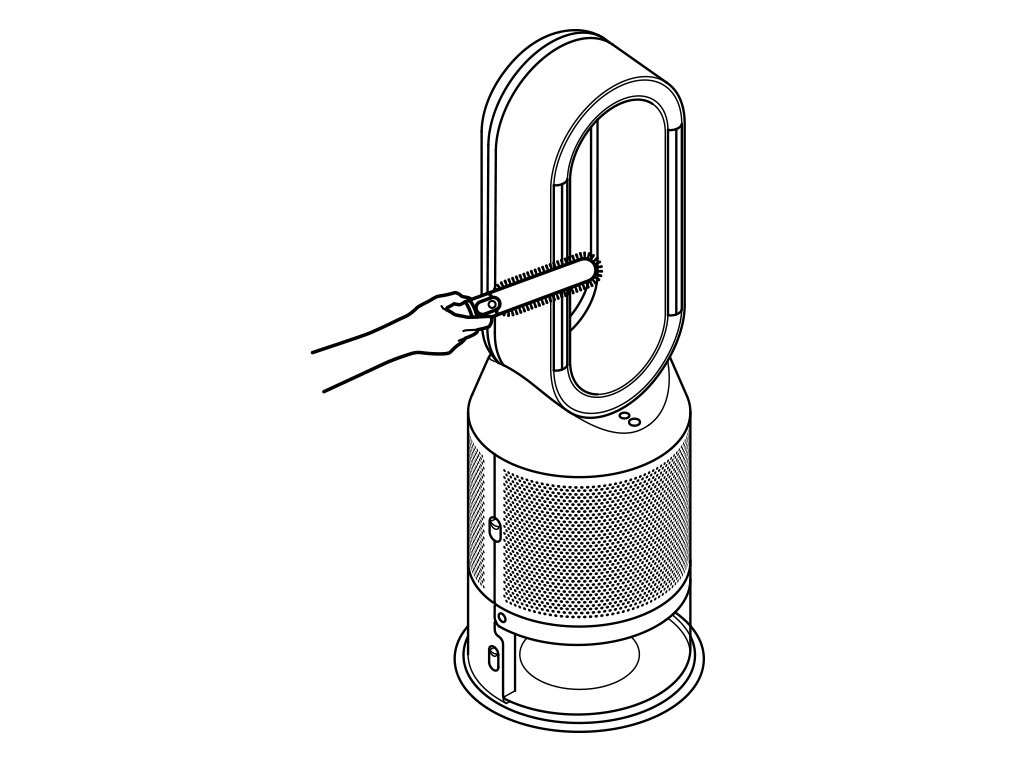
Wipe the machine with a damp lint-free cloth, paying special attention to the two oscillating channels within the amplifier loop.
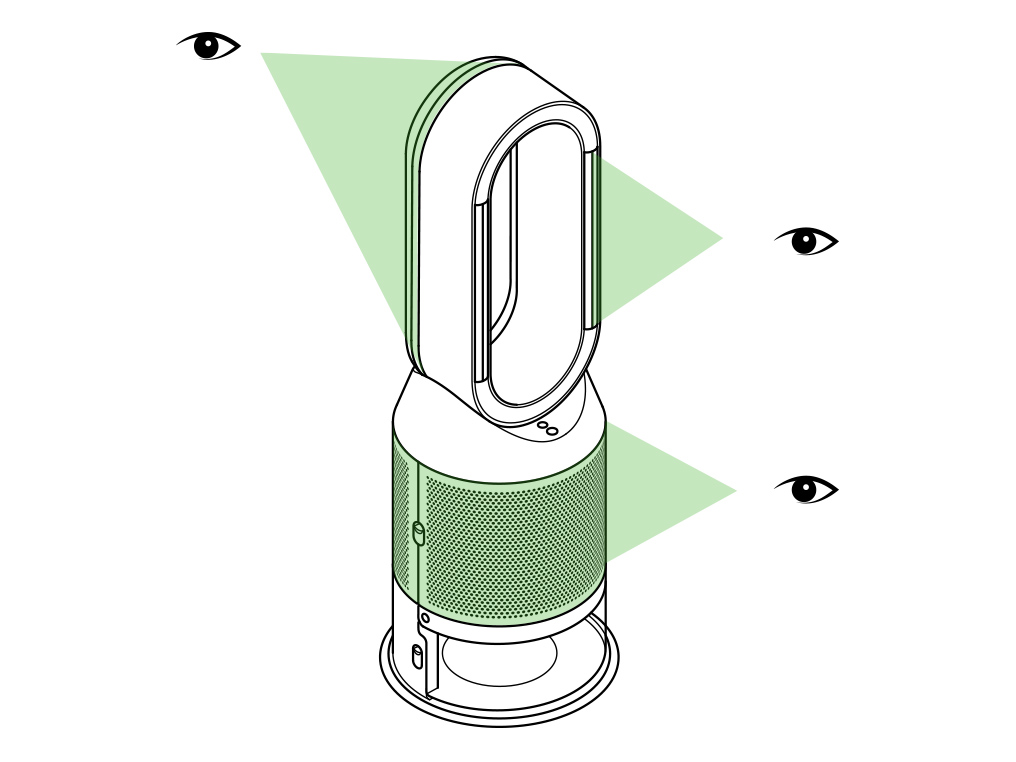
Look for blockages in the air inlet holes in the shrouds, the small aperture inside the amplifier loop, and the soft plastic mesh visible inside the machine when the evaporator is removed.
Use a soft brush to remove dust and debris.
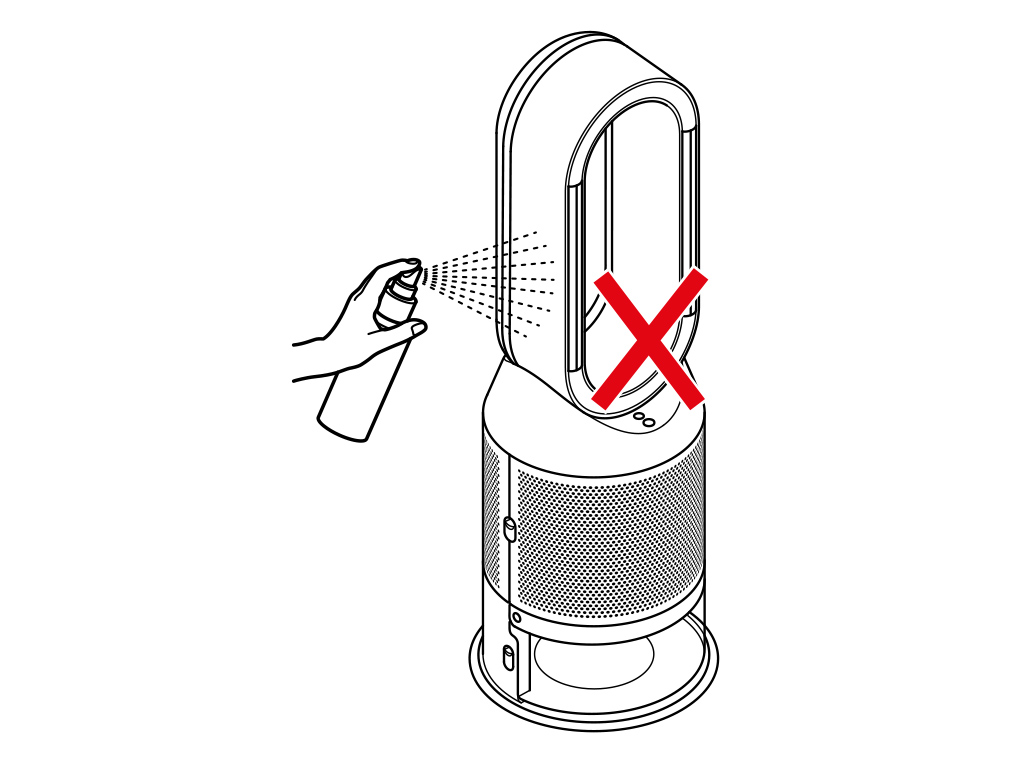
Do not use detergents or polishes to clean the machine.
Trickling or gurgling noise
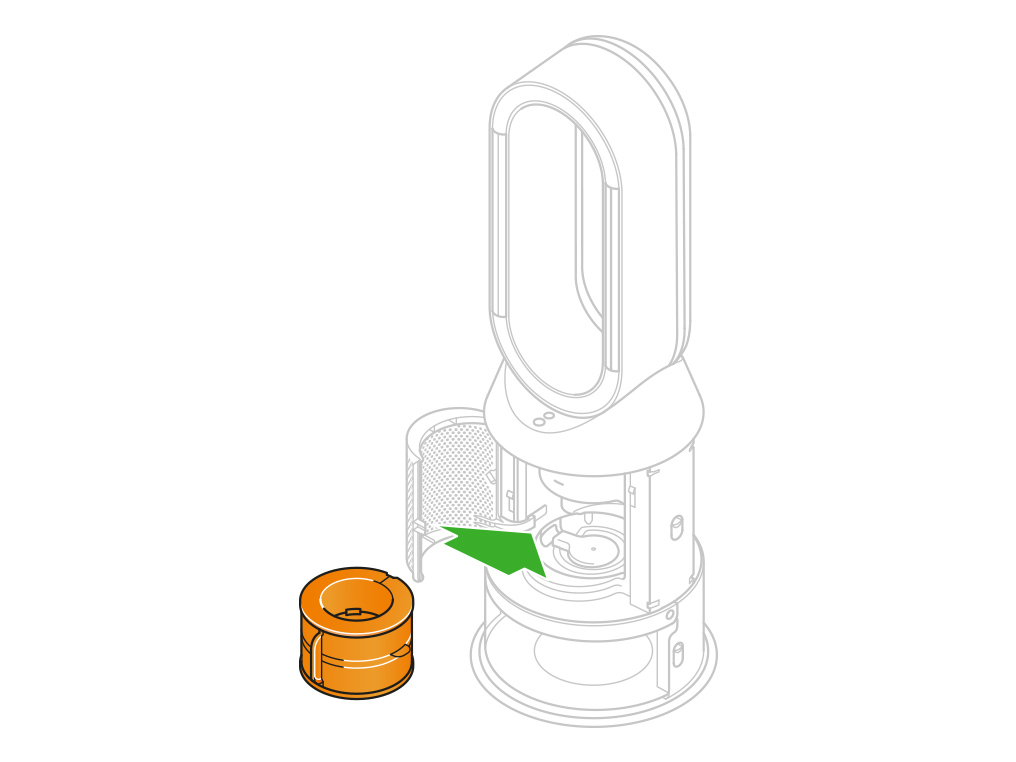
If your machine is making a trickling or a gurgling sound, this indicates that the evaporator may be missing or has not been inserted correctly. Remove the evaporator and reinsert it.
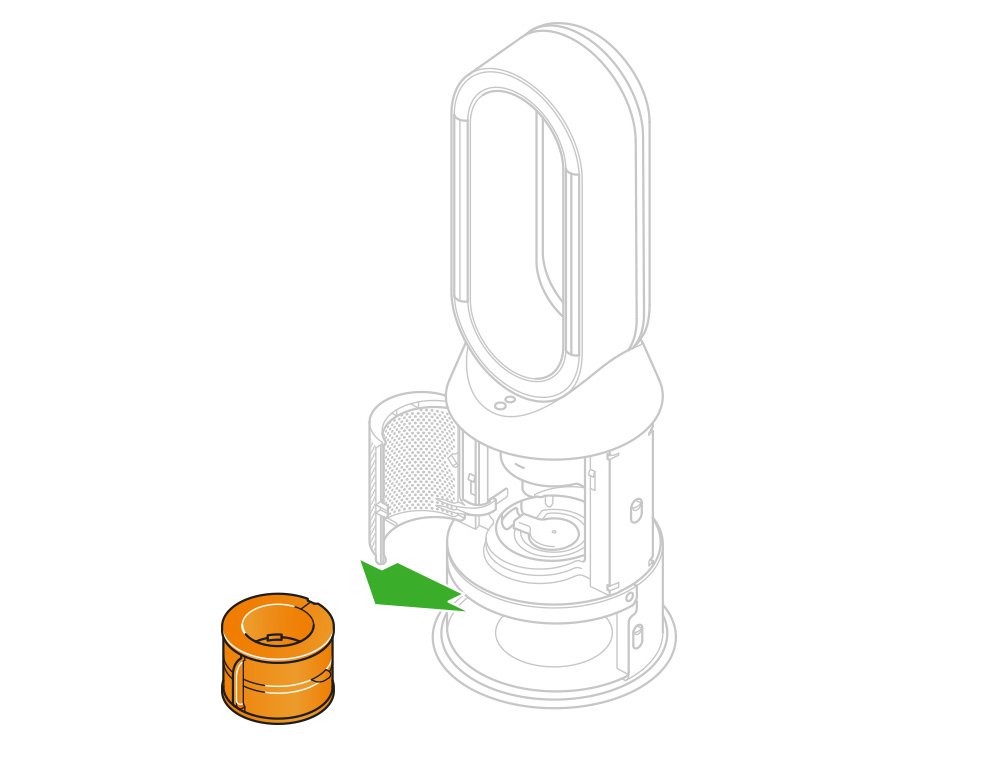
Hold the evaporator by the handle and push it into the machine until it slots into place.
With the evaporator in place, close the inner door making sure it clicks firmly shut.
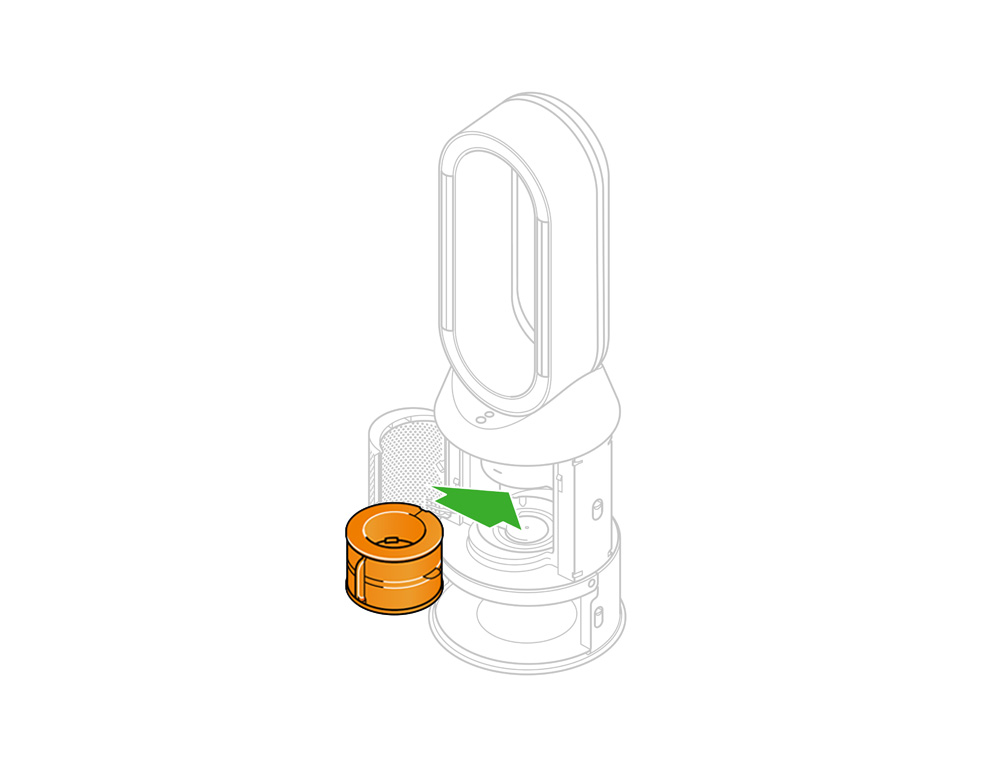
A trickling or gurgling noise can be heard if the evaporator is missing. In this instance, please replace the evaporator in the machine.
Should the drip tray overfill, the machine's water return float is activated. As the water returns to the tank, a trickling or gurgling noise may be heard. The display screen will prompt that a deep clean cycle is to be run.
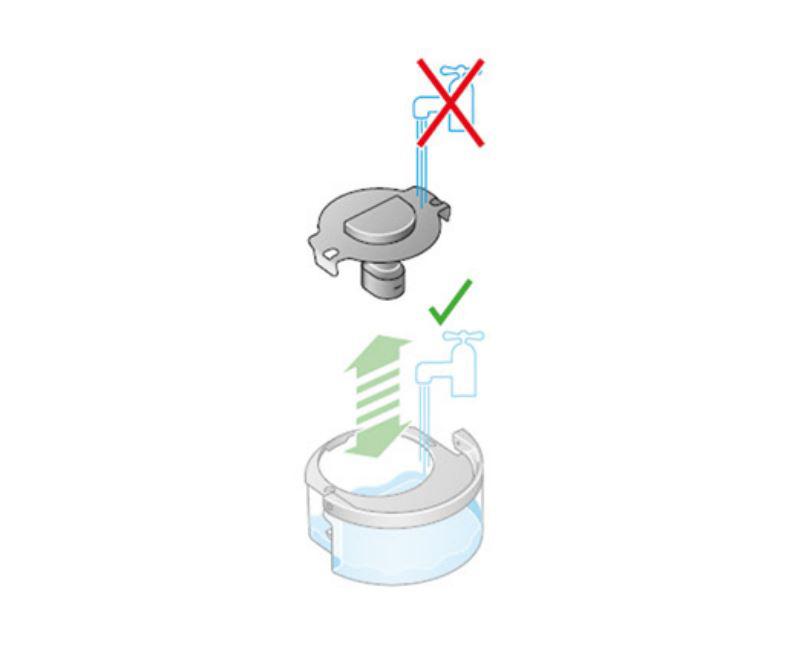
Keep the cap on the water tank dry when you run a Deep clean cycle or fill the tank. It contains power connections and should not be washed. If wet, wipe thoroughly with a dry cloth. Make sure the cap and connections are completely dry before refitting.
Deep cleaning your machine
To always get the best performance from your Dyson purifying humidifying fan, it is important to carry out regular deep cleaning to remove any limescale.
Before and after long periods where humidification is not used, we recommend you run an additional Deep clean cycle.
In hard water areas, you may need to run the Deep clean cycle more frequently. We recommend you use filtered water to always get the best performance from your machine.
Please follow the steps in the video.
Find the text version of the step-by-step guide instead, under "Has this resolved the problem?"
Has this resolved the problem?
Keep the cap on the water tank dry when you run a Deep clean cycle or fill the tank. It contains power connections and should not be washed. If wet, wipe thoroughly with a dry cloth. Make sure the cap and connections are completely dry before refitting.
Deep cleaning your machine
To always get the best performance from your Dyson purifying humidifying fan, it is important to carry out regular deep cleaning to remove any limescale.
Before and after long periods where humidification is not used, we recommend you run an additional Deep clean cycle.
In hard water areas, you may need to run the Deep clean cycle more frequently. We recommend you use filtered water to always get the best performance from your machine.
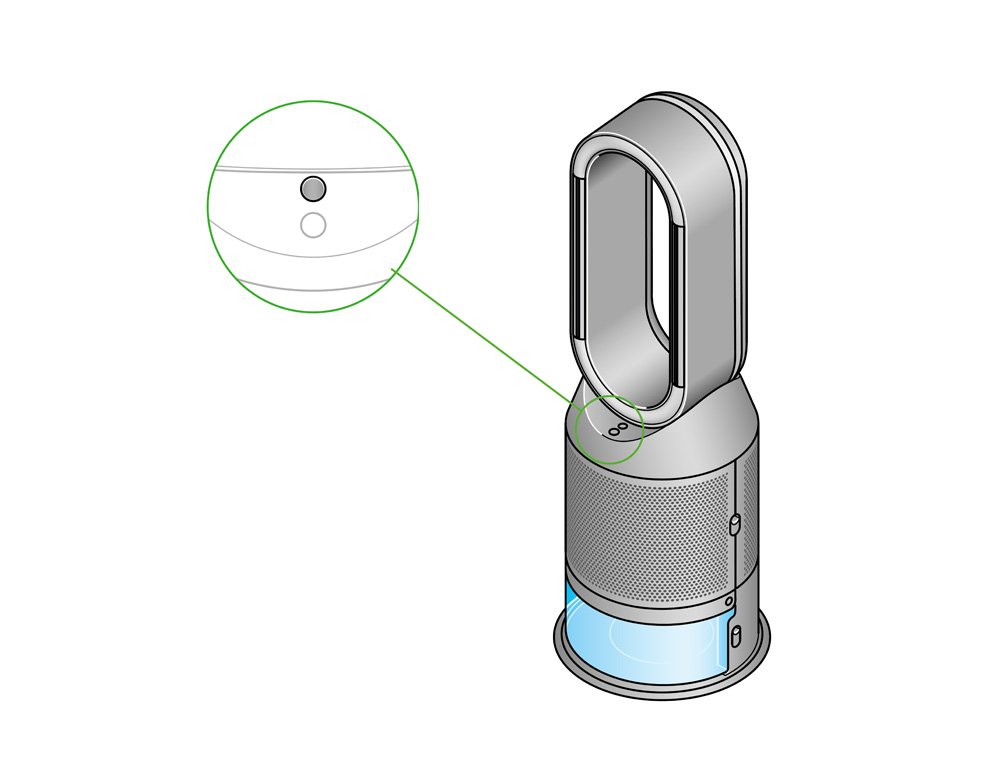
Your machine will alert you when it needs you to carry out a Deep clean cycle. You will be able to see this on the machine's LCD screen.

Press the Deep clean cycle button
Press the Deep clean cycle button on the front of your machine and your instructions will be shown on the LCD screen.
To cancel the Deep clean cycle at any point, press and hold the Deep clean cycle button for five seconds.
Remove the tank
Push down on the outer cover release buttons to remove the outer covers. The inner door will spring open. Put the outer covers to one side as you carry out the Deep clean cycle.
Push down the water tank release buttons on the sides of your machine. Slide the water tank out of your machine and unclip the cap.
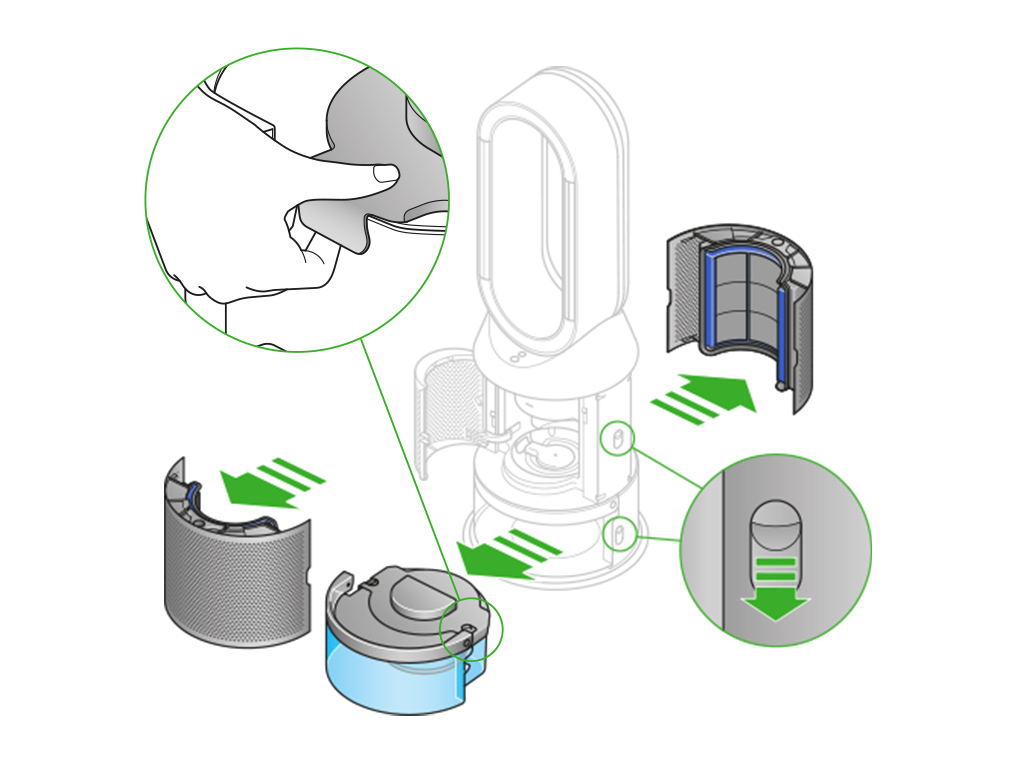
Remove the evaporator
Remove the evaporator from your machine, place it in the water tank and refit the cap.
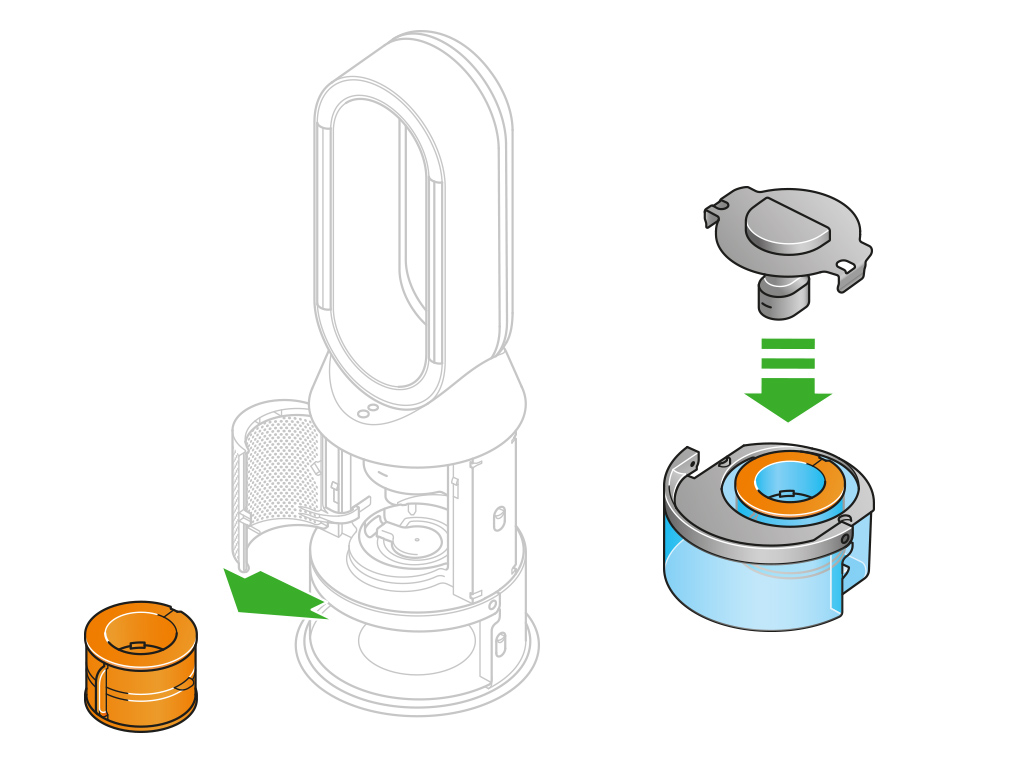
Keep the cap dry
Keep the cap on the water tank dry when you run a Deep clean cycle or fill the tank. It contains power connections and should not be washed. If wet, wipe thoroughly with a dry cloth. Make sure the cap and connections are completely dry before refitting.

Make a descaling solution
Measure out 150g of citric acid and place it in the water tank.
Agitate gently until all the citric acid has dissolved.
Place the evaporator in the water tank. Fill the water tank to the Max level with cold tap water.
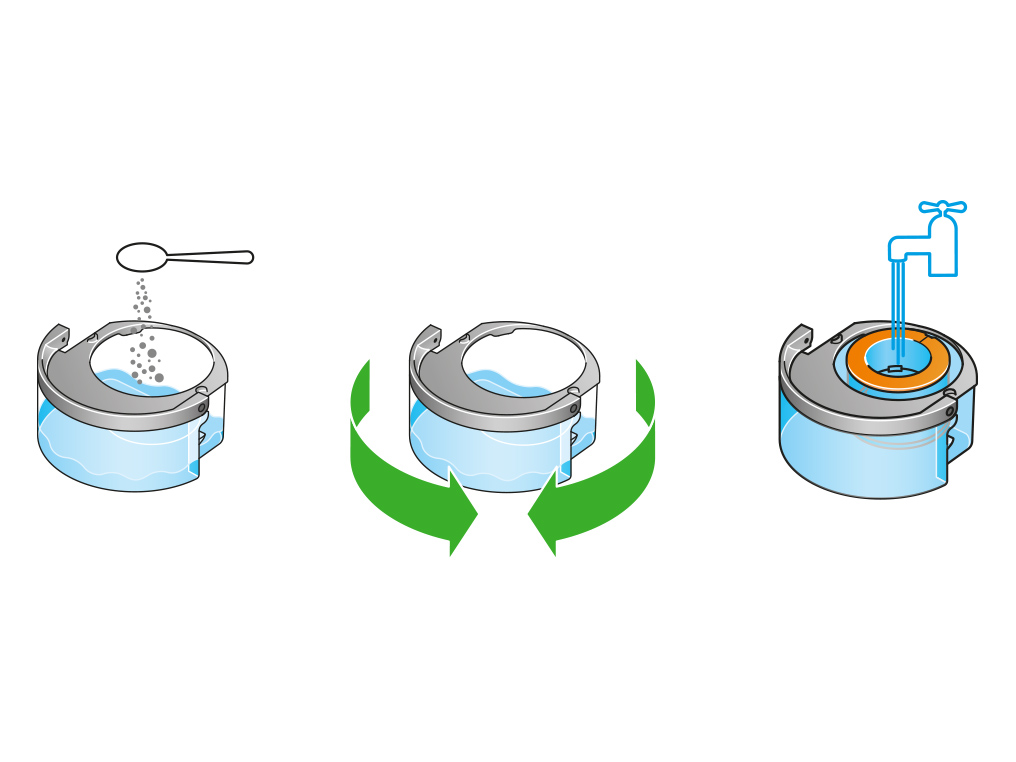
Replace the cap
Replace the cap and secure the cap clips in place.
Wipe off any excess water to avoid drips.
Make sure the cap is completely dry. If wet, wipe thoroughly with a dry cloth.
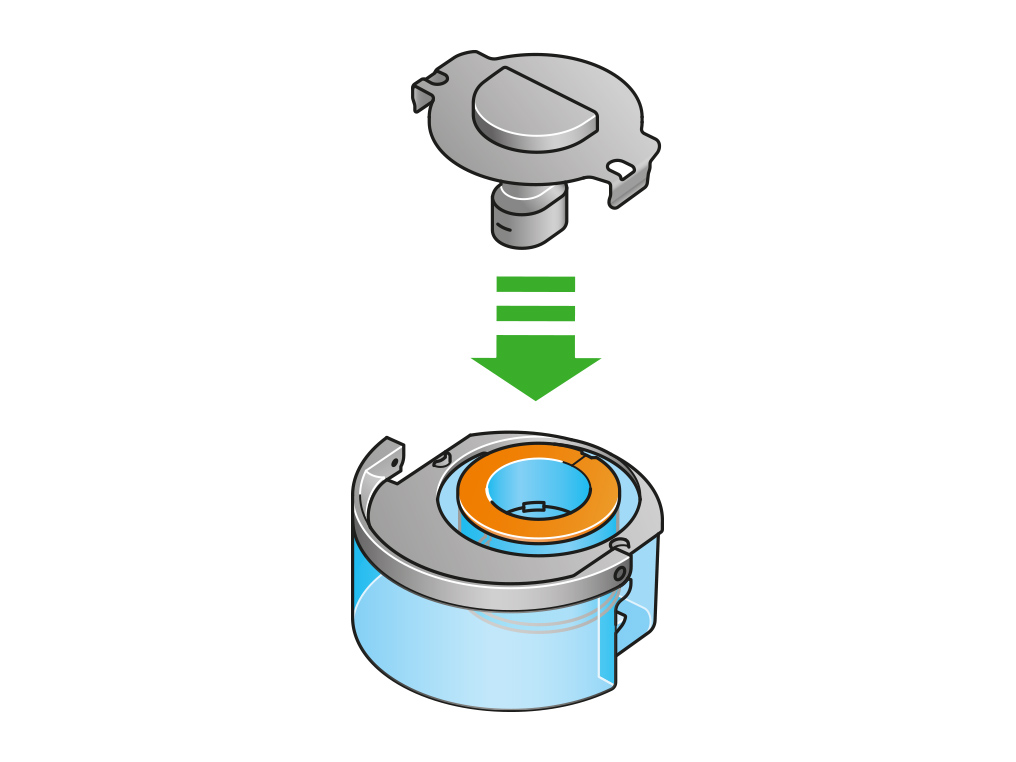
Replace the tank
Slide the water tank back into your machine until it clicks securely in place.
When prompted by the LCD screen, press the Deep clean cycle button.
The Deep clean cycle will start and the LCD screen will show a countdown timer.
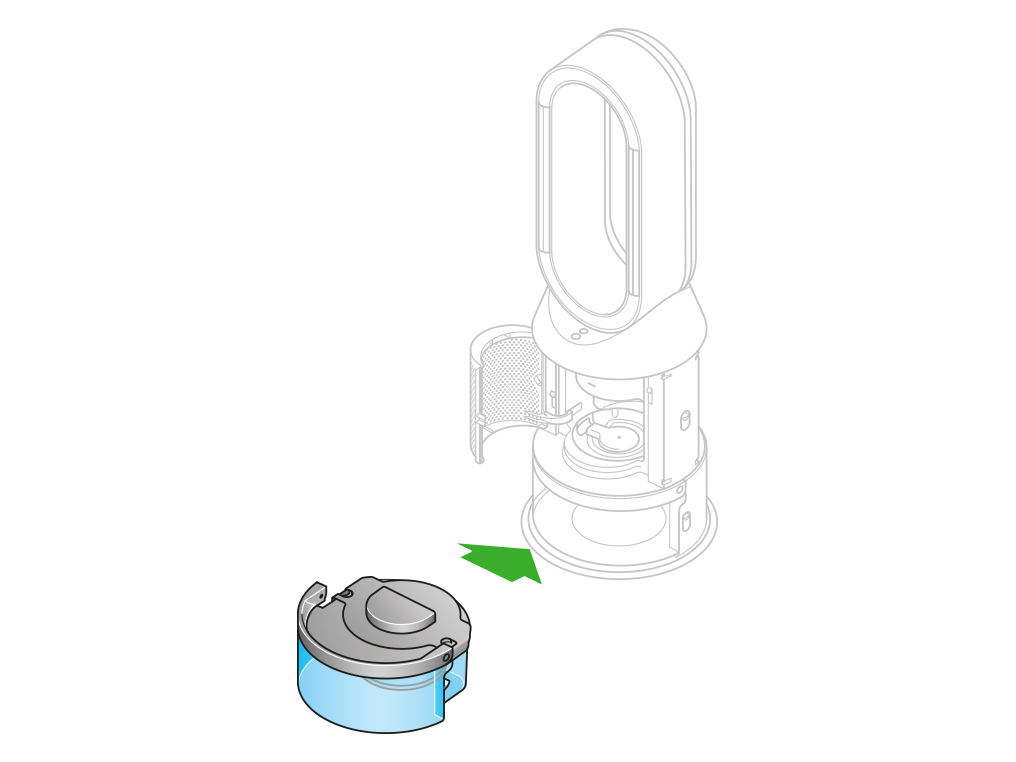
Remove the tank
When the LCD screen shows the Deep clean cycle is complete, push down the water tank release buttons on the sides of your machine.
Slide the water tank out of your machine. Carry the water tank by its handle to the tap.
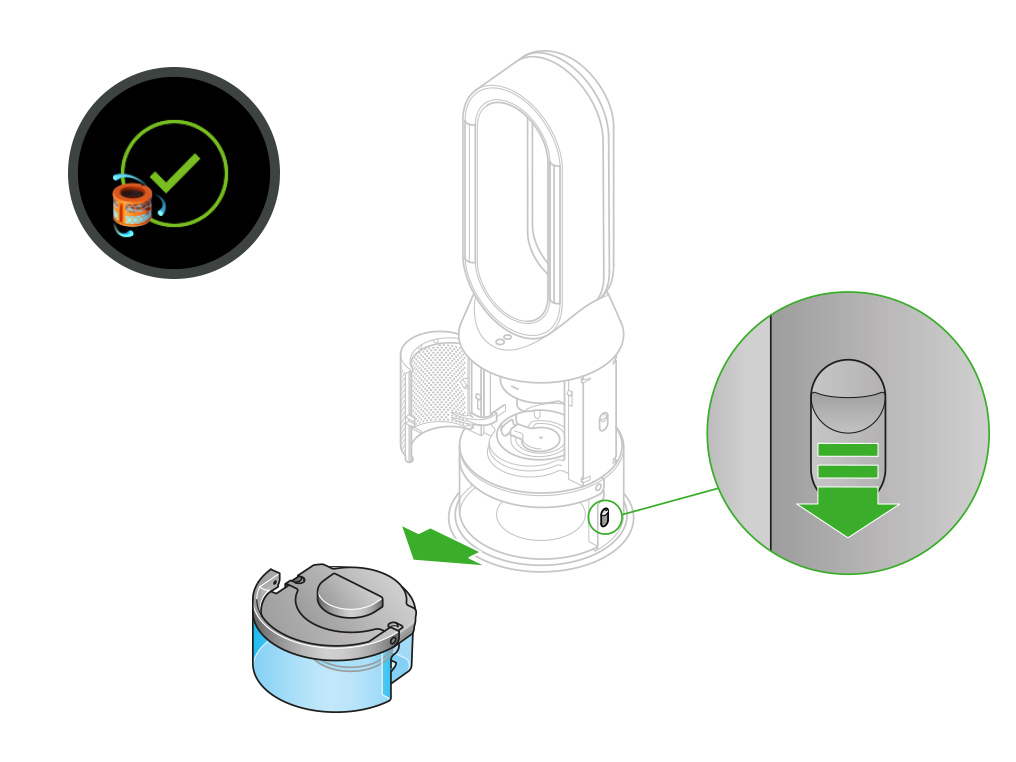
Rinse
Unclip the cap, take the evaporator out of the water tank and rinse it under a cold tap.
Wipe away any excess water to avoid drips and place the evaporator to one side.
Rinse the water tank under a cold tap. Wipe the inside of the tank to remove any excess solution and any debris.
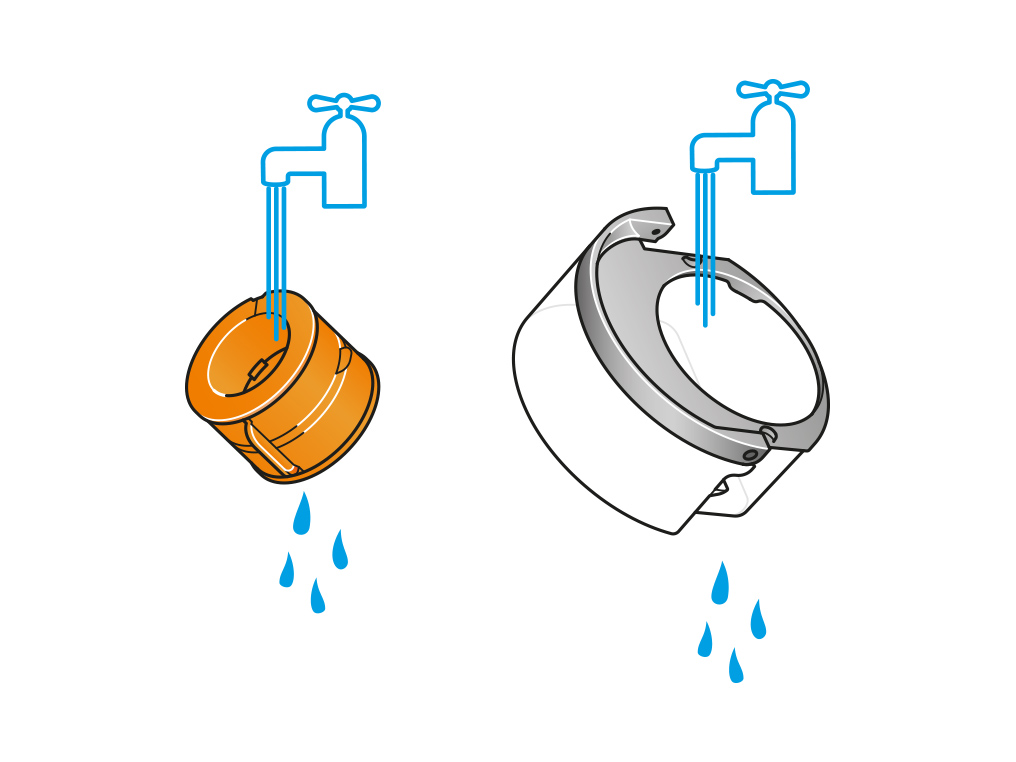
Refill the tank
Refill the water tank to the Max level. Wipe off any excess water and replace the cap, making sure that the cap clips are secured.
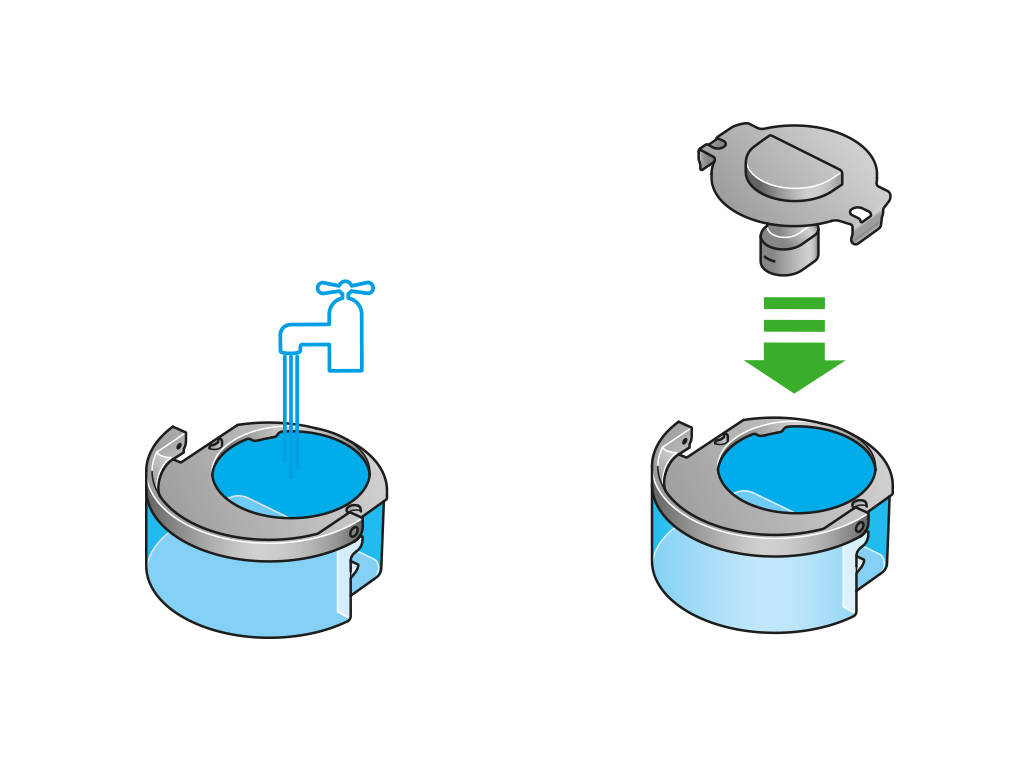
Reassemble
Push the evaporator back into your machine, making sure that it is securely in position.
Close the inner door and replace the outer covers.
Make sure the cap is completely dry. If wet, wipe thoroughly with a dry cloth.
Slide the water tank back into your machine and make sure it is securely in place.
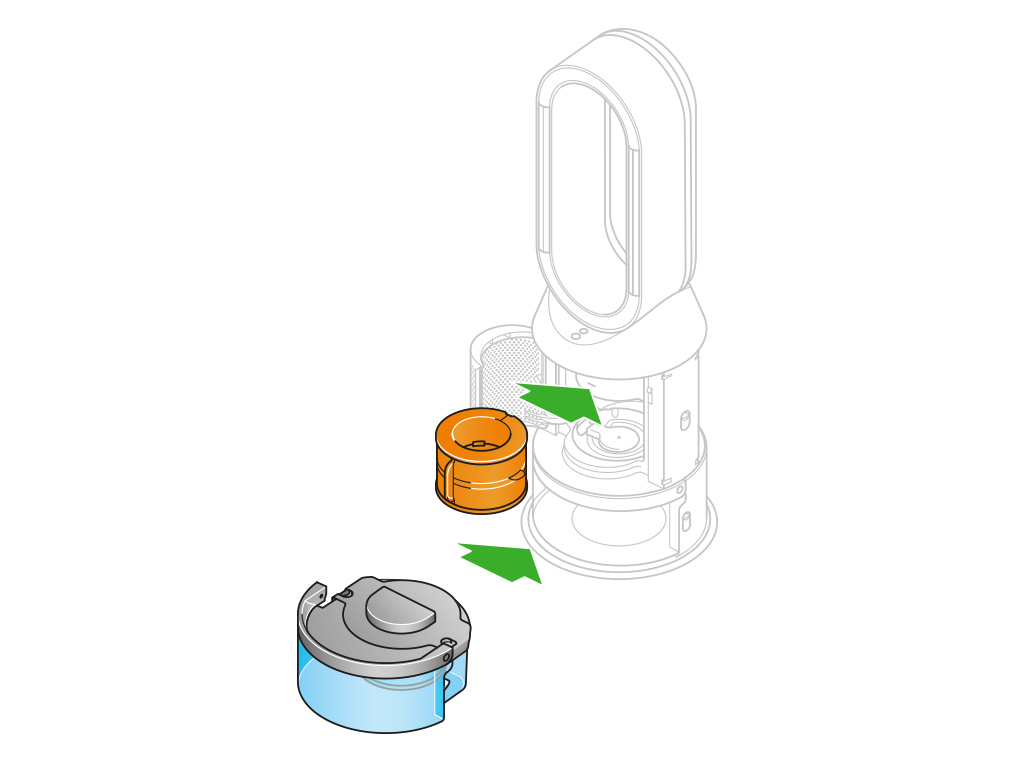
Reassemble the machine
If your machine is whining or whistling, it may be because one of the parts is not securely fitted.
Switch off, unplug and reassemble your machine.
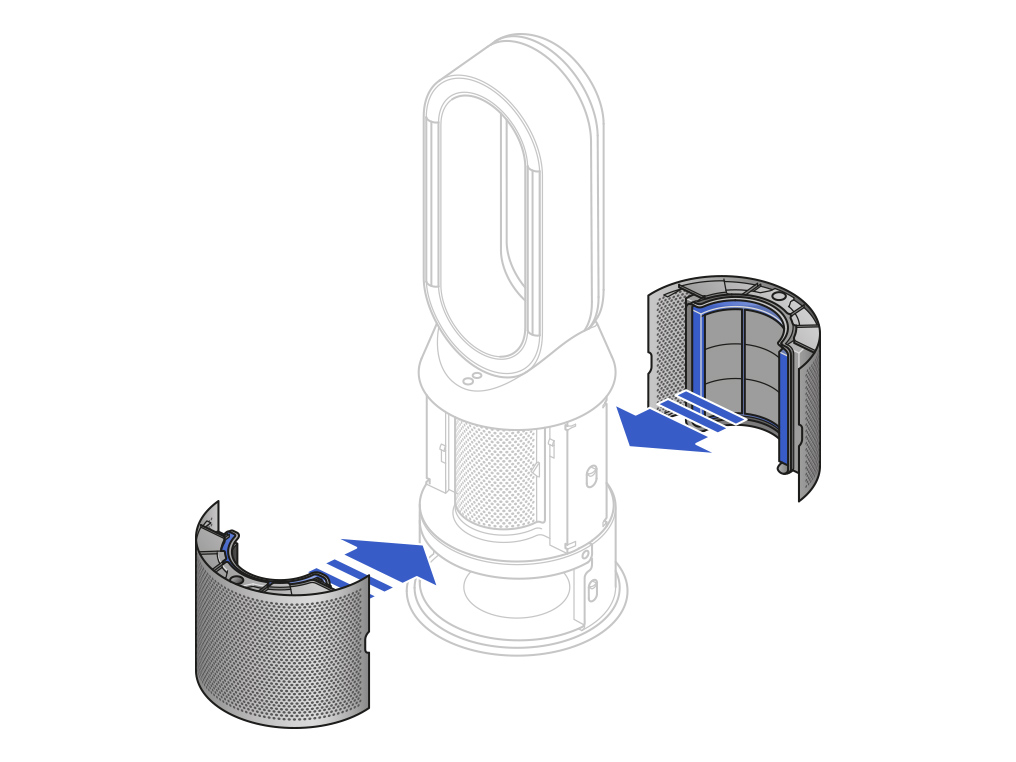
Push down on the buttons on either side of your machine to release the outer covers. Push down on the tabs to remove the filters.
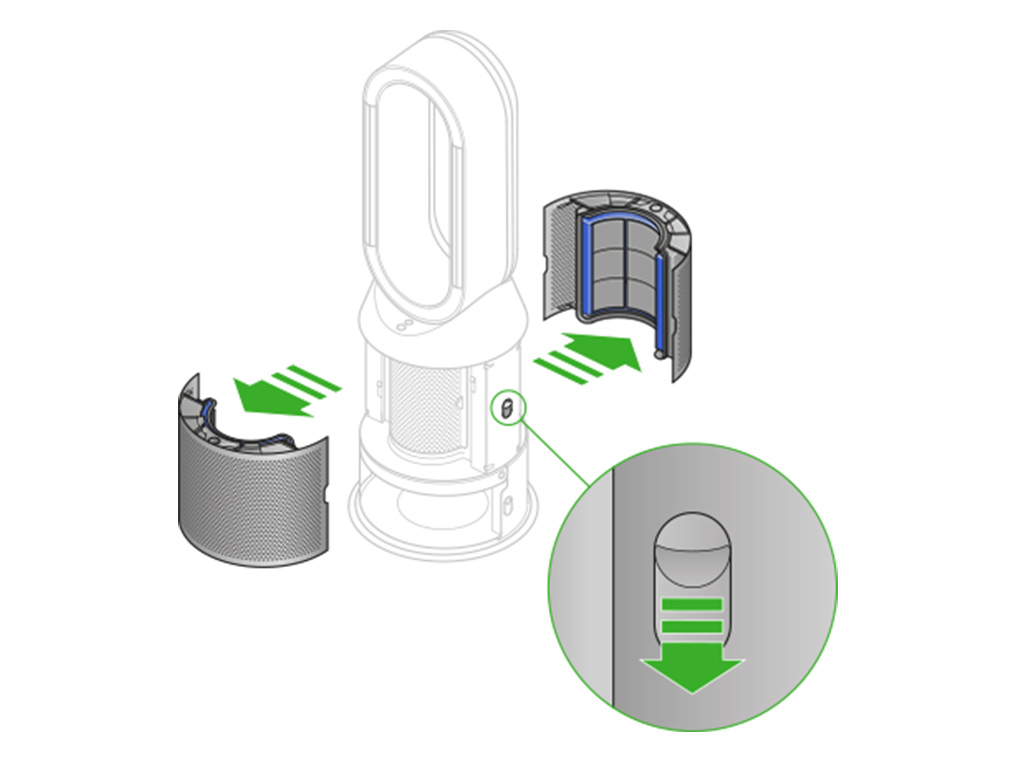
Push down the water tank release buttons on the sides of your machine.

Remove the evaporator and check the soft plastic mesh directly above where it sits inside the machine.
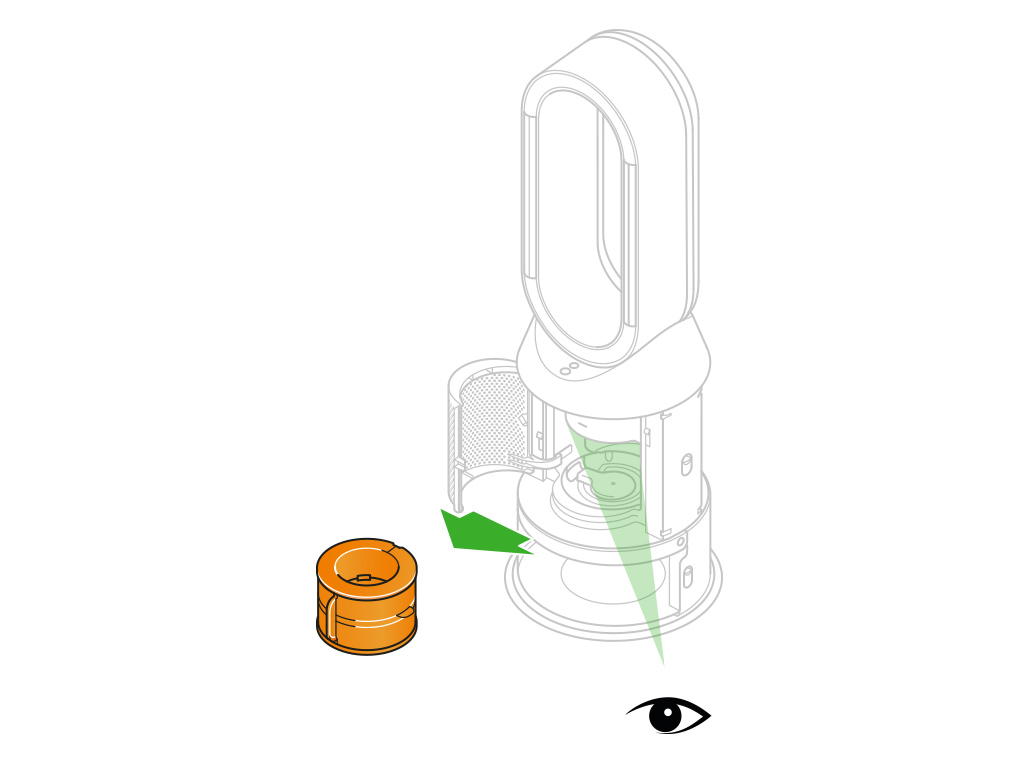
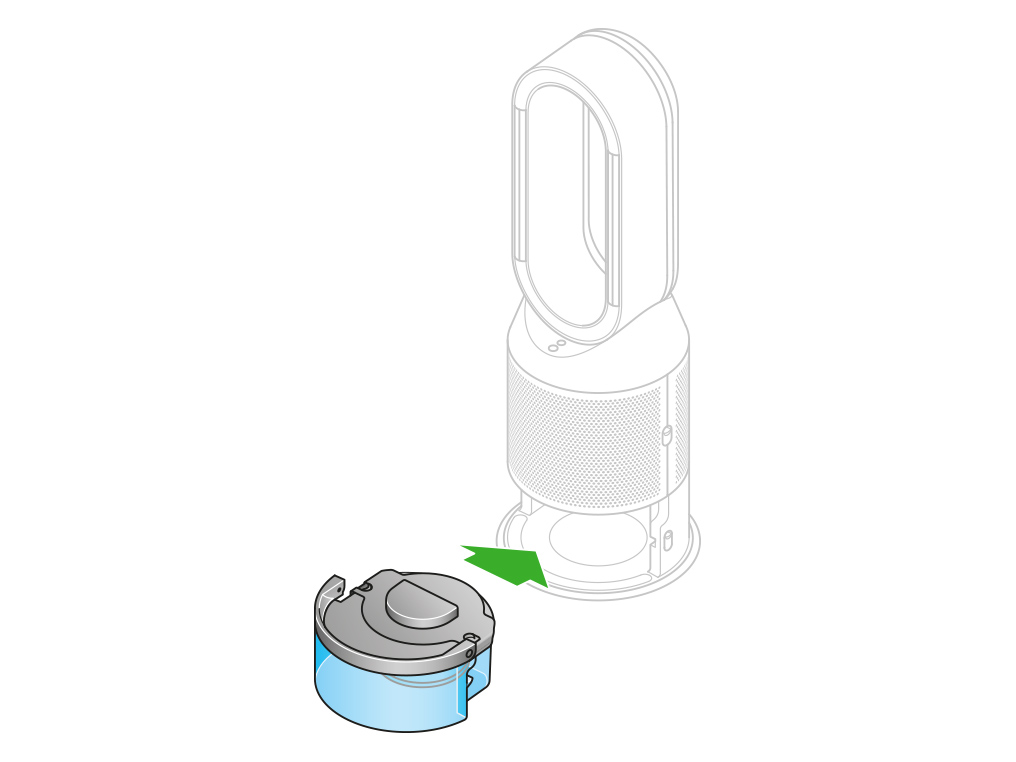
Hold the evaporator by the handle and push it into the machine until it slots into place.
With the evaporator in place, close the inner door making sure it clicks firmly shut.
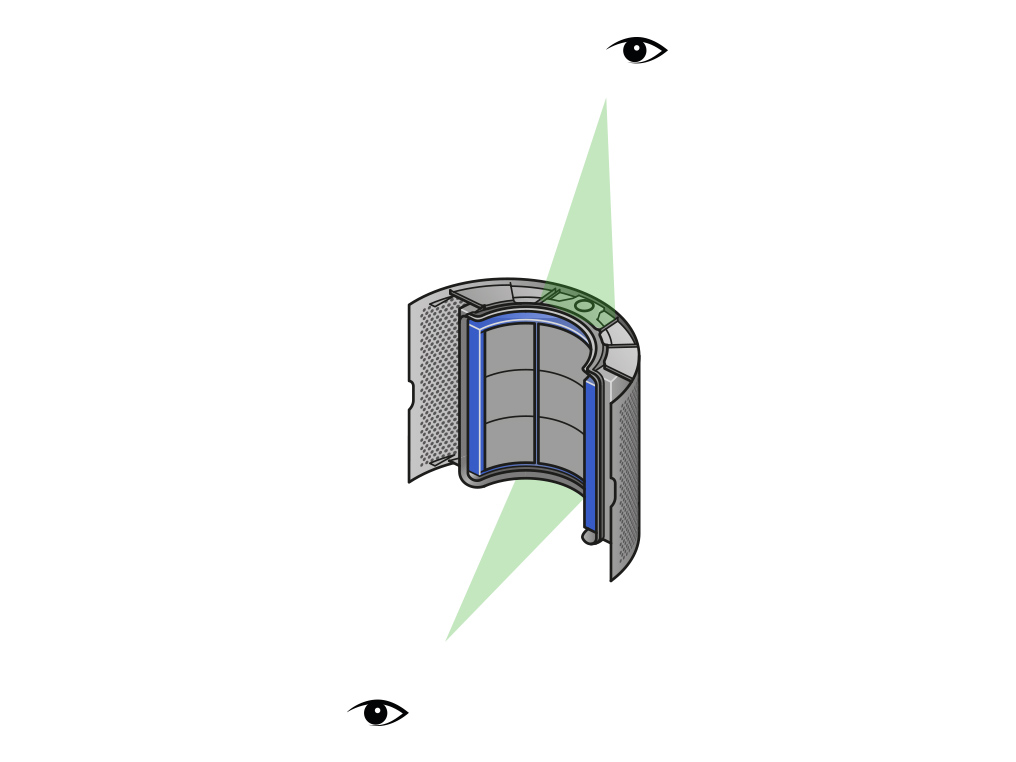
Push the filters into the outer covers and make sure the tabs click into place.
Refit the tank
Slide the water tank back into your machine until it clicks securely in place.
Put the outer covers into position on your machine and push firmly until they both click securely in place.
Plug your machine in and switch it on.
Please select the appropriate option
Please select the appropriate option
Ensure the correct button on the remote control is being pressed.
Point the remote control directly at the front of the machine when pressing the button.
Airflow speed
Press the Airflow speed button to increase and decrease the airflow speed.
The Airflow speed can be adjusted from 1 - 10, with 1 being the lowest setting and 10 being the highest.
Check the airflow direction
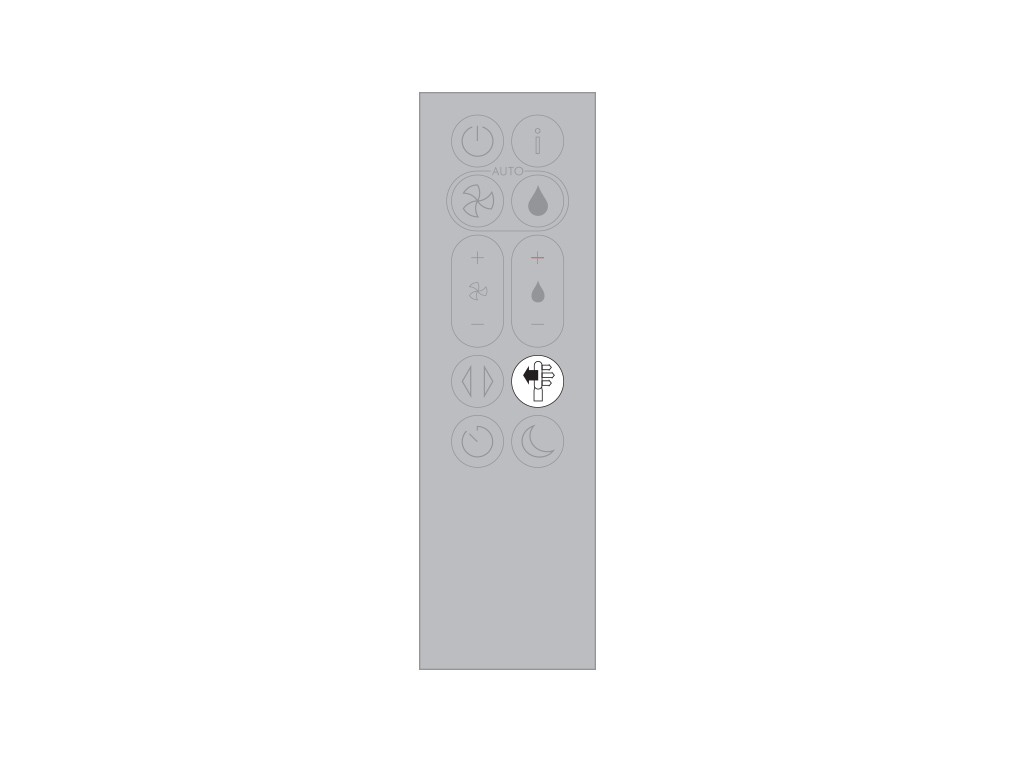
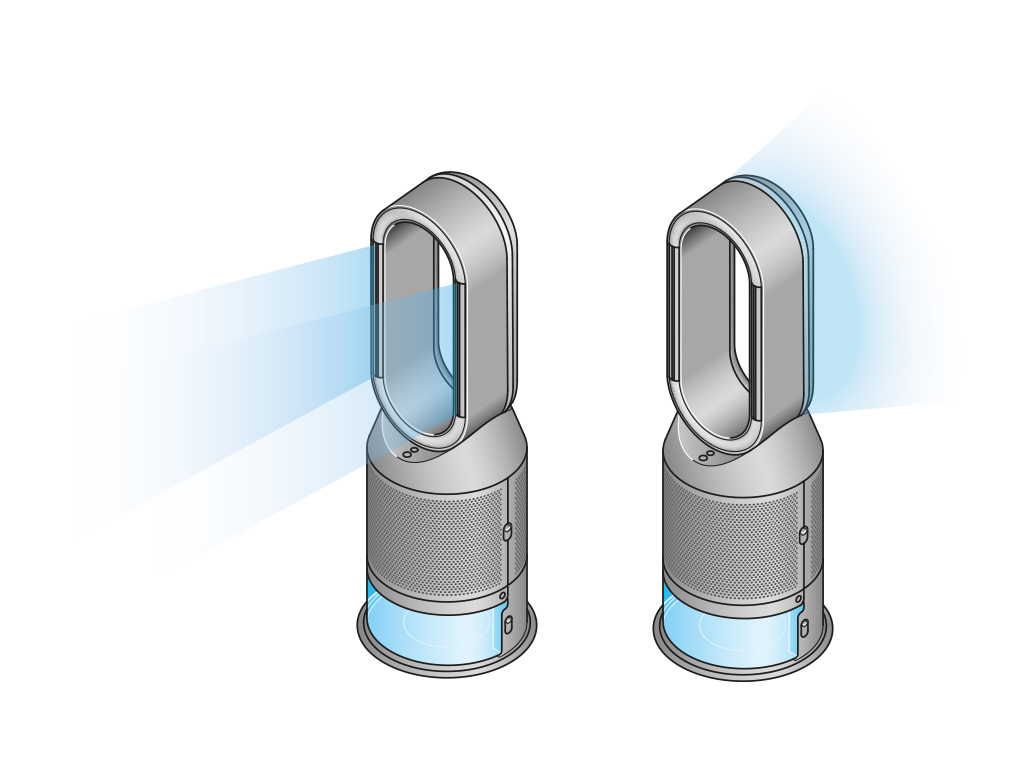
Press the Airflow direction button on the remote control to change the direction of airflow from front to back.
An animation on the display will indicate the airflow direction when the button is pressed. Alternatively, you can feel the airflow direction by holding your hand either in front of or behind the amplifier loop.
Looking after your machine
To always get the best performance from your Dyson purifying humidifying fan, it's important to regularly clean it and check for blockages.
Cleaning your machine
If your machine is dusty, wipe it with a damp lint-free cloth.

Look for blockages in the air inlet holes in the shrouds, the small aperture inside the amplifier loop, and the soft plastic mesh visible inside the machine when the evaporator is removed.

Use a soft brush to remove dust and debris.

Don't use detergents or polishes to clean your machine.

Ensure the correct button on the remote control is being pressed.
Point the remote control directly at the front of the machine when pressing the button.
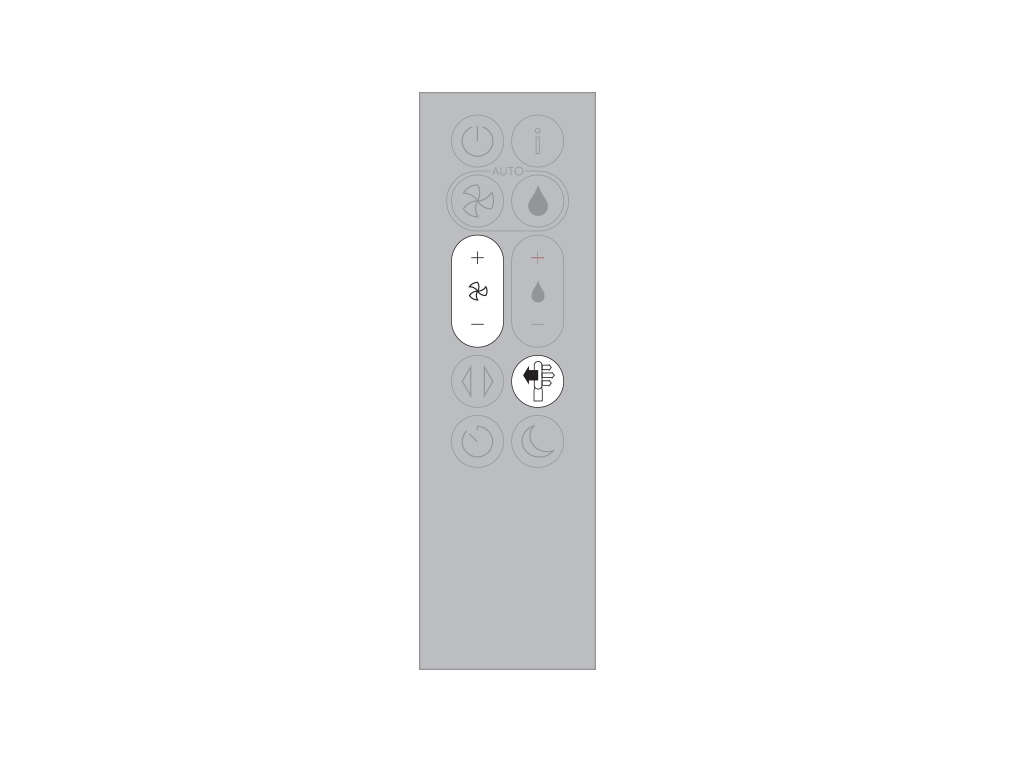
Airflow speed
Press the Airflow speed button to increase and decrease the airflow speed.
The Airflow speed can be adjusted from 1 - 10, with 1 being the lowest setting and 10 being the highest.
Check the airflow direction
Press the Airflow direction button on the remote control to change the direction of airflow from front to back.
An animation on the display will indicate the airflow direction when the button is pressed. Alternatively, you can feel the airflow direction by holding your hand either in front of or behind the amplifier loop.

Test the remote control
Test the other buttons on the remote control.
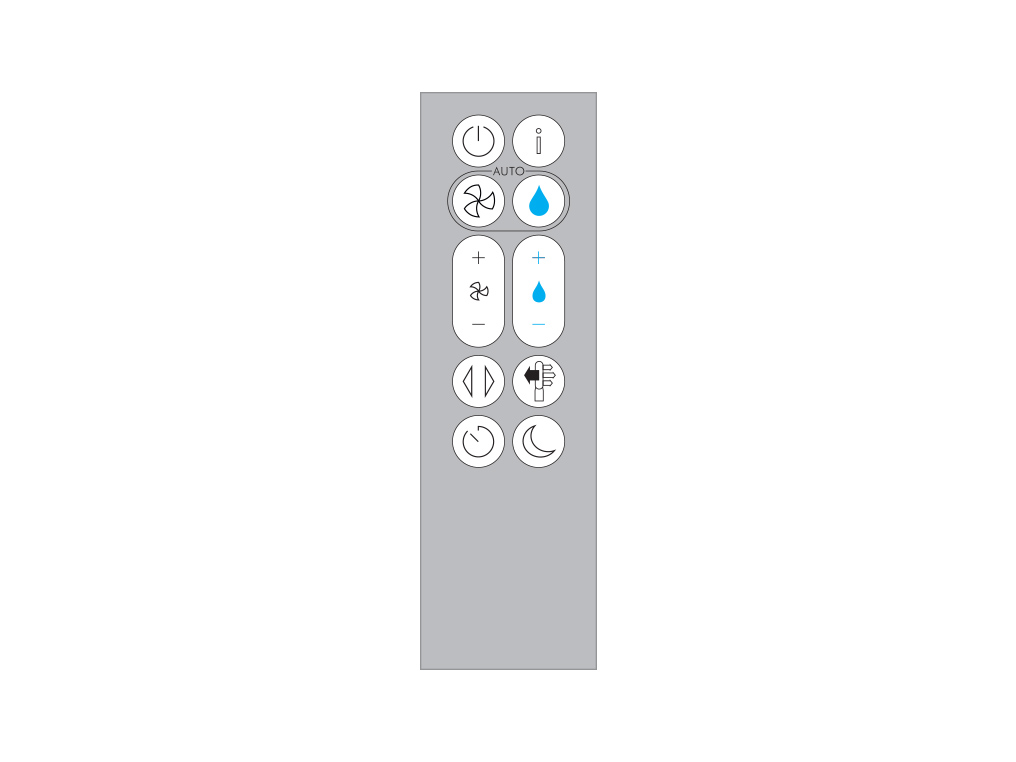
Point the remote control directly at the front of the machine when pressing the button.
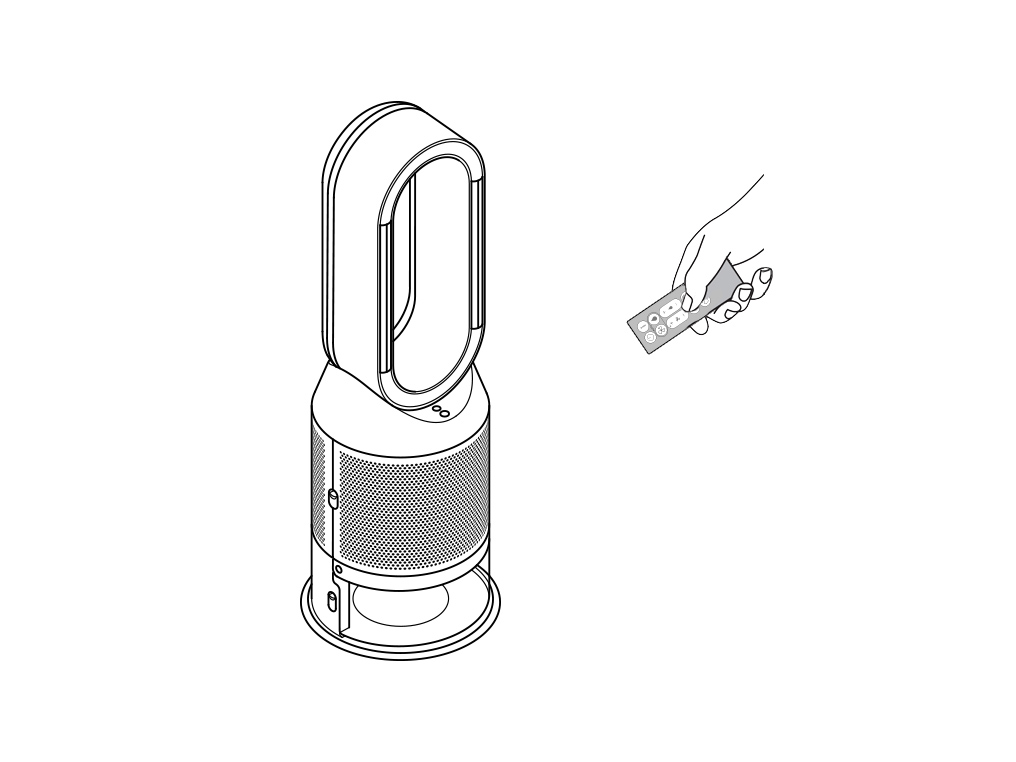
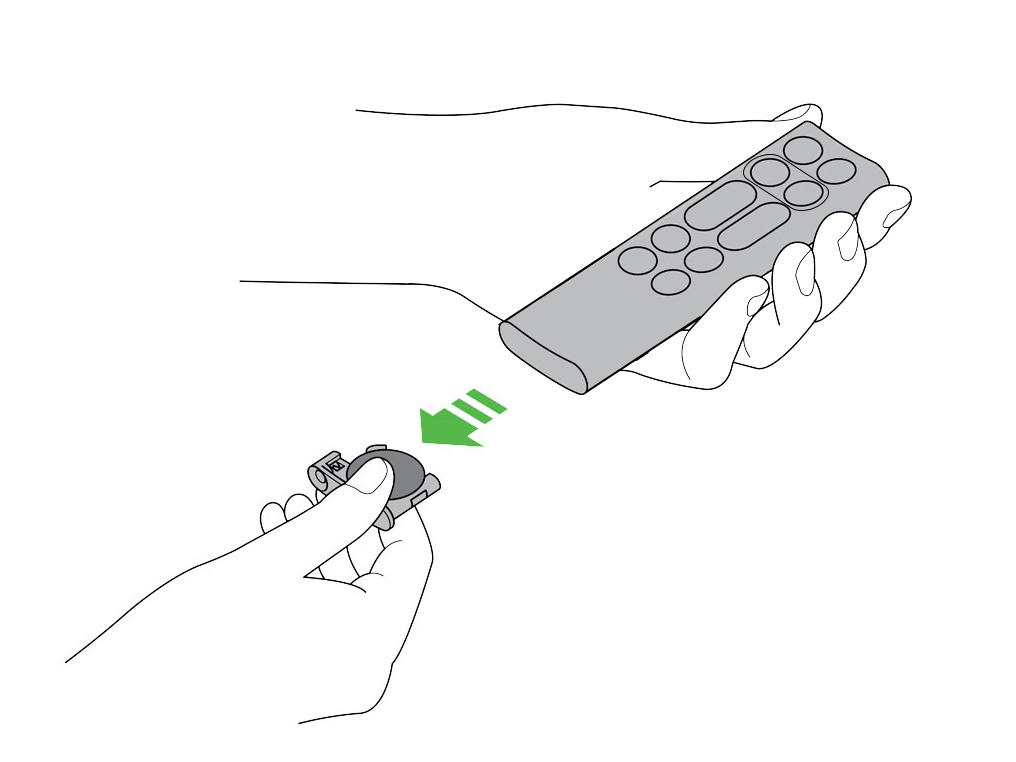
Replacing the remote control battery
Please follow the steps in the video.
Find the text version of the step-by-step guide instead, under "Has this resolved the problem?"
Has this resolved the problem?
Unscrew the remote control's battery compartment.

Loosen the base and pull it away from the remote. Replace the battery with type CR 2032.
Cancel the Deep clean cycle
To cancel the Deep clean cycle, press and hold the Deep clean cycle button for five seconds.
Remove the tank
Push down the water tank release buttons on the sides of your machine. Slide the water tank out of your machine.
Check the cap and connections
Keep the cap on the water tank dry when you run a Deep clean cycle or fill the tank. It contains power connections and should not be washed. If wet, wipe thoroughly with a dry cloth. Make sure the cap and connections are completely dry before refitting.

Replace the tank
Slide the water tank back into your machine until it clicks securely in place.
Restart the Deep clean cycle
Press the Deep clean cycle button on the front of your machine and your instructions will be shown on the LCD screen.
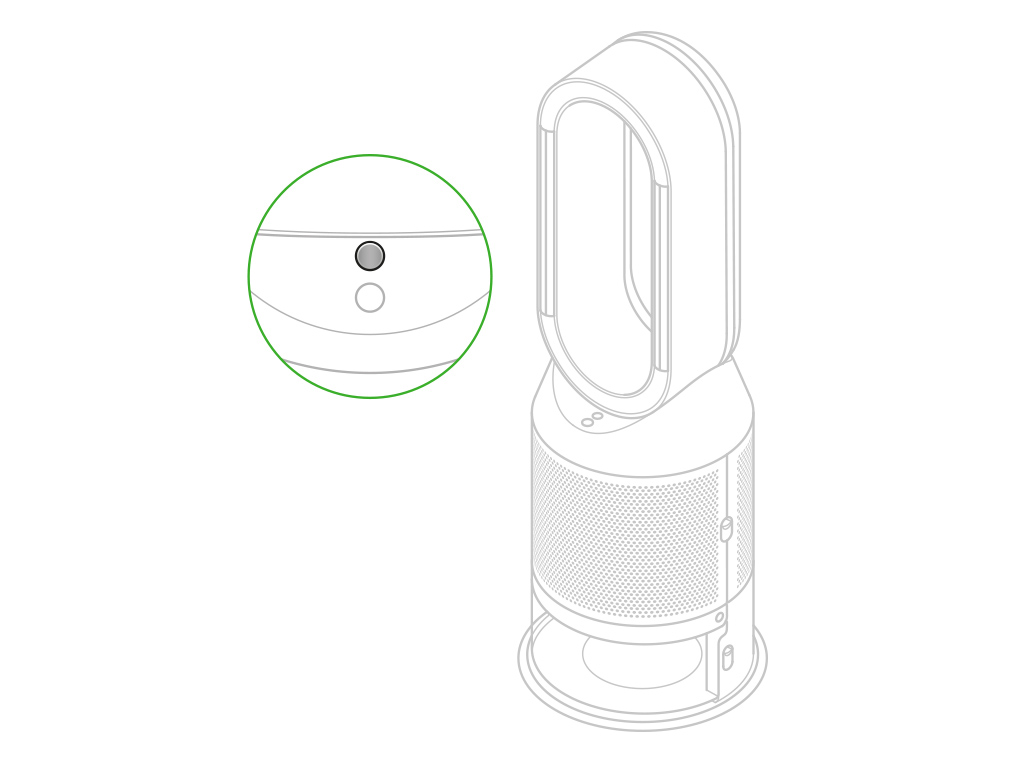
Deep cleaning your machine
Please follow the steps in the video.
Find the text version of the step-by-step guide instead, under "Has this resolved the problem?"
Has this resolved the problem?
Keep the cap on the water tank dry when you run a Deep clean cycle or fill the tank. It contains power connections and should not be washed. If wet, wipe thoroughly with a dry cloth. Make sure the cap and connections are completely dry before refitting.
Press the Deep clean cycle button
Press the Deep clean cycle button on the front of your machine and your instructions will be shown on the LCD screen.
To cancel the Deep clean cycle at any point, press and hold the Deep clean cycle button for five seconds.

Remove the tank
Push down on the outer cover release buttons to remove the outer covers. The inner door will spring open. Put the outer covers to one side as you carry out the Deep clean cycle.
Push down the water tank release buttons on the sides of your machine. Slide the water tank out of your machine and unclip the cap.

Remove the evaporator
Remove the evaporator from your machine, place it in the water tank and refit the cap.

Half fill the tank
Carry the water tank by its handle to the tap.
Remove the cap and evaporator. Fill the water tank halfway to the Max level with cold tap water.
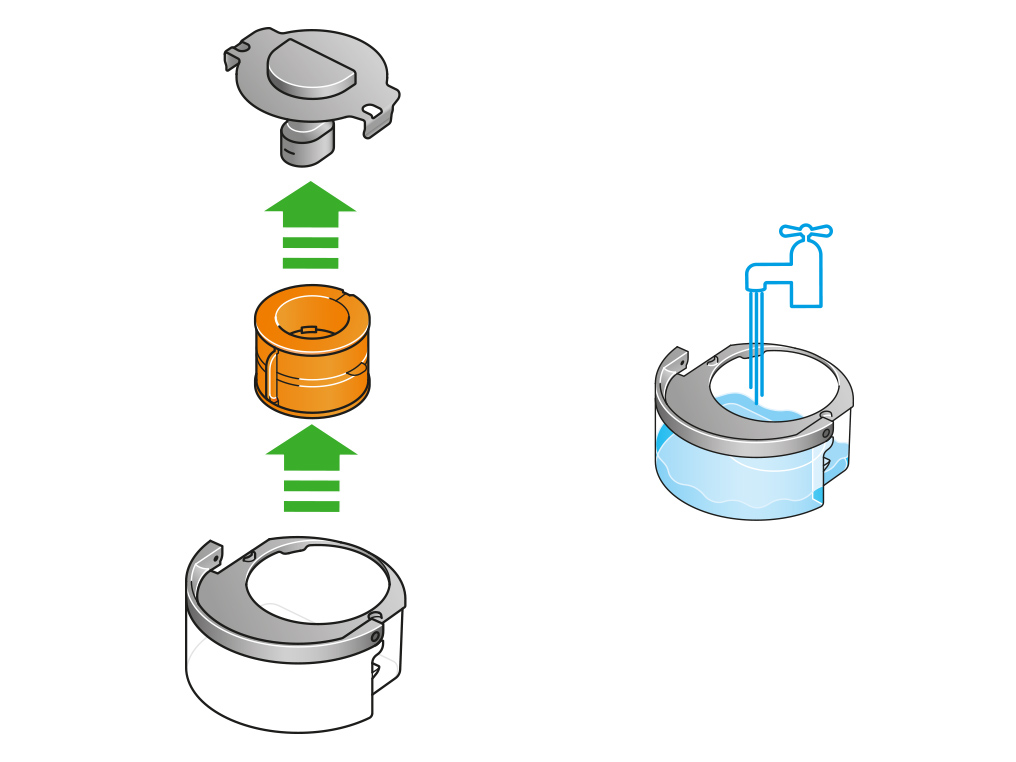
Keep the cap dry
Keep the cap on the water tank dry when you run a Deep clean cycle or fill the tank. It contains power connections and should not be washed. If wet, wipe thoroughly with a dry cloth. Make sure the cap and connections are completely dry before refitting.

Make a descaling solution
Measure out 150g of citric acid and place it in the water tank.
Agitate gently until all the citric acid has dissolved.
Place the evaporator in the water tank. Fill the water tank to the Max level with cold tap water.

Replace the cap
Replace the cap and secure the cap clips in place.
Wipe off any excess water to avoid drips.
Make sure the cap is completely dry. If wet, wipe thoroughly with a dry cloth.

Replace the tank
Slide the water tank back into your machine until it clicks securely in place.
When prompted by the LCD screen, press the Deep clean cycle button.
The Deep clean cycle will start and the LCD screen will show a countdown timer.

Remove the tank
When the LCD screen shows the Deep clean cycle is complete, push down the water tank release buttons on the sides of your machine.
Slide the water tank out of your machine. Carry the water tank by its handle to the tap.

Rinse
Unclip the cap, take the evaporator out of the water tank and rinse it under a cold tap.
Wipe away any excess water to avoid drips and place the evaporator to one side.
Rinse the water tank under a cold tap. Wipe the inside of the tank to remove any excess solution and any debris.

Refill the tank
Refill the water tank to the Max level. Wipe off any excess water and replace the cap, making sure that the cap clips are secured.

Reassemble
Push the evaporator back into your machine, making sure that it is securely in position.
Close the inner door and replace the outer covers.
Make sure the cap is completely dry. If wet, wipe thoroughly with a dry cloth.
Slide the water tank back into your machine and make sure it is securely in place.

Please select the appropriate option
Display screen
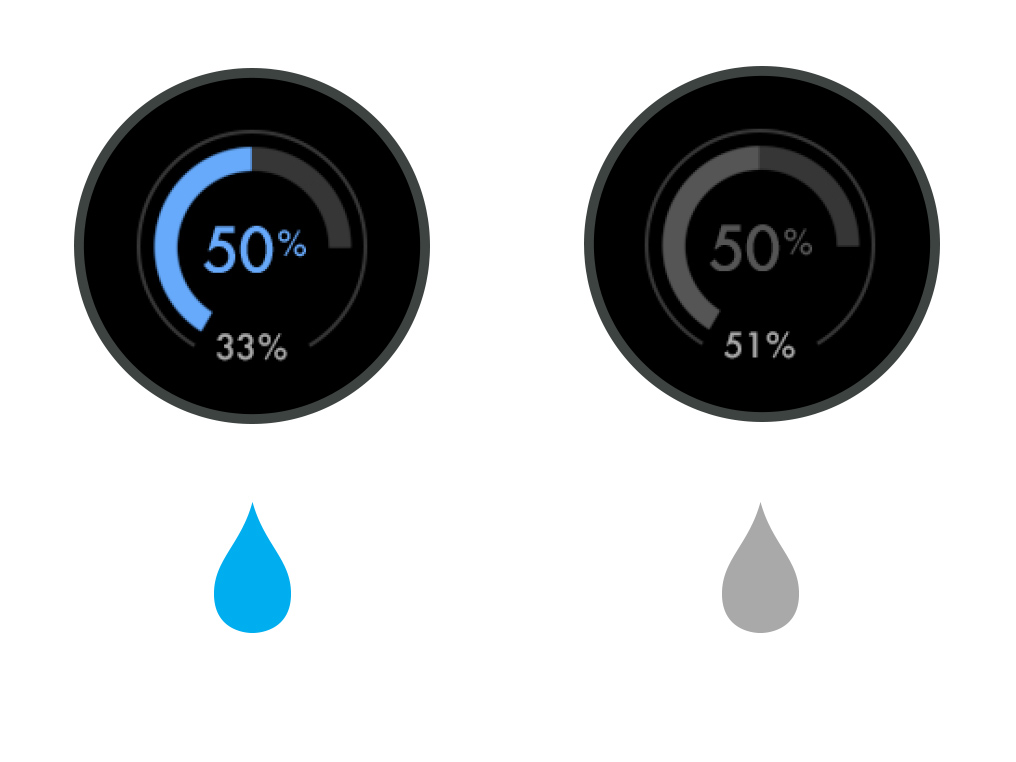
The humidification dial on your LCD screen shows the current room humidity in grey, and the target humidity in blue.
When your machine is humidifying, the dial will appear blue. A grey dial indicates that the humidifier is inactive.
Increasing the airflow speed
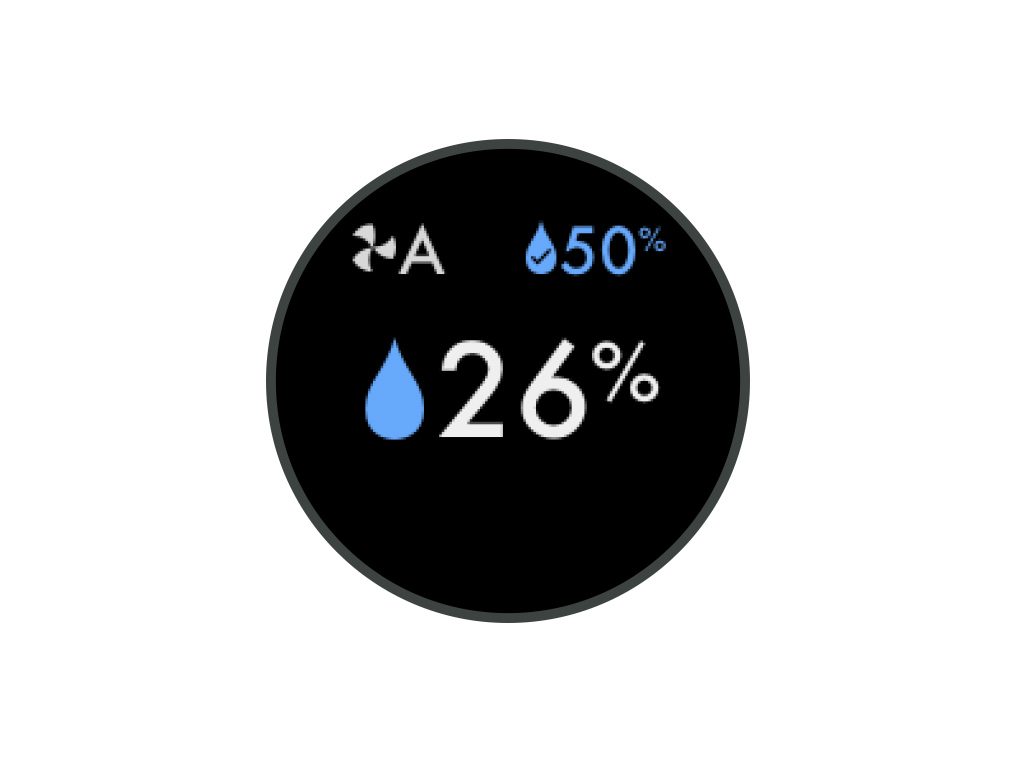
First, check the current humidity level in the room.
Press the information button on the remote control until you reach the relative humidity information screen.
If the ambient humidity level is higher or lower than the target humidity, increasing the airflow speed should help you reach your target.
Your machine is engineered to purify and humidify single rooms, so you should use it where you spend the majority of your time at home.
When placing the machine, allow for a few feet of clearance on all sides so that the air can circulate effectively. Place it away from radiators, draughts or air vents. Turn off any air conditioning and keep doors and windows closed during use.
If the machine is being used in a large open space with windows and doors open, it may take longer to reach the humidity level.
Deep cleaning your machine
To always get the best performance from your Dyson purifying humidifying fan, it is important to carry out regular deep cleaning to remove any limescale.
Before and after long periods where humidification is not used, we recommend you run an additional Deep clean cycle.
In hard water areas, you may need to run the Deep clean cycle more frequently. We recommend you use filtered water to always get the best performance from your machine.
Please follow the steps in the video.
Find the text version of the step-by-step guide instead, under "Has this resolved the problem?"
Has this resolved the problem?
Keep the cap on the water tank dry when you run a Deep clean cycle or fill the tank. It contains power connections and should not be washed. If wet, wipe thoroughly with a dry cloth. Make sure the cap and connections are completely dry before refitting.
Deep cleaning your machine
To always get the best performance from your Dyson purifying humidifying fan, it is important to carry out regular deep cleaning to remove any limescale.
Before and after long periods where humidification is not used, we recommend you run an additional Deep clean cycle.
In hard water areas, you may need to run the Deep clean cycle more frequently. We recommend you use filtered water to always get the best performance from your machine.

Your machine will alert you when it needs you to carry out a Deep clean cycle.

Press the Deep clean cycle button
Press the Deep clean cycle button on the front of your machine and your instructions will be shown on the LCD screen.
To cancel the Deep clean cycle at any point, press and hold the Deep clean cycle button for five seconds.

Remove the tank
Push down on the outer cover release buttons to remove the outer covers. The inner door will spring open. Put the outer covers to one side as you carry out the Deep clean cycle.
Push down the water tank release buttons on the sides of your machine. Slide the water tank out of your machine and unclip the cap.

Remove the evaporator
Remove the evaporator from your machine, place it in the water tank and refit the cap.

Keep the cap dry
Keep the cap on the water tank dry when you run a Deep clean cycle or fill the tank. It contains power connections and should not be washed. If wet, wipe thoroughly with a dry cloth. Make sure the cap and connections are completely dry before refitting.

Make a descaling solution
Measure out 150g of citric acid and place it in the water tank.
Agitate gently until all the citric acid has dissolved.
Place the evaporator in the water tank. Fill the water tank to the Max level with cold tap water.

Replace the cap
Replace the cap and secure the cap clips in place.
Wipe off any excess water to avoid drips.
Make sure the cap is completely dry. If wet, wipe thoroughly with a dry cloth.

Replace the tank
Slide the water tank back into your machine until it clicks securely in place.
When prompted by the LCD screen, press the Deep clean cycle button.
The Deep clean cycle will start and the LCD screen will show a countdown timer.

Remove the tank
When the LCD screen shows the Deep clean cycle is complete, push down the water tank release buttons on the sides of your machine.
Slide the water tank out of your machine. Carry the water tank by its handle to the tap.

Rinse
Unclip the cap, take the evaporator out of the water tank and rinse it under a cold tap.
Wipe away any excess water to avoid drips and place the evaporator to one side.
Rinse the water tank under a cold tap. Wipe the inside of the tank to remove any excess solution and any debris.

Refill the tank
Refill the water tank to the Max level. Wipe off any excess water and replace the cap, making sure that the cap clips are secured.

Reassemble
Push the evaporator back into your machine, making sure that it is securely in position.
Close the inner door and replace the outer covers.
Make sure the cap is completely dry. If wet, wipe thoroughly with a dry cloth.
Slide the water tank back into your machine and make sure it is securely in place.

Evaporator
The Dyson Purifier Humidify+Cool Auto React uses an evaporator to humidify the air. The room is humidified without the need for a cloud of mist. Instead, there will be an indication on the display when the machine is humidifying.
A water droplet animation on the display screen indicates that the machine is humidifying.
The water level in the tank will slowly decrease while your machine is humidifying.
The water will be depleted very slowly. Please allow a reasonable amount of time to pass before observing any change.
Is there anything else we can help with?
The water level in the tank will slowly decrease while your machine is humidifying.
The water will be depleted very slowly. Please allow a reasonable amount of time to pass before observing any change.
Which mode is your machine in?
Auto humidify mode
While in Auto humidify mode, the onboard sensors will intelligently adjust the settings of the machine according to the temperature and humidity of your room.
Room humidity
Your machine will pause when the target room humidity has been reached, switching on again when the room humidity levels drop.
Airflow speed
The airflow speed will increase until the target humidity level has been reached.
Manual mode
Switch the machine to Manual mode.
Target humidity
In Manual mode, your machine will only humidify if the target humidity is higher than the ambient humidity.
Manually setting the humidity level
You can choose from 30%, 40%, 50%, 60% or 70%, using the remote control.
A water droplet animation on the display screen indicates that the machine is humidifying.
Increasing the airflow speed will help you to reach your target humidity.
Keep the cap on the water tank dry when you run a Deep clean cycle or fill the tank. It contains power connections and should not be washed. If wet, wipe thoroughly with a dry cloth. Make sure the cap and connections are completely dry before refitting.
Deep cleaning your machine
To always get the best performance from your Dyson purifying humidifying fan, it is important to carry out regular deep cleaning to remove any limescale.
Before and after long periods where humidification is not used, we recommend you run an additional Deep clean cycle.
In hard water areas, you may need to run the Deep clean cycle more frequently. We recommend you use filtered water to always get the best performance from your machine.
Please follow the steps in the video.
Find the text version of the step-by-step guide instead, under "Has this resolved the problem?"
Has this resolved the problem?
Target humidity
In Manual mode, your machine will only humidify if the target humidity is higher than the ambient humidity.
Manually setting the humidity level
You can choose from 30%, 40%, 50%, 60% or 70%, using the remote control.
A water droplet animation on the display screen indicates that the machine is humidifying.

Increasing the airflow speed will help you to reach your target humidity.
Auto humidify mode
When in Auto humidify mode, the onboard sensors will intelligently adjust the settings of the machine according to the temperature and humidity of your room.
Room humidity
Your machine will pause when the target room humidity has been reached, switching on again when the room humidity levels drop.
To turn off Auto humidify mode or to change the humidity levels manually, press the Humidity control button.
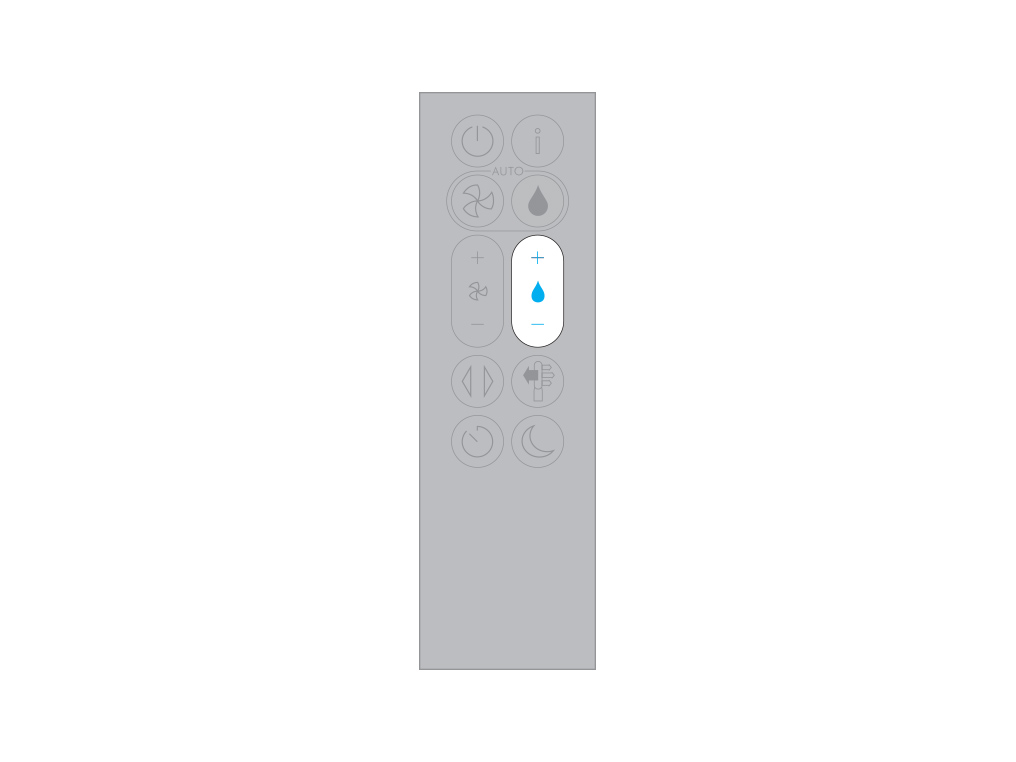
Manually setting the humidity level
You can choose from 30%, 40%, 50%, 60% or 70%, using the remote control.
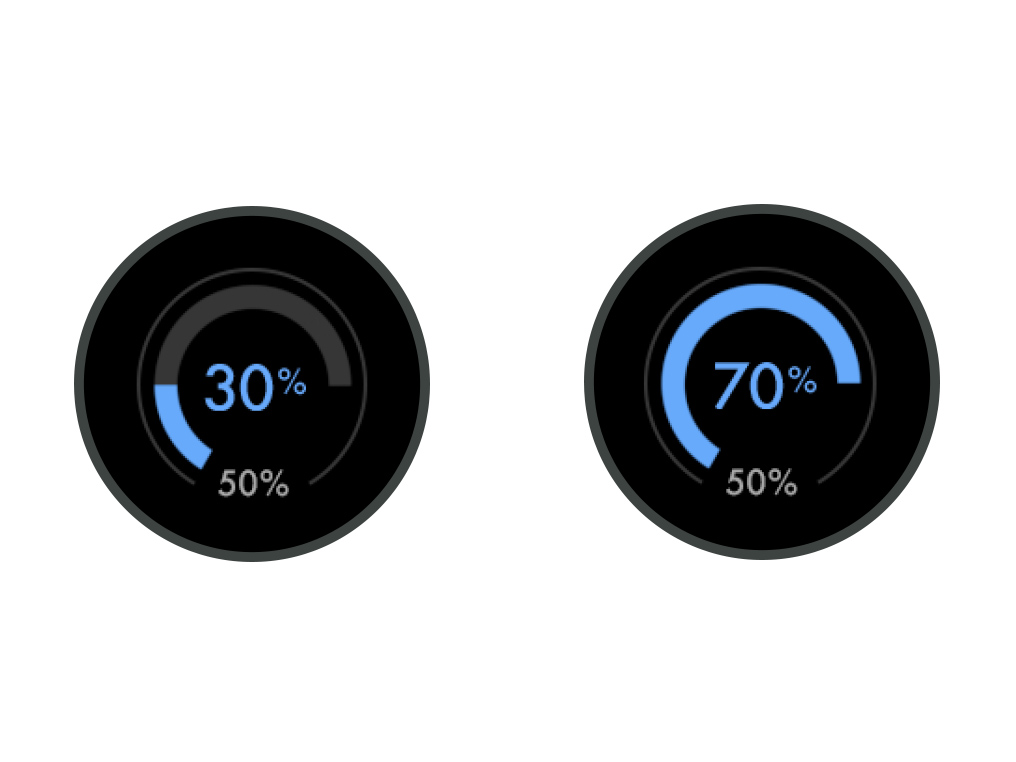
A water droplet animation on the display screen indicates that the machine is humidifying.
If your machine has stopped humidifying, check to see if the target humidity has been reached or is lower than the ambient humidity.
The humidification dial on your LCD screen shows the current room humidity in grey, and the target humidity in blue.
When your machine is humidifying, the dial will appear blue. A grey dial indicates that the humidifier is inactive.
Display screen
If your machine has stopped humidifying for another reason, there may be an indication on the display screen as to why.
Wrong PSU warning
Your machine will only operate using the power supply unit provided. If you are using a third party power supply, your machine will not operate and instead will display this warning graphic.
Please ensure you are using either the power supply unit provided or a genuine Dyson replacement part.
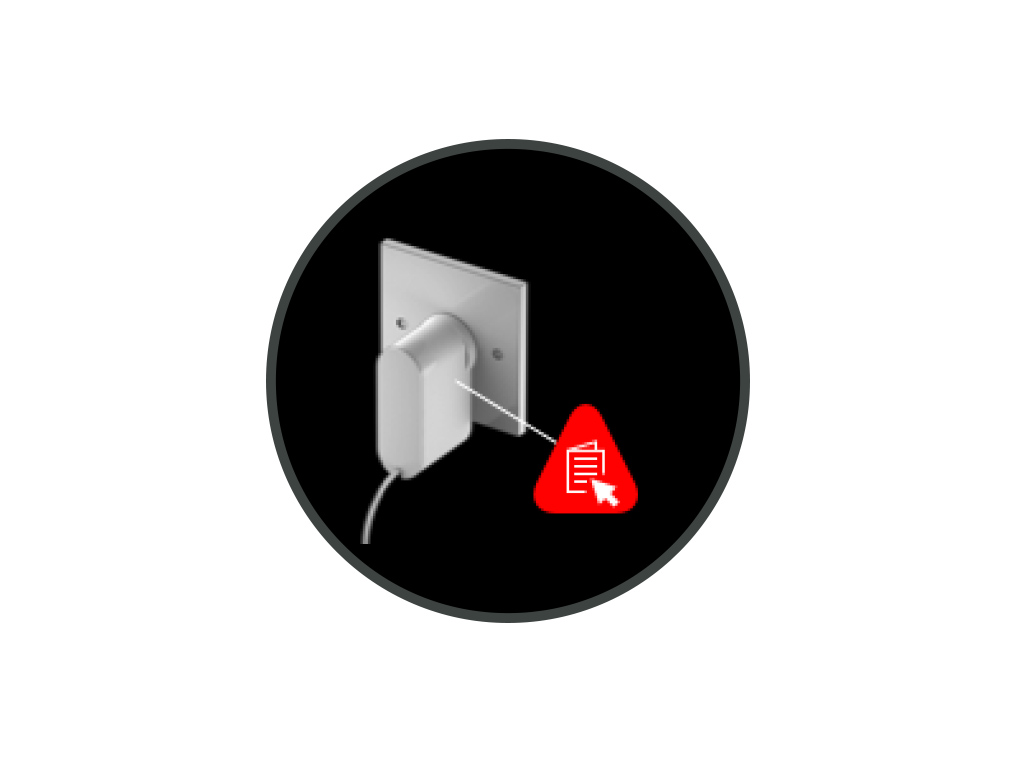
Check the electrics
Check that the household electrics are on.
Check the plug and power cord for signs of damage.
Try the machine in a different plug socket.
Ensure the cable is firmly plugged into the back of the machine.
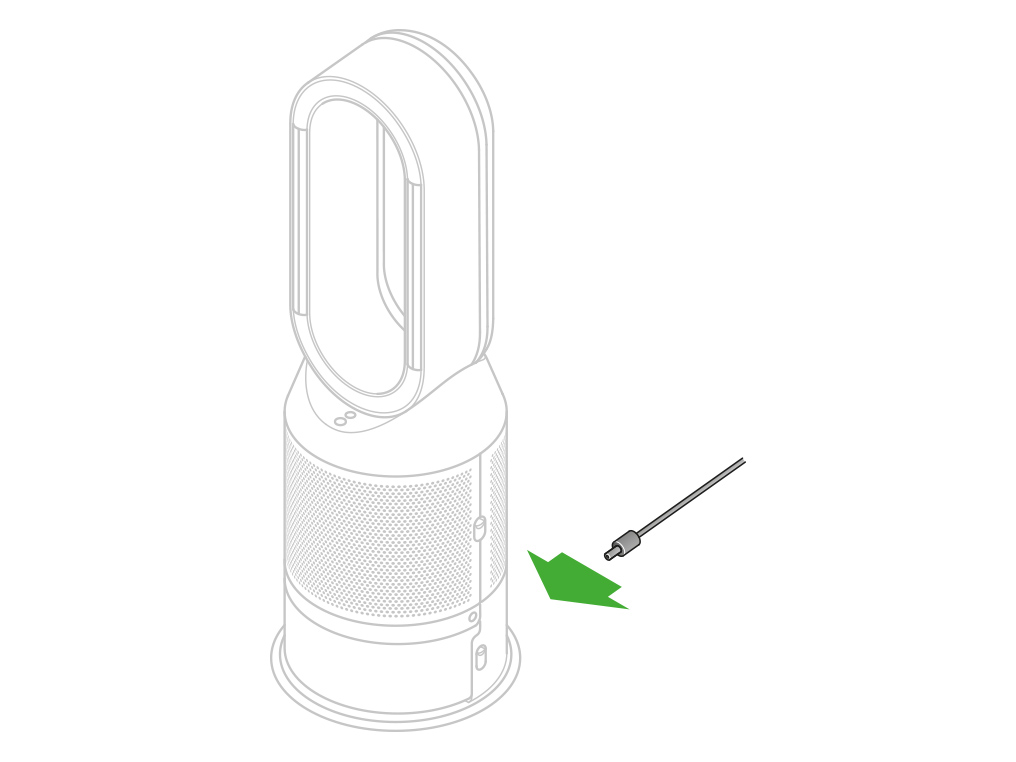
Has this resolved the problem?
Keep the cap on the water tank dry when you run a Deep clean cycle or fill the tank. It contains power connections and should not be washed. If wet, wipe thoroughly with a dry cloth. Make sure the cap and connections are completely dry before refitting.
Remove the tank
Push down the water tank release buttons. Slide the water tank out of your machine and unclip the cap.
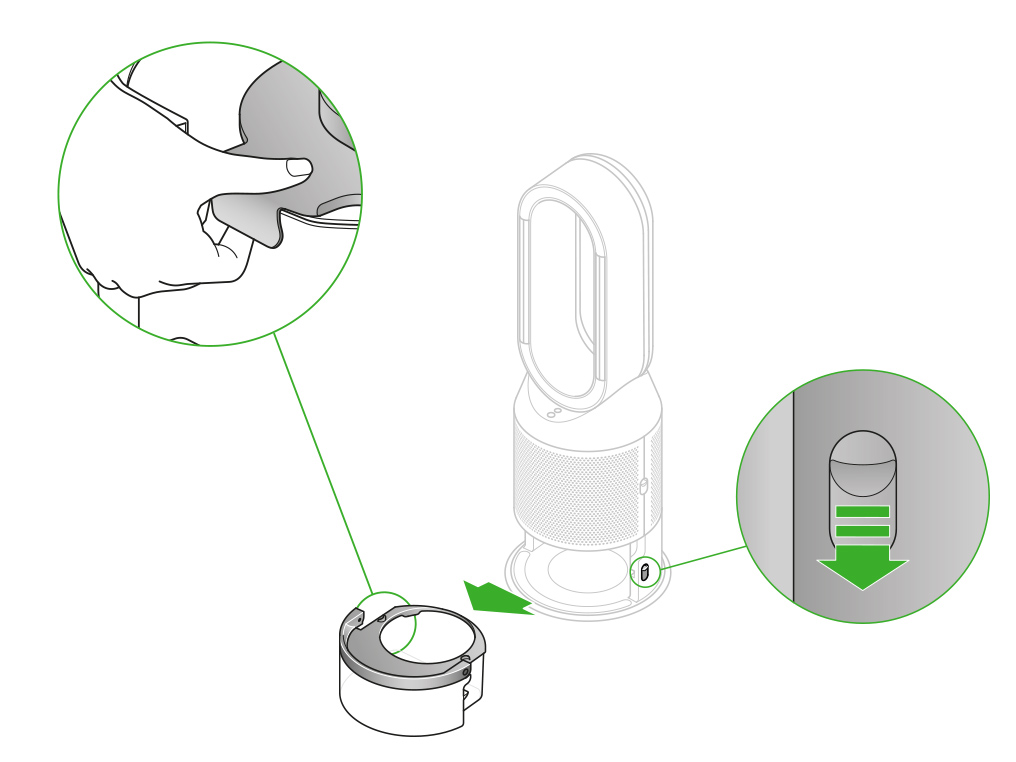
Check the pump column for signs of damage.
Place the pump column on a clean, soft cloth and allow it to dry for 24 hours.
Replace the tank
Replace the cap and secure the cap clips in place.
Make sure the cap is completely dry. If wet, wipe thoroughly with a dry cloth.
Slide the water tank back into your machine until it clicks securely in place.
Check the drip tray
Your machine will show this alert if the evaporator's drip tray has overflowed.
Remove the filter shrouds
Push down on the outer cover release buttons to remove the outer covers. The inner door will spring open.
Remove the evaporator
Take the evaporator out of the machine.
Mop up any spilt water with a dry cloth.
Insert the evaporator
Hold the evaporator by the handle and push it into the machine until it slots into place.
With the evaporator in place, close the inner door making sure it clicks firmly shut.
Important: don’t turn off or unplug your machine as the cleaning instructions will appear on the LCD screen.
Drip tray overflow
If your machine is still displaying this alert, we recommend running a Deep clean cycle.
Deep cleaning your machine
Please follow the steps in the video.
Find the text version of the step-by-step guide instead, under "Has this resolved the problem?"
Has this resolved the problem?
Keep the cap on the water tank dry when you run a Deep clean cycle or fill the tank. It contains power connections and should not be washed. If wet, wipe thoroughly with a dry cloth. Make sure the cap and connections are completely dry before refitting.
Deep cleaning your machine
Press the Deep clean cycle button on the front of your machine and your instructions will be shown on the LCD screen.
To cancel the Deep clean cycle at any point, press and hold the Deep clean cycle button for five seconds.

Remove the tank
Push down on the outer cover release buttons to remove the outer covers. The inner door will spring open. Put the outer covers to one side as you carry out the Deep clean cycle.
Push down the water tank release buttons on the sides of your machine. Slide the water tank out of your machine and unclip the cap.

Remove the evaporator
Remove the evaporator from your machine, place it in the water tank and refit the cap.
Half fill the tank
Carry the water tank by its handle to the tap.
Remove the cap and evaporator. Fill the water tank halfway to the Max level with cold tap water.

Keep the cap dry
Keep the cap on the water tank dry when you run a Deep clean cycle or fill the tank. It contains power connections and should not be washed. If wet, wipe thoroughly with a dry cloth. Make sure the cap and connections are completely dry before refitting.

Make a descaling solution
Measure out 150g of citric acid and place it in the water tank.
Agitate gently until all the citric acid has dissolved.
Place the evaporator in the water tank. Fill the water tank to the Max level with cold tap water.
Replace the cap
Replace the cap and secure the cap clips in place.
Wipe off any excess water to avoid drips.
Make sure the cap is completely dry. If wet, wipe thoroughly with a dry cloth.

Replace the tank
Slide the water tank back into your machine until it clicks securely in place.
When prompted by the LCD screen, press the Deep clean cycle button.
The Deep clean cycle will start and the LCD screen will show a countdown timer.

Remove the tank
When the LCD screen shows the Deep clean cycle is complete, push down the water tank release buttons on the sides of your machine.
Slide the water tank out of your machine. Carry the water tank by its handle to the tap.

Rinse
Unclip the cap, take the evaporator out of the water tank and rinse it under a cold tap.
Wipe away any excess water to avoid drips and place the evaporator to one side.
Rinse the water tank under a cold tap. Wipe the inside of the tank to remove any excess solution and any debris.

Refill the tank
Refill the water tank to the Max level. Wipe off any excess water and replace the cap, making sure that the cap clips are secured.

Reassemble
Push the evaporator back into your machine, making sure that it is securely in position.
Close the inner door and replace the outer covers.
Make sure the cap is completely dry. If wet, wipe thoroughly with a dry cloth.
Slide the water tank back into your machine and make sure it is securely in place.

Check the cap and connections
This indicates that there is an issue with the pump column.
Remove the tank
Push down the water tank release buttons on the sides of your machine.
Slide the water tank out of your machine.

Check the pump column for signs of damage.
Make sure that the cap on the water tank is dry. It contains power connections and should not be washed. If wet, wipe thoroughly with a dry cloth. Make sure the cap and connections are completely dry before refitting.
Replace the tank
Replace the cap and secure the cap clips in place.
Make sure the cap is completely dry. If wet, wipe thoroughly with a dry cloth.
Slide the water tank back into your machine until it clicks securely in place.
Keep the cap on the water tank dry when you run a Deep clean cycle or fill the tank. It contains power connections and should not be washed. If wet, wipe thoroughly with a dry cloth. Make sure the cap and connections are completely dry before refitting.
Deep cleaning your machine
Please follow the steps in the video.
Find the text version of the step-by-step guide instead, under "Has this resolved the problem?"
Has this resolved the problem?
Keep the cap on the water tank dry when you run a Deep clean cycle or fill the tank. It contains power connections and should not be washed. If wet, wipe thoroughly with a dry cloth. Make sure the cap and connections are completely dry before refitting.
Deep cleaning your machine
Press the Deep clean cycle button on the front of your machine and your instructions will be shown on the LCD screen.
To cancel the Deep clean cycle at any point, press and hold the Deep clean cycle button for five seconds.

Remove the tank
Push down on the outer cover release buttons to remove the outer covers. The inner door will spring open. Put the outer covers to one side as you carry out the Deep clean cycle.
Push down the water tank release buttons on the sides of your machine. Slide the water tank out of your machine and unclip the cap.

Remove the evaporator
Remove the evaporator from your machine, place it in the water tank and refit the cap.
Half fill the tank
Carry the water tank by its handle to the tap.
Remove the cap and evaporator. Fill the water tank halfway to the Max level with cold tap water.

Keep the cap dry
Keep the cap on the water tank dry when you run a Deep clean cycle or fill the tank. It contains power connections and should not be washed. If wet, wipe thoroughly with a dry cloth. Make sure the cap and connections are completely dry before refitting.

Make a descaling solution
Measure out 150g of citric acid and place it in the water tank.
Agitate gently until all the citric acid has dissolved.
Place the evaporator in the water tank. Fill the water tank to the Max level with cold tap water.
Replace the cap
Replace the cap and secure the cap clips in place.
Wipe off any excess water to avoid drips.
Make sure the cap is completely dry. If wet, wipe thoroughly with a dry cloth.

Replace the tank
Slide the water tank back into your machine until it clicks securely in place.
When prompted by the LCD screen, press the Deep clean cycle button.
The Deep clean cycle will start and the LCD screen will show a countdown timer.

Remove the tank
When the LCD screen shows the Deep clean cycle is complete, push down the water tank release buttons on the sides of your machine.
Slide the water tank out of your machine. Carry the water tank by its handle to the tap.

Rinse
Unclip the cap, take the evaporator out of the water tank and rinse it under a cold tap.
Wipe away any excess water to avoid drips and place the evaporator to one side.
Rinse the water tank under a cold tap. Wipe the inside of the tank to remove any excess solution and any debris.

Refill the tank
Refill the water tank to the Max level. Wipe off any excess water and replace the cap, making sure that the cap clips are secured.

Reassemble
Push the evaporator back into your machine, making sure that it is securely in position.
Close the inner door and replace the outer covers.
Make sure the cap is completely dry. If wet, wipe thoroughly with a dry cloth.
Slide the water tank back into your machine and make sure it is securely in place.

Keep the cap on the water tank dry when you run a Deep clean cycle or fill the tank. It contains power connections and should not be washed. If wet, wipe thoroughly with a dry cloth. Make sure the cap and connections are completely dry before refitting.
Refill the tank
This indicates that the water tank is empty and needs to be refilled.
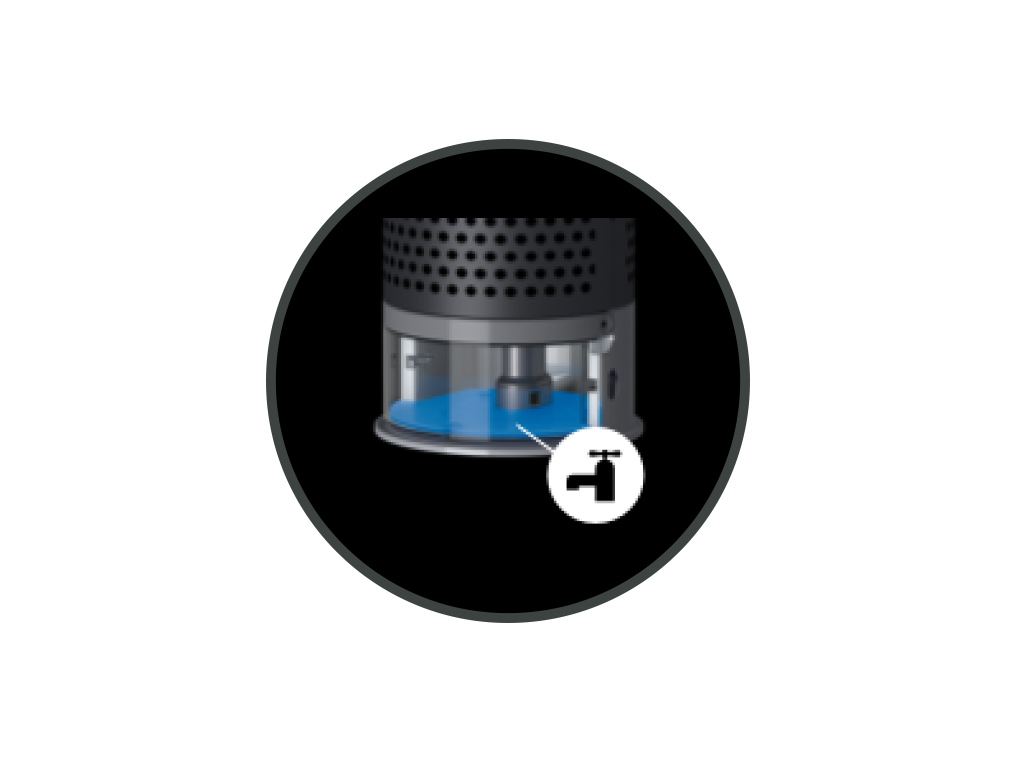
Before you remove the water tank, make sure humidification modes are turned off and the water tank is empty.

Remove the tank
Push down the water tank release buttons on the sides of your machine.
Slide the water tank out of your machine.
Carry the water tank by its handle to the tap, and unclip the cap.

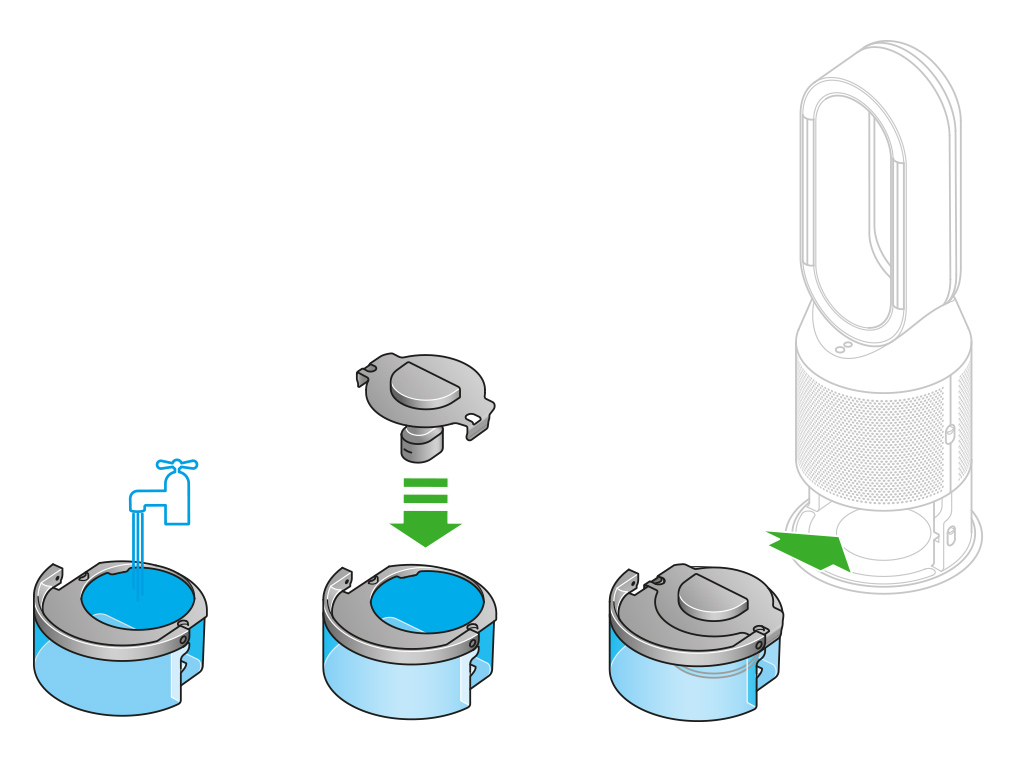
Fill the tank
Fill the water tank to the Max level with cold tap water.
Replace the tank
Replace the cap and secure the cap clips in place.
Make sure the cap is completely dry. If wet, wipe thoroughly with a dry cloth.
Slide the water tank back into your machine until it clicks securely in place.

Place the pump column on a clean, soft cloth and allow it to dry for 24 hours.
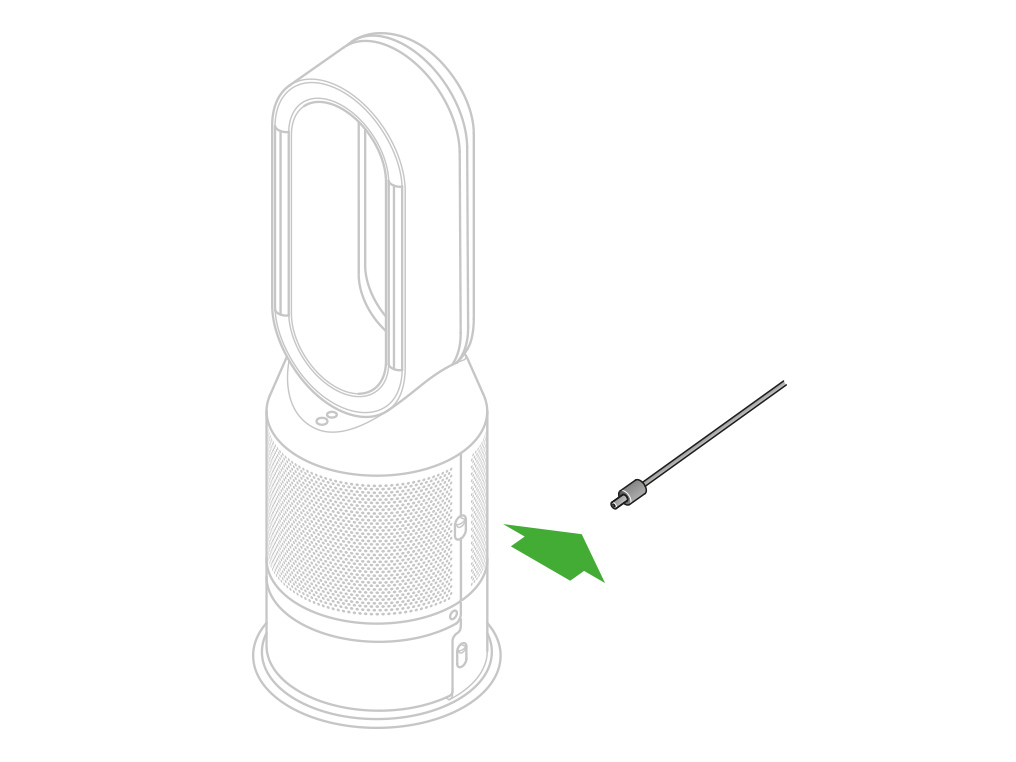
Slide the water tank out of your machine and unclip the cap.
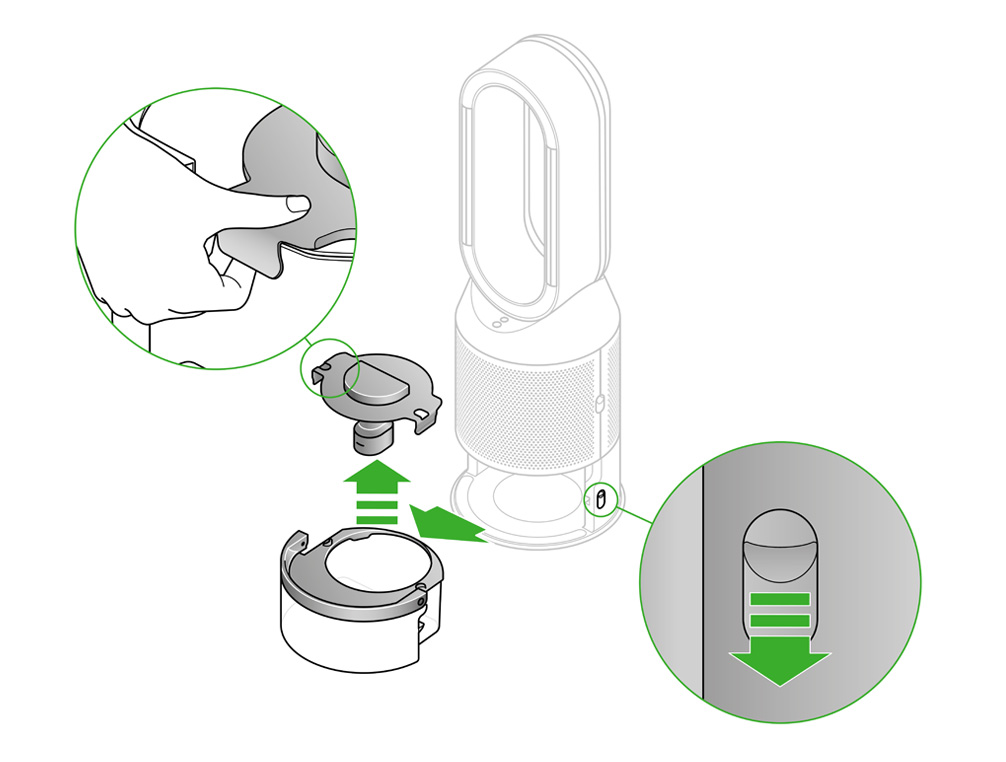
Check the cap for signs of damage.
Replace the cap, making sure that the cap clips are secured.
Make sure the cap is completely dry. If wet, wipe thoroughly with a dry cloth.
Slide the water tank back into your machine until it clicks securely in place.

Tank missing
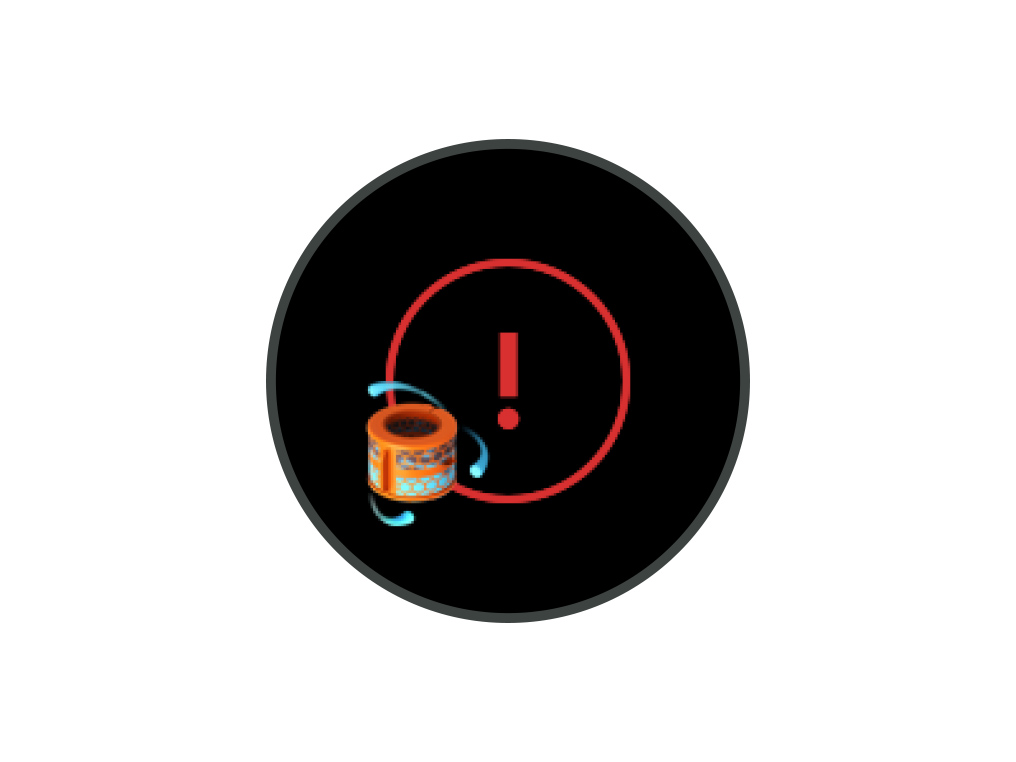
This animation indicates that the water tank missing or has not been inserted correctly.
Slide the water tank out of your machine.
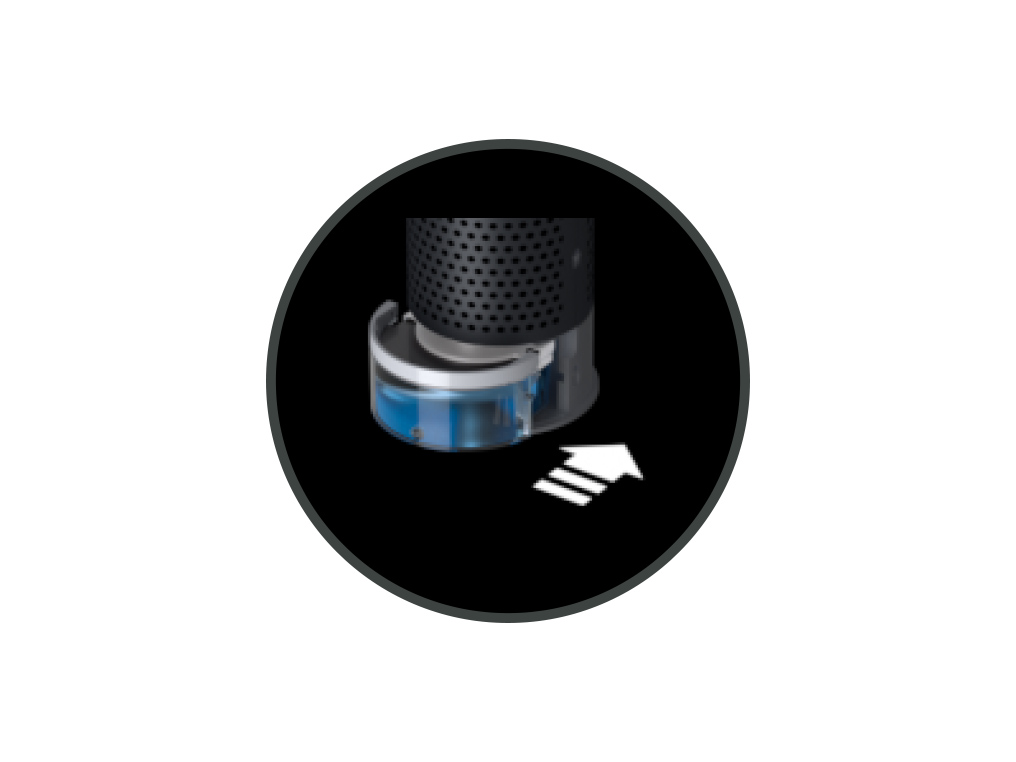
Remove the tank
Push down the water tank release buttons on the sides of your machine. Slide the water tank out of your machine.
Replace the tank
Slide the water tank back into your machine until it clicks securely in place.

This alert indicates that the ambient temperature is too low for the machine to operate.
It is displayed when the ambient temperature drops below 5℃ and there is water in the tank.
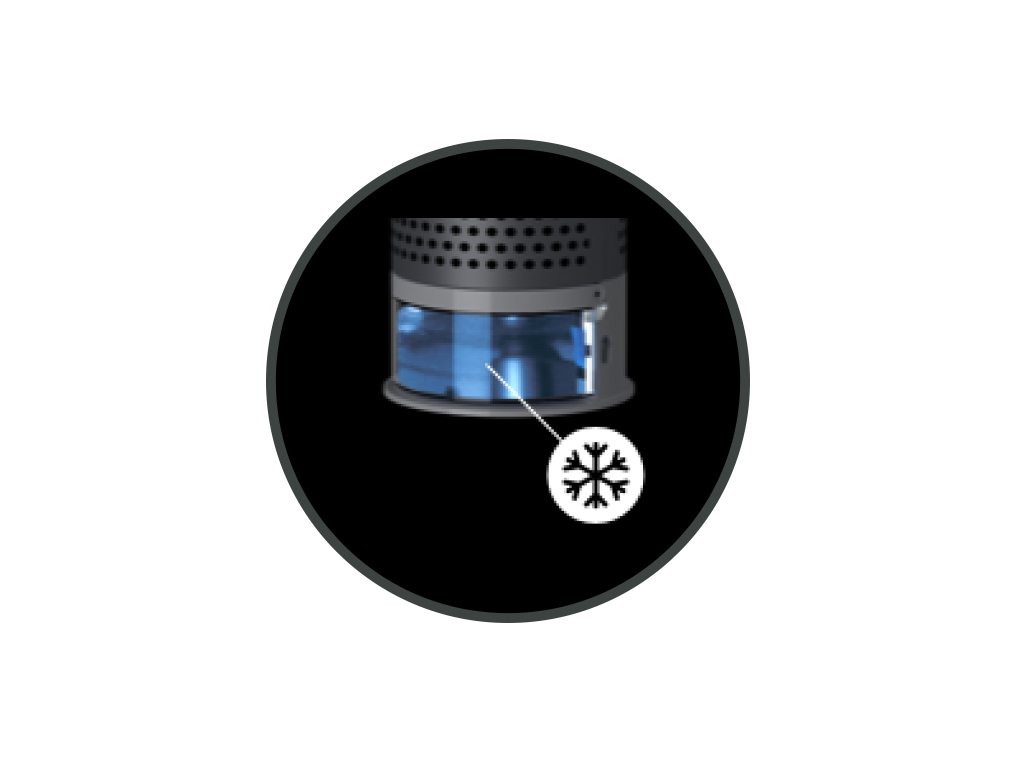
If your display is showing this alert, raising the ambient temperature of the room should resolve the problem.
Preparing to update
Your machine is preparing to update.
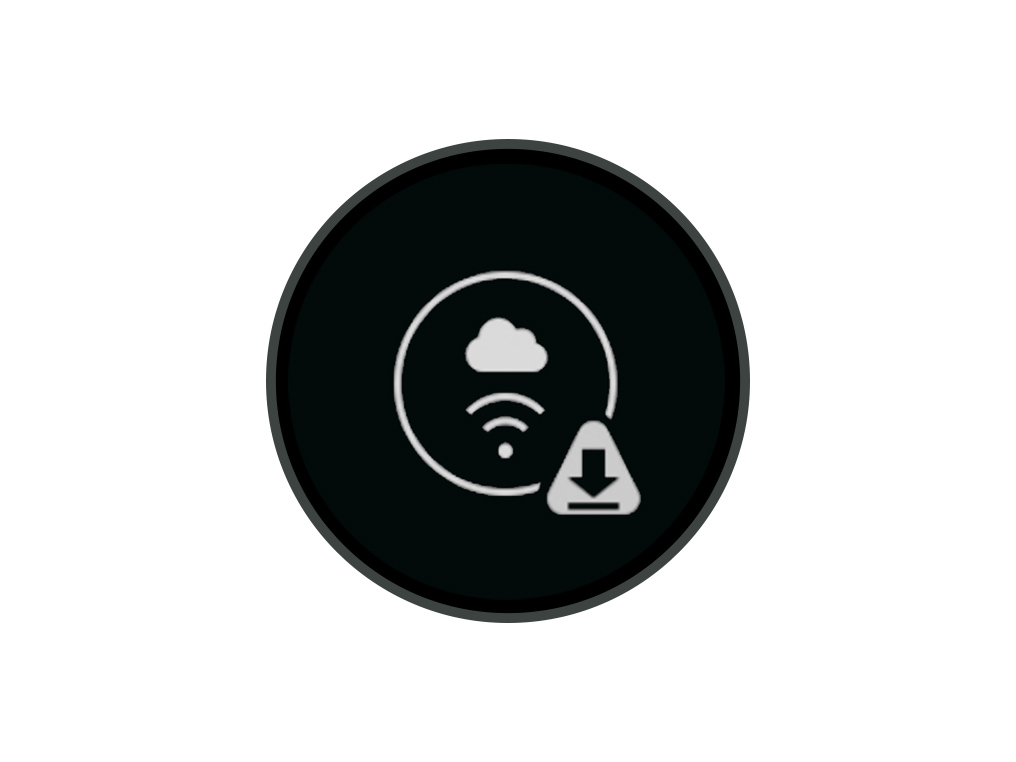
Updating
Your machine is updating.
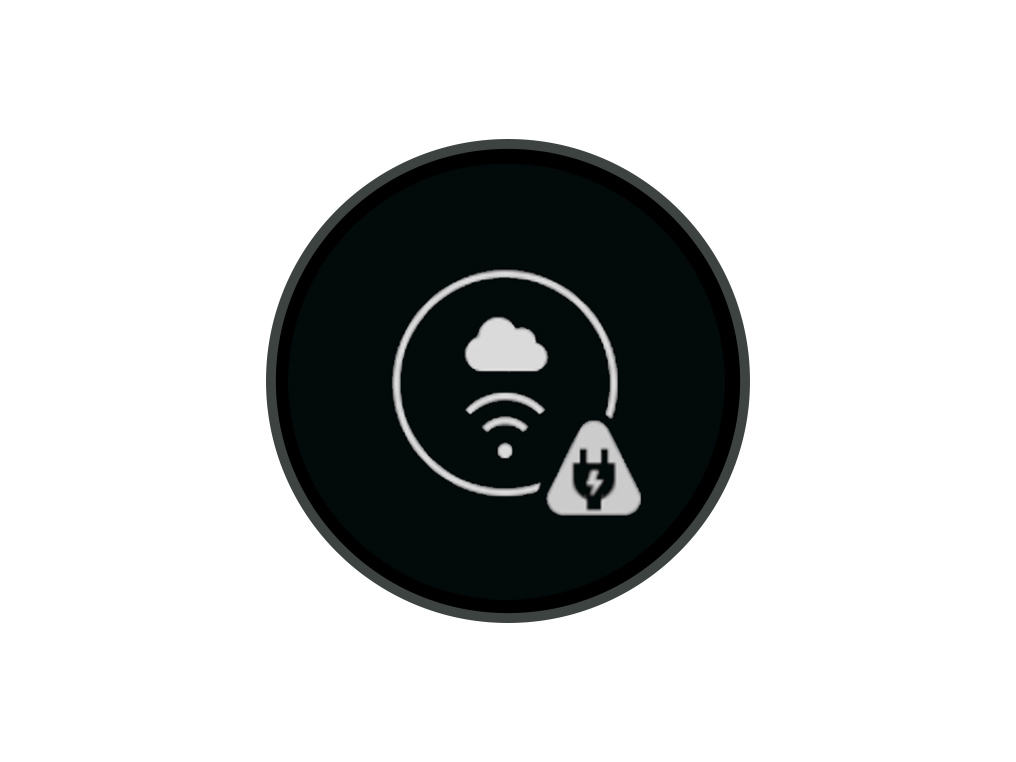
Update complete
Your machine has finished updating.
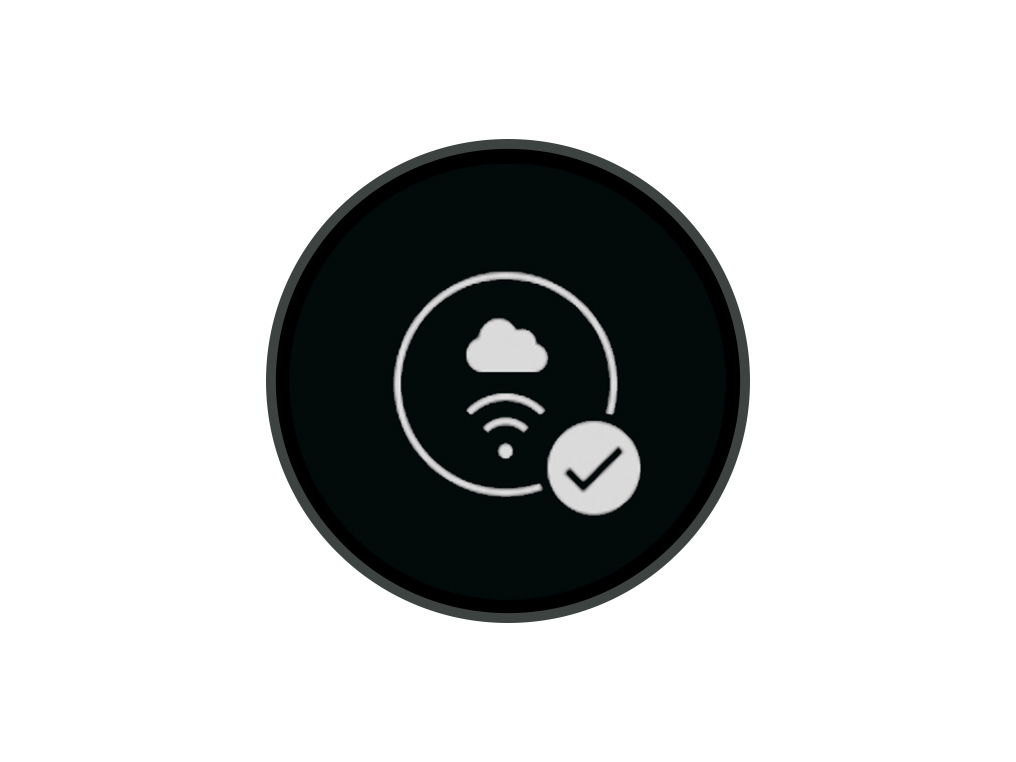
Is the triangle alert continuous or temporary?
Continuous alert triangle
Switch off and unplug your machine.
Leave it for 10 seconds and then plug your machine back in and switch it on.
Remove the pump column
Switch off and unplug your machine.
Remove the water tank and pump column.
Place the pump column on a clean, soft cloth and allow it to dry for 24 hours.
Reassemble your machine, ensuring that the pump column is dry.
Switch off and unplug your machine.
Leave it for 10 seconds and then plug your machine back in and switch it on.
If the alert appears on the LCD screen and then disappears, continue to use your machine as normal.
Switch off and unplug your machine.
Leave it for 10 seconds and then plug your machine back in and switch it on.
Please select the appropriate option
Unlike our purifiers which oscillate from the base up, the Dyson Purifier Humidify+Cool has two oscillating channels within the amplifier loop.
Ensure the correct button on the remote control is being pressed.
Point the remote control directly at the front of the machine when pressing the button.
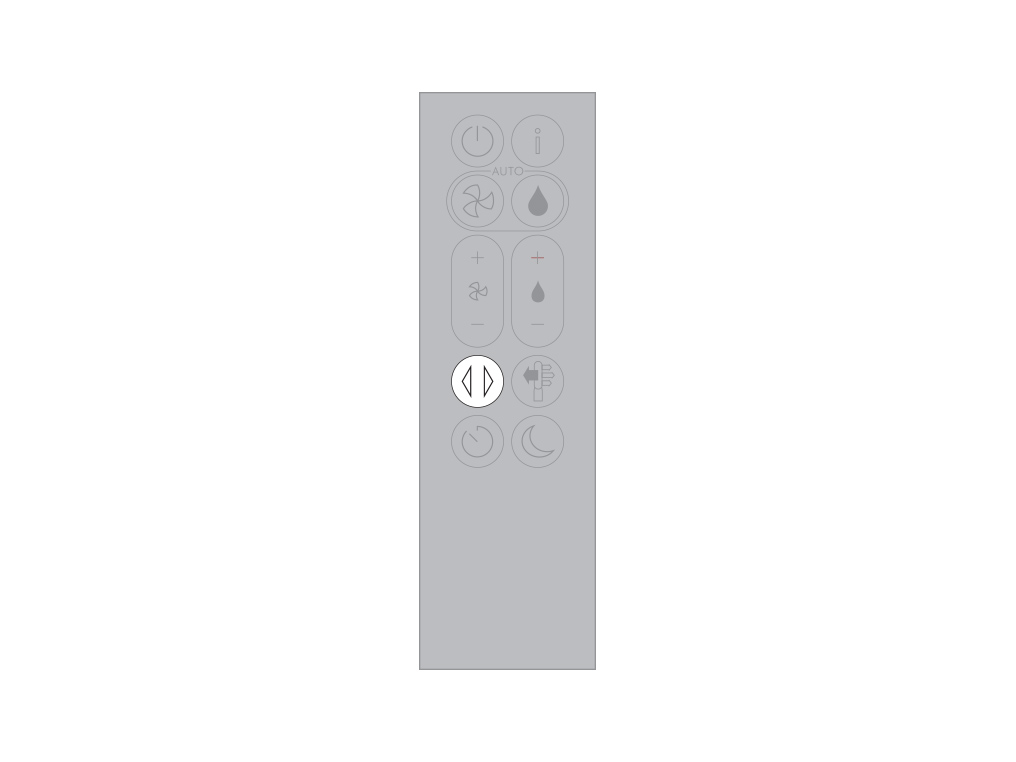
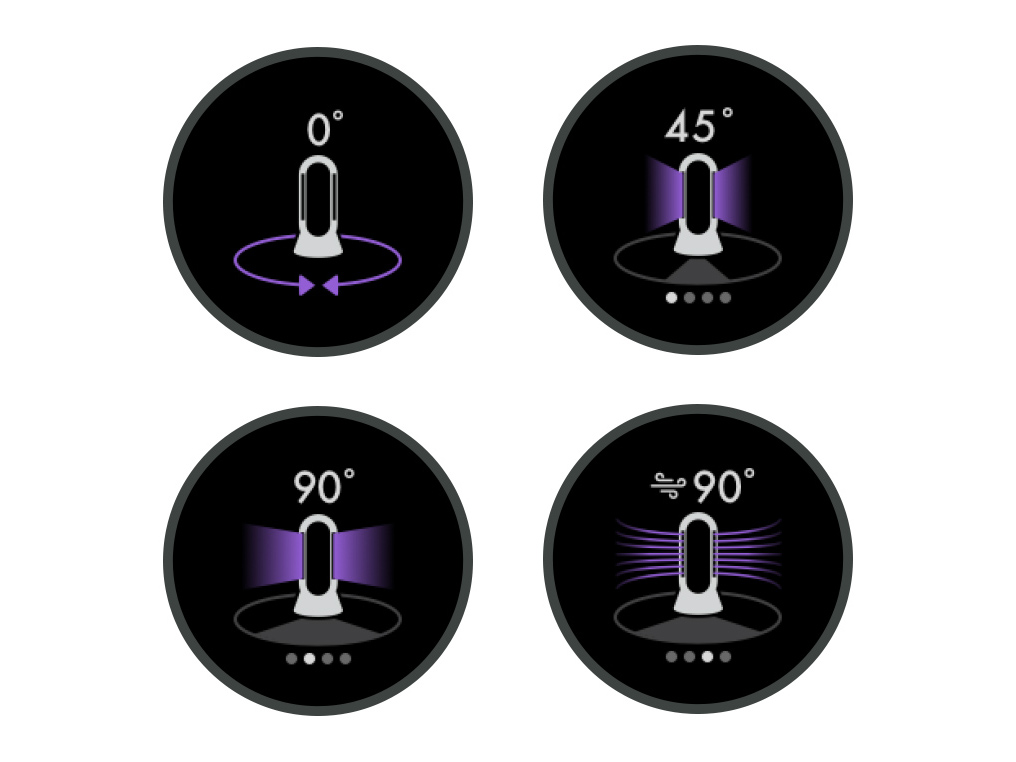
Press the Oscillation button to cycle through the oscillation options. Choose from 0°, 45°, 90° or Breeze mode.
Test the remote control
Test the other buttons on the remote control.

Point the remote control directly at the front of the machine when pressing the button.

Please follow the steps in the video.
Find the text version of the step-by-step guide instead, under "Has this resolved the problem?"
Has changing the battery resolved the problem?
Unscrew the remote control's battery compartment.

Loosen the base and pull it away from the remote. Replace the battery with type CR 2032.

Ensure the correct button on the remote control is being pressed.
Point the remote control directly at the front of the machine when pressing the button.

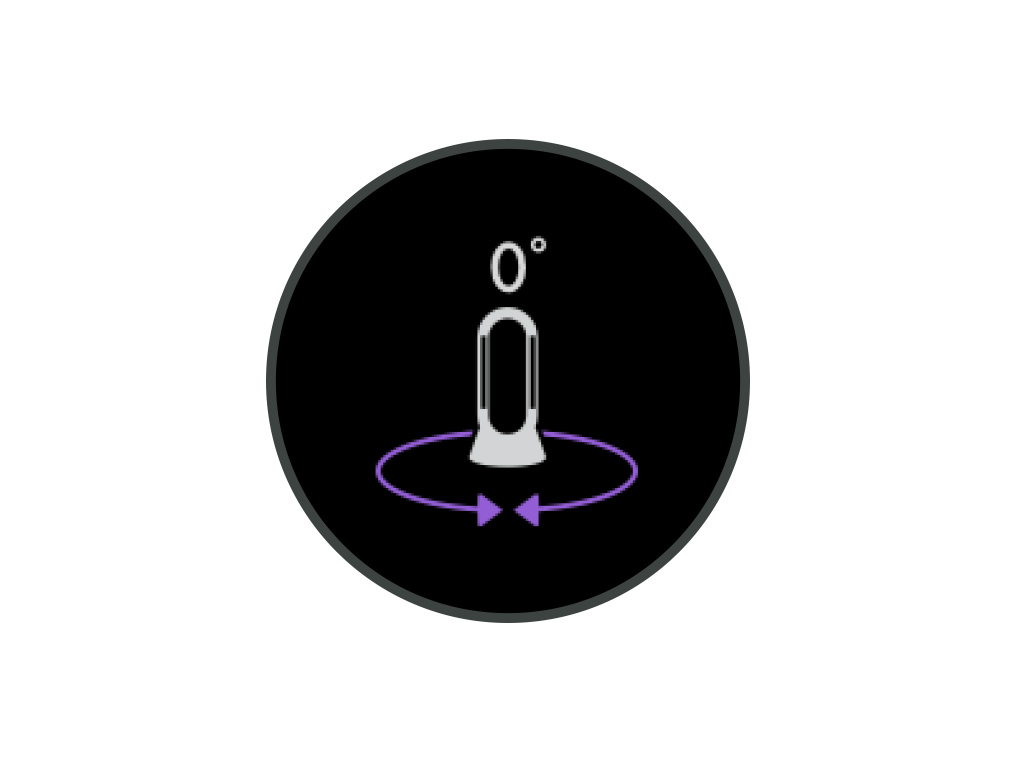
Press the Oscillation button to cycle through the oscillation options. Choose from 0°, 45°, 90° or Breeze mode.
Pause the oscillation at any point by pressing the Oscillation button.
Press the Oscillation button again to resume.
To reset the direction to the centre, press and hold the Oscillation button for two seconds.
Test the remote control
Test the other buttons on the remote control.

Point the remote control directly at the front of the machine when pressing the button.

Please select the appropriate option
Purifying
When in Auto purify mode, the onboard sensors will intelligently adjust the settings of your machine according to the air quality.
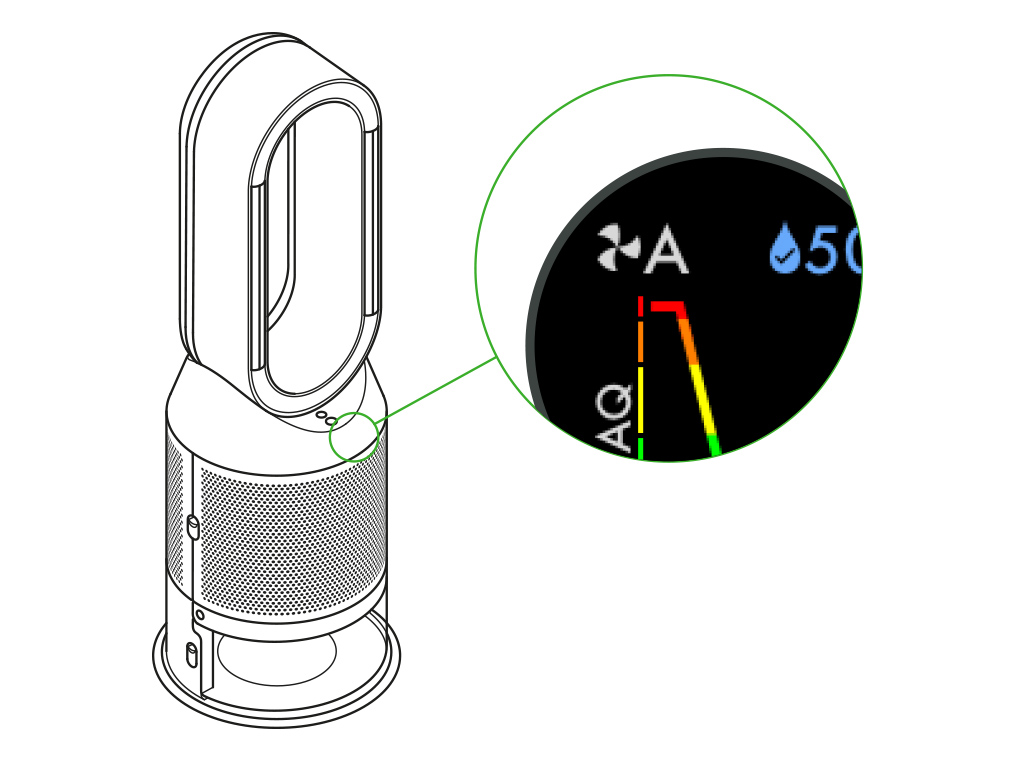
Air quality
Your machine will pause when the target air quality has been reached, switching on again when the air quality levels drop.
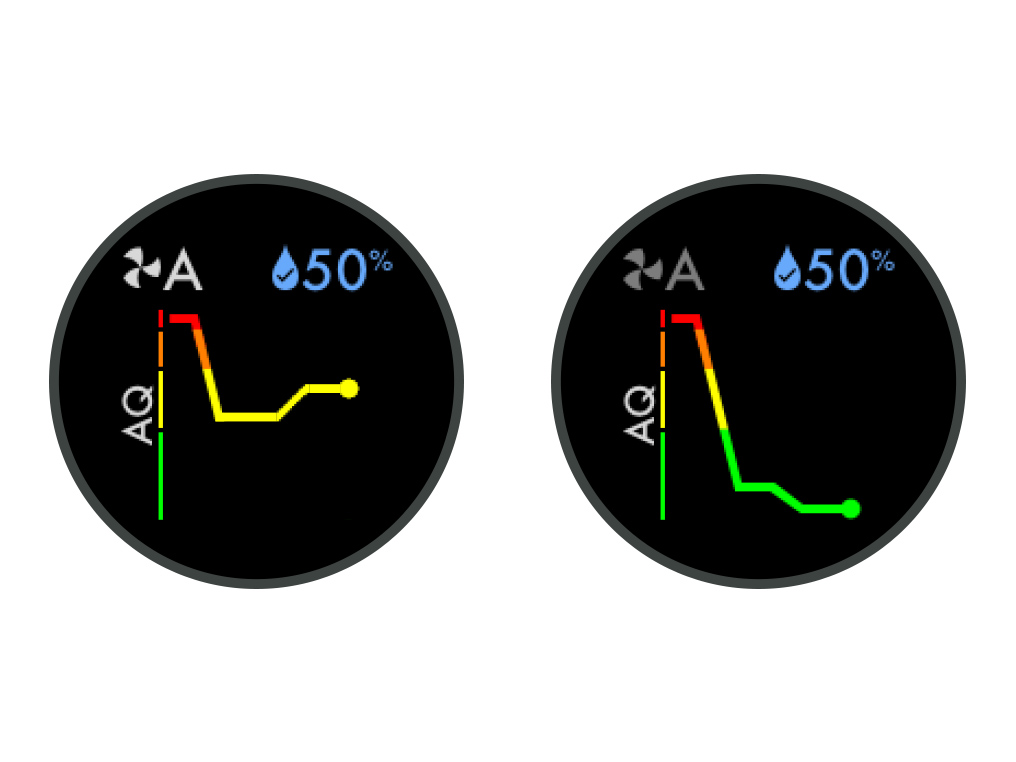
Understanding pollutant levels
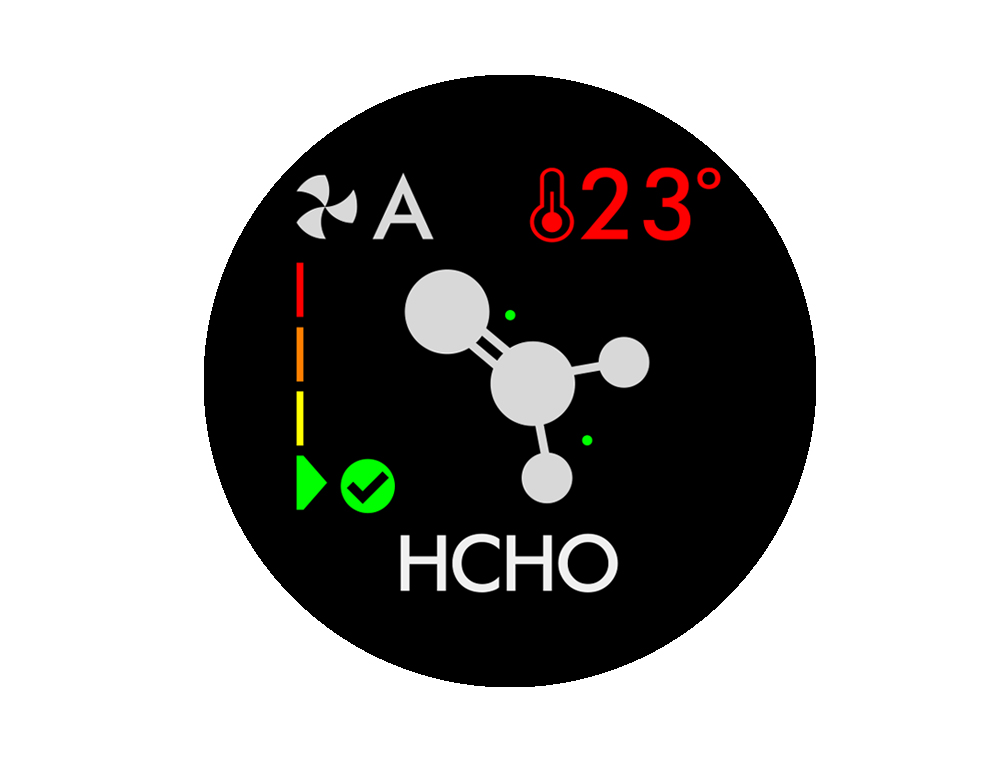
When a pollutant causes the air quality to drop, the relevant icon will appear on your LCD screen.
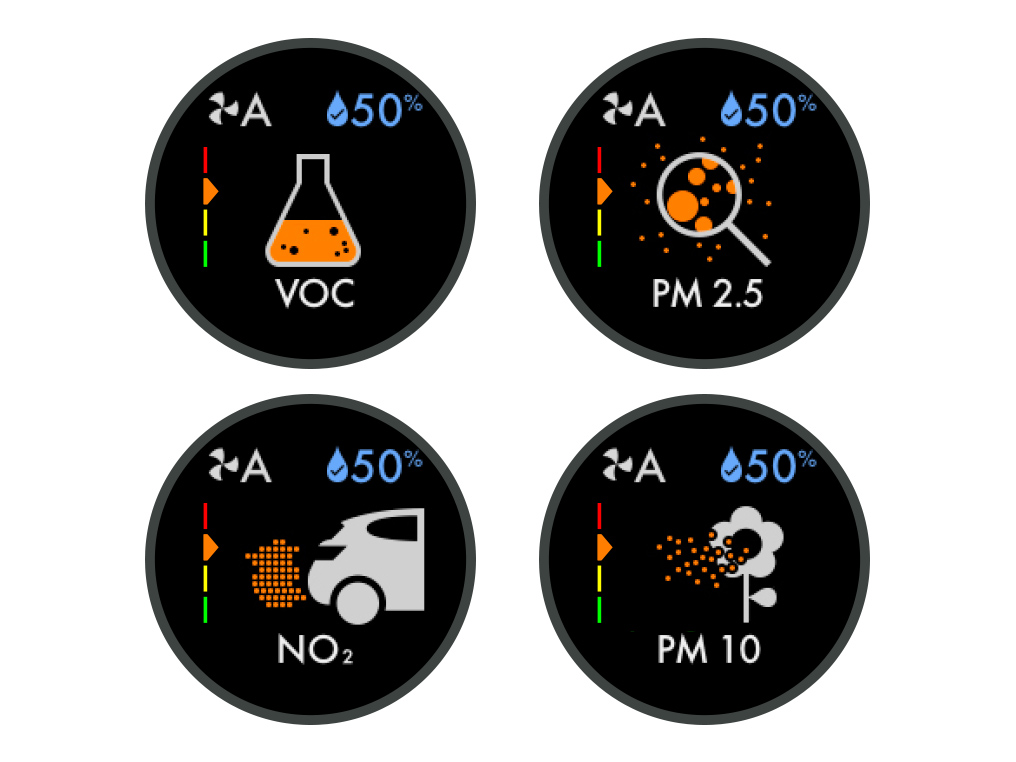
The coloured bar on the left of the screen will indicate how much of the pollutant is present, and will continually update as your machine purifies the air.
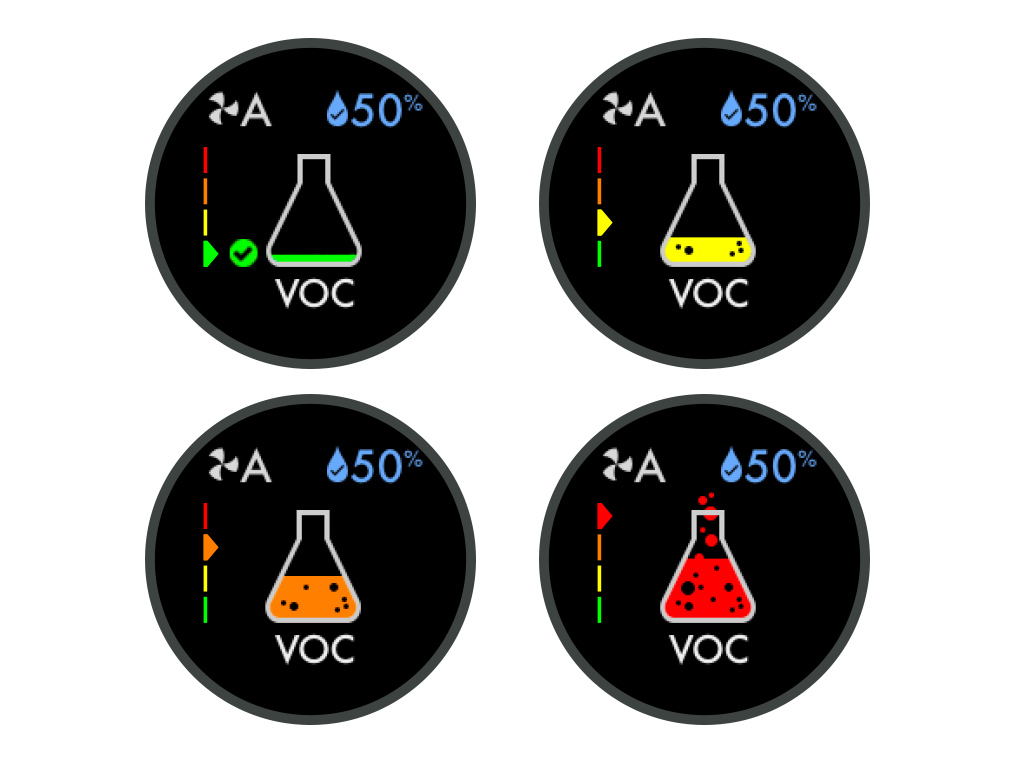
Pollutants may be present at varying levels at the same time. Your machine will detect pollutants and display the appropriate colour for each of them. For example, you may have a good level of PM2.5 and a very poor level of NO2.
Good
When the green section of the coloured bar is highlighted, your machine is detecting a very low level of the type of pollutant.
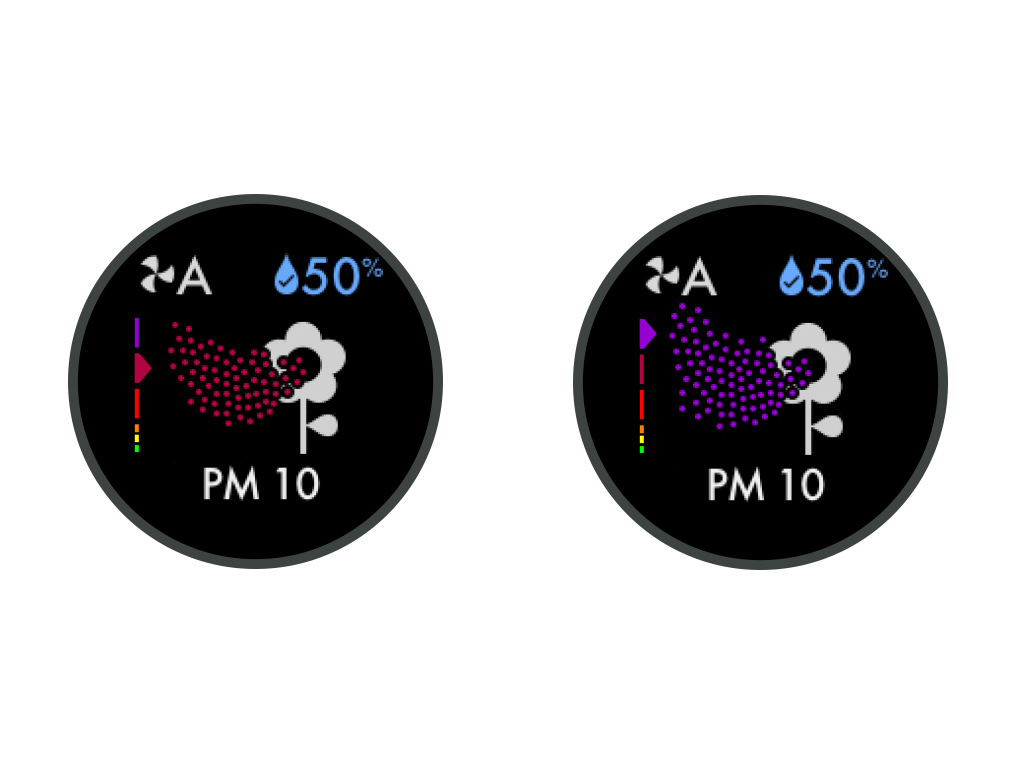
Fair
When the yellow section of the coloured bar is highlighted, your machine is detecting a moderate level of the type of pollutant.
Poor
When the orange section of the coloured bar is highlighted, your machine is detecting a high level of the type of pollutant.
Very poor
When the red section of the coloured bar is highlighted, your machine is detecting a very high level of the type of pollutant.
Extremely poor
When the dark red section of the coloured bar is highlighted, your machine is detecting an extremely high level of the type of pollutant.
Severe
When the purple section of the coloured bar is highlighted, your machine is detecting a severe level of the type of pollutant.
Please select the appropriate option
Check the power cable
Ensure the cable is firmly plugged into the back of the machine.

Check the plug and power cord for signs of damage.
Try the machine in a different plug socket.
Check the electrics
Check that the household electrics are on.
Has this resolved the problem?
Check the power cable
Ensure the cable is firmly plugged into the back of the machine.

Check the plug and power cord for signs of damage.
Try the machine in a different plug socket.
Check the electrics
Check that the household electrics are on.
Has this resolved the problem?
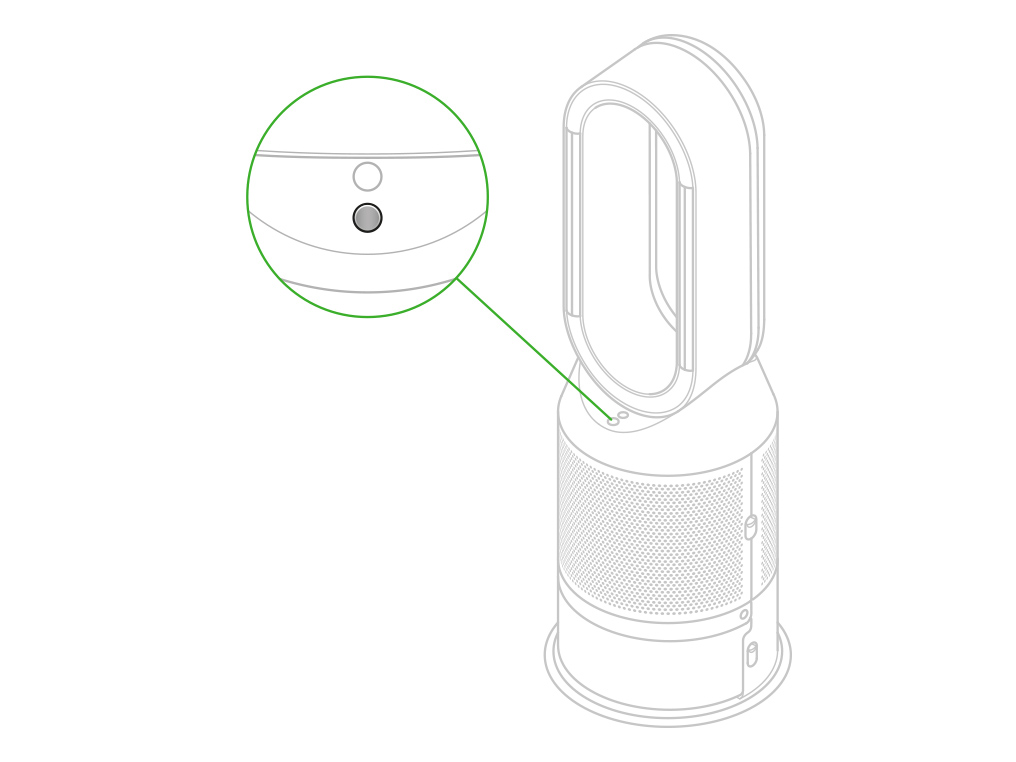
Press the Standby on/off button on your Dyson purifier humidifier fan to stop your machine.
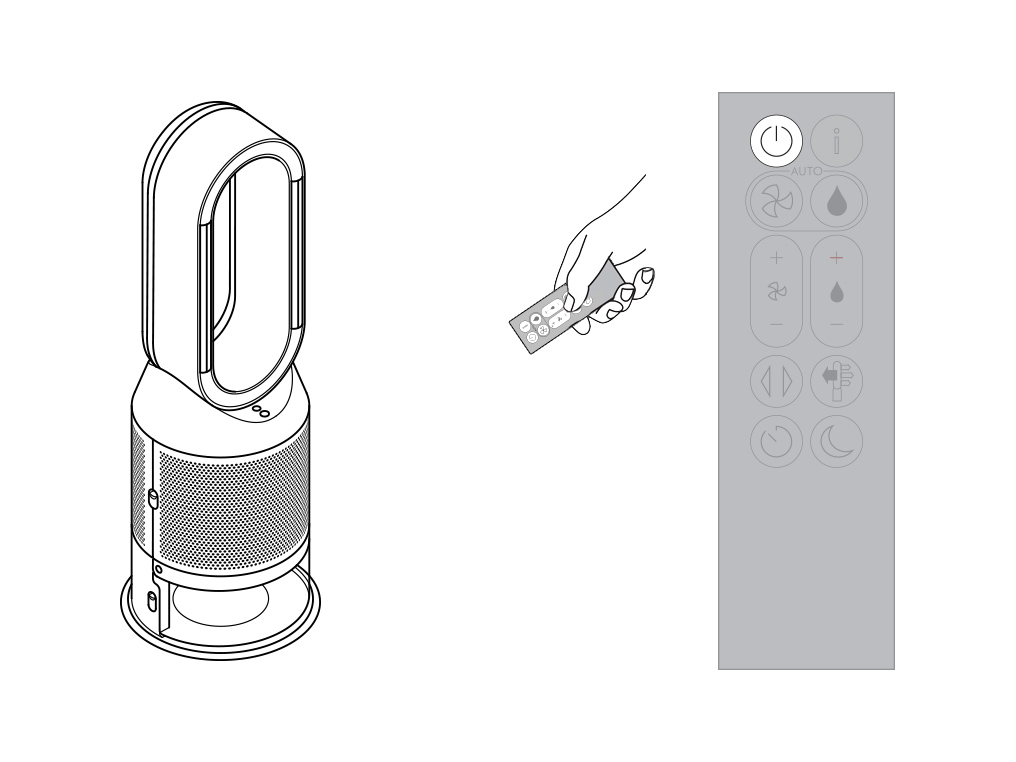
Press the Standby on/off button on your remote control to stop your machine.
Ensure the correct button on the remote control is being pressed.
Point the remote control directly at the front of the machine when pressing the button.
Test the remote control
Test the other buttons on the remote control.

Point the remote control directly at the front of the machine when pressing the button.

Replacing the remote control battery
Please follow the steps in the video.
Find the text version of the step-by-step guide instead, under "Has this resolved the problem?"
Has this resolved the problem?
Unscrew the remote control's battery compartment.

Loosen the base and pull it away from the remote. Replace the battery with type CR 2032.

Using the product with a filter or evaporator not produced by Dyson may have a detrimental effect on the functionality of the machine. Any issues therefore caused by using one or both of these, will not be covered under the products guarantee.
Please select the appropriate option
Do not plug in or attempt to use the machine in this condition.
Check and clean the machine
To always get the best performance from your Dyson purifying humidifying fan, it's important to regularly clean it and check for blockages.
Cleaning your machine
If your machine is dusty, wipe it with a damp lint-free cloth.

Look for blockages in the air inlet holes in the shrouds, the small aperture inside the amplifier loop, and the soft plastic mesh visible inside the machine when the evaporator is removed.

Use a soft brush to remove dust and debris.

Don't use detergents or polishes to clean your machine.

Keep the cap on the water tank dry when you run a Deep clean cycle or fill the tank. It contains power connections and should not be washed. If wet, wipe thoroughly with a dry cloth. Make sure the cap and connections are completely dry before refitting.
Deep cleaning your machine
To always get the best performance from your Dyson purifying humidifying fan, it is important to carry out regular deep cleaning to remove any limescale.
Before and after long periods where humidification is not used, we recommend you run an additional Deep clean cycle.
In hard water areas, you may need to run the Deep clean cycle more frequently. We recommend you use filtered water to always get the best performance from your machine.
Please follow the steps in the video.
Find the text version of the step-by-step guide instead, under "Has this resolved the problem?"
Has this resolved the problem?
Keep the cap on the water tank dry when you run a Deep clean cycle or fill the tank. It contains power connections and should not be washed. If wet, wipe thoroughly with a dry cloth. Make sure the cap and connections are completely dry before refitting.
Deep cleaning your machine
To always get the best performance from your Dyson purifying humidifying fan, it is important to carry out regular deep cleaning to remove any limescale.
Before and after long periods where humidification is not used, we recommend you run an additional Deep clean cycle.
In hard water areas, you may need to run the Deep clean cycle more frequently. We recommend you use filtered water to always get the best performance from your machine.

Your machine will alert you when it needs you to carry out a Deep clean cycle.

Press the Deep clean cycle button
Press the Deep clean cycle button on the front of your machine and your instructions will be shown on the LCD screen.
To cancel the Deep clean cycle at any point, press and hold the Deep clean cycle button for five seconds.

Remove the tank
Push down on the outer cover release buttons to remove the outer covers. The inner door will spring open. Put the outer covers to one side as you carry out the Deep clean cycle.
Push down the water tank release buttons on the sides of your machine. Slide the water tank out of your machine and unclip the cap.

Remove the evaporator
Remove the evaporator from your machine, place it in the water tank and refit the cap.

Keep the cap dry
Keep the cap on the water tank dry when you run a Deep clean cycle or fill the tank. It contains power connections and should not be washed. If wet, wipe thoroughly with a dry cloth. Make sure the cap and connections are completely dry before refitting.

Make a descaling solution
Measure out 150g of citric acid and place it in the water tank.
Agitate gently until all the citric acid has dissolved.
Place the evaporator in the water tank. Fill the water tank to the Max level with cold tap water.

Replace the cap
Replace the cap and secure the cap clips in place.
Wipe off any excess water to avoid drips.
Make sure the cap is completely dry. If wet, wipe thoroughly with a dry cloth.

Replace the tank
Slide the water tank back into your machine until it clicks securely in place.
When prompted by the LCD screen, press the Deep clean cycle button.
The Deep clean cycle will start and the LCD screen will show a countdown timer.

Remove the tank
When the LCD screen shows the Deep clean cycle is complete, push down the water tank release buttons on the sides of your machine.
Slide the water tank out of your machine. Carry the water tank by its handle to the tap.

Rinse
Unclip the cap, take the evaporator out of the water tank and rinse it under a cold tap.
Wipe away any excess water to avoid drips and place the evaporator to one side.
Rinse the water tank under a cold tap. Wipe the inside of the tank to remove any excess solution and any debris.

Refill the tank
Refill the water tank to the Max level. Wipe off any excess water and replace the cap, making sure that the cap clips are secured.

Reassemble
Push the evaporator back into your machine, making sure that it is securely in position.
Close the inner door and replace the outer covers.
Make sure the cap is completely dry. If wet, wipe thoroughly with a dry cloth.
Slide the water tank back into your machine and make sure it is securely in place.

Please select the appropriate option
This may be caused by water that has been sitting in the machine for too long.
This can likely be resolved by running a Deep clean cycle
Please select the appropriate option
Important: don’t turn off or unplug your machine as the cleaning instructions will appear on the LCD screen.
Deep cleaning your machine
To always get the best performance from your Dyson purifying humidifying fan, it is important to carry out regular deep cleaning to remove any limescale.
Before and after long periods where humidification is not used, we recommend you run an additional Deep clean cycle.
In hard water areas, you may need to run the Deep clean cycle more frequently. We recommend you use filtered water to always get the best performance from your machine.

Please follow the steps in the video.
Find the text version of the step-by-step guide instead, under "Has this resolved the problem?"
Has this resolved the problem?
Keep the cap on the water tank dry when you run a Deep clean cycle or fill the tank. It contains power connections and should not be washed. If wet, wipe thoroughly with a dry cloth. Make sure the cap and connections are completely dry before refitting.
Deep cleaning your machine
To always get the best performance from your Dyson purifying humidifying fan, it is important to carry out regular deep cleaning to remove any limescale.
Before and after long periods where humidification is not used, we recommend you run an additional Deep clean cycle.
In hard water areas, you may need to run the Deep clean cycle more frequently. We recommend you use filtered water to always get the best performance from your machine.

Your machine will alert you when it needs you to carry out a Deep clean cycle.

Press the Deep clean cycle button
Press the Deep clean cycle button on the front of your machine and your instructions will be shown on the LCD screen.
To cancel the Deep clean cycle at any point, press and hold the Deep clean cycle button for five seconds.

Remove the tank
Push down on the outer cover release buttons to remove the outer covers. The inner door will spring open. Put the outer covers to one side as you carry out the Deep clean cycle.
Push down the water tank release buttons on the sides of your machine. Slide the water tank out of your machine and unclip the cap.

Remove the evaporator
Remove the evaporator from your machine, place it in the water tank and refit the cap.
Half fill the tank
Carry the water tank by its handle to the tap.
Remove the cap and evaporator. Fill the water tank halfway to the Max level with cold tap water.

Keep the cap dry
Keep the cap on the water tank dry when you run a Deep clean cycle or fill the tank. It contains power connections and should not be washed. If wet, wipe thoroughly with a dry cloth. Make sure the cap and connections are completely dry before refitting.

Make a descaling solution
Measure out 150g of citric acid and place it in the water tank.
Agitate gently until all the citric acid has dissolved.
Place the evaporator in the water tank. Fill the water tank to the Max level with cold tap water.

Replace the cap
Replace the cap and secure the cap clips in place.
Wipe off any excess water to avoid drips.
Make sure the cap is completely dry. If wet, wipe thoroughly with a dry cloth.

Replace the tank
Slide the water tank back into your machine until it clicks securely in place.
When prompted by the LCD screen, press the Deep clean cycle button.
The Deep clean cycle will start and the LCD screen will show a countdown timer.

Remove the tank
When the LCD screen shows the Deep clean cycle is complete, push down the water tank release buttons on the sides of your machine.
Slide the water tank out of your machine. Carry the water tank by its handle to the tap.
Rinse
Unclip the cap, take the evaporator out of the water tank and rinse it under a cold tap.
Wipe away any excess water to avoid drips and place the evaporator to one side.
Rinse the water tank under a cold tap. Wipe the inside of the tank to remove any excess solution and any debris.

Refill the tank
Refill the water tank to the Max level. Wipe off any excess water and replace the cap, making sure that the cap clips are secured.

Reassemble
Push the evaporator back into your machine, making sure that it is securely in position.
Close the inner door and replace the outer covers.
Make sure the cap is completely dry. If wet, wipe thoroughly with a dry cloth.
Slide the water tank back into your machine and make sure it is securely in place.

Please select the appropriate option
Switch off and unplug your machine. Leave it for at least 10 seconds.

Ensure the power cable is firmly plugged into the back of the machine.

Plug the machine back in, making sure that the plug is firmly connected to the socket and switched on. Turn it back on again.

Check that the room temperature is above the minimum 5℃ (41°F) for your machine to work.
In Night mode, your Dyson purifying humidifying fan will continue to monitor and respond to changes in air quality and temperature, but only using its quietest settings - and with its LCD screen dimmed.

If the room is bright, (for example, the lights are on), the screen's display will be set to minimum brightness. If the room is dark (lights off) the screen is turned off.
In both scenarios, when the machine is interacted with, the screen brightness will uplift.
Please select the appropriate option
Ensure the correct button on the remote control is being pressed.
Point the remote control directly at the front of the machine when pressing the button.

Test the remote control
Test the other buttons on the remote control.

Point the remote control directly at the front of the machine when pressing the button.
Replacing the remote control battery
Please follow the steps in the video.
Find the text version of the step-by-step guide instead, under "Has this resolved the problem?"
Has this resolved the problem?
Unscrew the remote control's battery compartment.

Loosen the base and pull it away from the remote. Replace the battery with type CR 2032.

The screen will alert you when your machine needs your attention.
Keep the cap on the water tank dry when you run a Deep clean cycle or fill the tank. It contains power connections and should not be washed. If wet, wipe thoroughly with a dry cloth. Make sure the cap and connections are completely dry before refitting.
Evaporator full
This indicates that the evaporator is full and a Deep clean cycle is required.
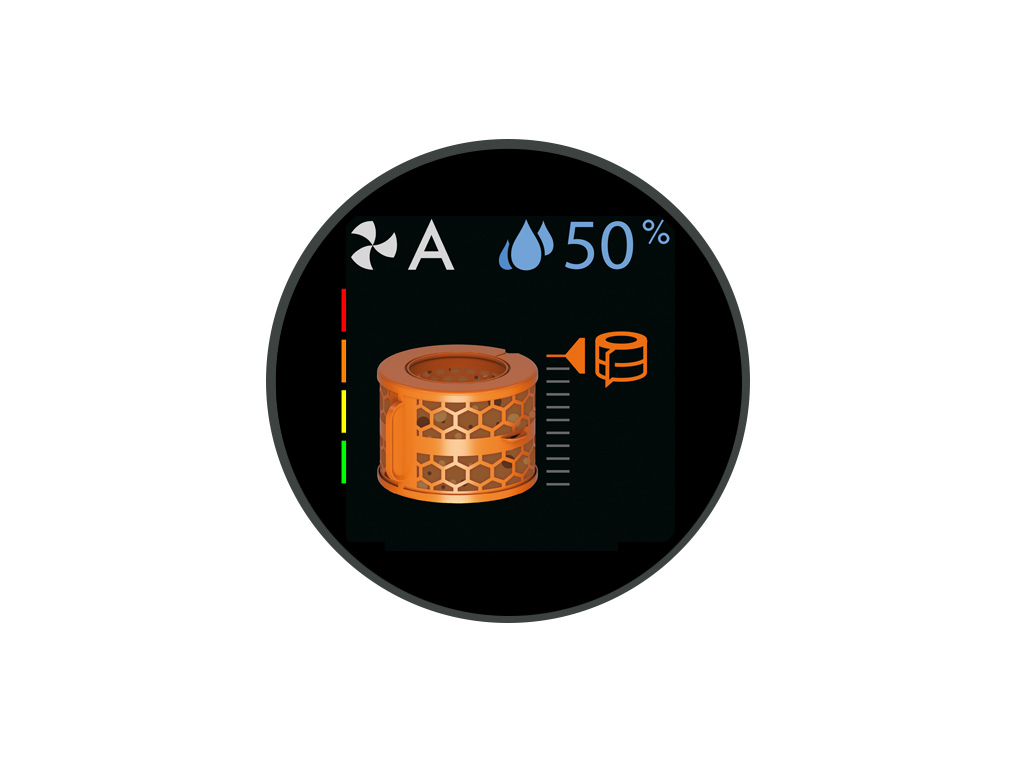
Deep cleaning your machine
Please follow the steps in the video.
Find the text version of the step-by-step guide instead, under "Has this resolved the problem?"
Has this resolved the problem?
Please select the appropriate option
Keep the cap on the water tank dry when you run a Deep clean cycle or fill the tank. It contains power connections and should not be washed. If wet, wipe thoroughly with a dry cloth. Make sure the cap and connections are completely dry before refitting.
Deep cleaning your machine
Please follow the steps in the video.
Find the text version of the step-by-step guide instead, under "Is there anything else we can help with?"
Is there anything else we can help with?
Keep the cap on the water tank dry when you run a Deep clean cycle or fill the tank. It contains power connections and should not be washed. If wet, wipe thoroughly with a dry cloth. Make sure the cap and connections are completely dry before refitting.
Deep cleaning your machine
To always get the best performance from your Dyson purifying humidifying fan, it is important to carry out regular deep cleaning to remove any limescale.
Before and after long periods where humidification is not used, we recommend you run an additional Deep clean cycle.
In hard water areas, you may need to run the Deep clean cycle more frequently. We recommend you use filtered water to always get the best performance from your machine.

Your machine will alert you when it needs you to carry out a Deep clean cycle.

Press the Deep clean cycle button
Press the Deep clean cycle button on the front of your machine and your instructions will be shown on the LCD screen.
To cancel the Deep clean cycle at any point, press and hold the Deep clean cycle button for five seconds.

Remove the tank
Push down on the outer cover release buttons to remove the outer covers. The inner door will spring open. Put the outer covers to one side as you carry out the Deep clean cycle.
Push down the water tank release buttons on the sides of your machine. Slide the water tank out of your machine and unclip the cap.

Remove the evaporator
Remove the evaporator from your machine, place it in the water tank and refit the cap.

Half fill the tank
Carry the water tank by its handle to the tap.
Remove the cap and evaporator. Fill the water tank halfway to the Max level with cold tap water.

Keep the cap dry
Keep the cap on the water tank dry when you run a Deep clean cycle or fill the tank. It contains power connections and should not be washed. If wet, wipe thoroughly with a dry cloth. Make sure the cap and connections are completely dry before refitting.

Make a descaling solution
Measure out 150g of citric acid and place it in the water tank.
Agitate gently until all the citric acid has dissolved.
Place the evaporator in the water tank. Fill the water tank to the Max level with cold tap water.

Replace the cap
Replace the cap and secure the cap clips in place.
Wipe off any excess water to avoid drips.
Make sure the cap is completely dry. If wet, wipe thoroughly with a dry cloth.

Replace the tank
Slide the water tank back into your machine until it clicks securely in place.
When prompted by the LCD screen, press the Deep clean cycle button.
The Deep clean cycle will start and the LCD screen will show a countdown timer.

Remove the tank
When the LCD screen shows the Deep clean cycle is complete, push down the water tank release buttons on the sides of your machine.
Slide the water tank out of your machine. Carry the water tank by its handle to the tap.

Rinse
Unclip the cap, take the evaporator out of the water tank and rinse it under a cold tap.
Wipe away any excess water to avoid drips and place the evaporator to one side.
Rinse the water tank under a cold tap. Wipe the inside of the tank to remove any excess solution and any debris.

Refill the tank
Refill the water tank to the Max level. Wipe off any excess water and replace the cap, making sure that the cap clips are secured.

Reassemble
Push the evaporator back into your machine, making sure that it is securely in position.
Close the inner door and replace the outer covers.
Make sure the cap is completely dry. If wet, wipe thoroughly with a dry cloth.
Slide the water tank back into your machine and make sure it is securely in place.

Keep the cap on the water tank dry when you run a Deep clean cycle or fill the tank. It contains power connections and should not be washed. If wet, wipe thoroughly with a dry cloth. Make sure the cap and connections are completely dry before refitting.
Before you remove the water tank, make sure humidification modes are turned off and the water tank is empty.
Remove the tank
Push down the water tank release buttons on the sides of your machine.
Slide the water tank out of your machine.
Carry the water tank by its handle to the tap, and unclip the cap.

Fill the tank
Fill the water tank to the Max level with cold tap water.
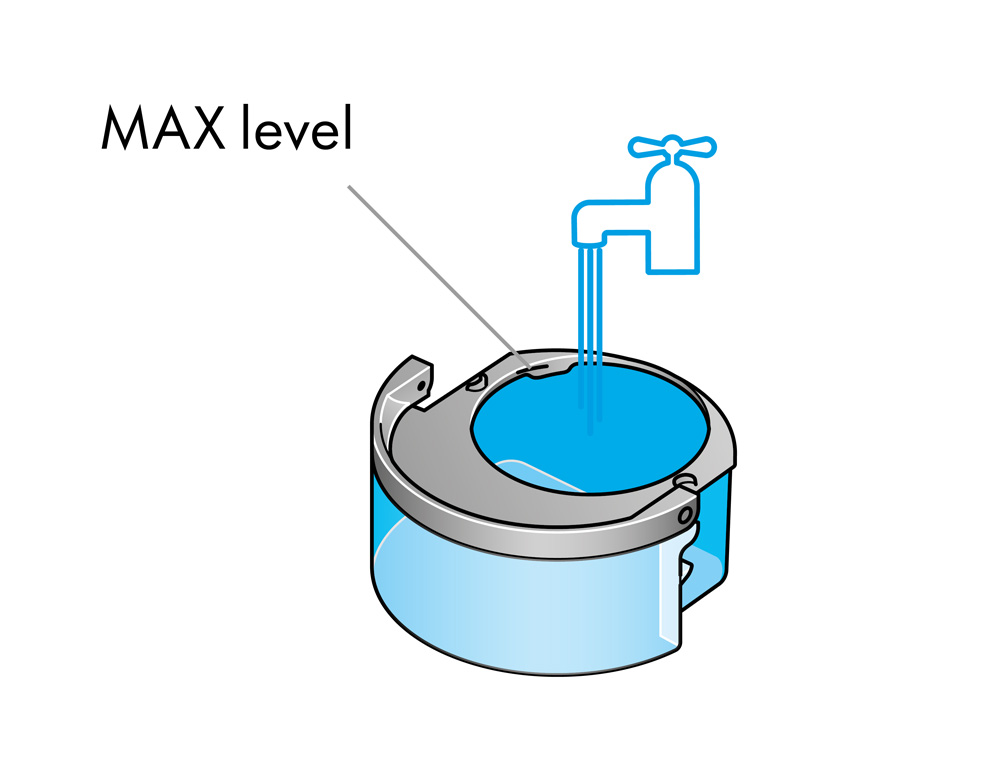
Replace the tank
Replace the cap and secure the cap clips in place.
Make sure the cap is completely dry. If wet, wipe thoroughly with a dry cloth.
Slide the water tank back into your machine until it clicks securely in place.
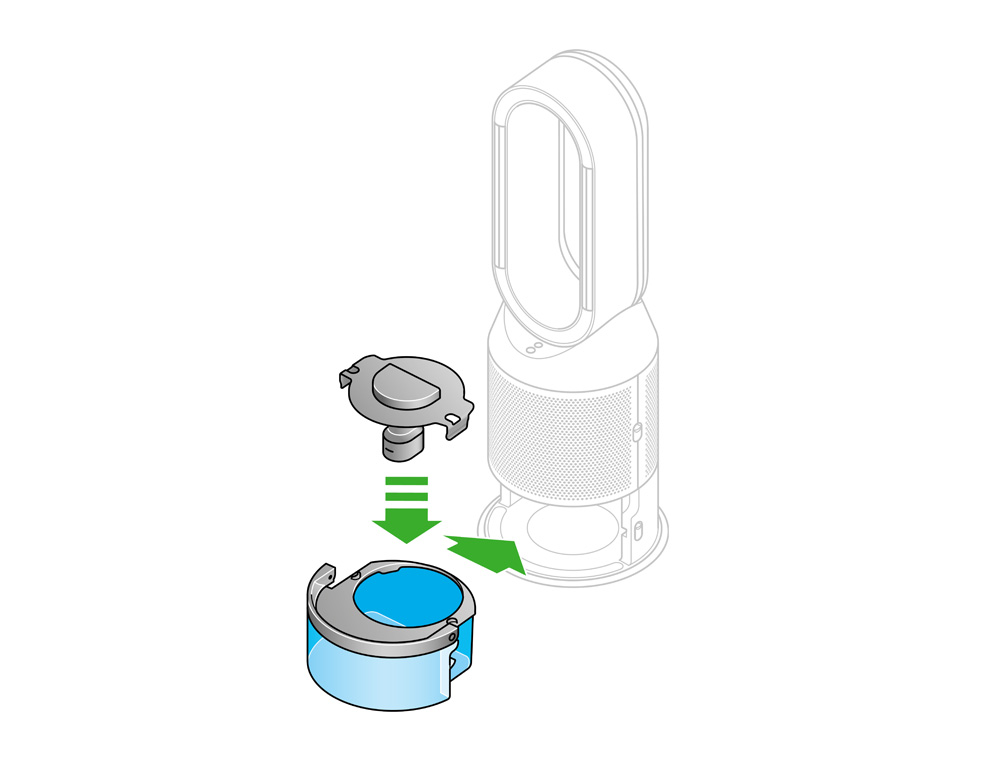
Use both hands to lift your Dyson purifying humidifying fan out of the box, by its base. Don't lift it out by the amplifier loop.
Assemble your machine with the filters that are supplied.
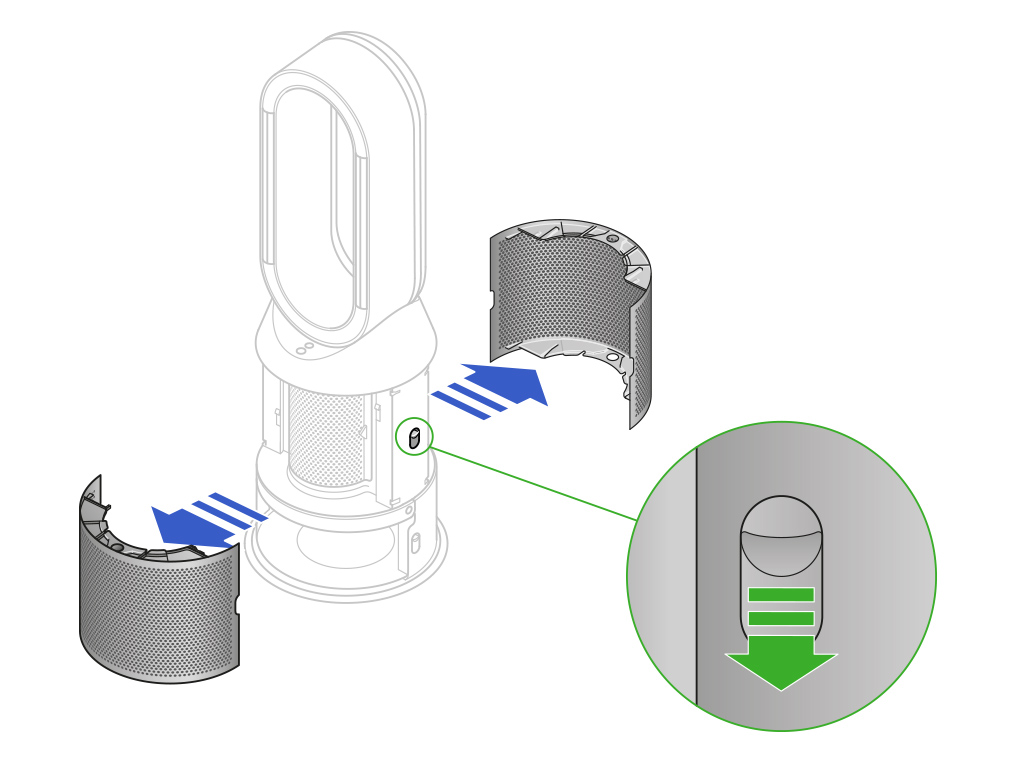
Your machine comes with a permanent catalytic filter and a HEPA+Carbon filter.
The permanent catalytic filter will already be in place on your machine.
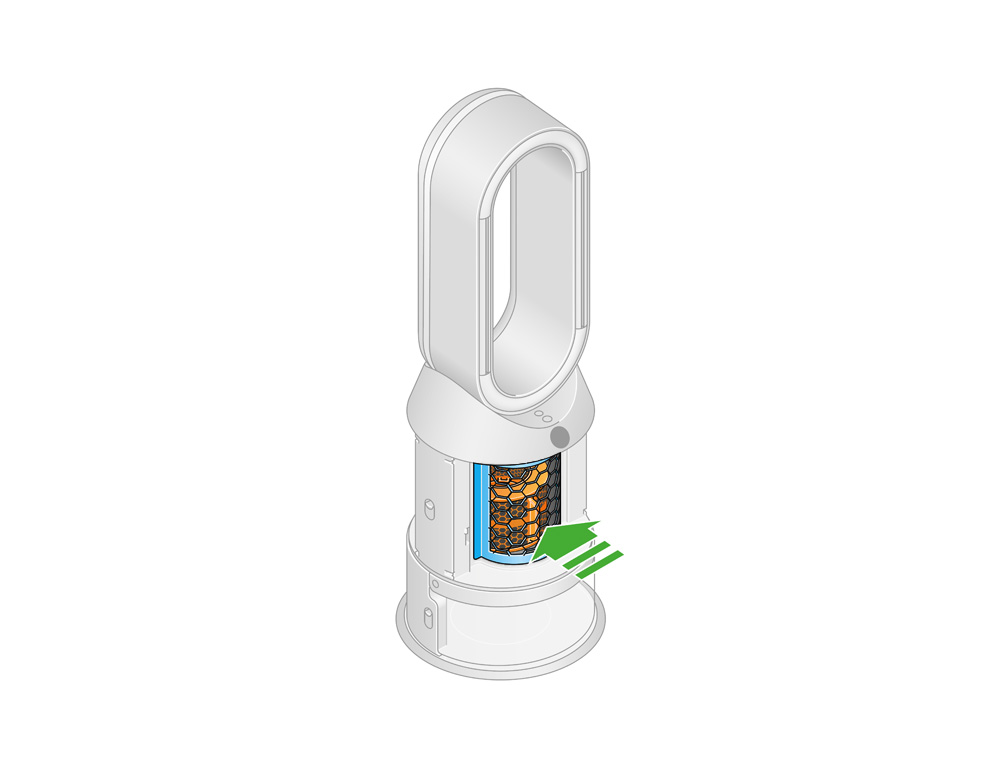
Insert the evaporator
Hold the evaporator by the handle and push it into the machine until it slots into place.
With the evaporator in place, close the inner door making sure it clicks firmly shut.

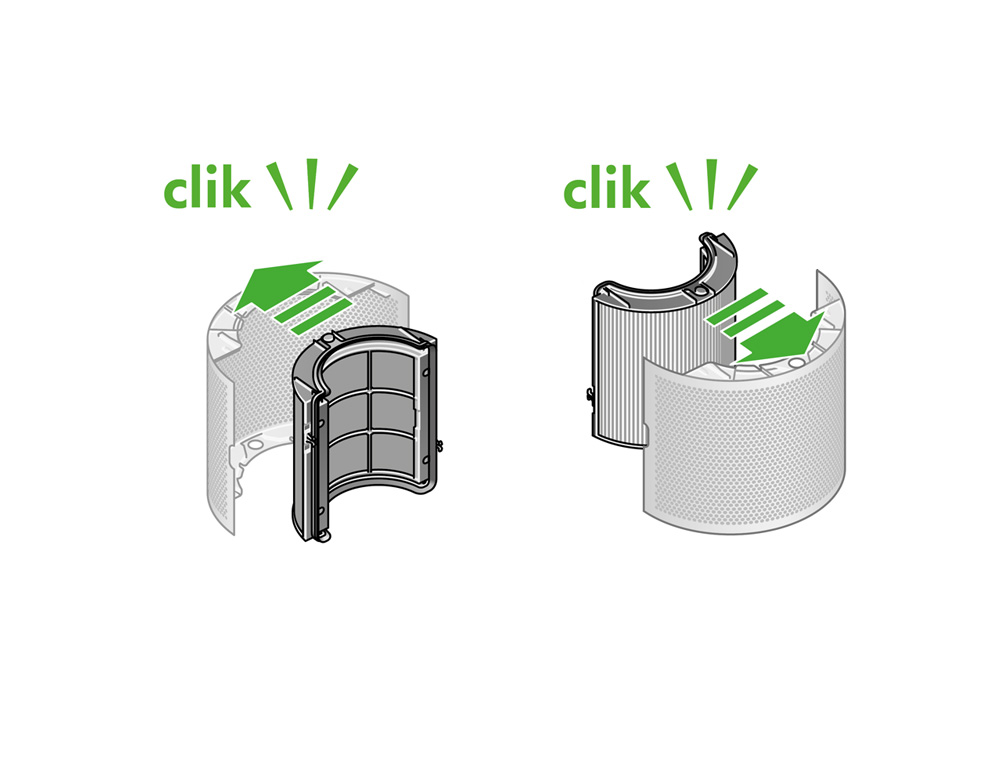
Inserting the HEPA+Carbon filters
Remove the HEPA+Carbon filters from any protective packaging.
Push them into the outer covers and make sure the tabs click into place.
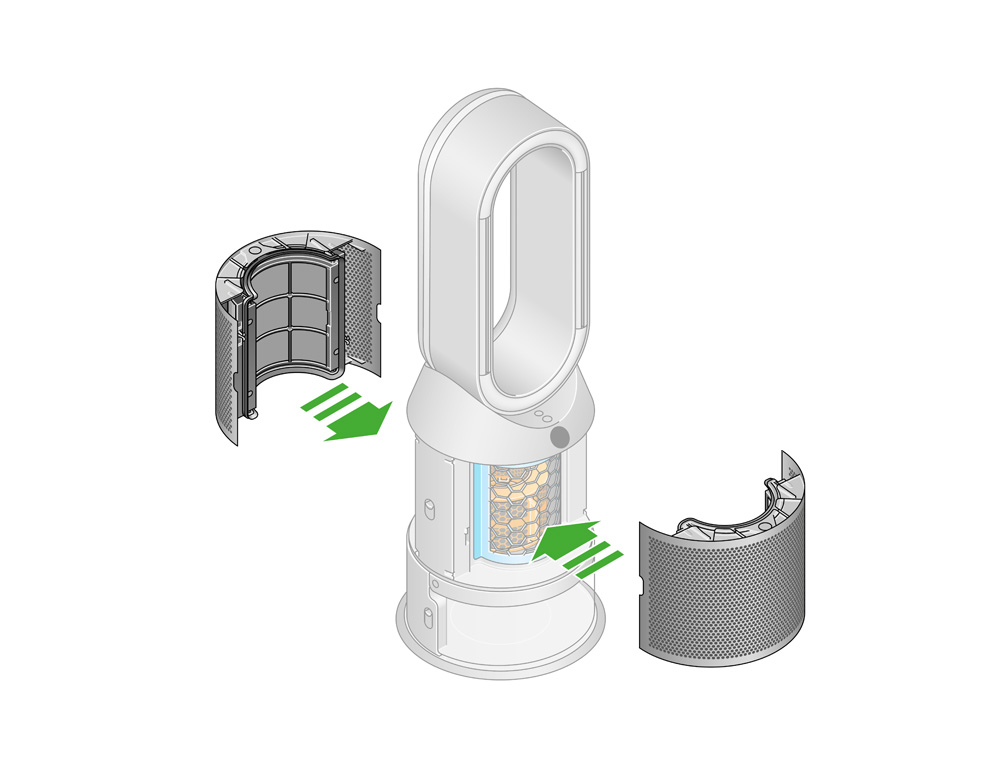
Put the outer covers into position on your machine and push firmly until they both click securely in place.
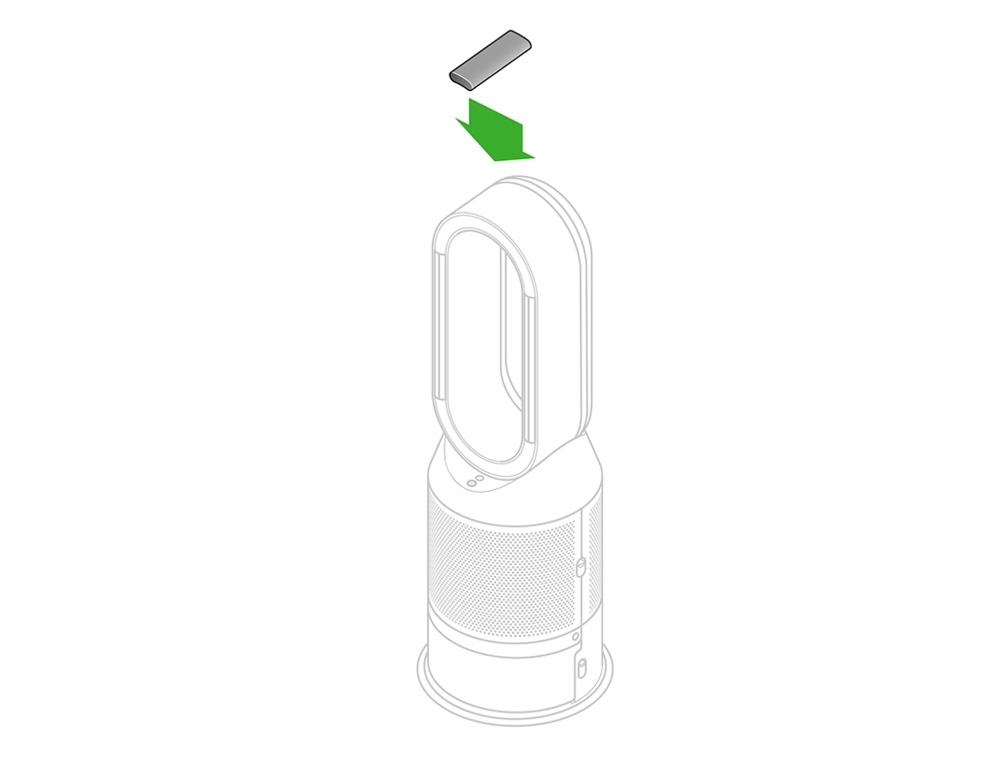
Place the remote control on top of the machine with the buttons facing down.
Plug your machine in and switch it on.
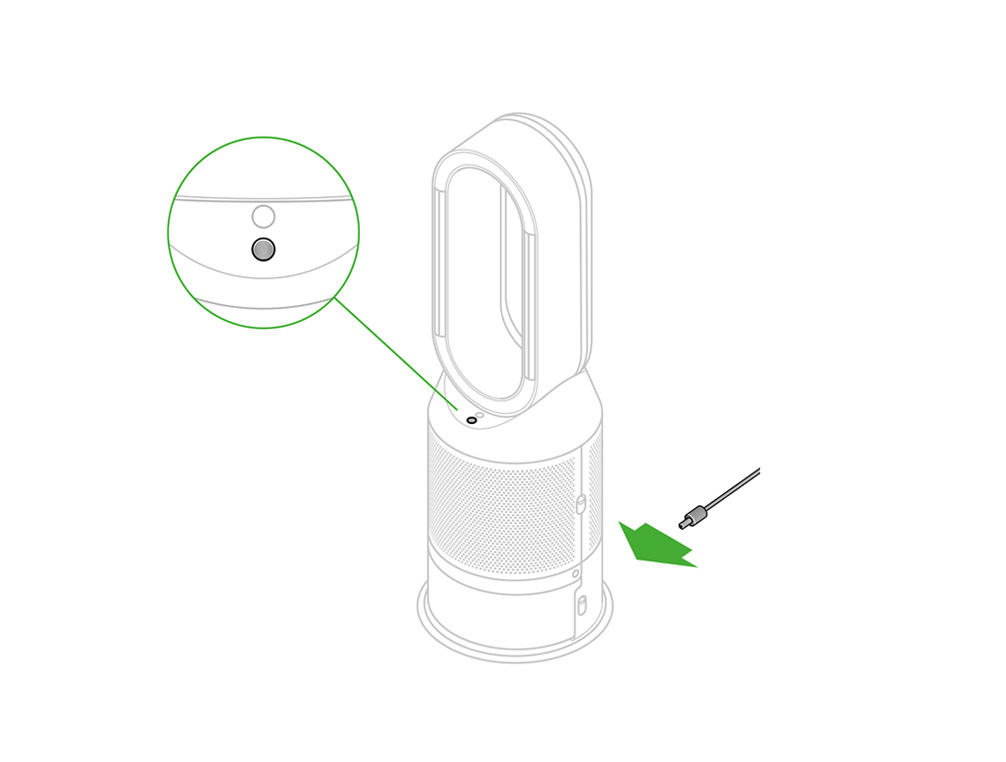
Please select the appropriate option
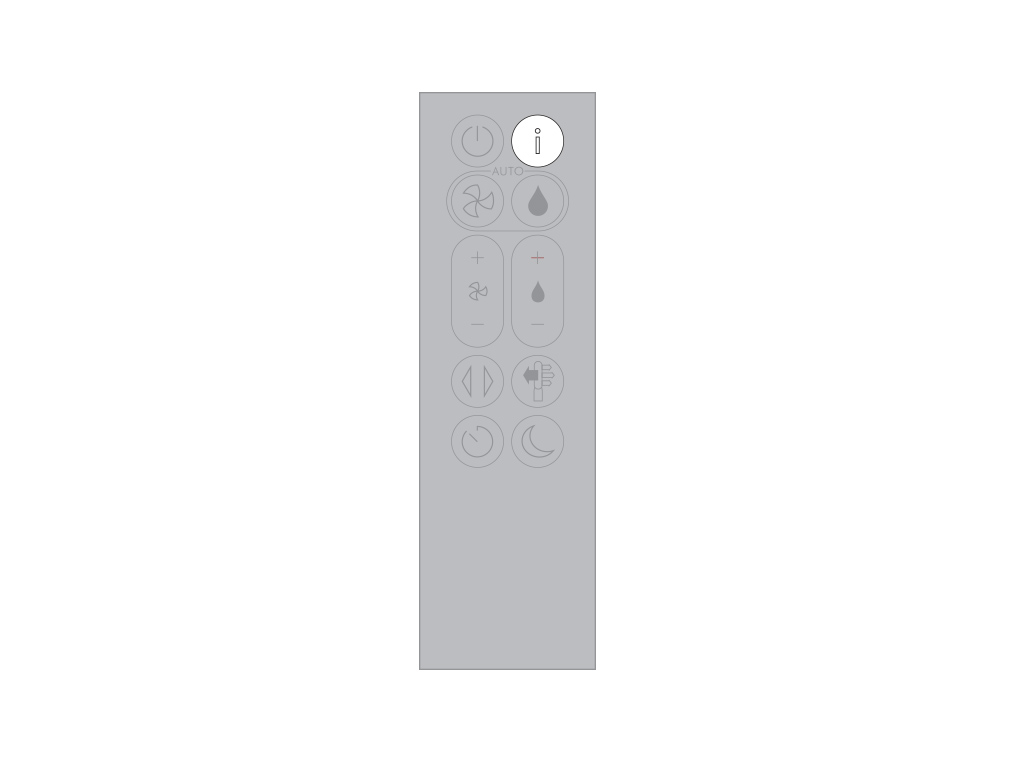
Information menu
Press this button to scroll through the information being monitored by your Dyson purifying humidifying fan.
Information about air quality, temperature, humidity, filter levels and evaporator levels are shown.
When a particular type of pollutant causes the air quality to decrease, an icon for the pollutant will show on the LCD screen.
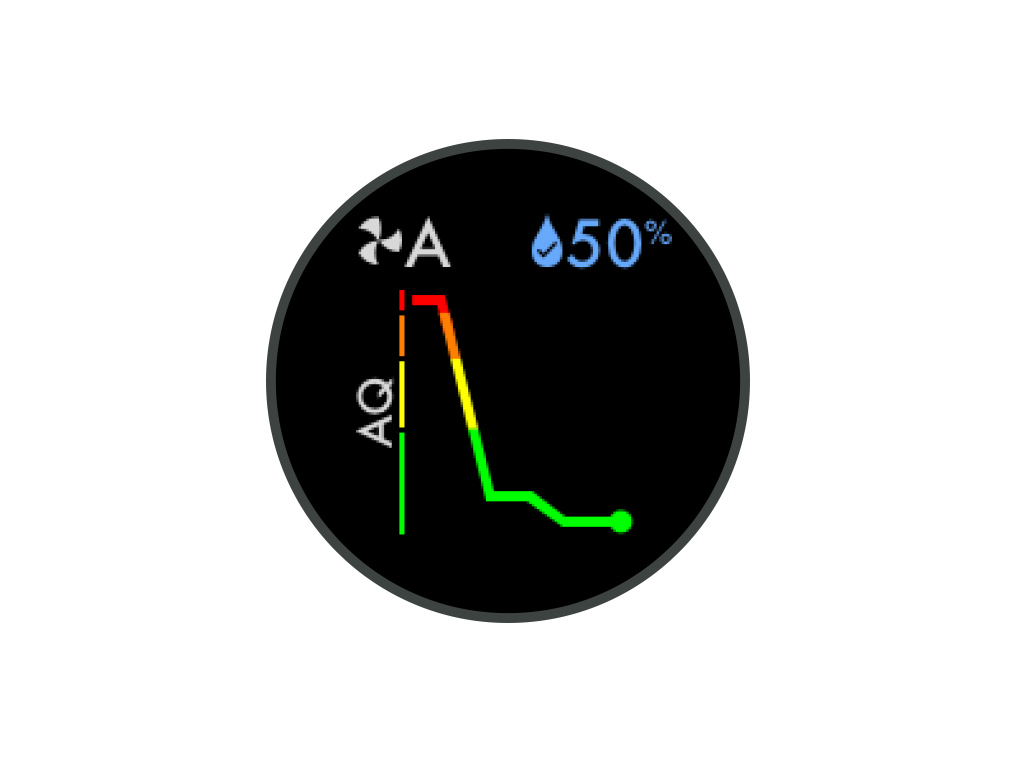
Indoor air quality - 12 seconds
Monitor the current air quality with a graph showing the last 12 seconds of data.
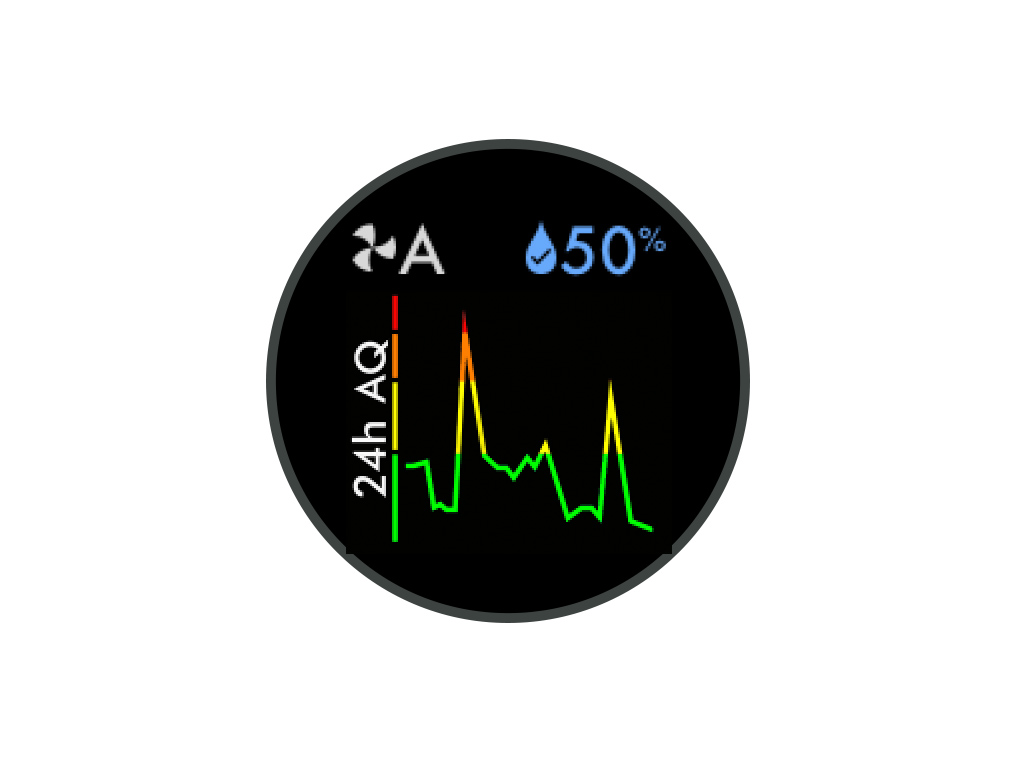
Indoor air quality - 24 hours
Monitor the air quality with a graph showing the last 24 hours of data.
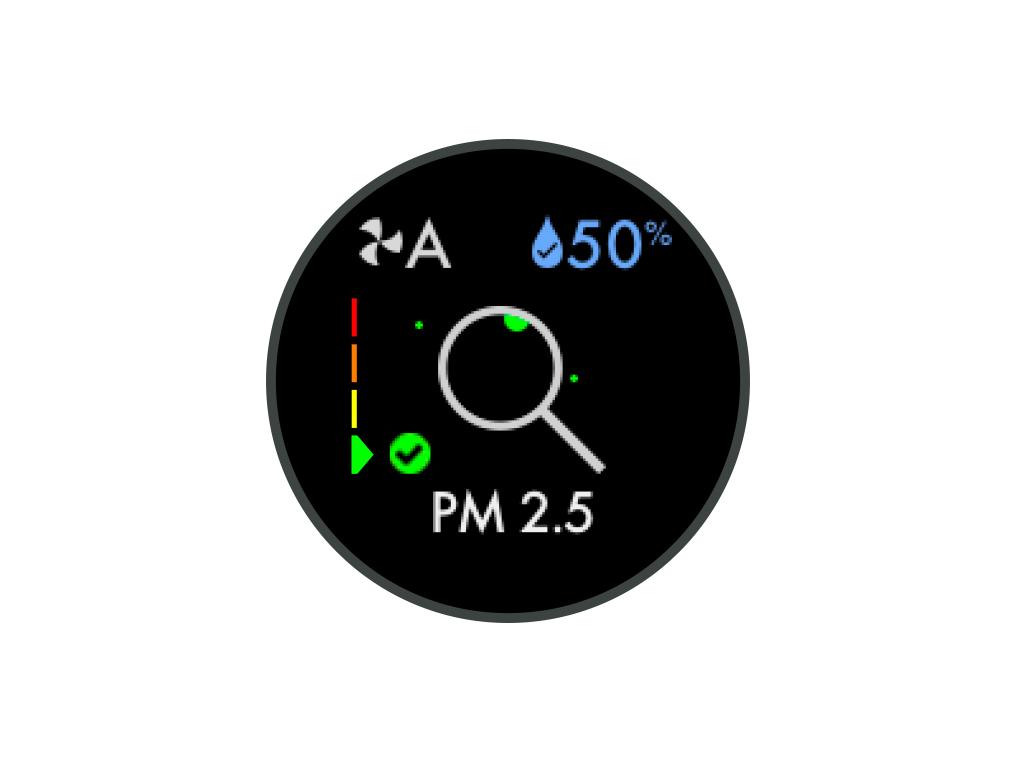
Particulate matter (PM2.5)
Microscopic particles up to 2.5 microns in size, suspended in the air we breathe. These include smoke, bacteria and allergens.
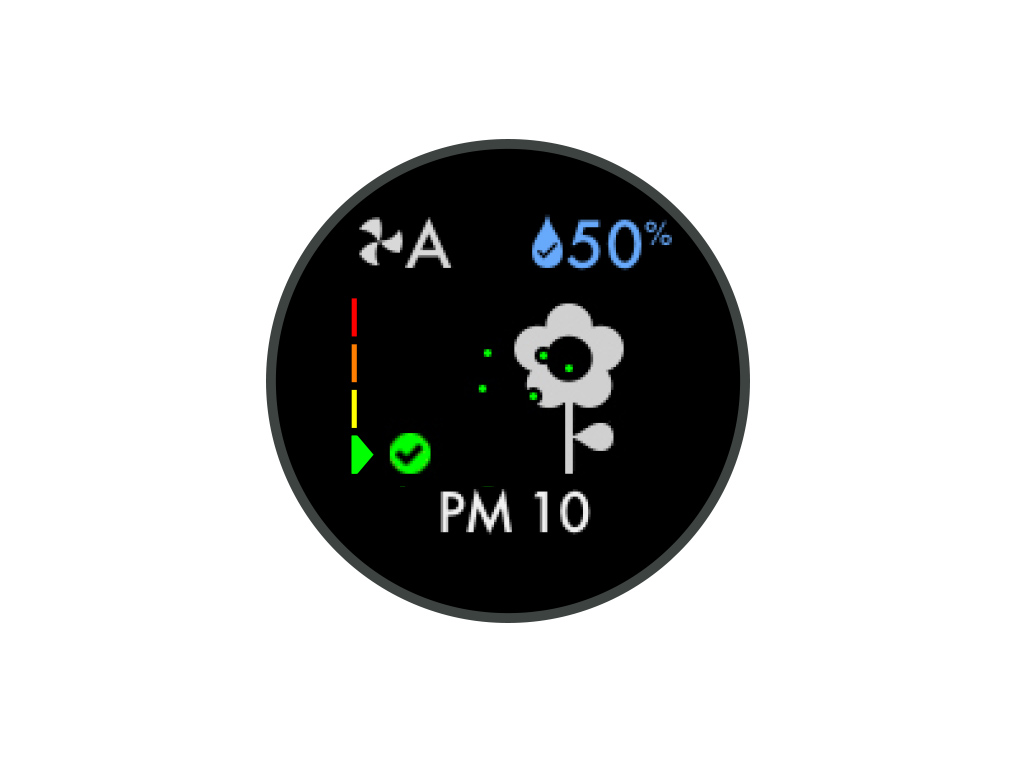
Particulate matter (PM10)
Larger microscopic particles up to 10 microns in size, suspended in the air we breathe. These include dust, mould and pollen.
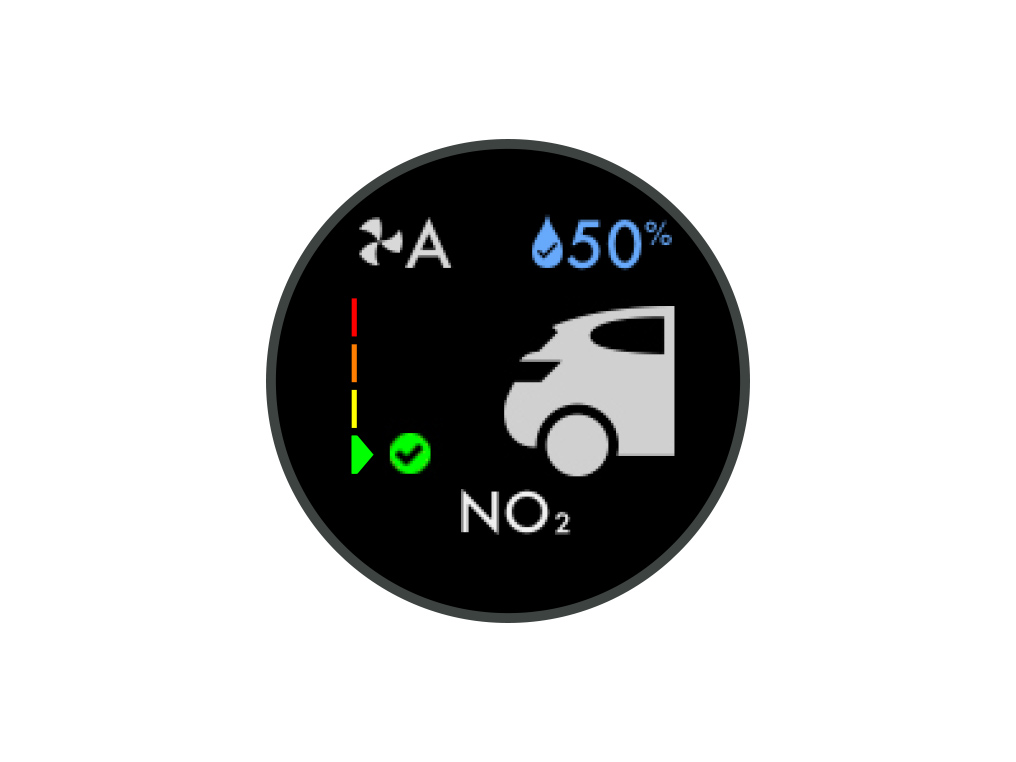
Nitrogen dioxide and other oxidising gases
These potentially harmful gases are released into the air by combustion, for example, the burning gas when cooking and in vehicle exhaust emissions.
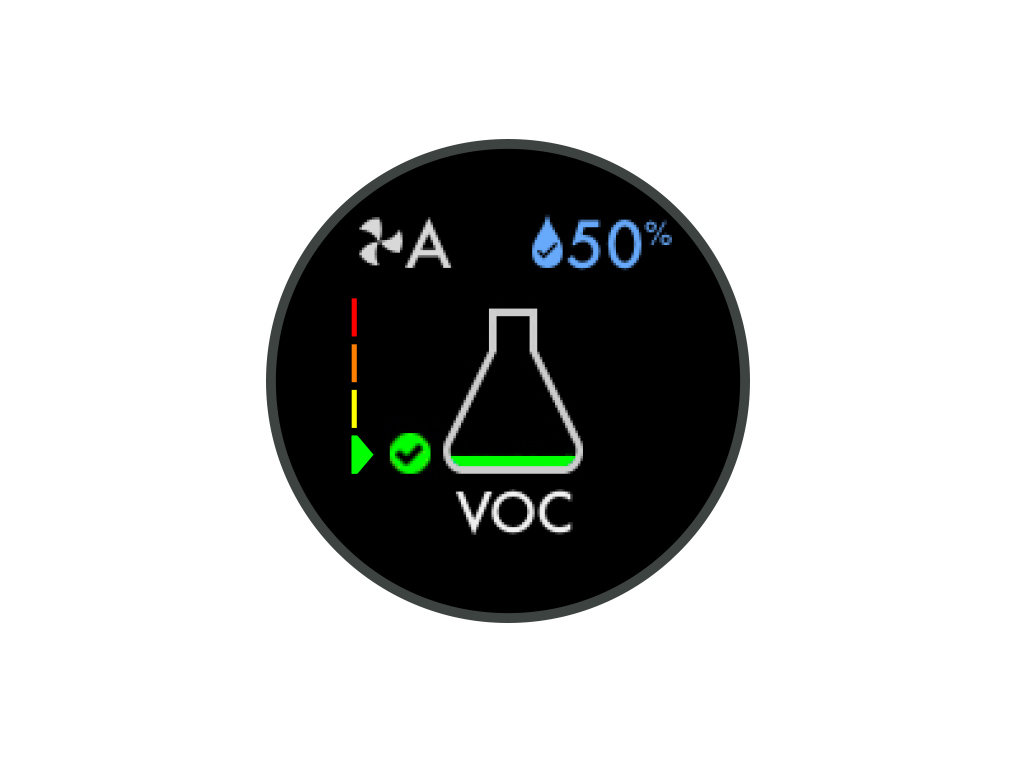
Volatile organic compounds
VOCs are typically odours that may be potentially harmful. These can be found in cleaning products, paints and furnishings.
Indoor temperature
Monitor the ambient temperature to help maintain a comfortable environment.
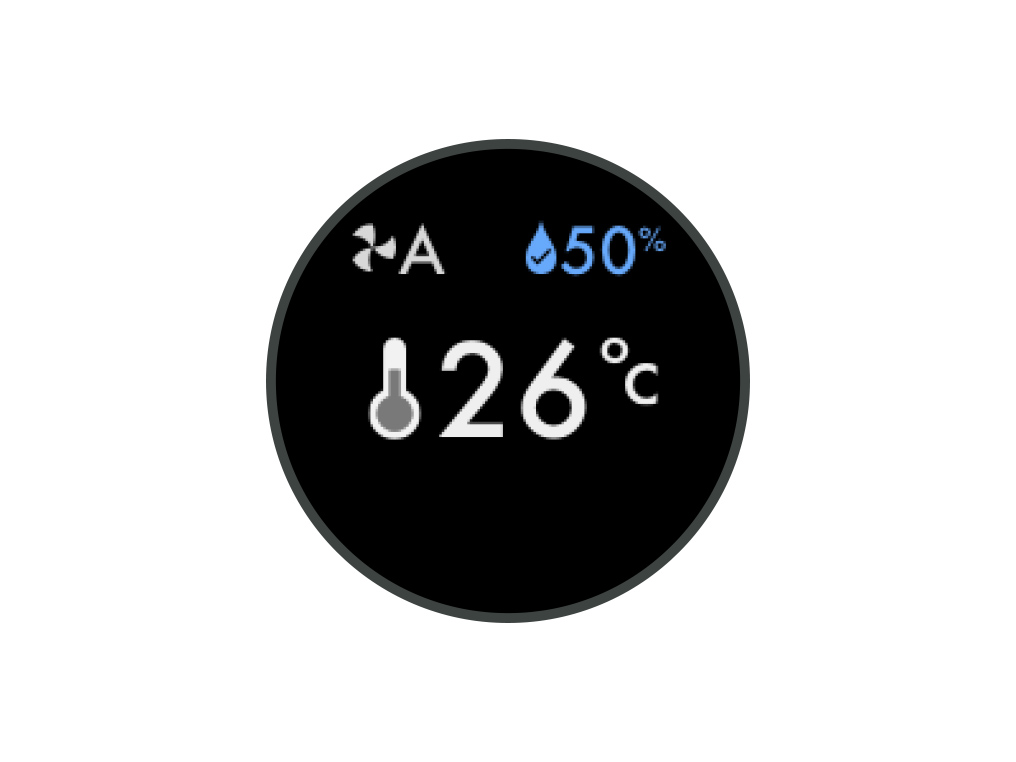
Indoor humidity
The amount of water vapour in the air, shown as a percentage of the maximum possible humidity at the current temperature.

Filters
The remaining filter life is shown on the LCD screen and will indicate when your filters need replacing.
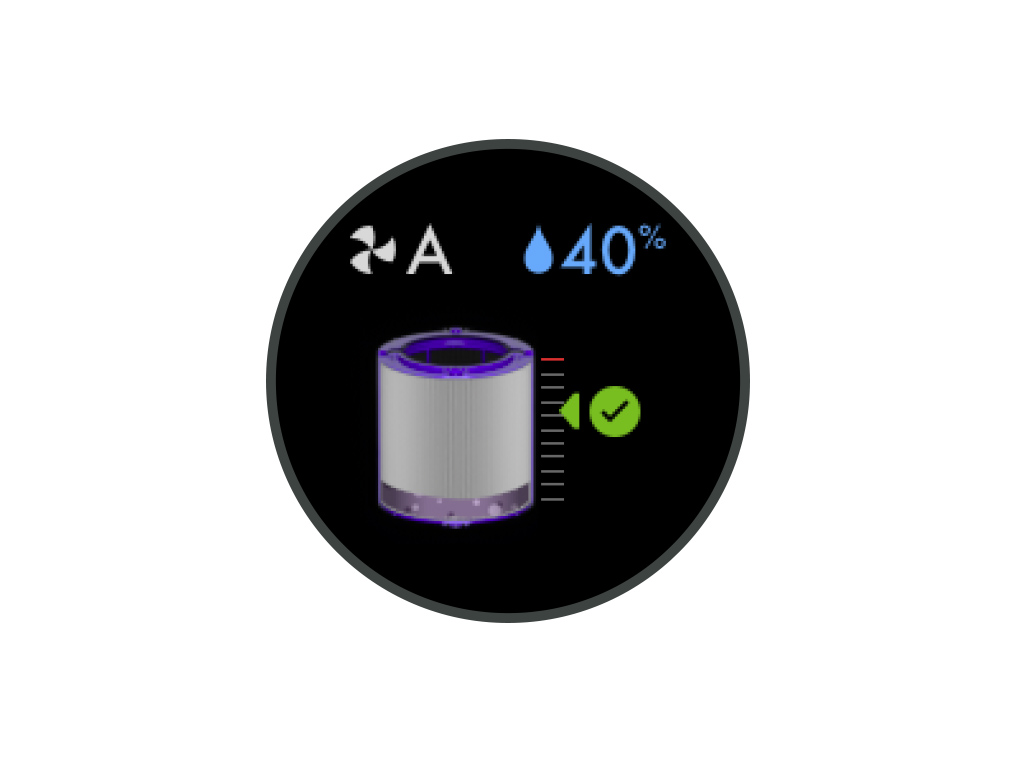
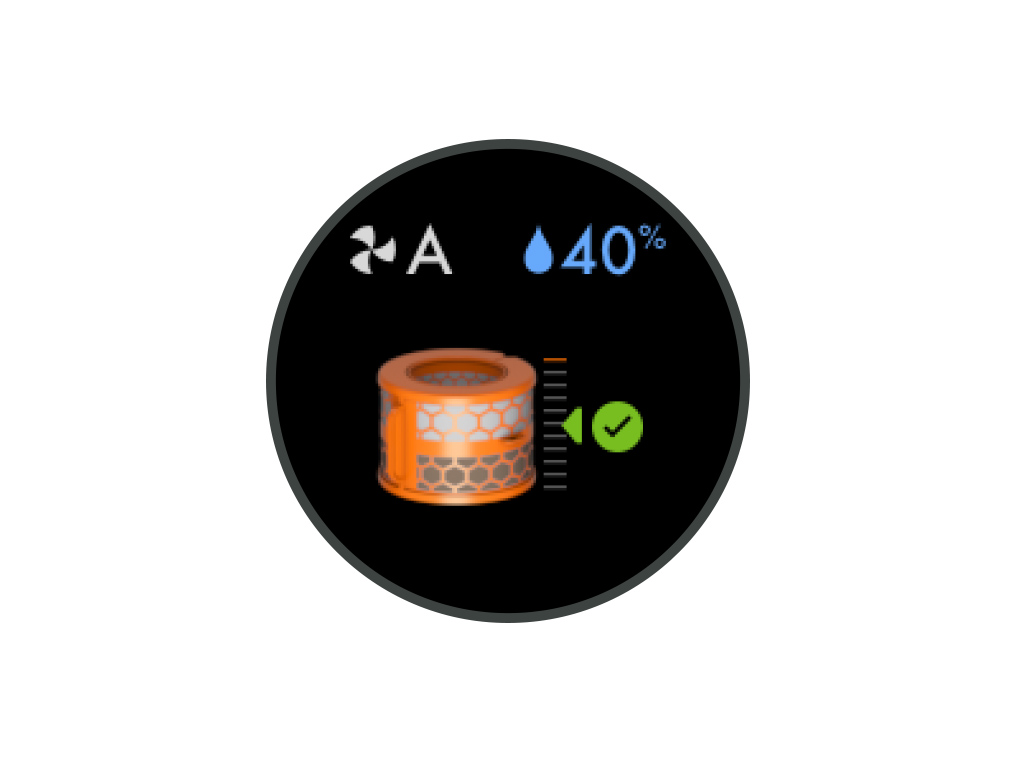
Evaporator
The status will show how full the evaporator is with limescale and how soon a deep clean cycle is required.
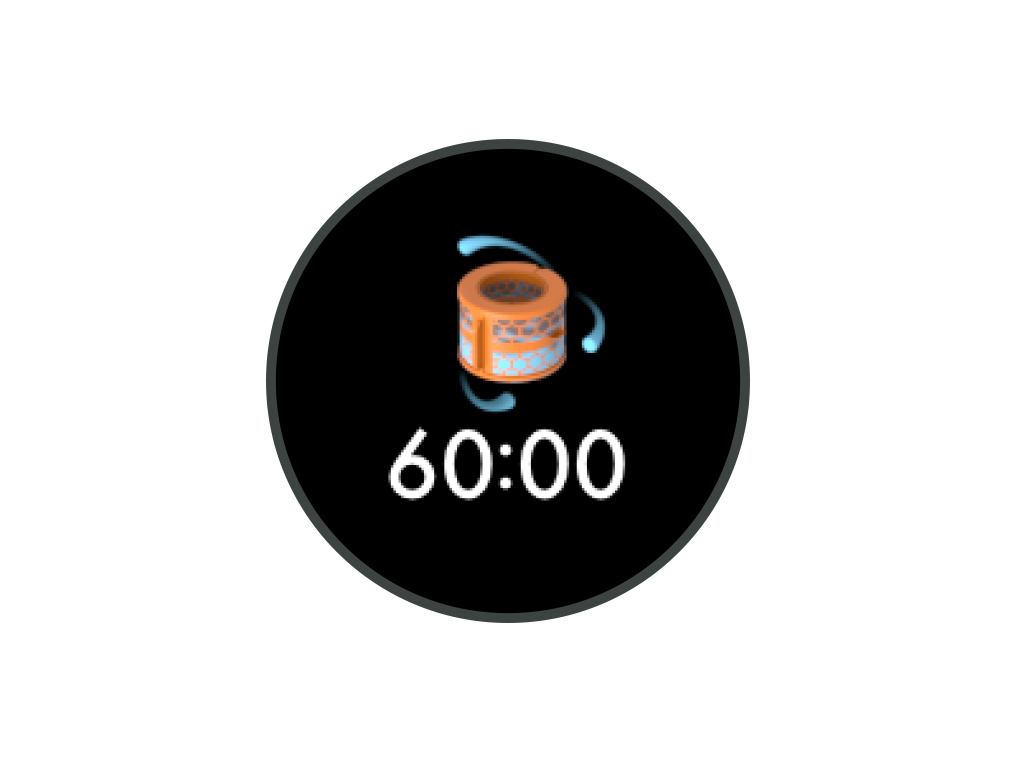
Deep clean cycle in progress
Displays the amount of time until the Deep Clean cycle is complete.
Deep clean cycle complete
The Deep clean cycle is complete.
Deep clean cycle not complete
The Deep clean cycle is not complete.

Night mode on

Night mode off

Continuous monitoring on
With Continuous monitoring turned on, your machine will draw air through it, allowing the machine to react to changes in the air quality.
Continuous monitoring off
Continuous monitoring is turned off by default. Once turned on, it will always be active until you turn it off again.
Standby on/off button

Deep clean cycle button

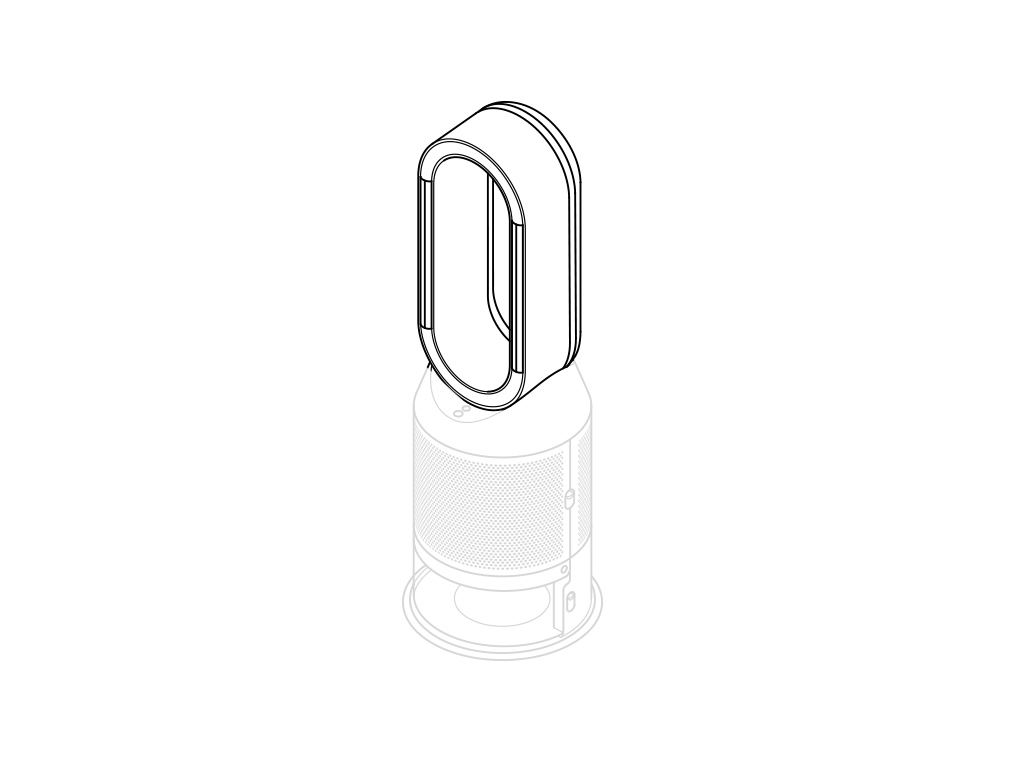
Amplifier loop
Water tank release buttons
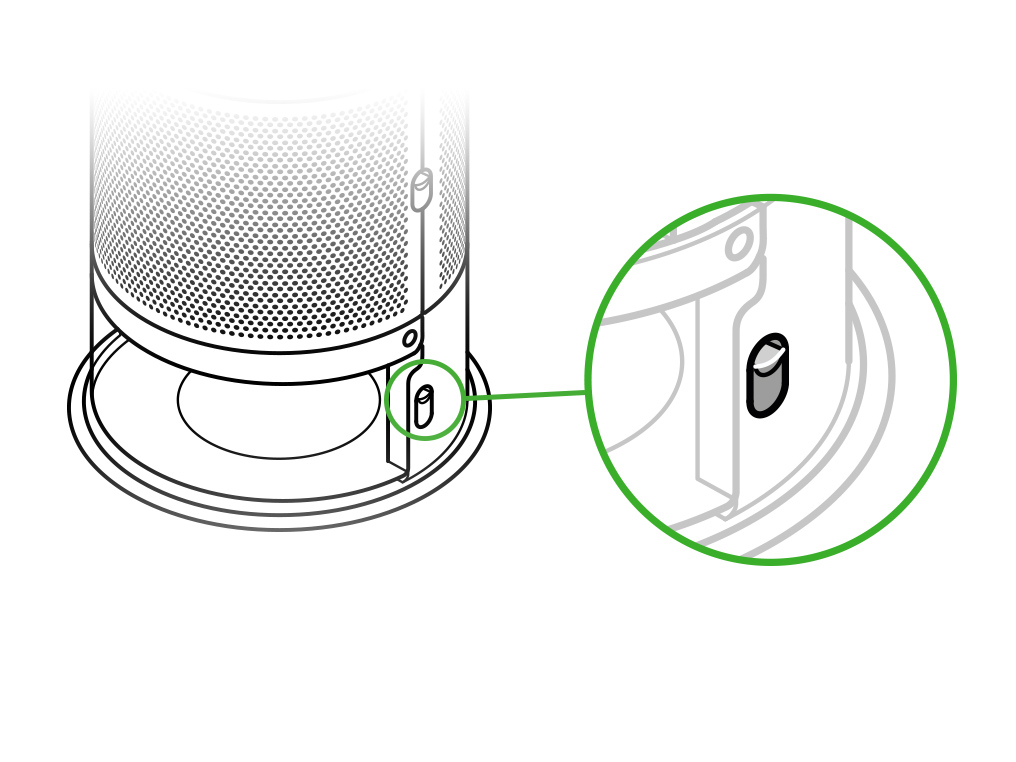
Outer cover release buttons
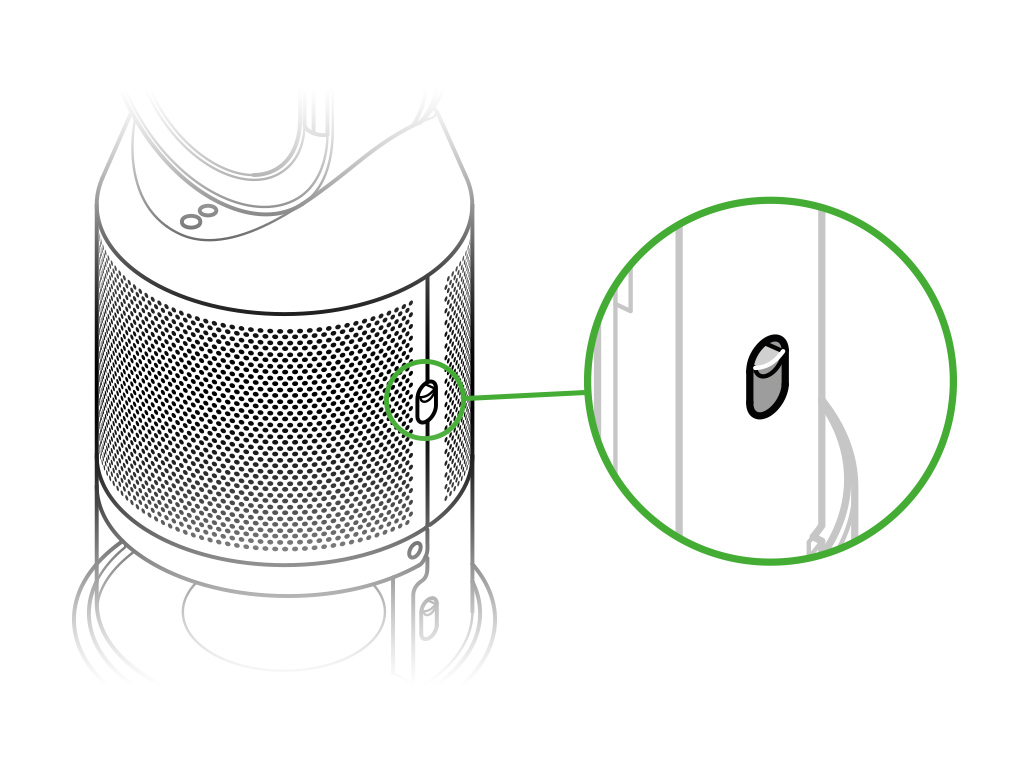
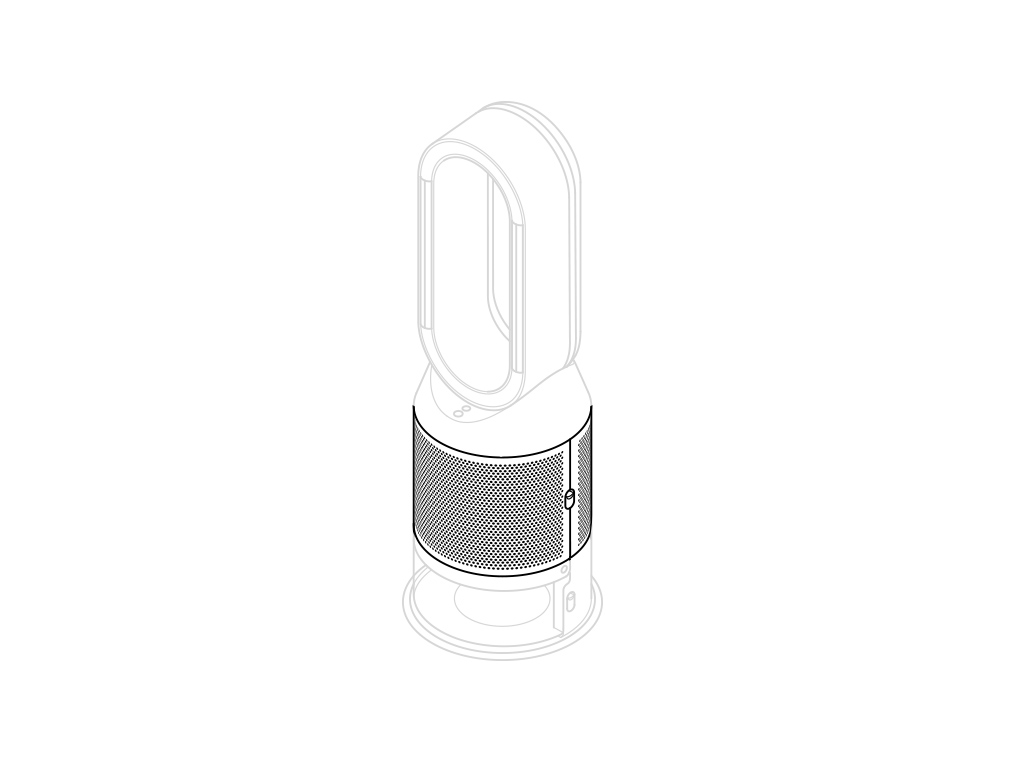
Outer cover
Continuous monitoring
Continuous monitoring is turned off by default. Once turned on, it will always be active until you turn it off again.

With continuous monitoring turned on, your Dyson purifier humidifier fan will gather air quality, temperature and humidity information, which is displayed on the LCD screen.

Continuous monitoring on/off
Press and hold the Auto purify mode button on the remote control for five seconds to turn it on. The LCD screen will indicate when continuous monitoring is on or off.
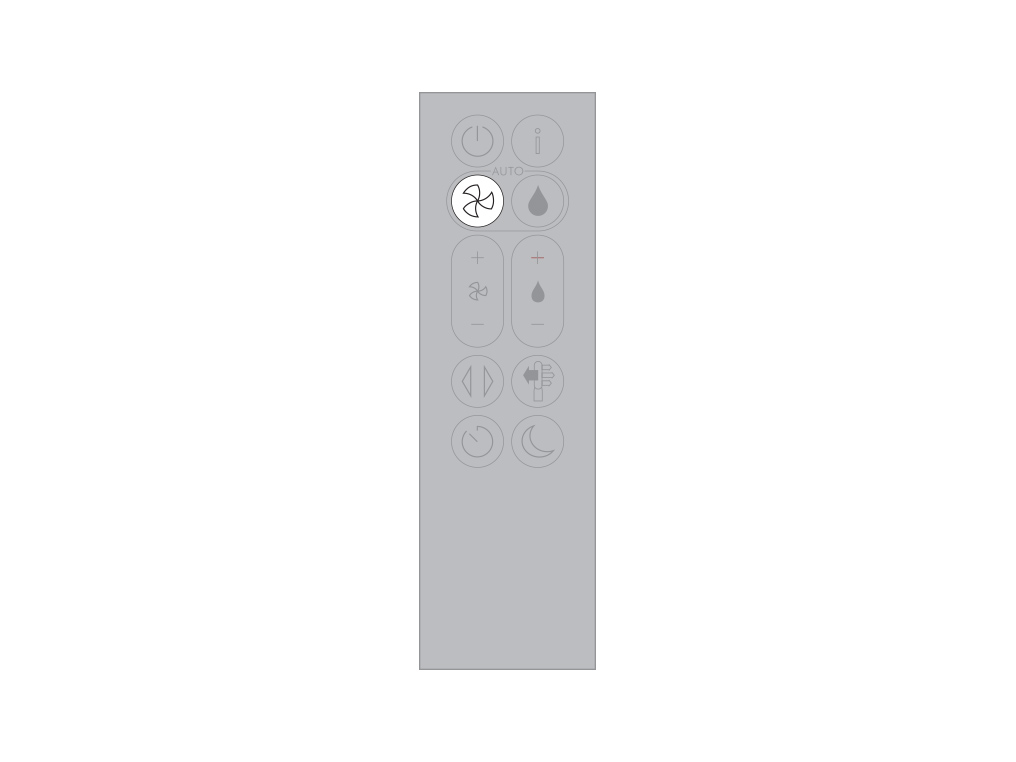
Using the remote control
To operate, point the remote control toward the front of the base.
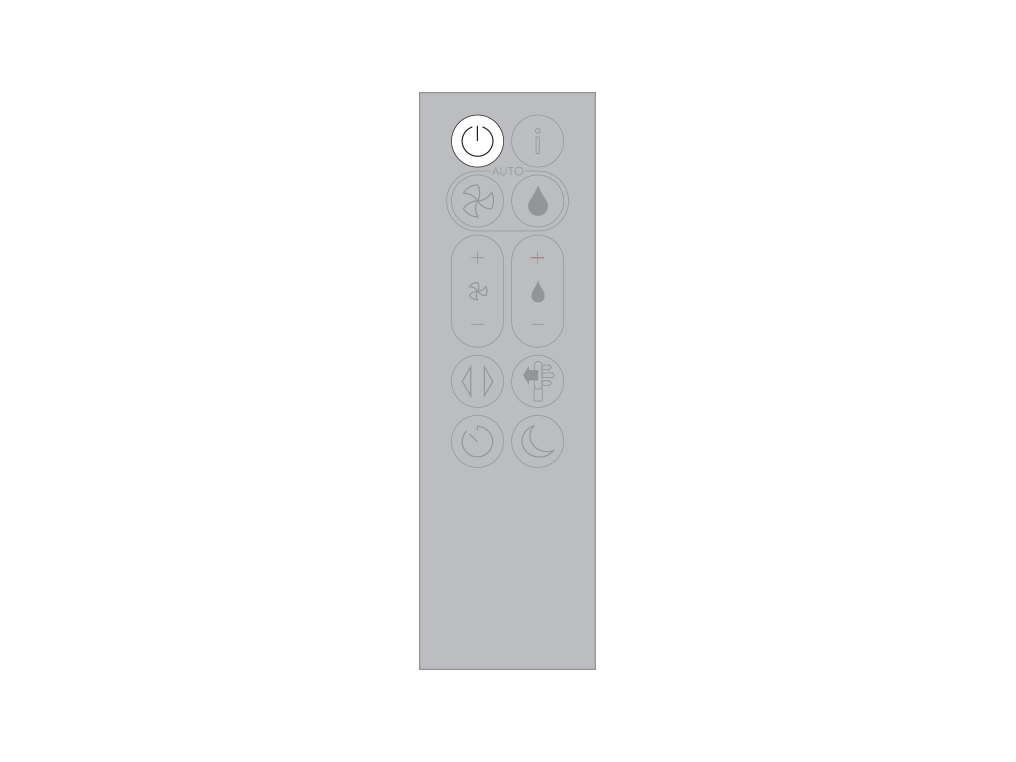
Standby on/off
Press the Standby on/off button on your Dyson purifier humidifier fan or remote control to stop your machine. It will continue to monitor the air quality.
Information menu
Press this button to scroll through the information being monitored by your Dyson purifying humidifying fan.
Information about air quality, temperature, humidity, filter levels and evaporator levels are shown.
When a particular type of pollutant causes the air quality to decrease, an icon for the pollutant will show on the LCD screen.

Auto purify mode
Set your Dyson purifying humidifying fan to Auto purify mode and the onboard sensors will intelligently adjust the settings of your machine according to the air quality.
Air quality: your machine will pause when the target air quality has been reached, switching on again when the air quality levels drop.
Airflow speed: the airflow speed will increase until the target air quality and temperature have been reached.
Night mode: your machine will only run with airflow speeds from 1 to 4.

Auto humidify mode
Set your Dyson purifying humidifying fan to Auto humidify mode and the onboard sensors will intelligently adjust the settings of the machine according to the temperature and humidity of your room.
Room humidity: your machine will pause when the target room humidity has been reached, switching on again when the room humidity levels drop.
Airflow speed: the airflow speed will increase until the target humidity level has been reached.
To turn off Auto humidify mode or to change the humidity levels manually, press the Humidity control button.
Airflow speed
Press the Airflow speed button to increase and decrease the airflow speed.

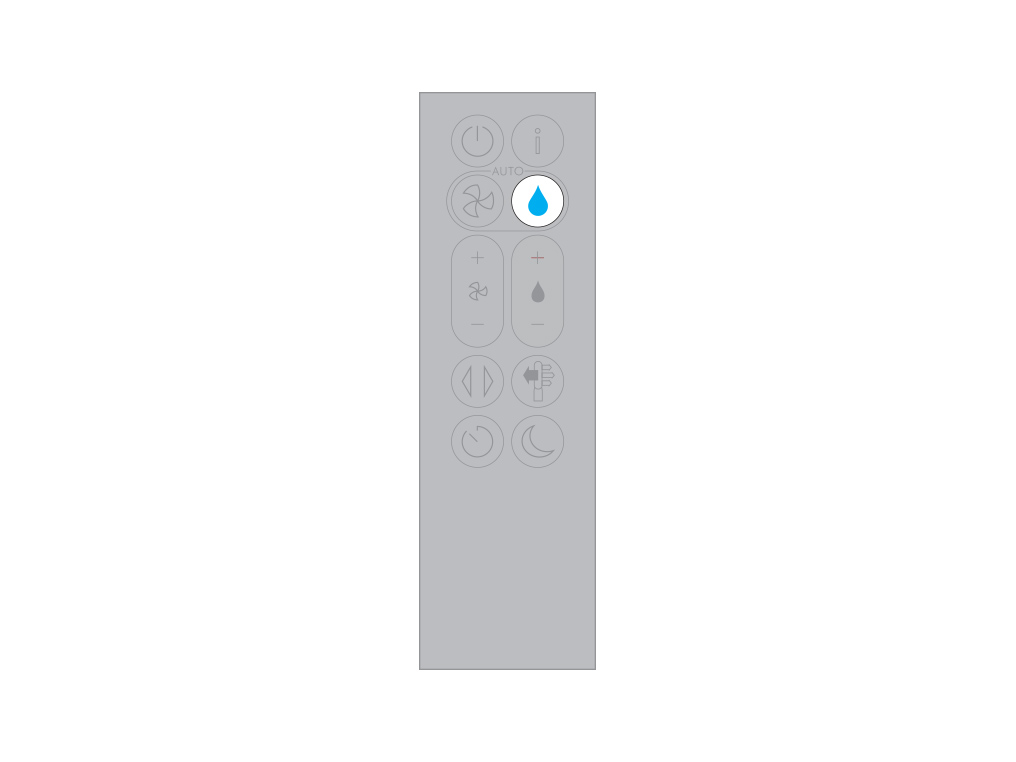
Humidity control
Press the Humidity control button to increase and decrease the target humidity.
Oscillation
Press the Oscillation button and select the angle of oscillation to 0°, 45°, 90° or Breeze mode.
Pause the oscillation at any point by pressing the Oscillation button.
Press the Oscillation button again to resume.
To reset the Oscillation direction to the centre, press and hold the Oscillation button for two seconds.

Airflow direction
Press the Airflow direction button to change the direction of airflow from front to back.
Change the airflow direction for your personal comfort.
Select the Airflow direction to Fan mode for airflow from the front for purifying and cooling.
Air will be purified continuously, whether the air is set to flow from the front or the back.
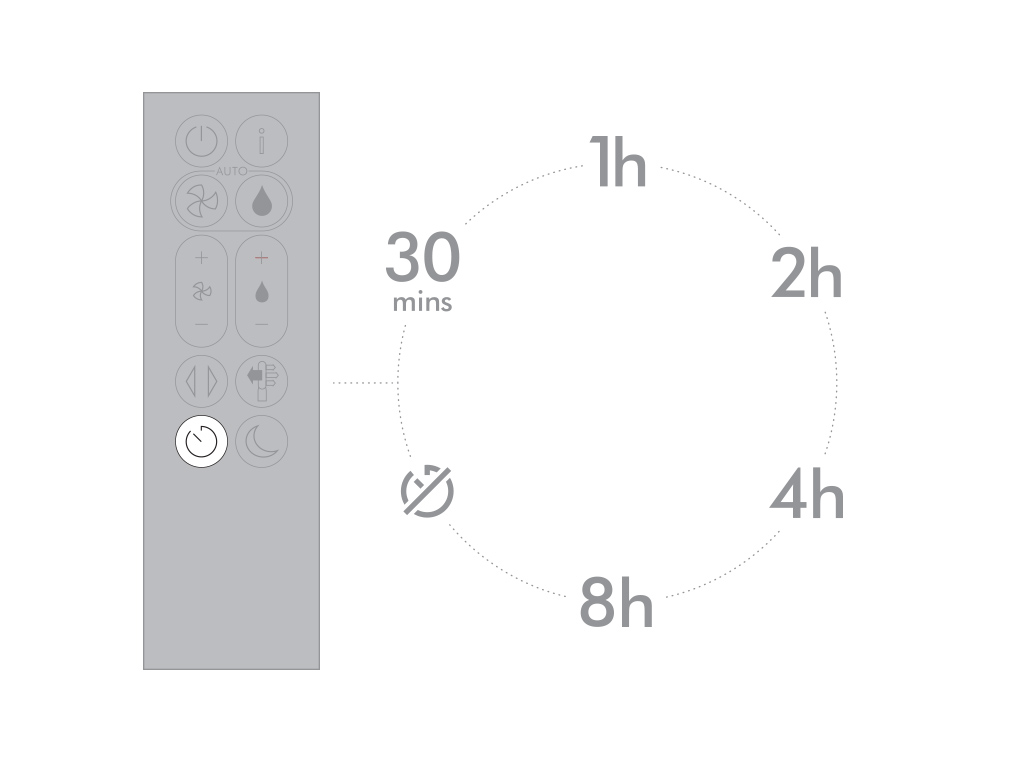
Sleep timer
Your Dyson purifying humidifying fan will turn off automatically after the selected amount of time.
To set the time: press the button to scroll through the time options. Once activated, press the Sleep timer button once to see the time selected.
To cancel the Sleep timer: press the Sleep timer button to scroll through all the options and select the cancel option.
Night mode
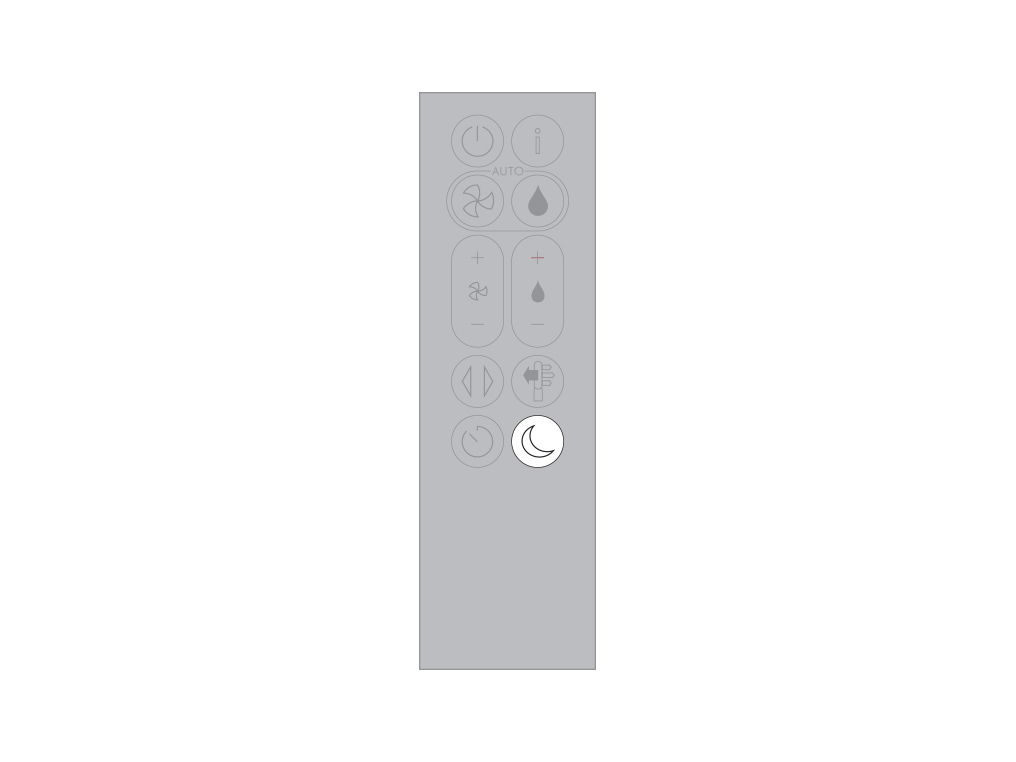
In Night mode, your Dyson purifying humidifying fan will continue to monitor and respond to changes in air quality and temperature, but only using its quietest settings - and with its LCD screen dimmed.
If Auto purify mode or Auto humidify mode hove been set, Night mode will reduce the airflow speed to a range from 1 to 4.
Personalise your Night mode settings in the Dyson Link app.
Looking after your machine
To always get the best performance from your Dyson purifying humidifying fan, it's important to regularly clean it and check for blockages.

Cleaning your machine
If your machine is dusty, wipe it with a damp lint-free cloth.

Look for blockages in the air inlet holes in the shrouds, the small aperture inside the amplifier loop, and the soft plastic mesh visible inside the machine when the evaporator is removed.

Use a soft brush to remove dust and debris.

Don't use detergents or polishes to clean your machine.

Cleaning your machine's sensors
You may need to clean your machine's sensors if your internal air quality is constantly shown as Severe.
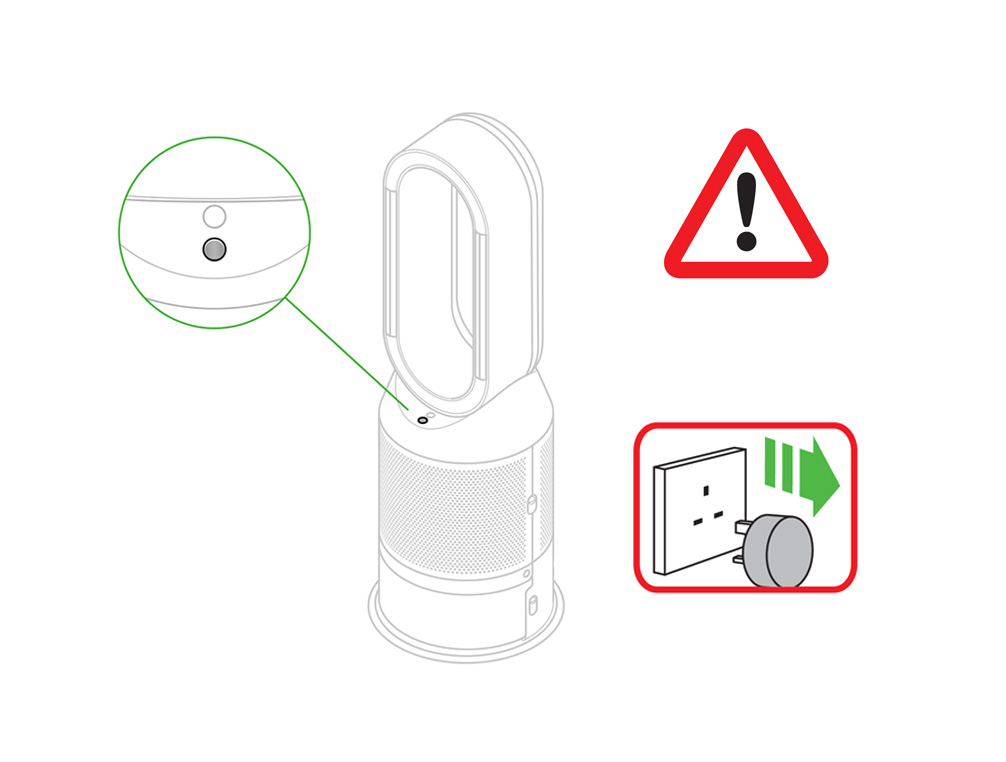
Unplug your machine
Begin by unplugging your machine from the mains power outlet.
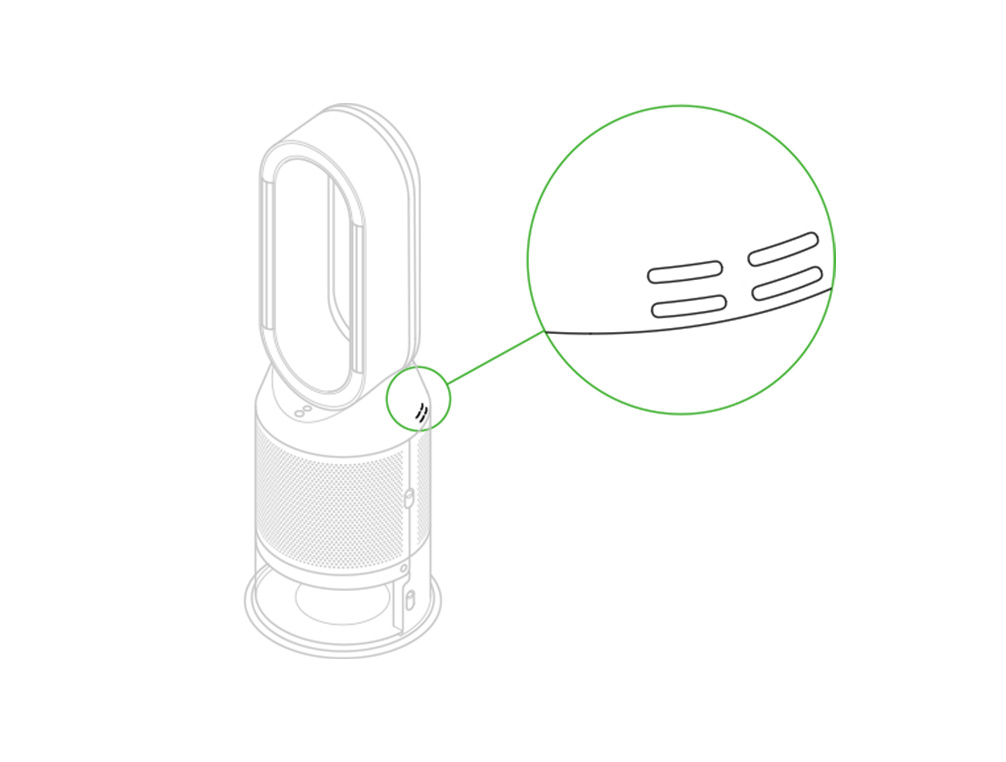
Next, locate the machine's sensors. The four oval-shaped slots can be found on the side of the machine, below the loop amplifier.
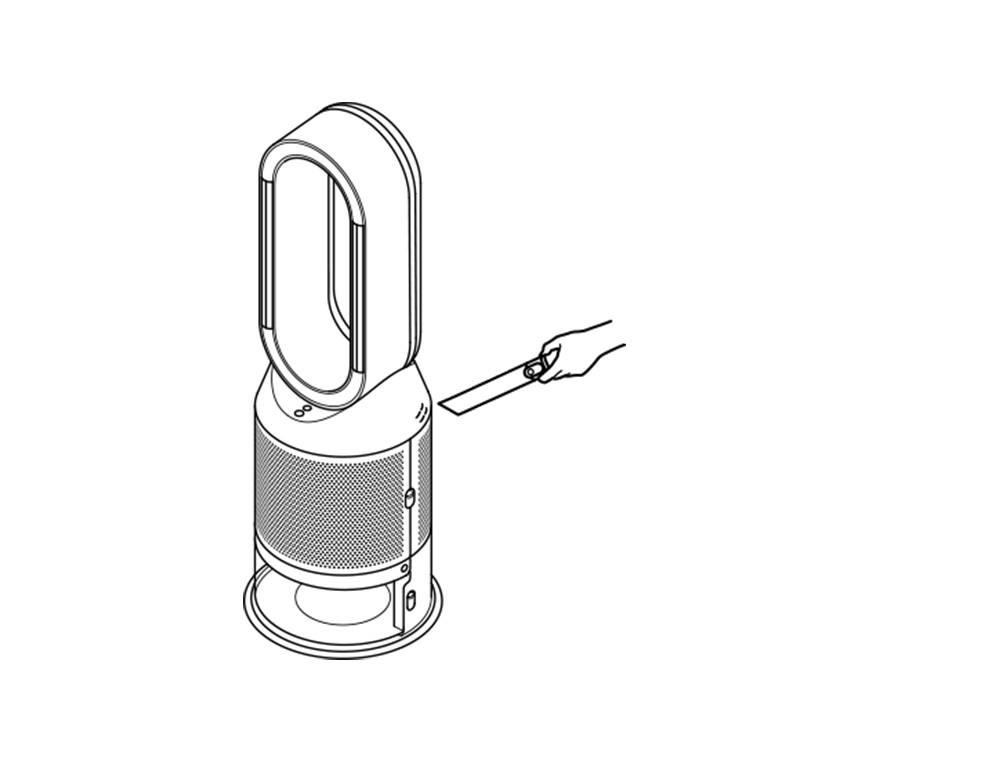
Vacuum clean the sensors to remove any dust or debris that has built up.
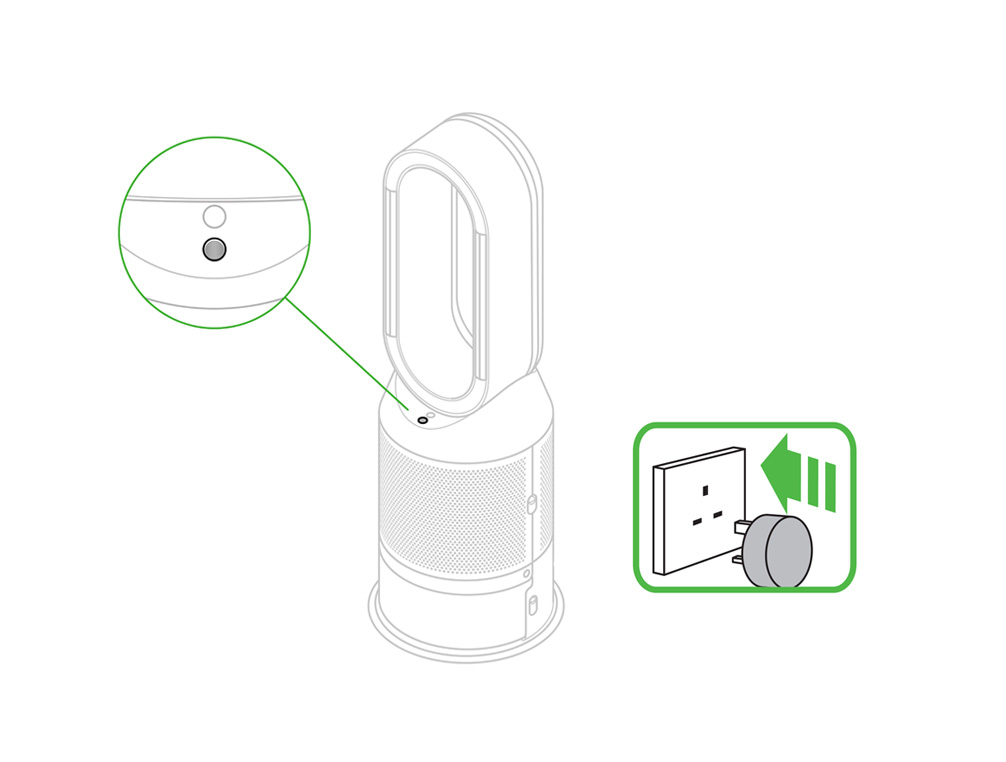
Plug your machine in and switch it on.
Please follow the steps in the video.
Find the text version of the step-by-step guide instead, under "Is there anything else we can help with?"
Is there anything else we can help with?
Changing your HEPA+Carbon filters
The remaining filter life is displayed on the screen and will indicate when your non-washable filters need replacing. Press the Information button on your remote.
After you've replaced your filters, you'll need to reset the filter life on your machine.

Filter life information
The arrow marks the remaining filter life. When your filter needs replacing, it will show as full with a red exclamation mark.
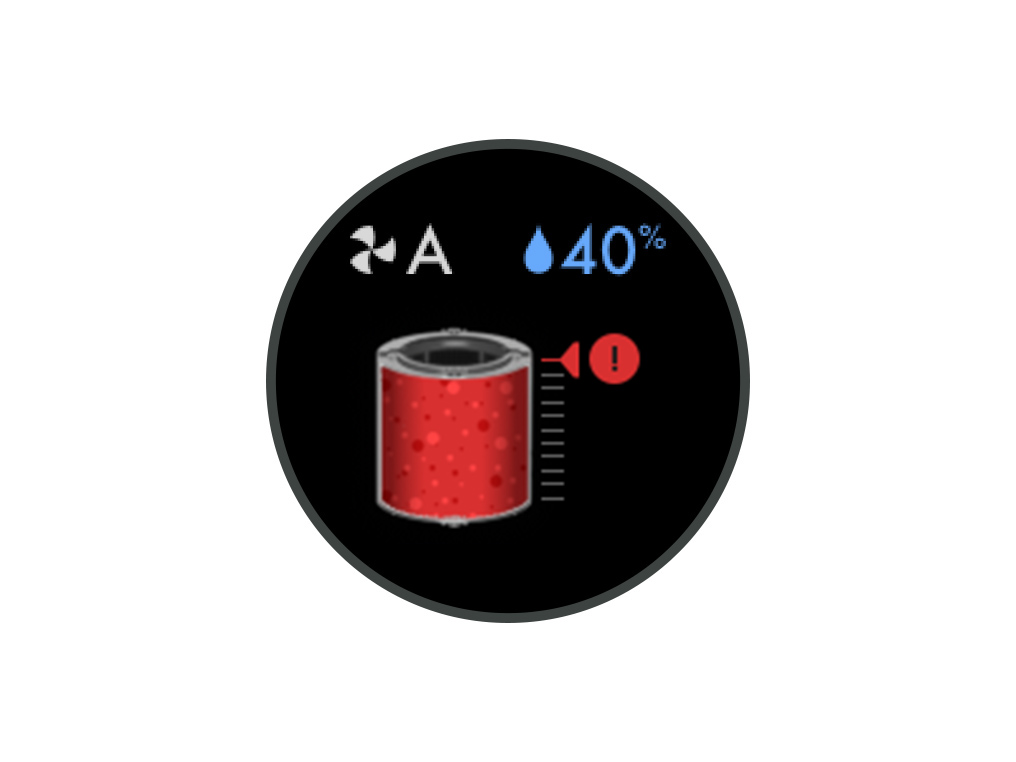
Before changing your filters, switch off and unplug your machine.

Your machine comes with a permanent catalytic filter and a HEPA+Carbon filter.
You won't need to change your catalytic filter.

To change your HEPA+Carbon filter, push down on the buttons on either side of your machine to release the outer covers. Push down on the tabs to remove the filters.
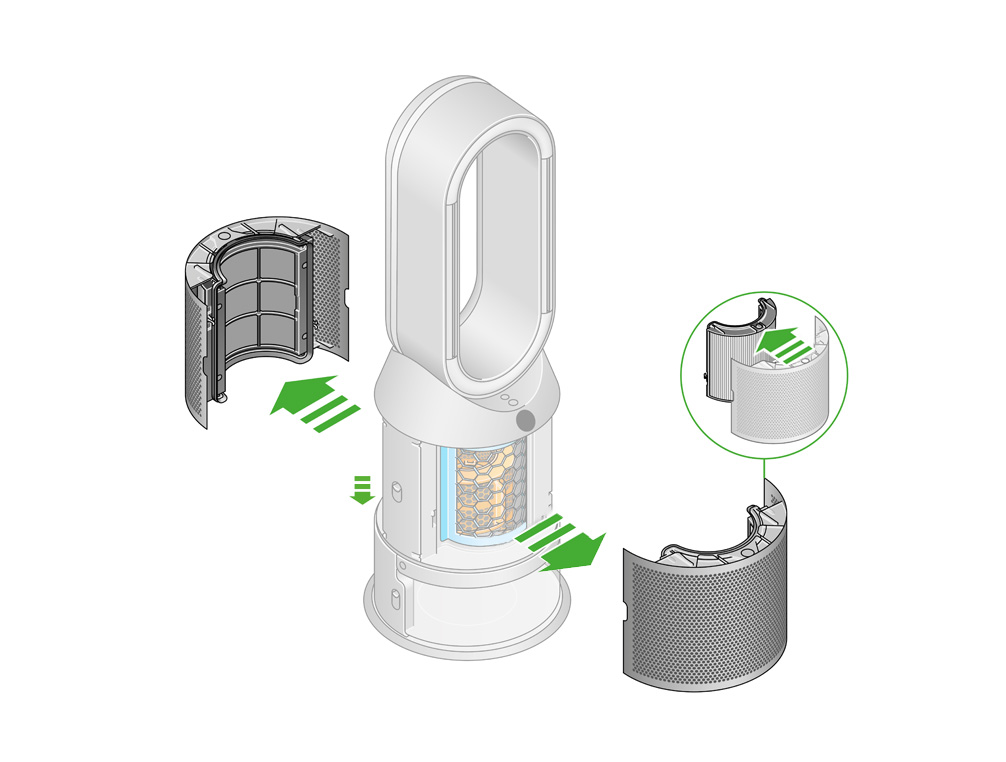
Push the replacement filters into the outer covers and make sure the tabs click into place.

Put the outer covers into position on your machine and push firmly until they both click securely in place.

Plug your machine in and switch it on. Reset the filter life.

Resetting your HEPA+Carbon filter life
It's important to reset your filter life after you have replaced your filter.
Press and hold the Night mode button on the remote control.
The LCD screen on your machine will count down from five, ending with the default screen.
The filter life has been reset and your machine is ready to use.
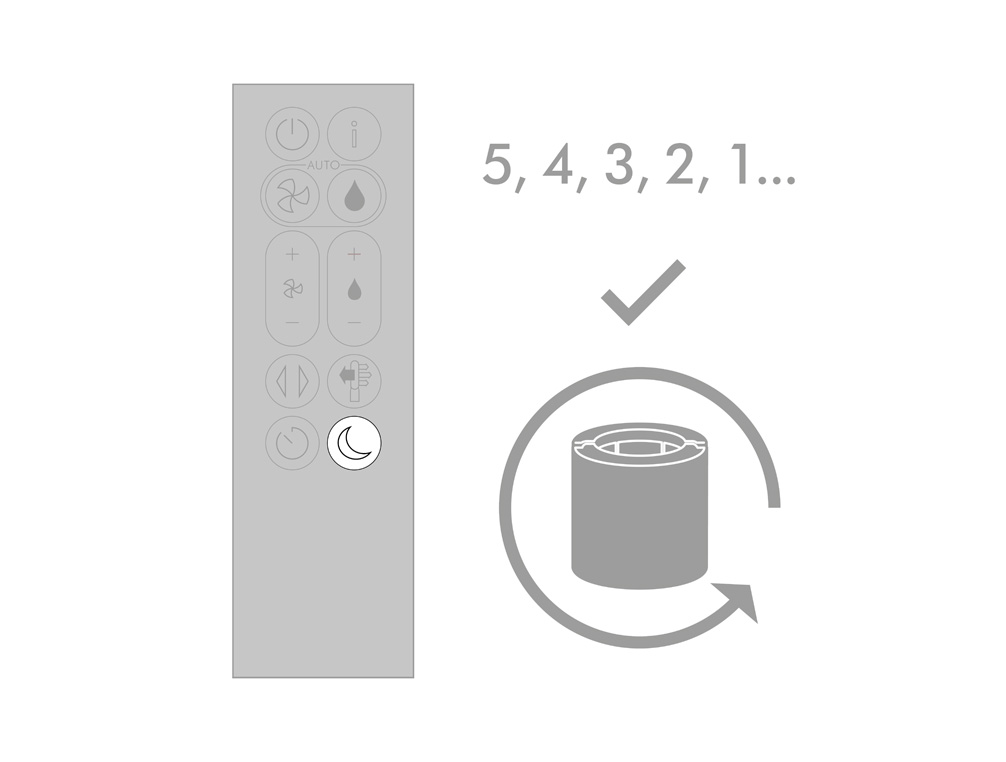
Water hardness is defined by the level of naturally occurring calcium and magnesium compounds in your water.
High content classifies your water as hard, whereas low traces of the compounds mean your water is soft.
High content can lead to a build-up of limescale in your appliances, such as your kettle or coffee-maker.
To avoid a build-up of limescale in your purifying humidifying fan, you'll need to run Deep clean cycles.
You'll need to run a Deep clean cycle more frequently in areas with hard water.
Further help
Dyson Purifier Humidify+Cool™ PH3A Autoreact (White/Silver)


